Index
This tutorial is too large to show on 1 page, so it is spread over multiple pages. Use the links in the index below to go to the page where you want to be.
- Introduction, abbreviations and symbols, and start tutorial 1: that is this page
- Start tutorial 1, setup and first rows: click here
- tutorial 1: slanted lines, open structures, part 1: click here
- tutorial 1: slanted lines, open structures, part 2: click here
- tutorial 1: slanted lines, open structures, part 3, working at the back side: click here
- tutorial 1: slanted lines, closed structures, part 1, with triangles pointing upwards: click here
- tutorial 2: slanted lines, closed structures, part 2, with triangles pointing downwards: click here
- combining structures and summary: click here
- tutorial 3: click here
Introduction
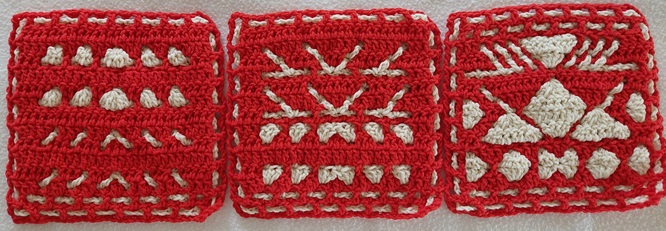
Interlocking or interwoven crochet with slanted lines is such fun! It provides additional options for the crochet patterns, allowing images with smoother lines and edges to be created. It is a technique for which you must be an experienced crocheter and, above all, must be well acquainted with the interwoven or interlocking crochet technique, both with the basic technique with the ‘open squares’ and the ‘solid squares’ . There are tutorials for both techniques on this website (look in the menu under crochet instructions).
Tutorials: videos and described with photos
This tutorial is split into several pieces because I want to walk you through the process step by step. The written instructions are expanded with new elements, which require some practice to read them. It is important that you already understand the written instructions of the open and solid squares versions, but they are also repeated in the practice pieces.
I made videos of the tutorial pieces. Not everything, because once you have done the tutorials for the basics, you can crochet the rest yourself as practice. And here on these pages are of course the written tutorials with the photos. You can download all patterns. Do this also when you watch the videos so that you can follow the instructions as you go. And crochet along as an exercise!
Link to the playlist of all videos: click here.
New: pattern charts with instructions!

I have come up with something new to make it easy to work with pattern charts. That will definitely help you!
When I first started working on the technique, I couldn’t find anything about pattern charts for slanted lines, and how best to translate it into written instructions. To do this, I first thought of how to do the design drawings with the diagonal lines (and built them into my own design software), and then I started trying to crochet my designs, writing down what I had to do in each box: a stitch at the front, back, diagonally to the left, diagonally to the right, and so on.
I gradually realized that this would also be useful if I built this into my software as a basis for generating the written instructions, but I also noticed that it could actually be very useful to use when crocheting it, rather than use the written instructions. Compare it a bit with mosaic crochet, where the picture is sometimes easier to work from than the written instructions. This is also discussed in detail. For a wide and tall design that will take up many pages it depends on your preference whether you prefer to work with a chart or written instructions, but if you use a tablet with apps that allow you to read PDFs and edit them, then this is very useful. I use the XODO app for this, which allows you to cross off things, highlight things, make notes, and much more, but other apps can also help you.
Also take a look at the video with the introduction where I show some things about the pattern and instruction drawings: https://youtu.be/jwqeR1nVl3M.
Overview of abbreviations and characters with translations
You can read through this overview, but you can also go through the tutorials step by step and learn as you go. It seems like a long list, but it’s actually quite simple.
- sst: side stitch
- f: front
- b: back
- c: chain
- -: not a stitch (is the side of the piece at the b-rows)
- .: marks a mesh stitch, so .f is a front stitch at a mesh cell. Not all mesh cells have a dot, like the ones with an arrow drawn in it.
- br, bl: back to the right, back to the left
- fr, fl: front to the right, front to the left
- bmr, bml: middle back to the right, middle back to the left
- fmr, fml: middle front to the right, middle front to the left
- {il}: insert at the left side
- {ir} insert at the right side
- [, +, en ]: + indicates a combined stitch, combined with “[” and “]” in the written instructions
- &: consecutive stitches, without in-between chains; this does not appear in the instruction chart, but it does appear in the written instructions
This seems like a lot of new terminology you’ll see appearing here alongside the familiar terminology, and it kind of is, but really, it’s very clear once you’ve followed the tutorials.
Introduction video
First watch the introductory video where I pay attention to the pattern and instruction drawings and explain the importance of following the grid: https://youtu.be/jwqeR1nVl3M.

