
On these pages I show how to do balanced mosaic knitting with the use of the pattern charts that are on the page with the instructions (click here). Download them both: the ‘shortened’ full version as well as the partial version with the regular knitting symbols. Please also read the explanation of the knitting symbols first and pay attention to the difference between front, back and working side!
Click on the small pictures in this tutorail to see them in full.
- Cast on and row 1: that’s this page
- Row 2: click here to go to that page
- Row 3 and 4: click here to go to that page
The videos
I also made videos for this tutorial. Click here for the entire playlist or look at the bottom of this page.
Step 1: the cast on and row 1
The cast on
Basically you can use the way of casting on that has your preference, but I prefer to use the provisional cast on with a helping thread. With this, you never have the issue that your cast on is too loose or too tight. Especially with this technique, with which the piece is pulled in because of the many slipped stitches, you will have the risk of your cast on row being too loose(!!!), which will cause your bottom border to ripple. Usually it’s the other way around 🙂 . Another advantage of this way of casting on is that you can finish the bottom of your piece the same way as the top of your piece, because you can pick up the stitches of the helping thread and use the same way of casting off you used for the top.
I have a separate video in Dutch for this with English subtitles (click here), but I also show it quickly in the new video for this tutorial, and below with the pictures.
Cast on 37 stitches in color 1.
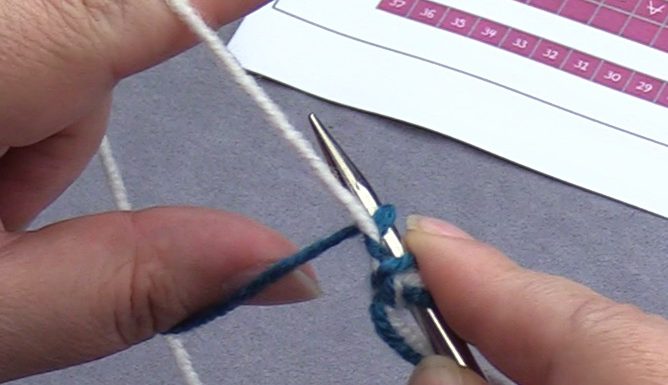
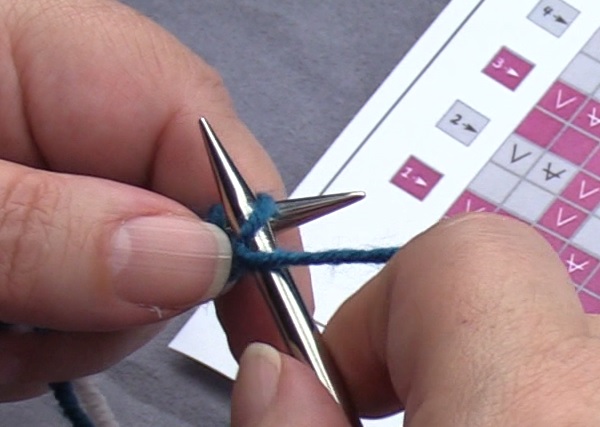
 Make a slipknot with the helping thread (the white yarn in this case) and the working thread you will be using for the first row. Put the slipknot on your needle. This does not(!) count as a stitch.

Put the working thread over your thumb and the helping thread over your index finger.
 Bring the needle from the top underneath the working thread. You now have a loop on your needle that counts as your first stitch.
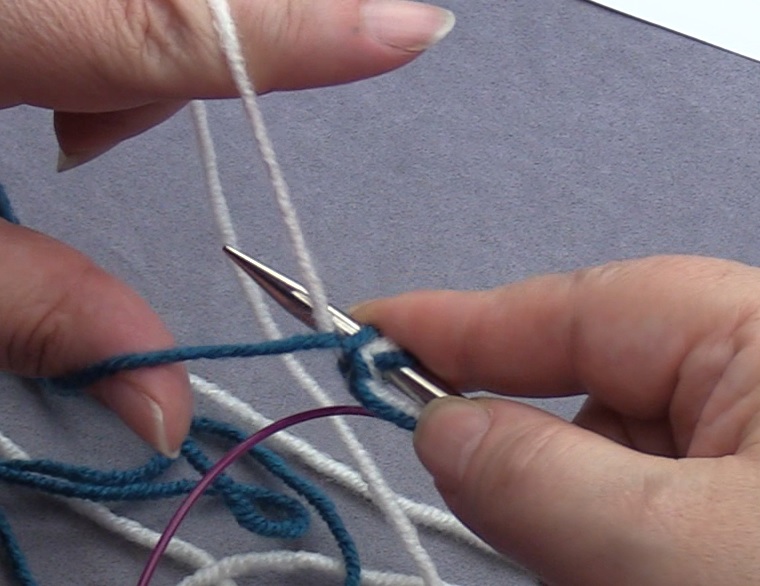
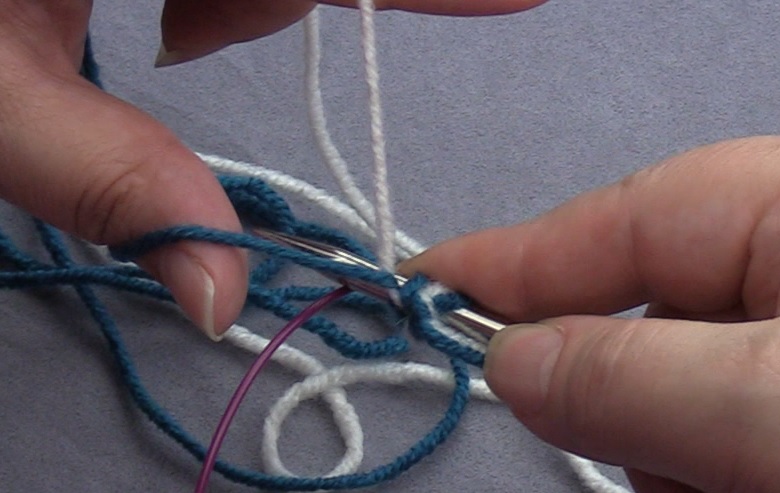
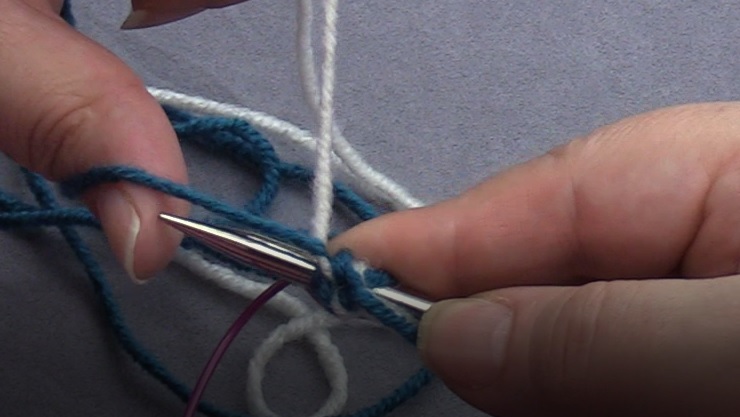
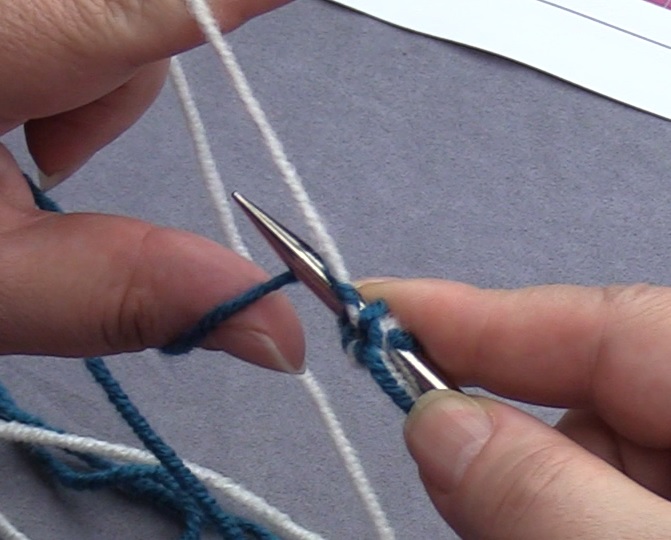
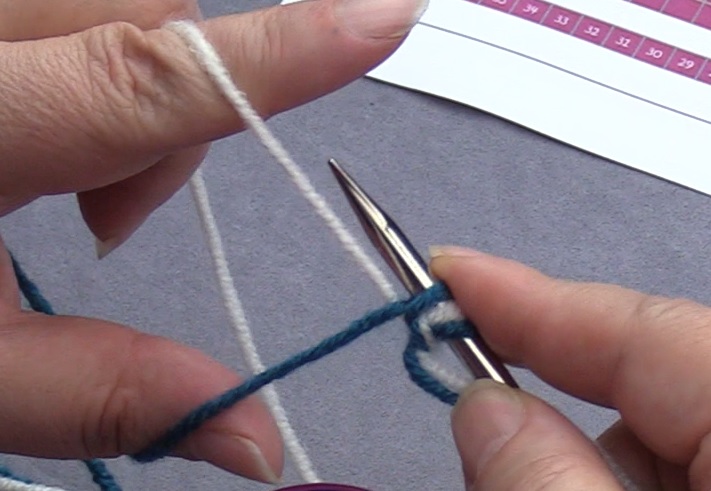
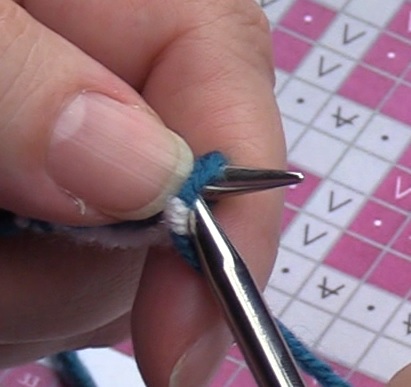
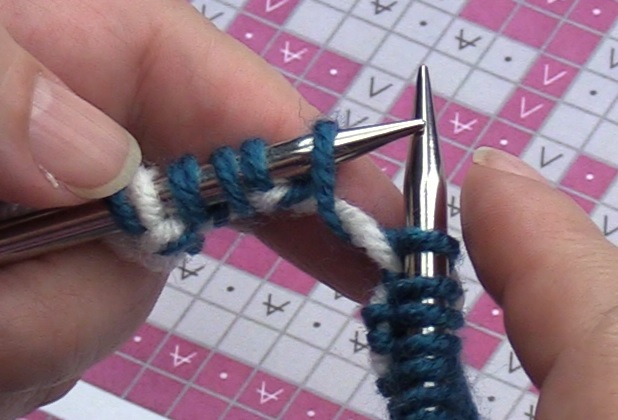
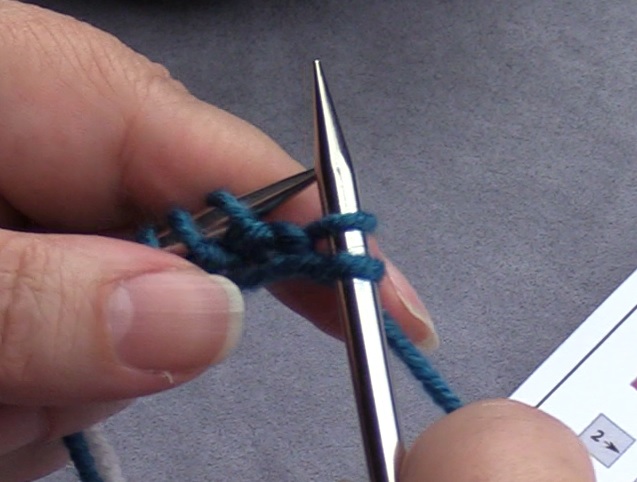
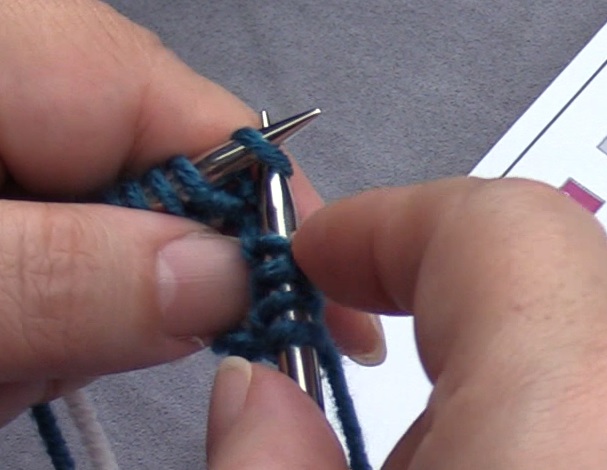
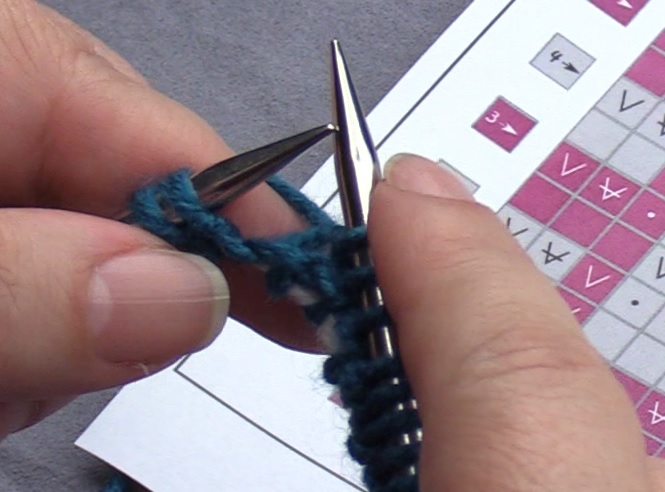
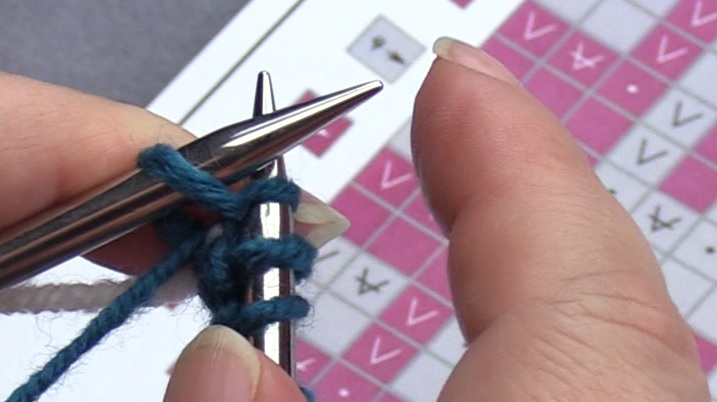
 Now bring the needle over the helping thread and go underneath it (picture 1 and 2), continue and go underneath the working thread (picture 3), go up again with the needle over the working thread and under the helping thread (picture 4 and 5). You now have 2 stitches on your needle. Repeat this until you have made 37 stitches.
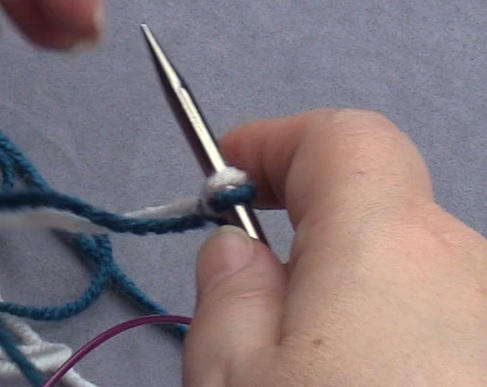
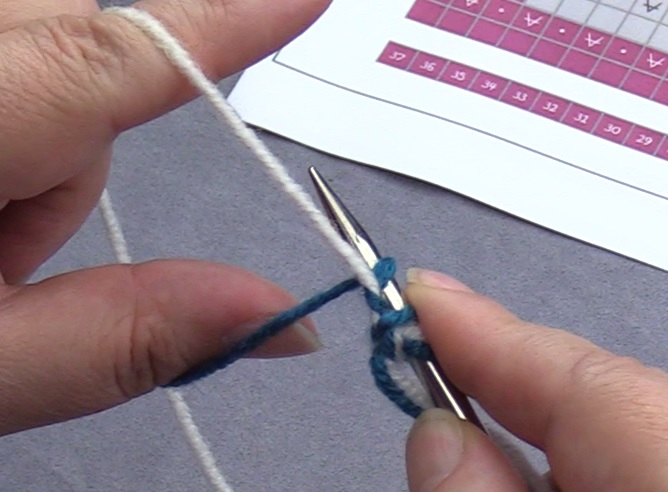
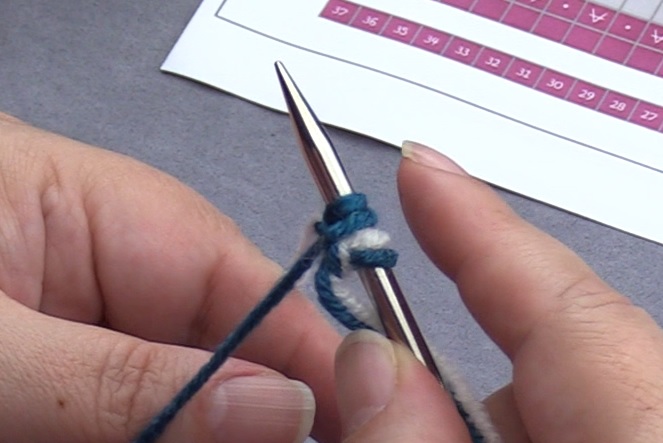
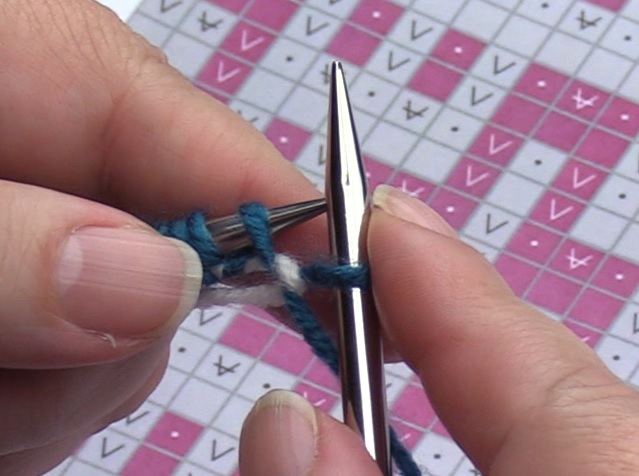
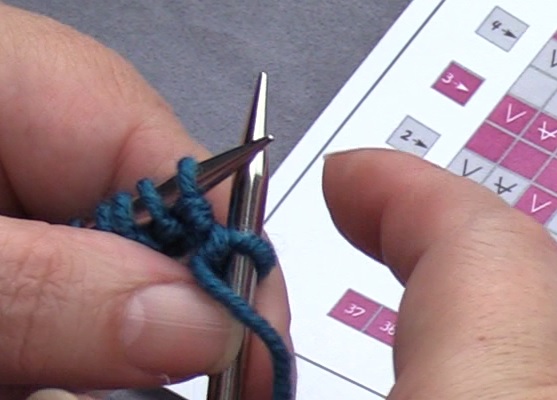
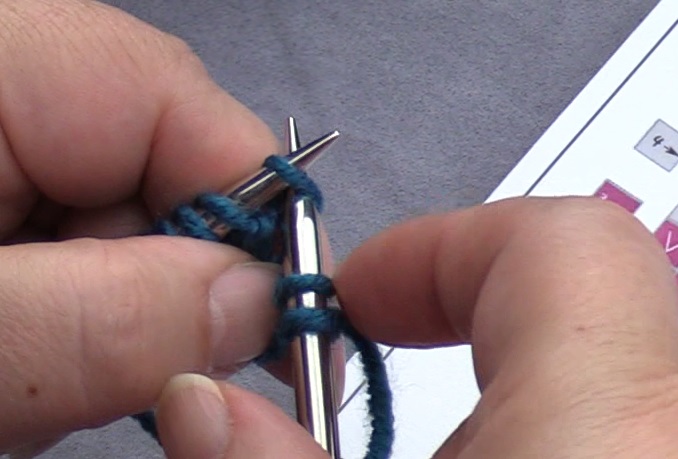
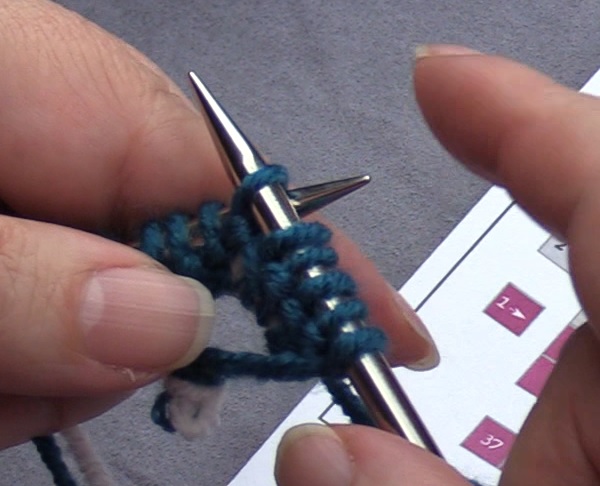
 When you have made all your stitches, you turn the needle. Lay the helping thread in such a way over the working thread that it ‘anchors’ the last stitch on your needle.
Row 1, forth going row
We will now do row 1, both the forth going and returning row, in color 1.

Here you see how to knit row 1 (click on the picture). In this version with the knitting symbols you see of every stitch how to do it, and you see both rows: forth and back. You start at the bottom at the right.
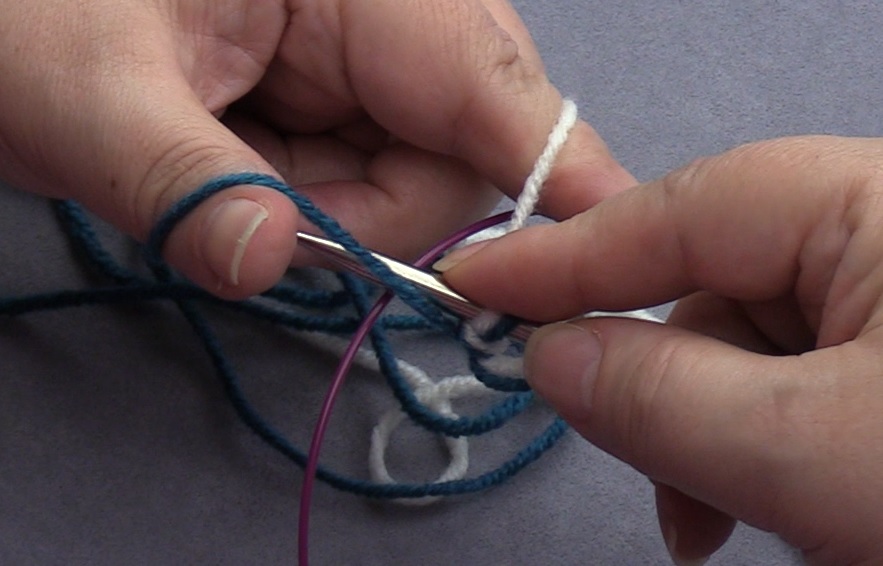
You start with a slipped stitch with the yarn to the back side of the piece (also see the explanation of the knit symbol with the V-shape), and next you will knit 36 stitches (the empty squares).
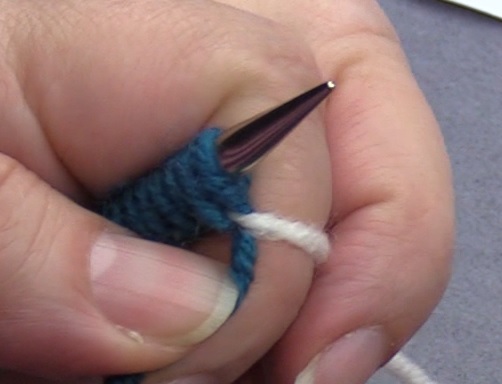
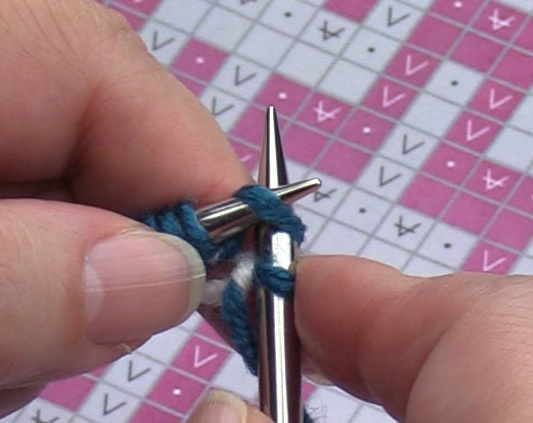
Here you see how the first stitch is slipped.
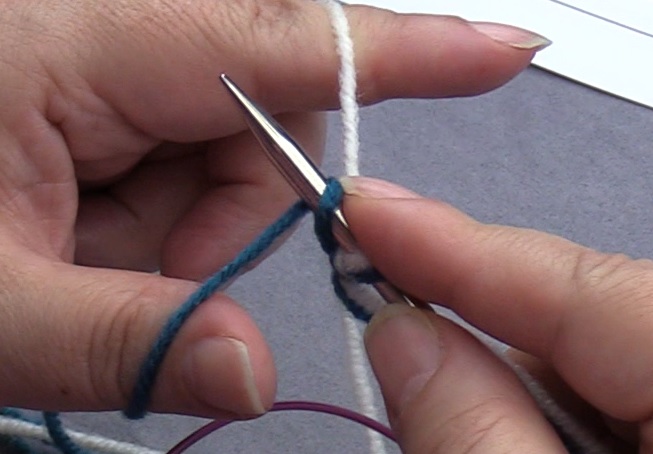
 Knit all the next stitches: in the pictures you see stitch 2 and 3 of the row.
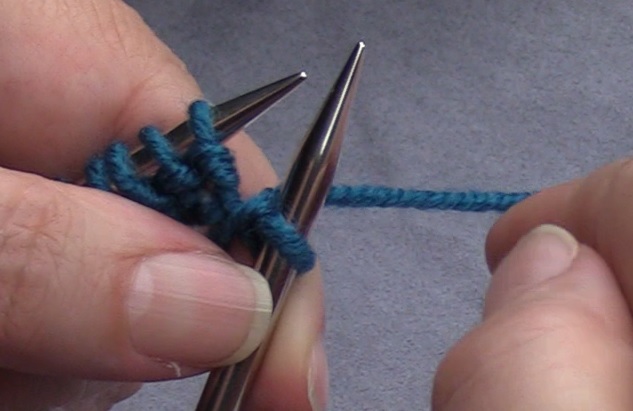
 A tip: take care that the helping thread always is at the bottom side of the left needle. Especially when you’ve cast on a lot of stitches that ended up on the cable of your circular needles, it could happen that they get on the needle twisted around while pushing them off the cable on to the needle. So always turn it so that they are facing you correctly.
Another tip: do not pull on the thread that is in between the stitch you just knitted and the stitch to be knitted next. You will get ugly loops if you do that!
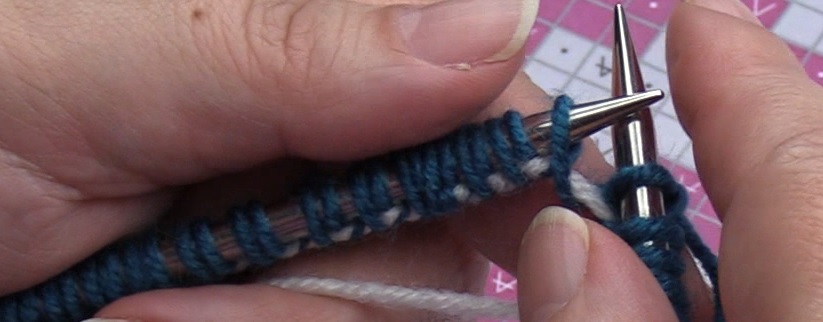
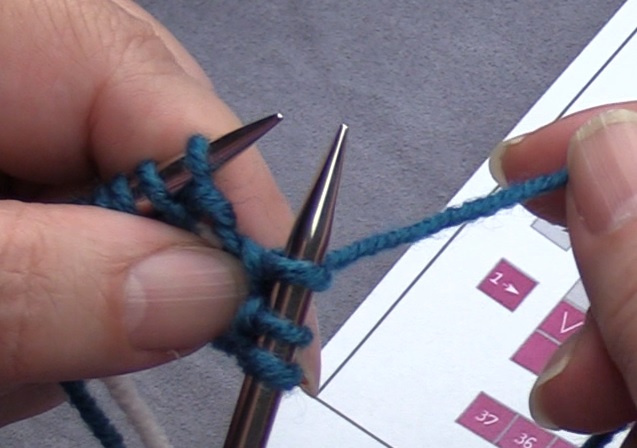
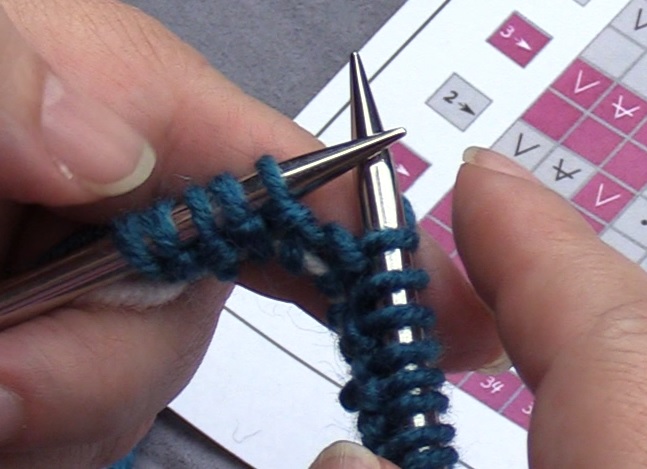
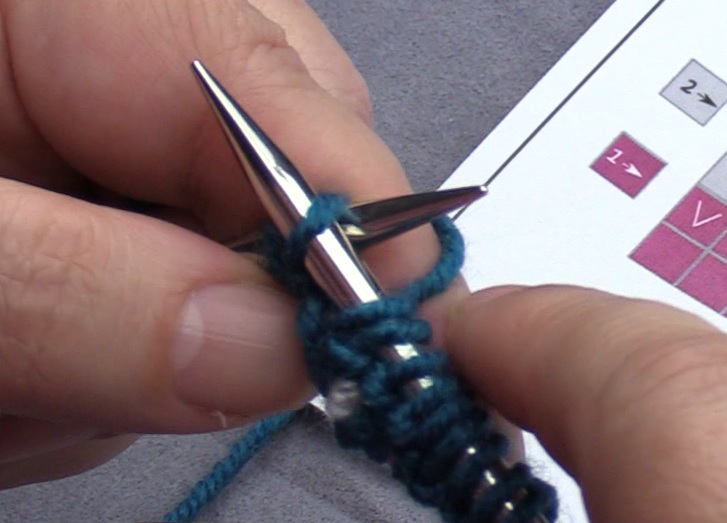
 Here we knitted until we have 4 stitches left on the left needle. The slipknit doesn’t count!
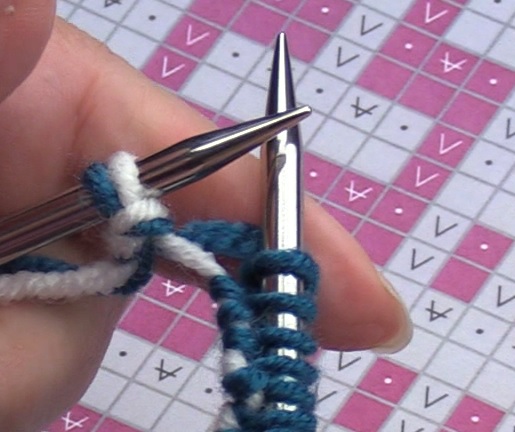
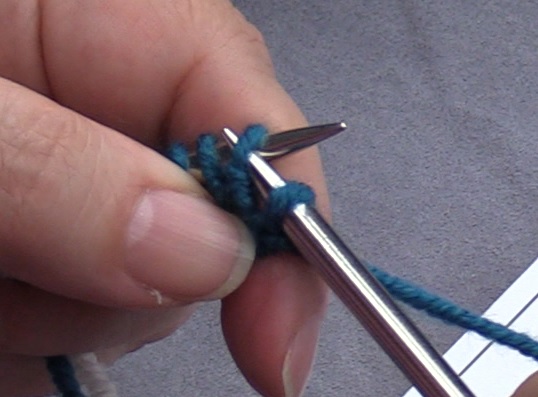
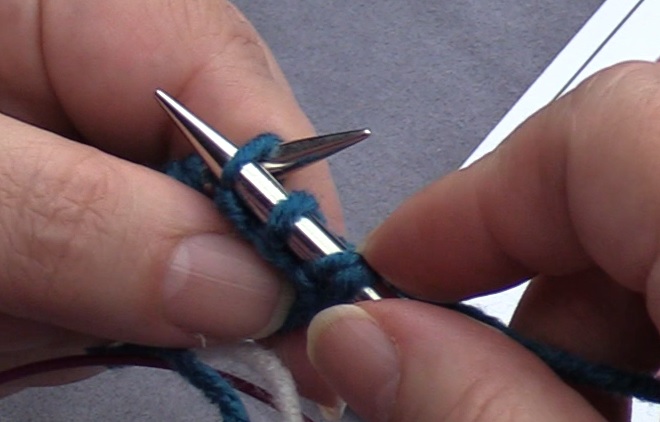
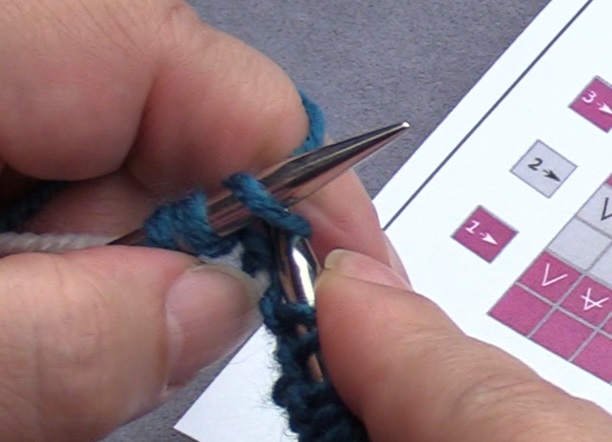
 Let the slipknot slip off the needle when you’re ready knitting the last stitch. Put a stitchmarker in the loops of the slipknot, so that the helping thread cannot be pulled out accidentally. You can cut off the helping thread, but take quite some extra length, so that your stitches can move freely with enough space, when for instance you want to measure the width of your piece. Also make a knot there and put a stitchmarker in it. If your stitches will get off the helping thread, the work just pulls out and you will loose the work you’ve done.
Row 1, returning row
 In the returning row at the wrong side of the work you will start with slipping the first stitch with the yarn to the back (wrong side) of the work. In this case this means to the side that you’re working on.
 You slip the 2nd stitch purlwise with the yarn to the front (right side) of the piece (see the rules for making the first 2 side stitches on the previous page!). For this you first have to bring the yarn to the front (right side) of the piece.
In this first row you only have stitches in color 1. You will now do the rest of this row like described at the rules for balanced mosaic knitting for the back side of the piece on the previous page. So you start with a knit stitch, the next stitch is slipped off purlwise with the yarn at the front of the piece, and you will repeat that until you have just 2 stitches left. The last stitch is a knitted stitch. This is your check! If this last stitch was a slipped stitch, you have made a mistake somewhere. Here it is showed with some pictures.
In picture 1 you see that the 3rd stitch (which counts as the first pattern stitch) is knitted. Leave the yarn at the right side of the piece (picture 2), slip the next stitch purlwise with the yarn still at the right side of the piece (picture 3), and repeat that all along: knit 1, slip 1.
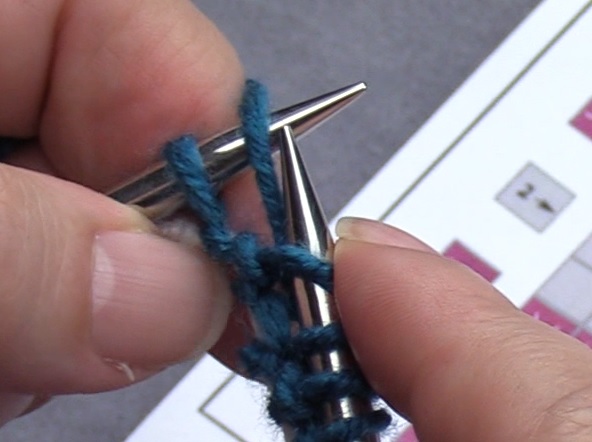
 Here you see in picture 1 there are still 5 stitches left on the left needle. This is 3 pattern stitches and 2 side stitches. In picture 2 you see the last pattern stitch is knitted.
Now you will do the last 2 side stitches as described at the rules for making the last 2 side stitches at the end of the row at the back side of the piece. So the second to last stitch is a slipped stitch with the yarn to the front of the piece, the last stitch will be purled! Do you see that in the chart the last square doesn’t contain a dot? This means that this is a purled stitch! Read the explanation of the knitting symbols again if you want. Now the pictures for this.
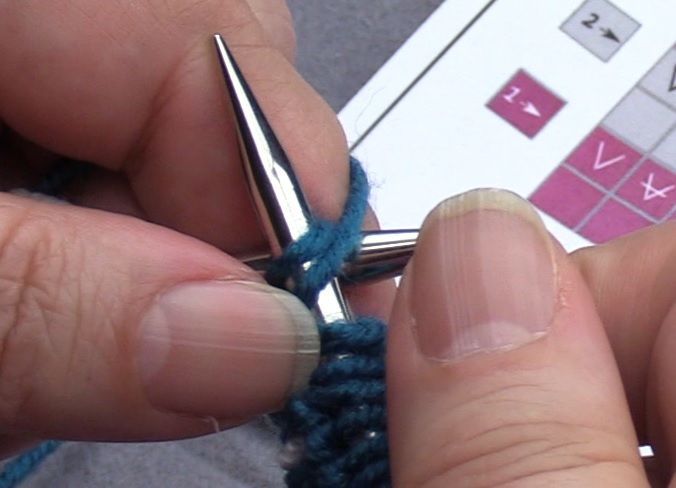
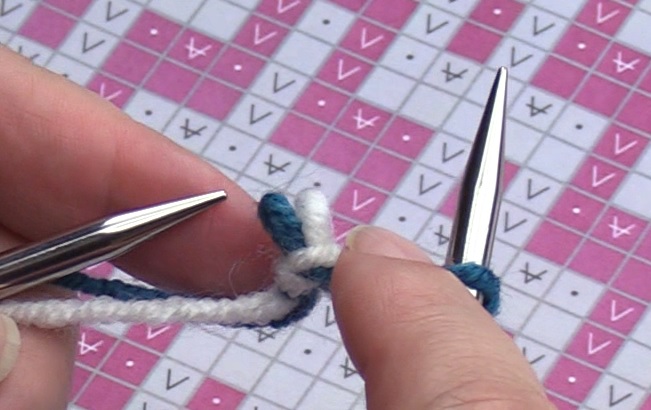
 In picture 1 you see that the yarn is still on the right side of the piece, so you don’t have to switch places. In picture 2 the second to last stitch is slipped purlwise. In picture 3 you see that the yarn is brought to the back side (the wrong side) of the piece again so that you can purl the last stitch (picture 4 and 5).

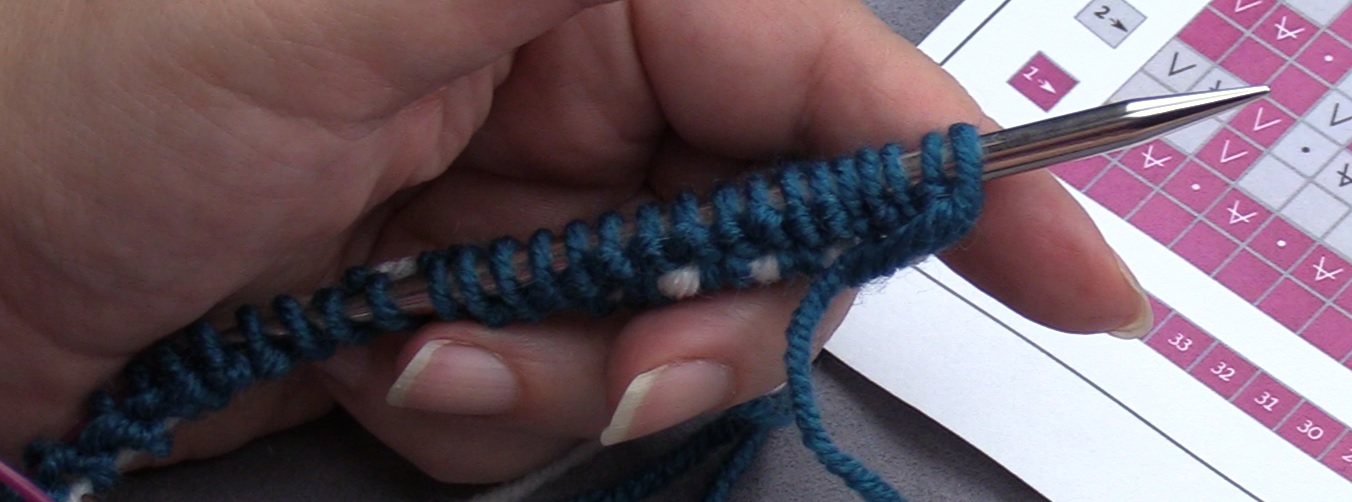
The pattern chart here shows you this row in a shortened version (click on the picture again).
In the shortened version you see only 1 row is drawn. You see the side stitches at the sides, of which you know how to always do them. Next you see how many stitches you have to make after the first 2 side stitches: 33 stitches. After that you will have again 2 side stitches. You also know how to do the returning row if you just follow the rules.
So if you follow the rules for balanced mosaic knitting, you actually only need a picture. And of course it is super handy if you see right away how many stitches you have to knit, like you see in my pattern charts. That just takes away so much counting.
Row 2
This was simple and with just 1 color, but now we will do the next row with color 2, where a piece of the pattern appears.
Look for this in the next tutorial pagina (click on this).