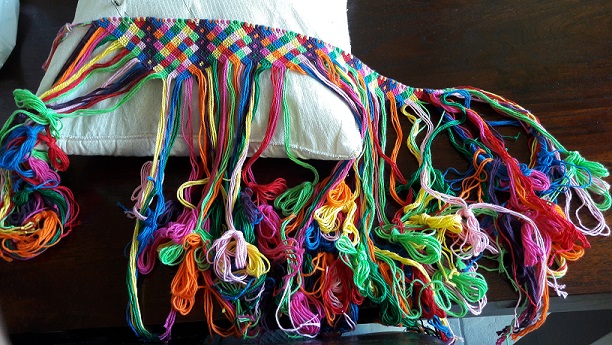
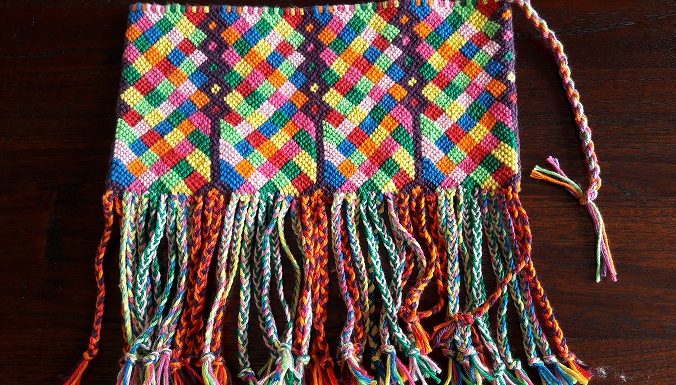
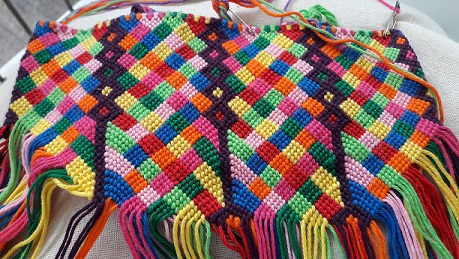
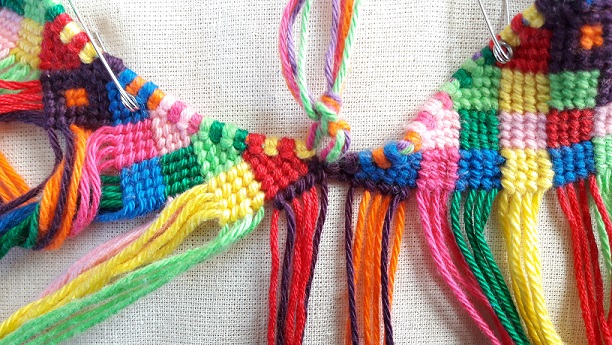
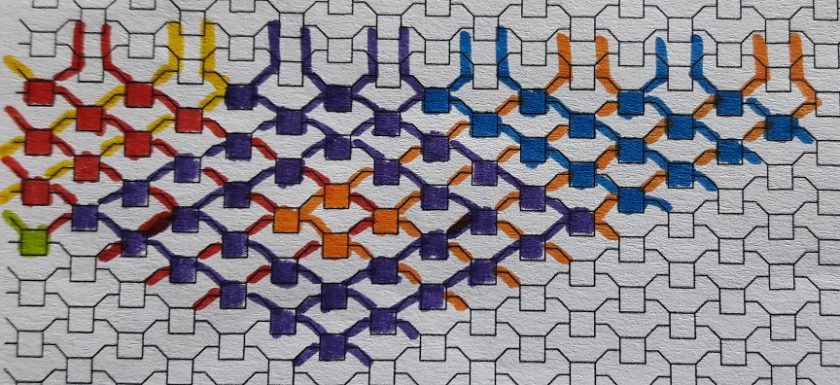
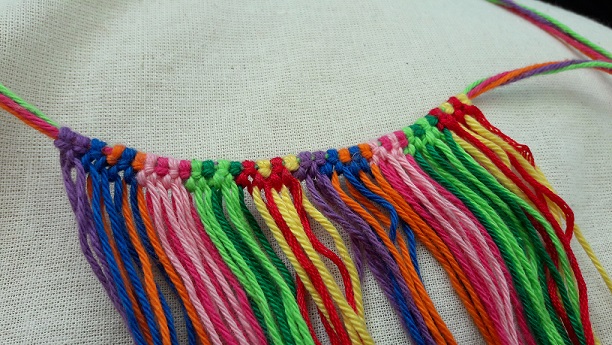
Yay! The last video in this series is published on my YouTube channel! The last instructions, how to knot the lower border and decorating it with braids, for example. Also a little design switch to make a kind of ‘standing foot’ by switching back to the original design and making a half zigzag-border. You can choose how to finish the upper border. You can add a zipper with an optional lining, buttons and loops, whatever you like. Maybe you have some other brilliant ideas yourself, it is all okay! I hope I inspired you with this series to make bags or purses yourself. Or bracelets.Read More →

We almost reached the last video in this series. In this video I will show you how to knot the purple straight line. I had to change the design, because I noticed that the purple threads were used up a lot more quicker than the other colors. I could have figured that out in advance, because you make more knots with purple than with the other colors. But it turned out very nice. The design had some room left for having some variation, and this added just that little touch which made it more attractive. Okay, only one video to to go after this one,Read More →

2 More video’s to go! This short video shows how to close the ‘circle’, so that you can continue to work in the round after this. The 2 sides are brought together, so that the borders can be closed and knotted. I show that the threads on both sides first have to be knotted together to make the knot of the first row, please do not forget that! And I show again why it is important to first do some knotting on both sides before bringing it together and close the circle. Again, wishing you a lot of fun watching this video! After this thereRead More →

Hi everyone! I’ve published the fifth video for knotting the little bag on YouTube. The previous video was a very short one, so this next one is published a bit quicker. This time it’s a detailed explanation on how to knot the zigzag border. Maybe you already figured it out yourself, but I thought it might be handy for the people that don’t have much experience with knotting. I hope again that it is a handy addition. Have fun knotting!Read More →

Hi everyone. A short one this time, but it belongs to the rest! This one is about correcting errors. About what to pay attention to with undoing, so you have it clear for yourself what you have to undo, but also about what you do not(!) have to undo. Because it would be a pitty when you realize afterwards you did undo more than necessary. In this video it’s about replacing threads with threads in another color, but the principle is the same of course! Next time the video about how to knot the zigzag-border will be published. So a little bit more patience! But,Read More →

Hi everyone, on this somewhat cold day! If I would have something to say about it, I would suggest to watch this video with some hot chocolate 🙂 . In this 3rd video I explain how I like to work, how I approach a design to actually make it. I like to work as long as possible with one working thread, this works the fastest and simplest – for me, that is -. I also explain why I don’t work in a circle yet. In short, go sit and relax, and watch this video on the couch with some hot tea or chocolate! And…, pleaseRead More →

Hi everyone! The second video, in which I explain how to knot the very first row, is published on my YouTube channel. This first row is a bit different compared to the rest, because you work towards the position of the threads that is needed for the rest of the pattern. Every other knot is making a turn, so you have to look closely to the design (see here for the patterns). I stumble a bit over my English, probably was a bit tired, so if that bothers you (I really do my best 🙂 ), please switch on the English subtitles! Wishing you a lotRead More →

The easy thing of this pattern is in the way the knots are made. Used Colors: Dark red: 2218; Silver gray 2791 Usage: 20 Repeats of the pattern is about 12,5 cm (5 inch) long. Description: 1. Start with placing the threads in the order as shown in the upper part of the picture. So, from left to right: gray, red, gray, red, gray, red. 2. Start at the rigth side with 2 double left knots with red around the gray and red thread. 3. Then at the left side make 3 double right knots with gray around the red, gray and red thread. 4.Read More →

” order_by=”sortorder” order_direction=”ASC” returns=”included” maximum_entity_count=”500″] The techniques I’ve shown so far were used to make bracelets. And of course that’s fun for young girls (and boys). But you can do so much more with this technique. It is simply a way to make nice motifs with a couple of threads. Why not go wider than the narrow bands? It will be nicer to work with thicker yarn if you don’t want to end up with a monks work, which will take you weeks or months to finish. Why not work in the round? That offers suddenly al kinds of applications. Make bookmarkers: use fine yarnRead More →

With the explanation of the basic knots (see Basic knots) I explained how to read the patterns and how to make the knots. With this description you can start designing your own patterns. You have to know that each thread that leaves a knot will be used to make a next knot. So it is important at which side you let the threads come out. Will they come out at the same side as they were originally (combination knots), or do they switch places (double knots)? And for a next knot you can make a choice each time which color you want it to have.Read More →