
Index
This tutorial is too large to show on 1 page, so it is spread over multiple pages. Use the links in the index below to go to the page where you want to be.
- Introduction, abbreviations and symbols, and start tutorial 1: click here
- Start tutorial 1, setup and first rows: click here
- tutorial 1: slanted lines, open structures, part 1: click here
- tutorial 1: slanted lines, open structures, part 2: click here
- tutorial 1: slanted lines, open structures, part 3, working at the back side: click here
- tutorial 1: slanted lines, closed structures, part 1, with triangles pointing upwards: click here
- tutorial 2: slanted lines, closed structures, part 2, with triangles pointing downwards: that is this page
- combining structures and summary: click here
- tutorial 3: click here
Video
For the basics with closed structures you can watch this video: https://youtu.be/nmO37qBS4C0.
Tutorial 2
DOWNLOAD THE PATTERN WITH THE WRITTEN INSTRUCTIONS HERE
DOWNLOAD THE INSTRUCTION CHART HERE
Artdeco CAL 2024 yarn usage
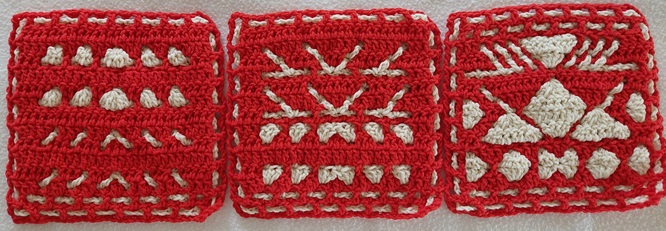
For the Artdeco CAL of 2024 I used Alize Cotton Gold. I used about 38 m of color 1 and 32 m of color 2. The piece is 16.5 cm wide and high.
| c1: # ch | c1: # dc | c2: # ch | c2: # dc | c2: # full slant | c2: # mid slant |
| 172 | 324 | 213 | 210 | 28 | 12 |
The instruction chart
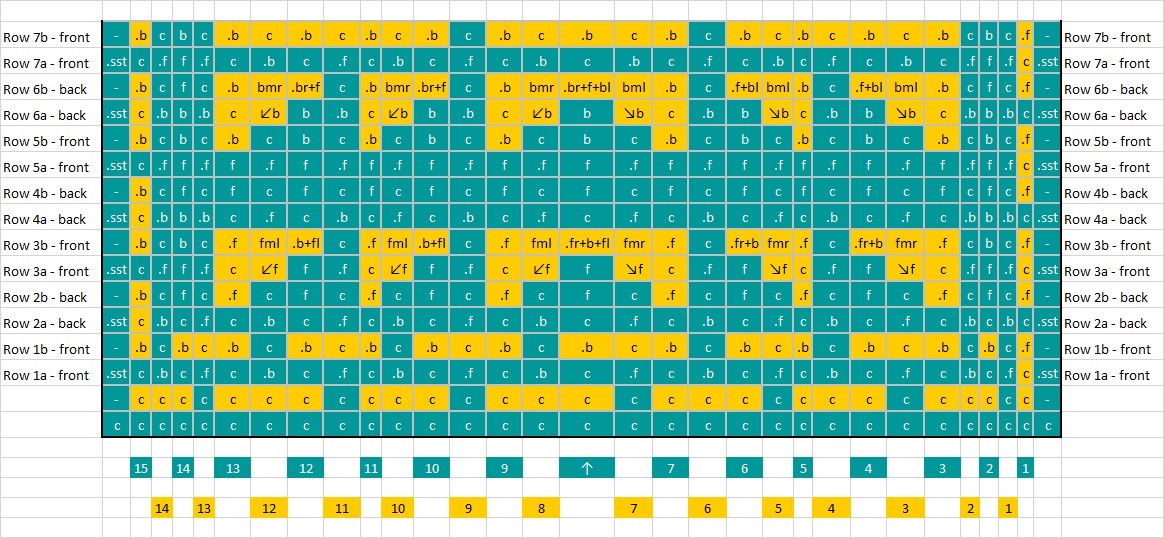 In this part of the tutorial we focus on rounds 3b and 6b. The setup is the same as the previous sample, so you can go to the appropriate page of the tutorial and watch the setup video.
Row 3b
|
Notation: Row 3b – front: f, b, *(f & fmr & [fr+b])* 2x, f & fmr & [fr+b+fl] & fml & f, *([b+fl] & fml & f)* 2x, b 2x You won’t see much new here, you’ve actually come across everything before. But we’re going to focus on ‘f & fmr & [fr+b]‘, ‘f & fmr & [fr+b+fl] & fml & f‘ and ‘[b+fl] & fml & f’. These are stitches that are completed each time, so they are not combined stitches (with the exception of course of the parts with the square brackets around them)! The ‘&’ (ampersand) between the stitches tells you that they are worked without any chain in between! And each ‘fmr’ and ‘fr’ are worked to the right, inserting where the previous grid stitch is. Each ‘fml’ and ‘fl’ are worked to the left, inserting where the next grid stitch is. The ‘fr’ and the ‘fl’ are again extended dc’s, the ‘fmr’ and the ‘fml’ are regular dc’s. Watch the video or photos below to see how to make the stitches. |
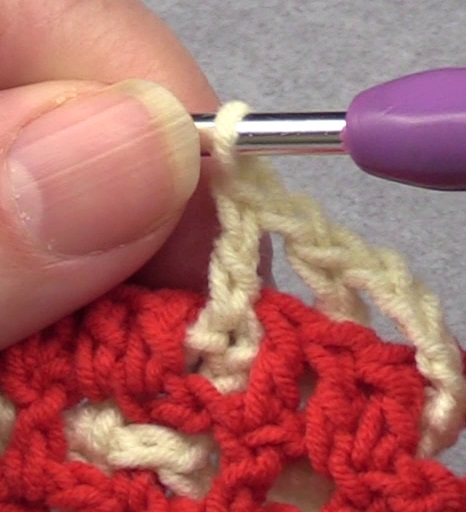
Here are some screenshots from the video. Click on the photos to see them in their entirety and full size.
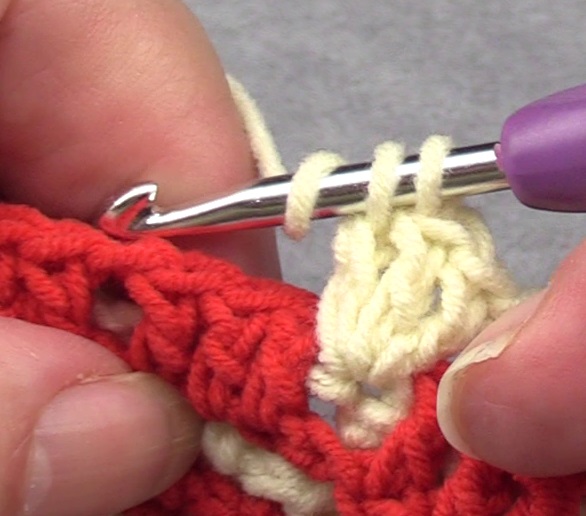
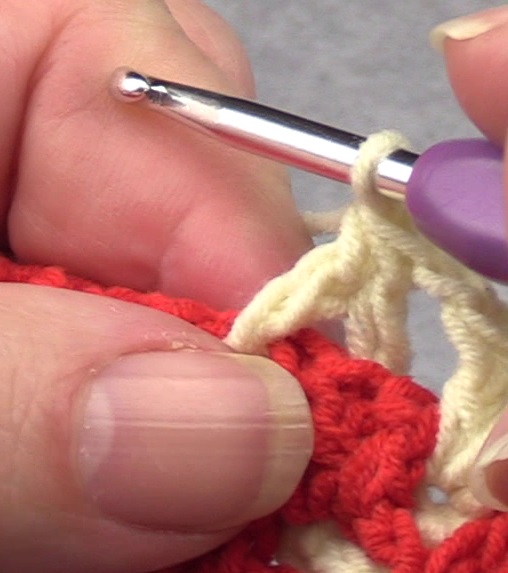
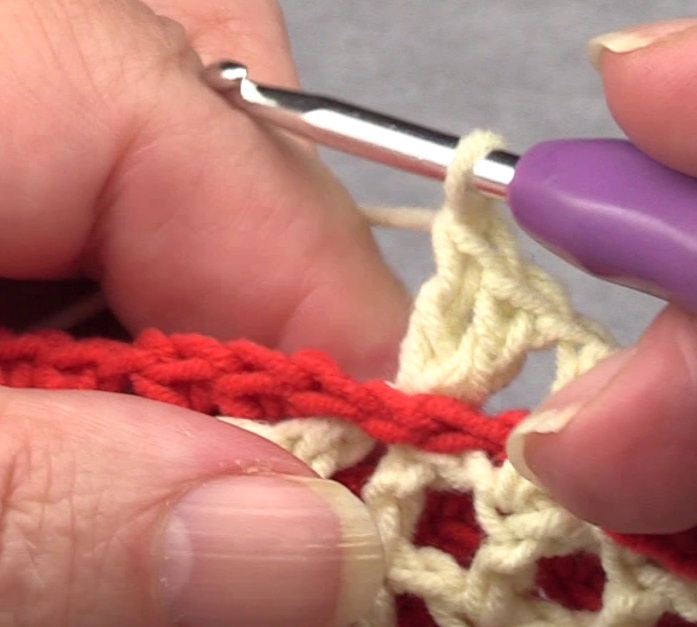
 This is the starting position of where we will create the ‘f & fmr & [fr+b]‘. You can see through the opening in the red box where you have to work.
 The ‘f’ is made. A double crochet made in the grid stitch below and completed because it is not a combined stitch. You don’t (!!!) make an in-between chain now, because you see the ‘&’.
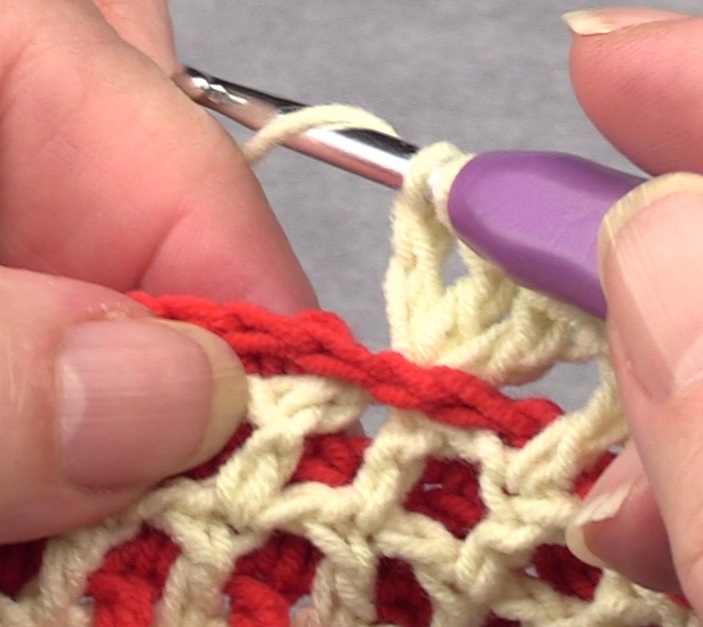
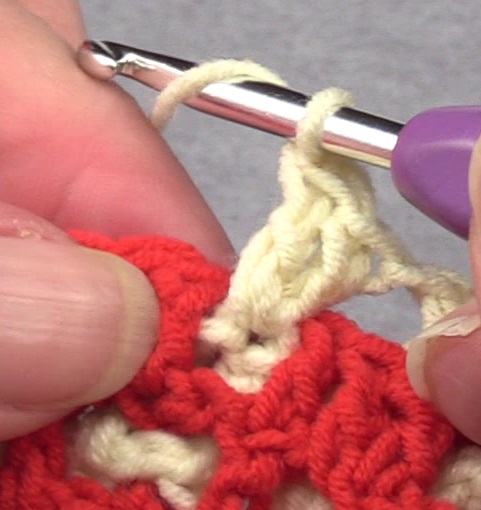 The next stitch is a ‘fmr’. A regular double crochet, but you have to make it to the right, so in the previous mesh stitch! You can see here that the ‘f & fmr’ are made in the same stitch. Once again you don’t (!!!) make an in-between chain, because you see the ‘&’.
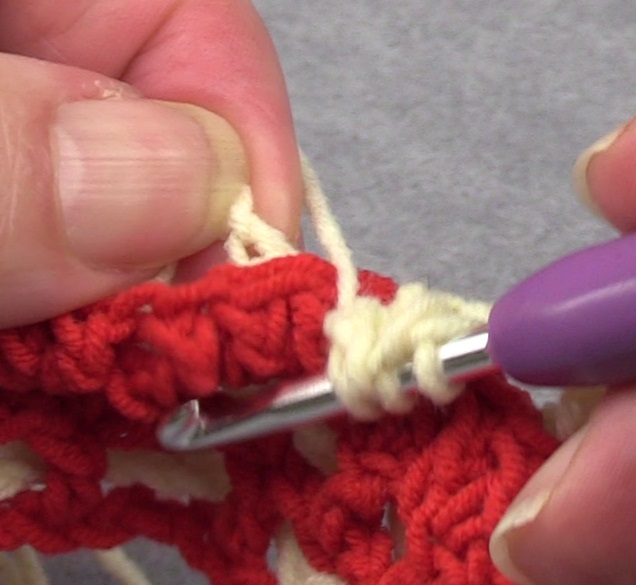
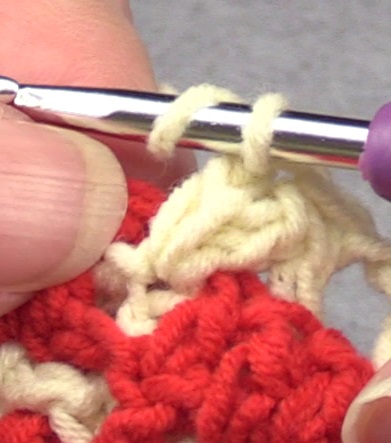
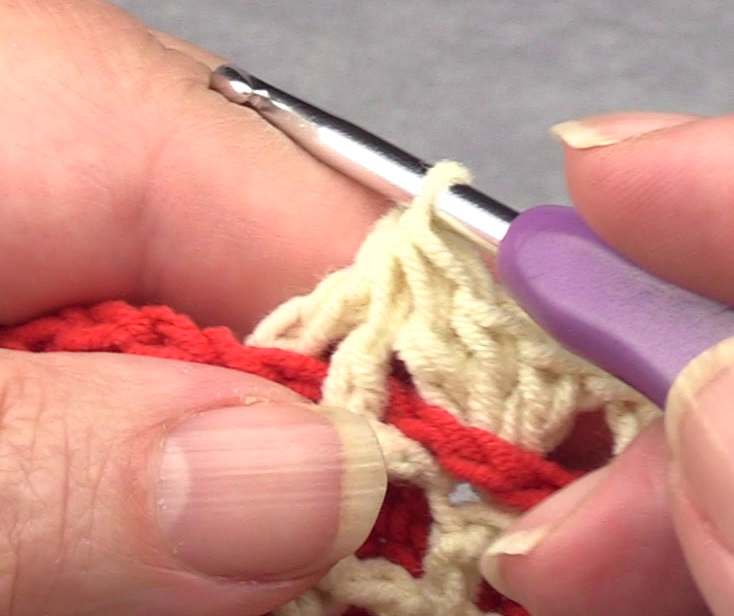
 After this, a ‘[fr+b]‘ must be made, a combined stitch. Here the ‘fr has already been made, an extended dc, which has not been finished. This is made in the same stitch as the previous two, so the previous mesh stitch.
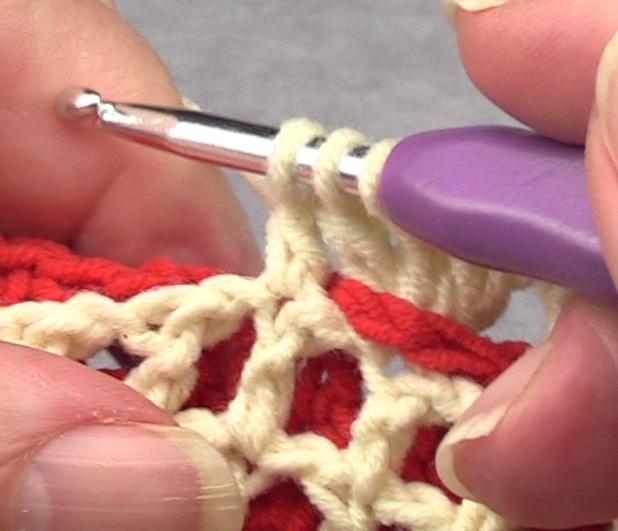
 This is the position, near my thumb, where the ‘b’ still needs to be made.
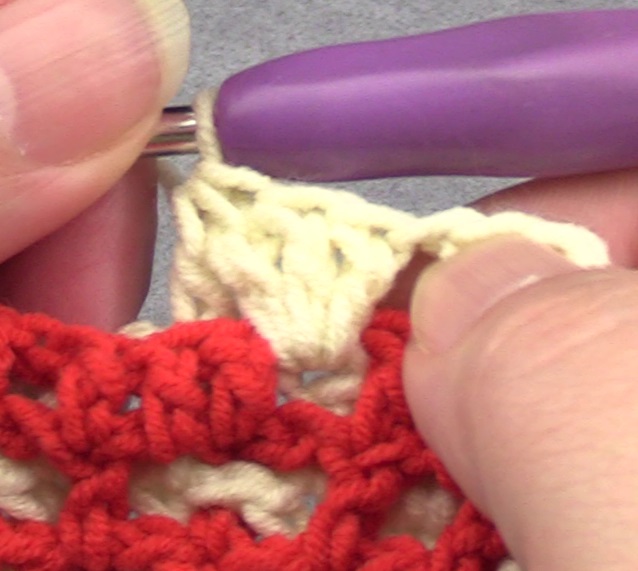
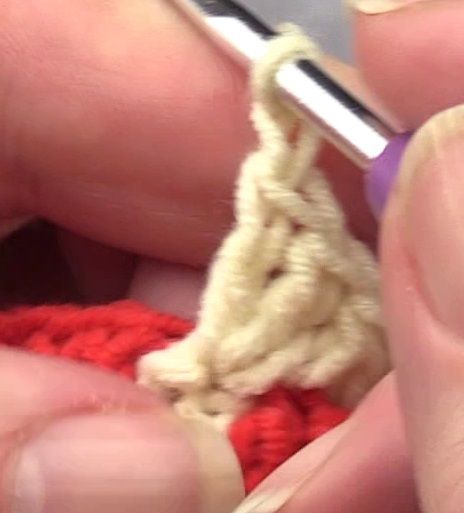
And here the combined stitch is also completed. You now see that all 3 parts of the ‘front’ stitches have been worked together into one point at the base (except of course the ‘b’ of the combined stitch), but that it has resulted in 3 stitches at the top.
If you study the instruction chart you will also see that there are 3 cells at the top of the structure.
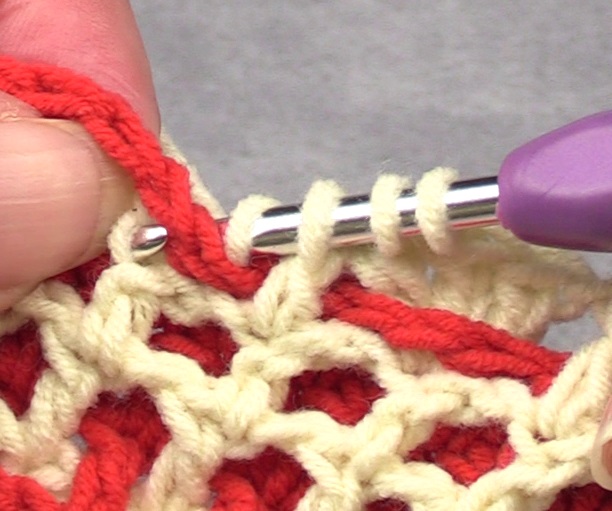
 Here we are going to create the ‘[b+fl] & fml & f’. Here we start with the combined stitch, the ‘[b+fl]‘. The ‘b’ has already been made.
 The ‘fl’ here is also made into the next mesh stitch and the two stitches are worked together. Do not (!!!) make an in-between chain now, because there is an ‘&’.
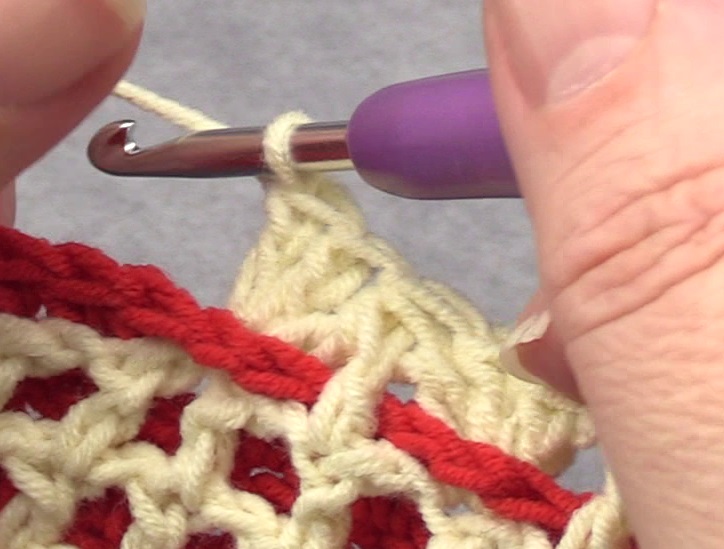
 Here the ‘fml’ is crocheted. So to the left, just like the ‘fl’ of the combined stitch, in the next grid stitch. Just finish this stitch. Do not (!!!) make an in-between chain now, because there is an ‘&’.
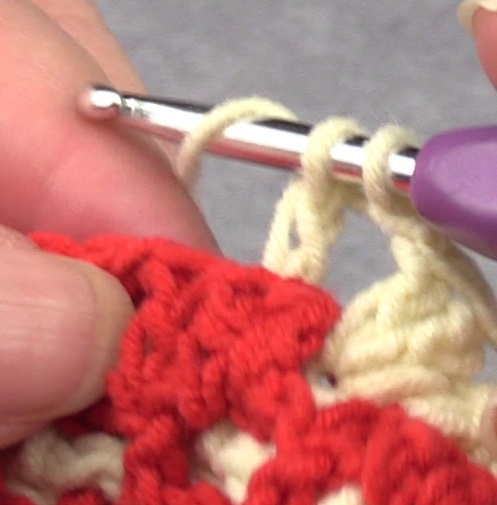
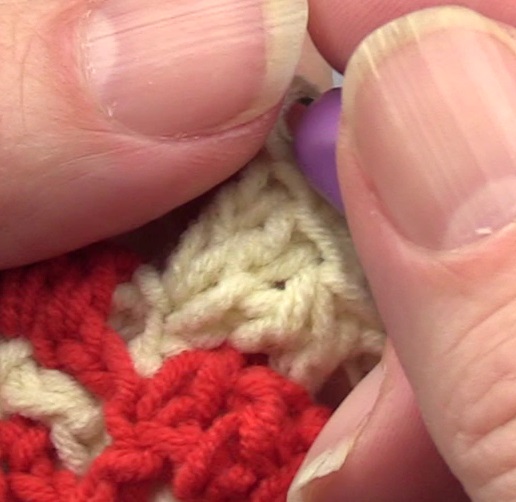 And finally the ‘f’. The photo is not very clear, because the 3 stitches at the top are a bit hidden under my thumb.
 This is a slightly better photo from a little further on in the row.
 And here the tour ends. Sorry, the first part is missing from the photo.
Row 6b
|
Notation: Row 6b – back: b, f, *(b & bmr & [br+f])* 2x, b & bmr & [br+f+bl] & bml & b, *([f+bl] & bml & b)* 2x, f 2x No doubt you now know how to read and do this. The ‘bmr’ and the ‘bml’ are new, they are regular double crochets that are worked diagonally in a previous or next mesh stitch respectively, but behind the work, at the front of the piece. Watch the video or photos below to see how to make the stitches. |
Here are some screenshots from the video. Click on the photos to see them in their entirety and full size.
 We’re going to do the broad bit here: ‘b & bmr & [br+f+bl] & bml & b‘. The crochet hook points to the place where we will do the first double crochet at the back. This dc is simply finished completely. Then no in-between chain, because there is an ‘&’ after the ‘b’.
 Here the second stitch is made, the ‘bmr’. This stitch is inserted to the right, into the previous mesh stitch where the ‘b’ was made. The stitch is simply finished. Then no in-between chain again, because there is an ‘&’ after the ‘bmr’.
 Here is the start of the ‘[br+f+bl]‘. A combined stitch consisting of 3 parts. The ‘br’ has been made, an extended dc, but not yet finished. This is inserted into the previous mesh stitch, where the ‘bmr’ is made.
 Here the stitch at the front is made, the ‘f’, in the next mesh stitch. Do not complete the stitch.
 And here is where the ‘bl’ should be made, in the next mesh stitch to the left. An extended dc.
 Here the combined stitch has been completed. This results in 1 stitch at the top. Then no in-between chain again, because there is an ‘&’ after the combined stitch.
 Hier is de ‘aml’ gemaakt in dezelfde steek waar de ‘al’ is gemaakt. De steek is afgemaakt. Opnieuw geen tussenlosse.
 Here the ‘bml’ is made in the same stitch where the ‘bl’ is made. The stitch is completed. Again no in-between chain.
 And here is the row at the front of the piece.
Rest of tutorial 2 and tutorial 3
You can continue crocheting the rest of the 2nd part as an exercise. The 3rd tutorial, for which I didn’t make a video, is also a fun exercise. You can find the downloads on a further page.
Combining structures
On the next page I show a piece from my blanket, where various structures are combined next to each other. This happens often in my blanket, and it’s just useful to have seen it once.
Click here to go to the next page.