
What is the difference with regular interwoven crochet?
With regular interwoven crochet you make square squares (okay, that sounds a bit weird 🙂 ), that are made out of double crochets (dc, US terminology) with 1 chain in between them. Just like regular filet crochet. With clustered interwoven crochet you could also 2, 3 or even more dc’s directly next to each other, that form a cluster. These clusters are separated from each other by 1 chain. I also have patterns for interwoven crochet where I use treble crochets with 2 chains in between them, which gives a more airy result. You can apply clustered interwoven crochet (I will shorten this to CIC) on that as well, but in this tutorial I will focus on the regular way of CIC.
Single clustered interwoven and double clustered interwoven
In this tutorial only 1 of the two colors will have clusters of dc’s. In a later tutorial I will explain double clustered, where both colors have clusters.
First learn regular interwoven crochet
Before starting with CIC, you can better learn the regular interwoven technique first. You could of course try it with the following tutorial, But in my other tutorials on this website (see here) I really go into the details. There are pictures and videos with it, that helps a lot.
Videos
This tutorial also has videos that are on my YouTube channel:
- The start: https://youtu.be/y17vNYmkR7o
- Working with the pattern chart: https://youtu.be/_KcNT-Cm2po
- The next rows: https://youtu.be/Vn93eNExD7Q
Or use this playlist: https://www.youtube.com/playlist?list=PL0tHWoXKpGCTnhN_Kd2xmb7nUBliwbHoF
You can also go to the bottom of this page to go to the video’s.
2 Parts
This tutorial is cut into 2 parts. At the bottom of this page you can find the link for the next page.
The pattern
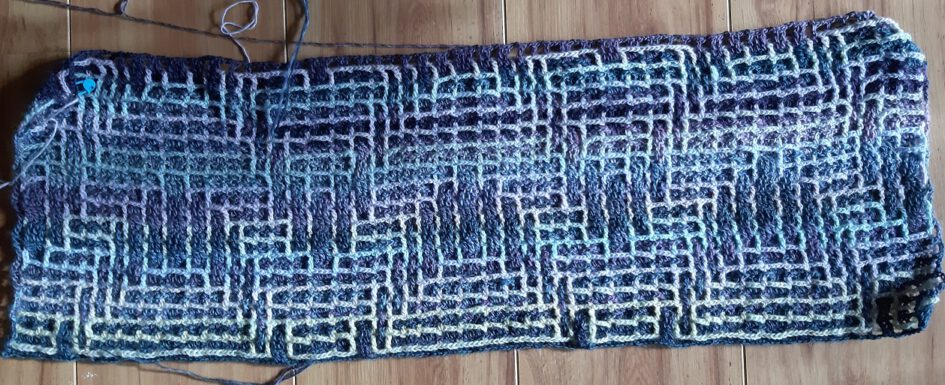
I will give you here a short part of the pattern ‘The Arches’ that is available on my Ravelry page: https://www.ravelry.com/designers/the-craftsteacher. I show you the setup and the first rows, with the version where clusters are made with dc’s and 1 chain between the clusters (of the a-rows). With the sold pattern, that is designed especially for the Scheepjes Our Tribe yarn, you will work with the following technique, but just a tiny bit different to get a airy result. I explain that explicitly in a separate tutorial in the sold pattern. At the start of this page you see a picture of a part of the shawl.

Click on the pattern next to this to see it completely. You can download it to your computer and print it, so that you can hold it next to the steps.
Description of these first rows:
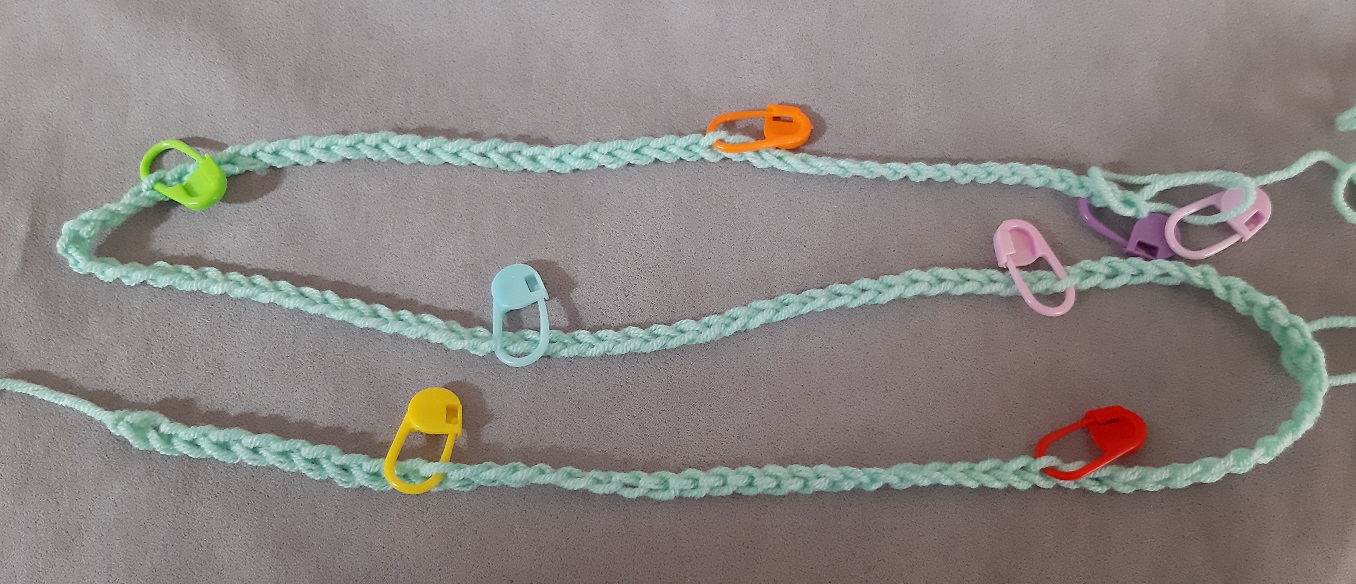
Row 0a: setup 139 st. Place a marker in stitch 11, 33, 55, 77, 99, 121 and 137.
Row 0b: setup 137 st. Place a marker in stitch 11, 33, 55, 77, 99, 121 and 133.
Row 1a – front: color 2 to back, side st, b 2x, *(f 1x, b 11x, f 1x, b 3x)* 2x, f 1x, b 11x, f 1x, b 2x, side st
Row 1b – front: b 2x, *(f 3x, b 8x, f 3x, b 2x)* 3x
Row 2a – back: color 2 to front, side st, f 2x, *(b 2x, f 9x, b 2x, f 3x)* 2x, b 2x, f 9x, b 2x, f 2x, side st
Row 2b – back: f 2x, *(b 3x, f 8x, b 3x, f 2x)* 3x
This is the description of a ‘regular’ interwoven crochet pattern. I have not added the description of the clusters here, so we need something extra. Because this is single clustered interwoven, and we will only have clusters in color 1, you need some extra information for row 1a. You could also use the patternchart to see where the clusters are, but I will explain that after this.
Once the clusters are made, they are repeated in the rows of color 1. Of course you will need to do something extra for color 2, but that will also be clear soon.
Intro

Click again on the chart next to this and download it, so you can hold it next to the steps. In this chart I show where the dc’s of row 1a are, this is where the yellow lines are drawn. If you have followed the tutorials for reading interwoven pattern charts, or if you’re already used to working off the pattern charts, then you will see quickly where the clusters are. If you actually only use the written instructions for interwoven crochet, you could read this if you’re curious about it, or skip it.
The first line at the right (we work from right to left) is the side stitch. After that you see 3 lines directly next to each other. This is a cluster of 3 dc’s. After that there are 2 sets of 2 lines directly next to each other: These are clusters of 2 dc’s each. After that you see a single line 3 times, these are single dc’s. I also call these clusters. This has to to with the description of interwoven crochet patterns. If you will see in the description of a row for example f 3x, b 2x ziet staan, this means you have to 3 clusters at the front, and 2 clusters at the back! So keep in mind that a cluster contains 1, 2, 3 or more dc’s. A bit cryptical still? It will get clear in a moment!
The setup
 Row 0a: setup 139 st. Place a marker in stitch 11, 33, 55, 77, 99, 121 and 137.
 Row 0b: setup 137 st. Place a marker in stitch 11, 33, 55, 77, 99, 121 and 133.
Place the markers on the places that I gave in the instructions. Thess are ‘strategic’ spots that help you checking if you still go right.
 You probably would expect that the orange marker should be two stitches to the right (in stitch 135), but this will get clear later.
Row 1a
Description: Row 1a – front: color 2 to back, side st, b 2x, *(f 1x, b 11x, f 1x, b 3x)* 2x, f 1x, b 11x, f 1x, b 2x, side st
Enhancement for the setup (cluster description): side st, c3 1x, c2 2x, *(c1 3x, c2 2x, c3 1x, c2 2x)* 5x, c2 2x, c3 1x, side st
We will use the weaving through method, so for row 1a we will first ignore what goes front or back, that will be used later with the weaving through of color 2. This is the same as with regular interwoven, so this is nothing new. But we do need to place the clusters. And for that we need the enhancement for the setup.
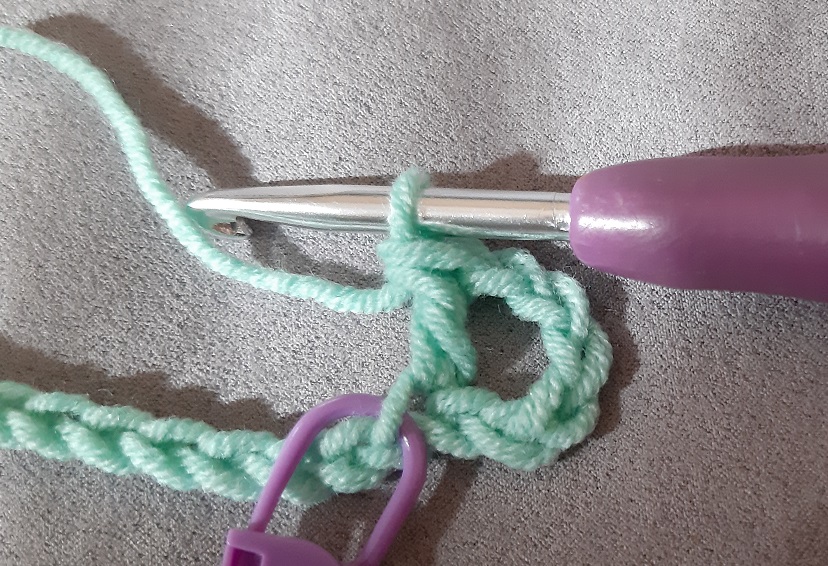
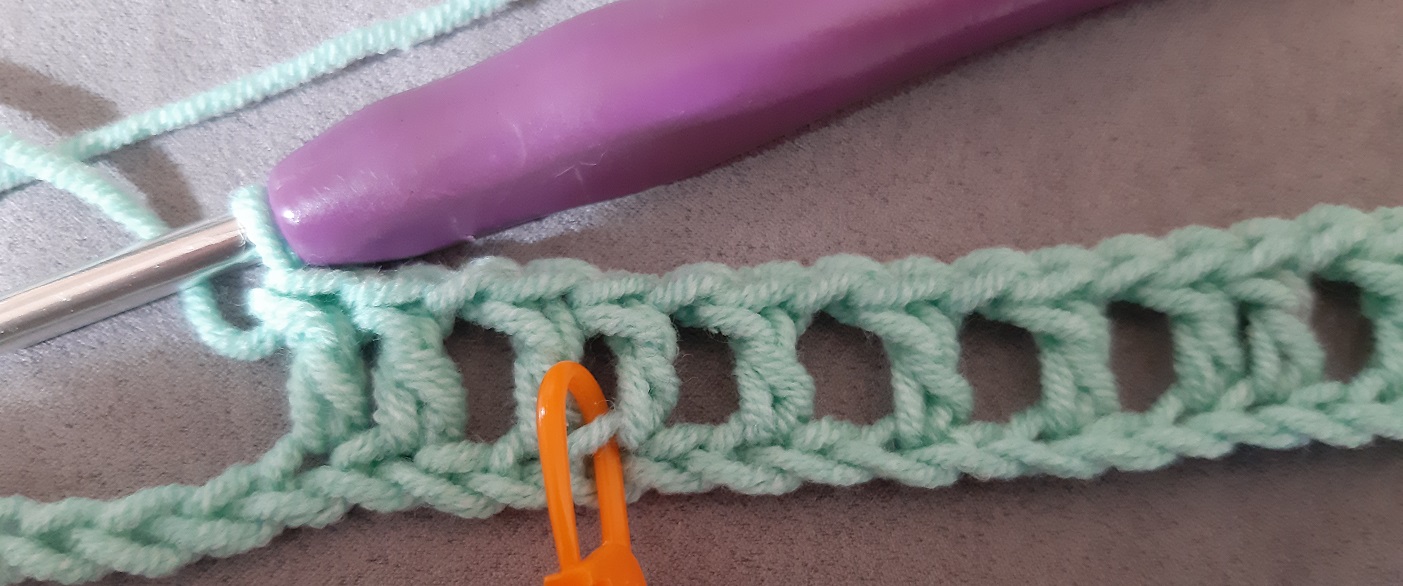
We will start as usual. Make 4 chains. This is the first dc (3 chains, the side stitch) plus the in-between-chain. After that we make the first dc into the stitch with the first marker (into stitch 137 of the setup).
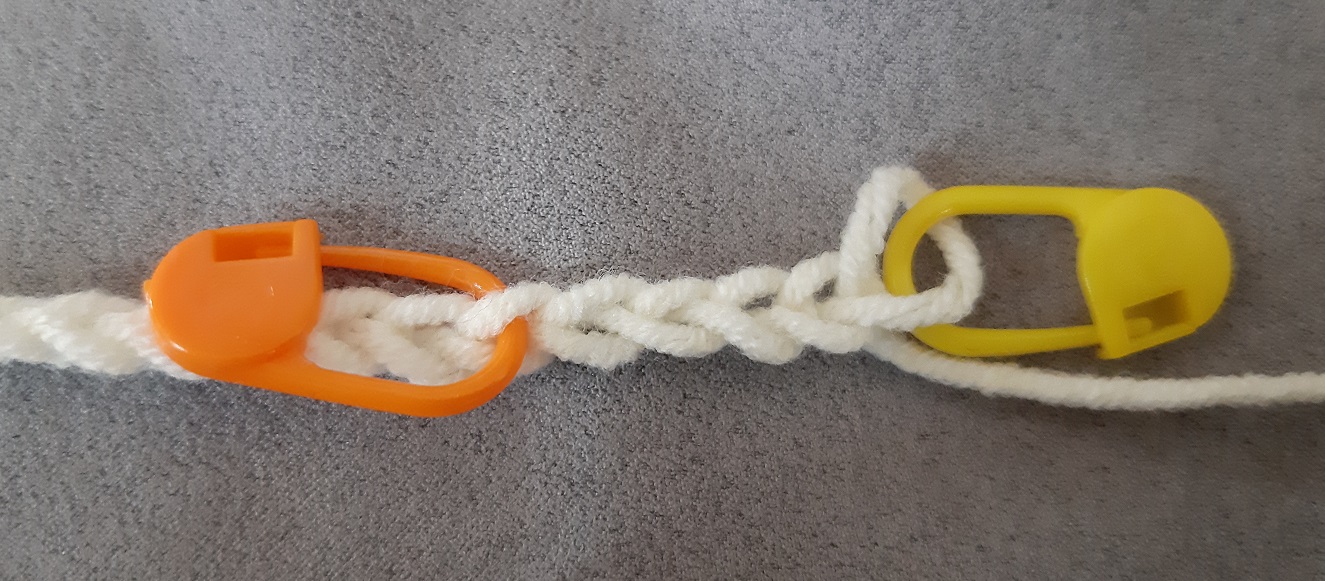
When you look at the additional cluster description, you see side st, c3 1x. This means that you have to make a cluster of 3 dc’s (c3), and that you do this once (1x). So the first dc of this cluster is already made (into stitch 137), and we will now also make a dc into stitch 136 and 135 of the setup.
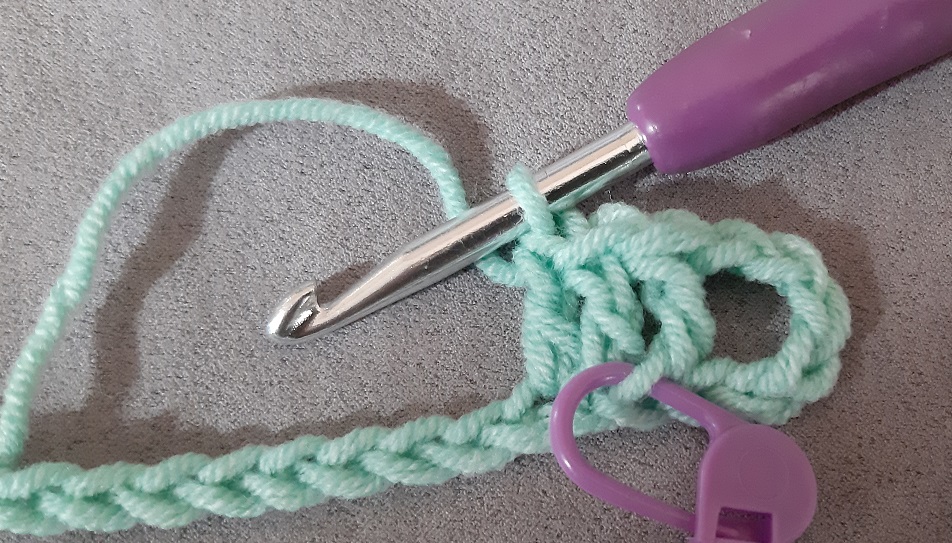
After that the cluster description says c2 2x. This means you have to make 2 clusters (2x) of 2 dc’s (c2). We make the in-between-chain as usual, skip 1 stitch (134), we make 2 dc’s into the next 2 stitches of the setup (133 and 132), an in-between-chain, we skip 1 stitch (131) and make the next cluster of 2 dc’s (130 and 129).
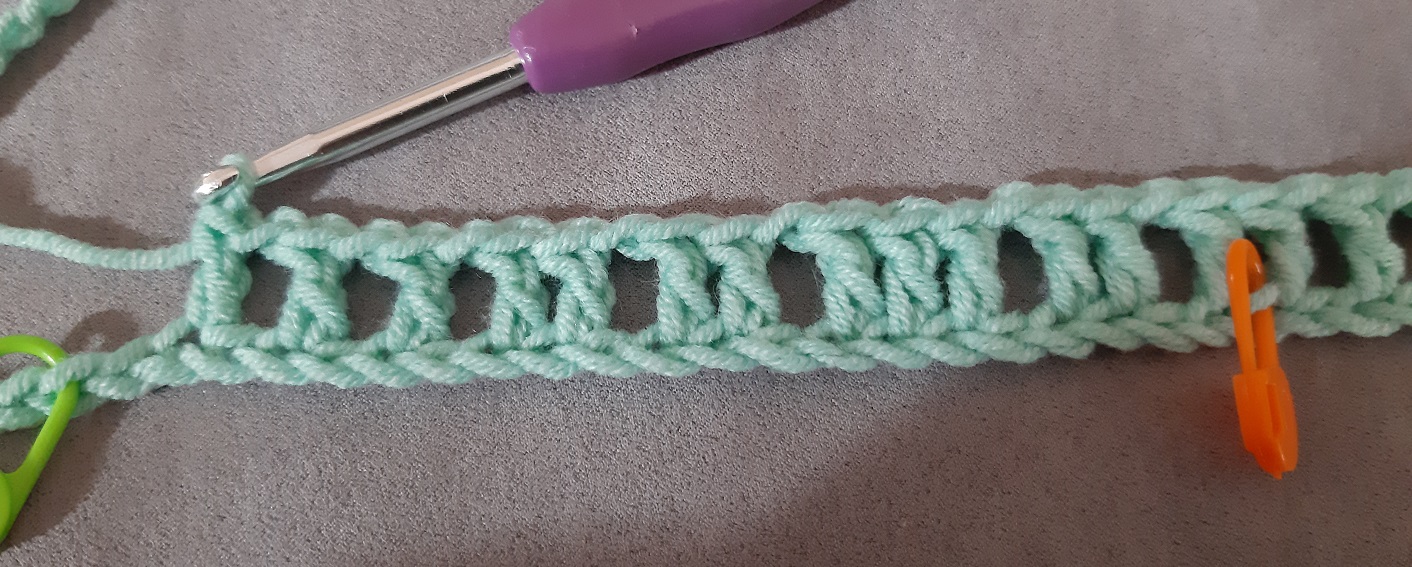
Next part is a repeat of the pattern: *(c1 3x, c2 2x, c3 1x, c2 2x)* 5x. It starts with c1 3x. This means we will do 3 times (3x) a cluster of 1 dc (c1). I know, it may sound a bit weird, but for the pattern description and the technique it is just the simplest to think that way. Between every cluster we always make 1 in-between-chain and skip 1 stitch of the setup. So we make 1 in-between-chain (128), 1 dc (127), 1 in-between-chain (126), 1 dc (125), 1 in-between-chain (124) and 1 dc (123).
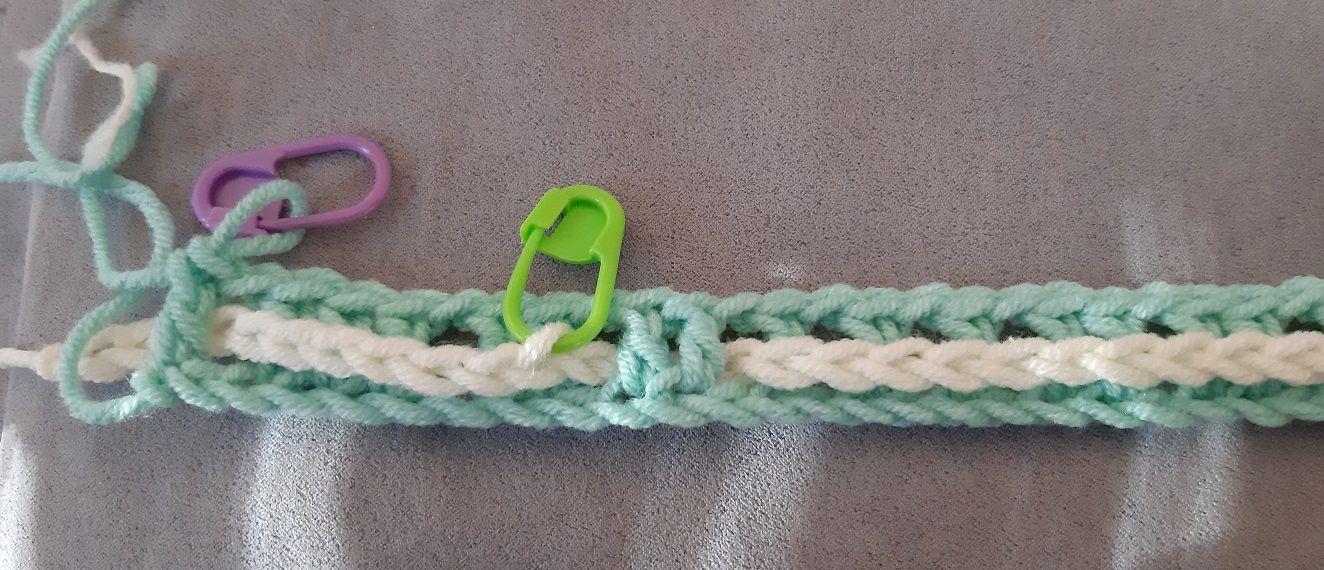
After that c2 2x. The next marker is in stitch 121. I placed the markers in a way so that they are each time at the start of a c2-c2-c3-c2-c2 part. So the first dc of the first c2 has to be made at a marker. This is a nice check to see if you do correctly.
I think this is clear now. Now crochet the rest of the row.
After this some pictures will follow. Click on the pictures to see them fully.
 Further: c3 1x, c2 2x and c1 3x
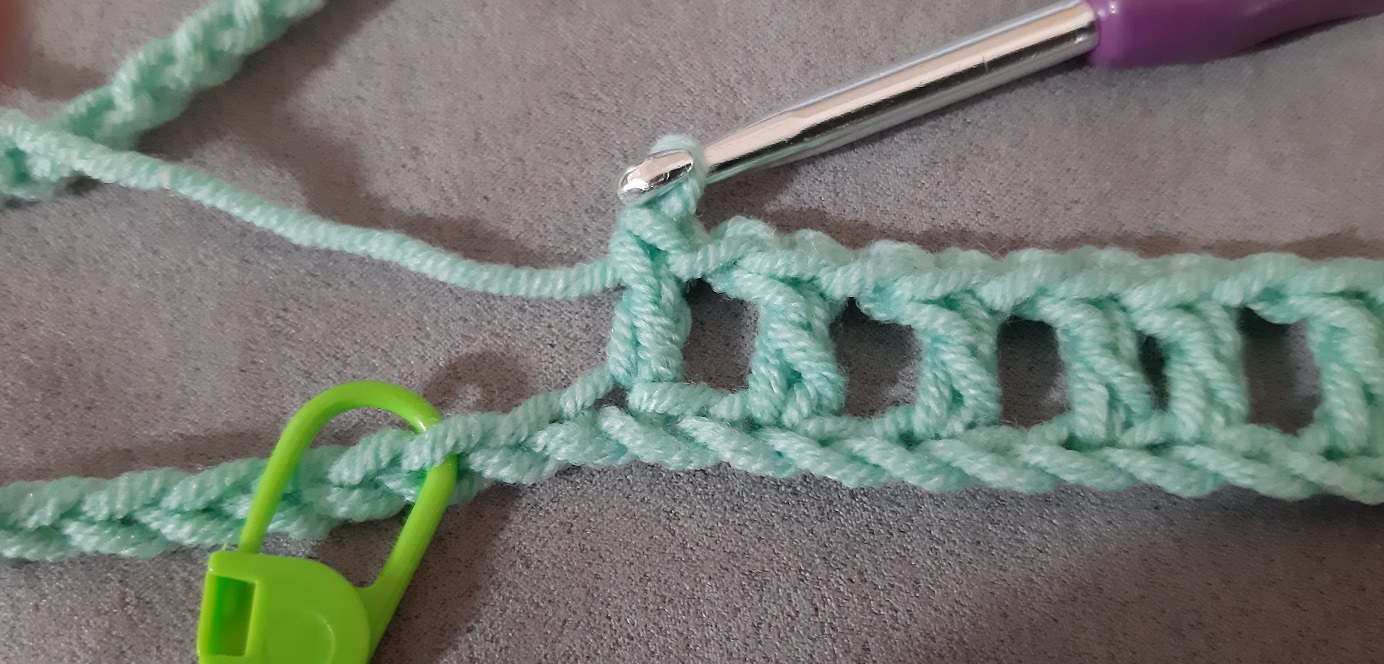 Here you can clearly see again you have come just before the next marker. The marker marks the start of a c2-c2-c3-c2-c2 part.
 The next repeat.
 Here is shown again that the marker is at the first dc of a c2-c2-c3-c2-c2 cycle.
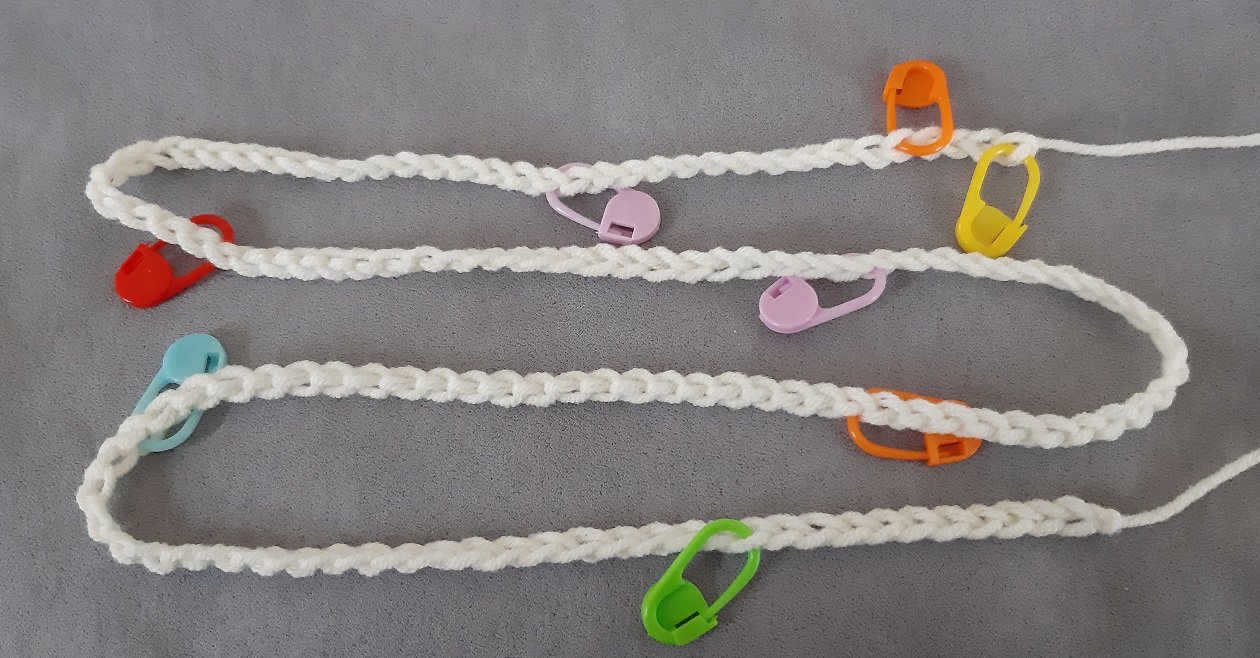
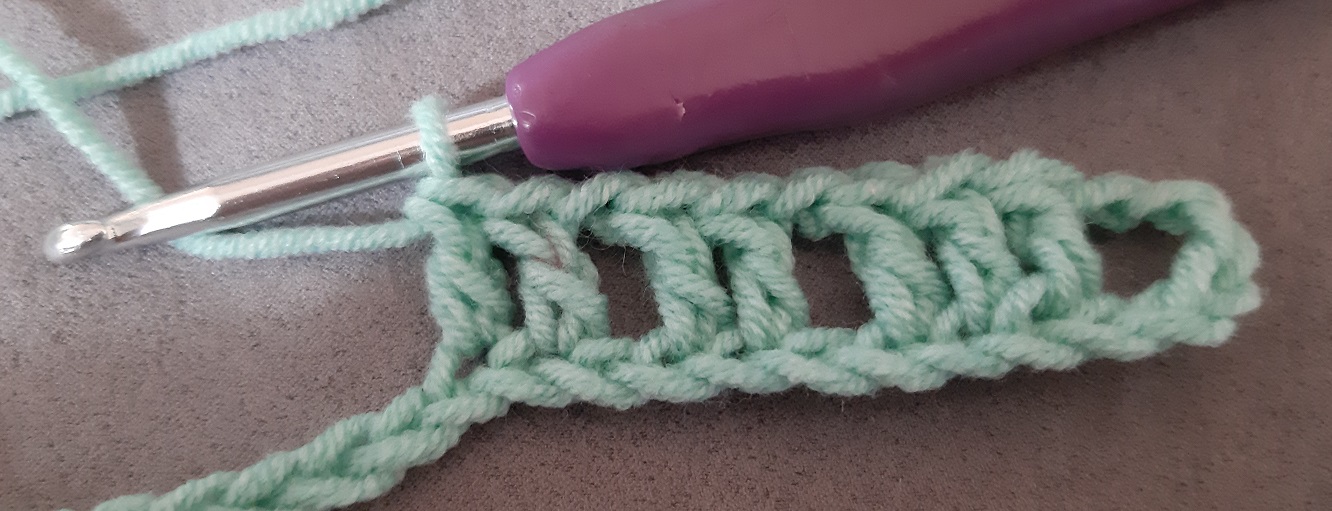
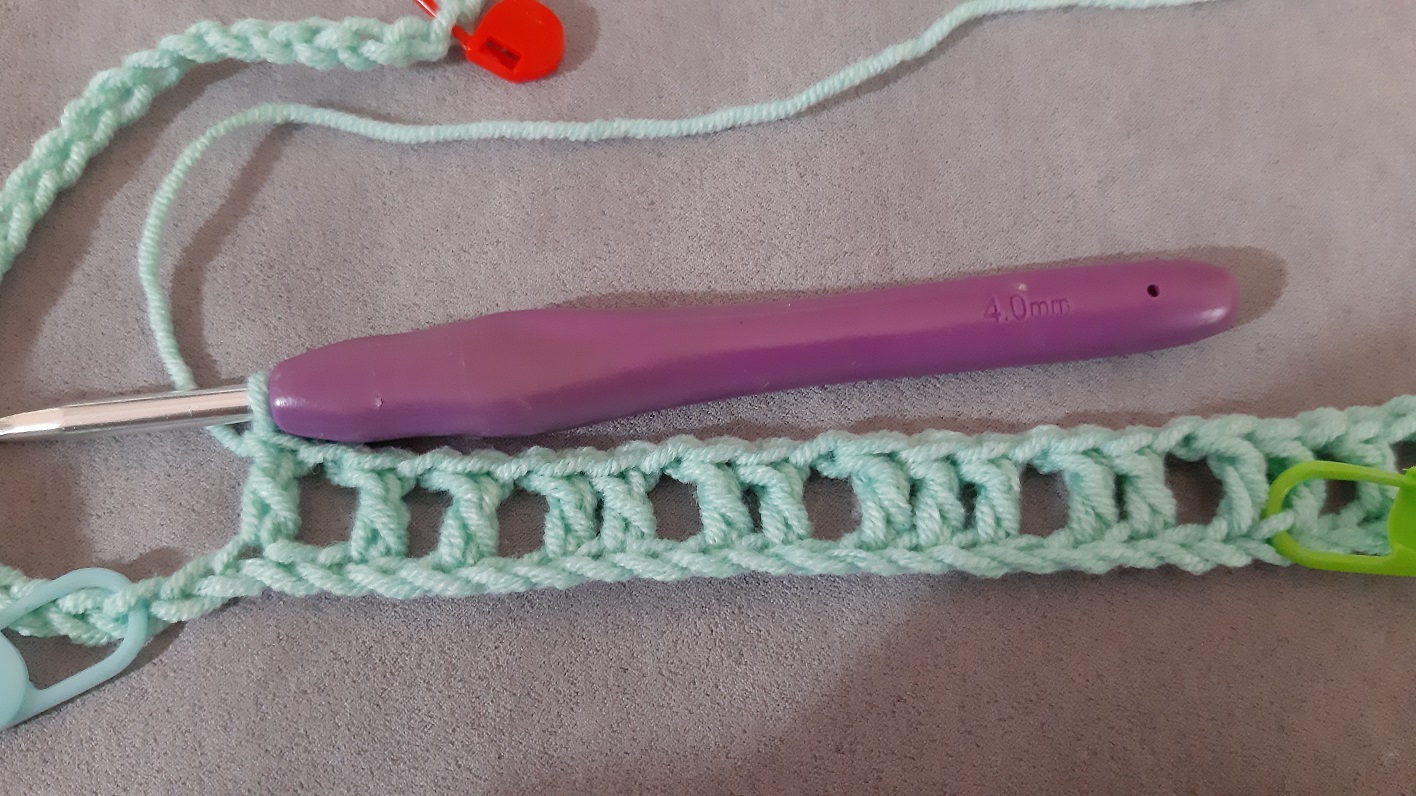
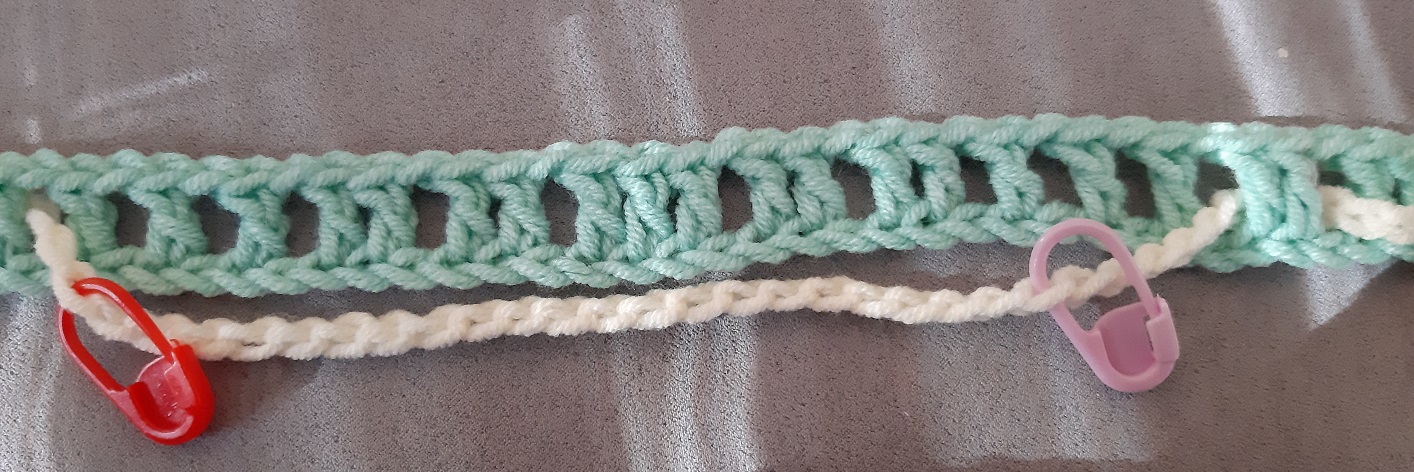
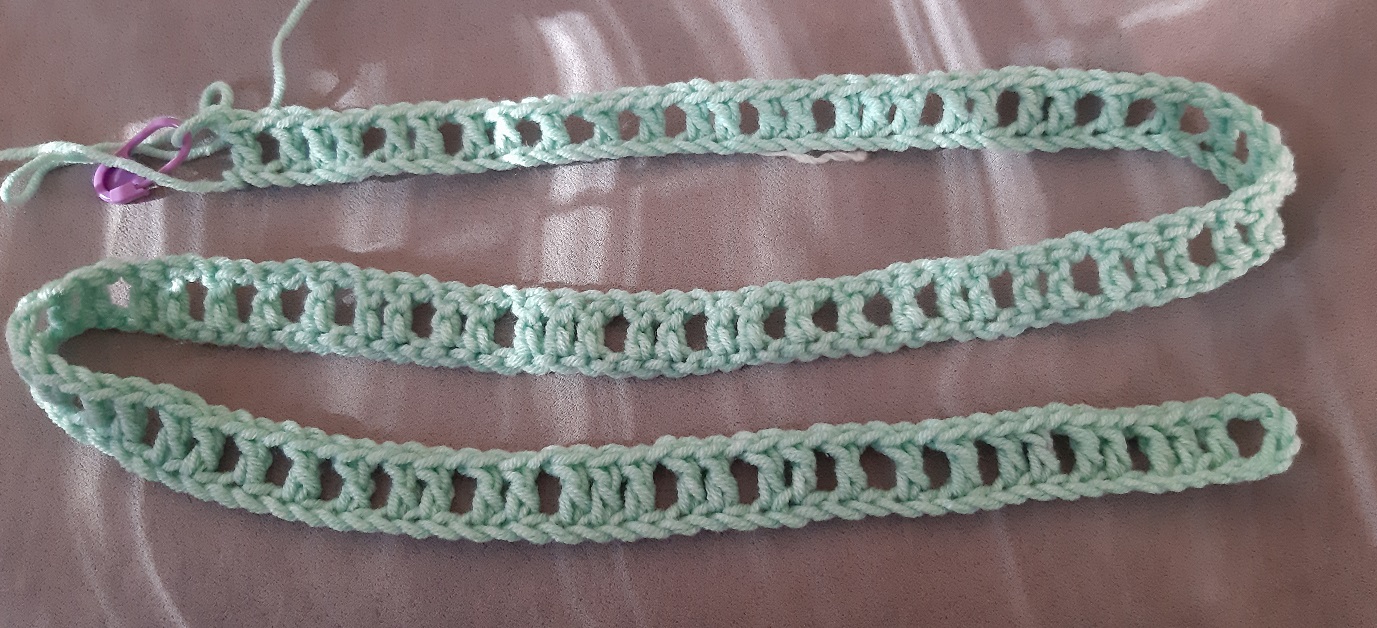 The entire row is finished. Put down the row in the correct way as a preparation to weaving through. Take care that the end where you have stopped crocheting is at the top left. Then go all the way to the right of this first row. Pay attention you don’t twist it.
 Description: Row 1a – front: color 2 to back, side st, b 2x, *(f 1x, b 11x, f 1x, b 3x)* 2x, f 1x, b 11x, f 1x, b 2x, side st
So now we will look at the description of row 1a to see what has to go back or front.
If you’re already familiar with interwoven crochet and the weaving through method, the next steps will look familiar. I will reveal it already: where you used to think in dc’s, now think clusters.
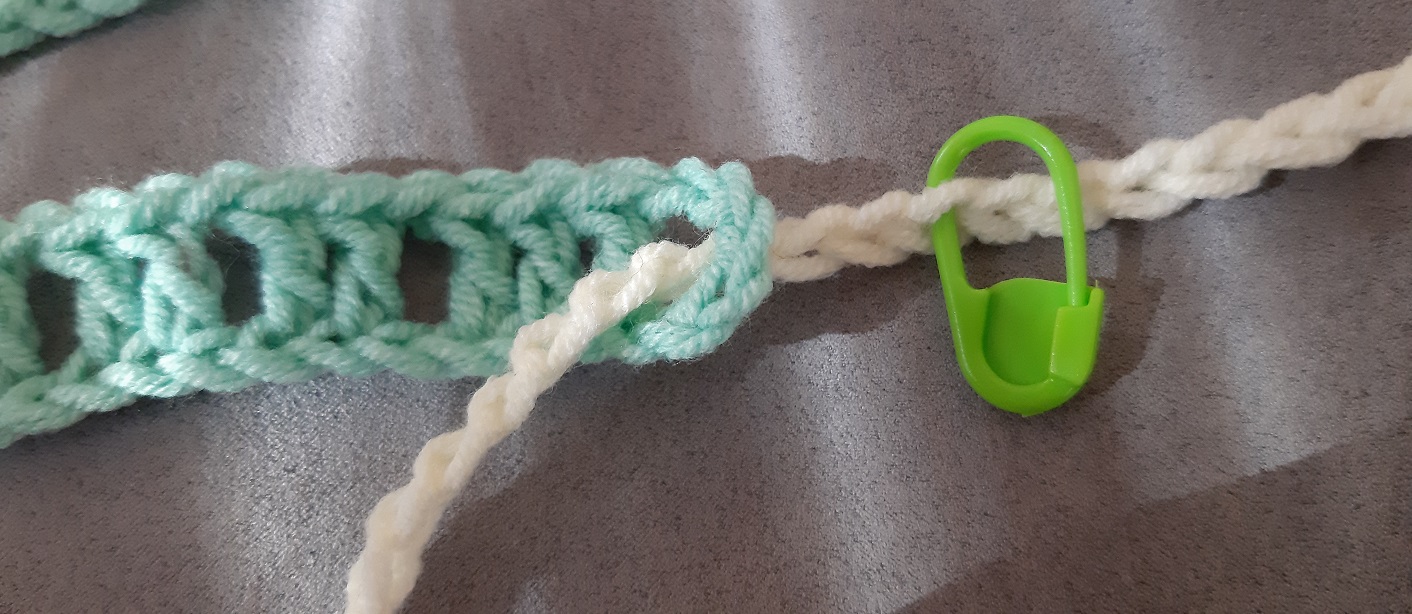
We first read color 2 to back. This means that we have to start with color 2 at the back of the work. The side stitch is for crocheting, so we can skip that. After this the instructions say b 2x. Take the end of the setup in color 2 and bring it to the top after the side stitch, so that you can lay the next 2 clusters(!) behind color 2.
Don’t worry about where to put the markers of the setup row by the way, this comes later with row 1b.
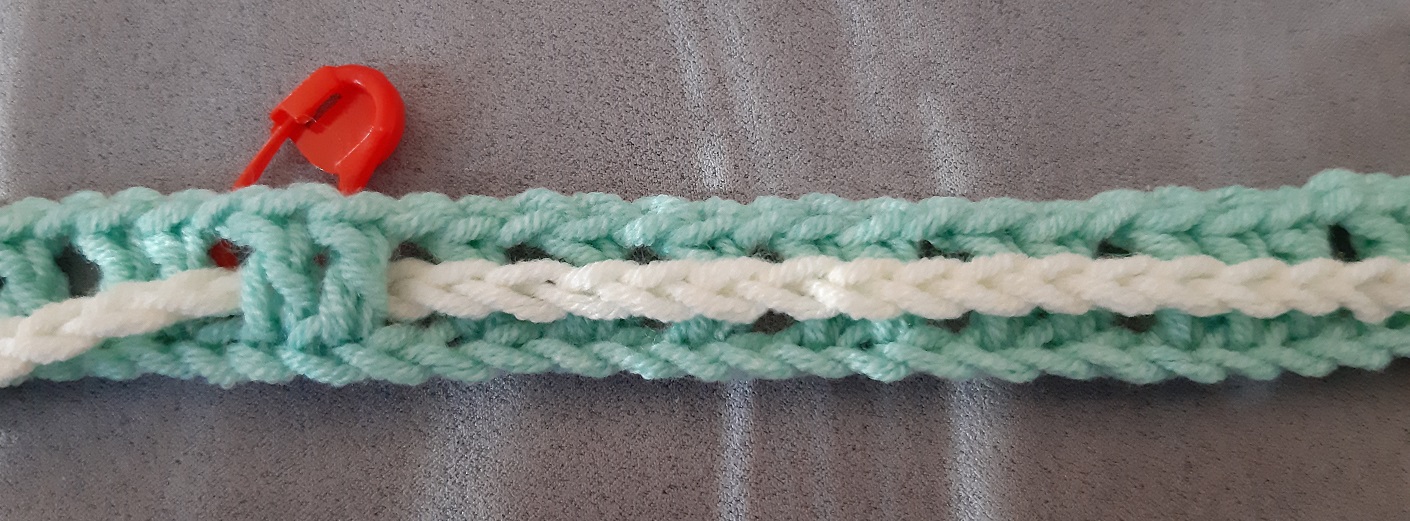
 Here you see that the 2 clusters (1st with 3 dc’s and the 2nd with 2 dc’s) have been put behind color 2. Next bring the tail to the back.
 The next instructions say f 1x. Here the next cluster of 2 dc’s is put in front of color 2. The tail of color 2 has been brought to the front again.
Pay attention with weaving through, that the v-shapes of the setup of color 2 lay neatly facing to the top, and take care it doesn’t twist around. That will save you from a lot of trouble with crocheting the next row!
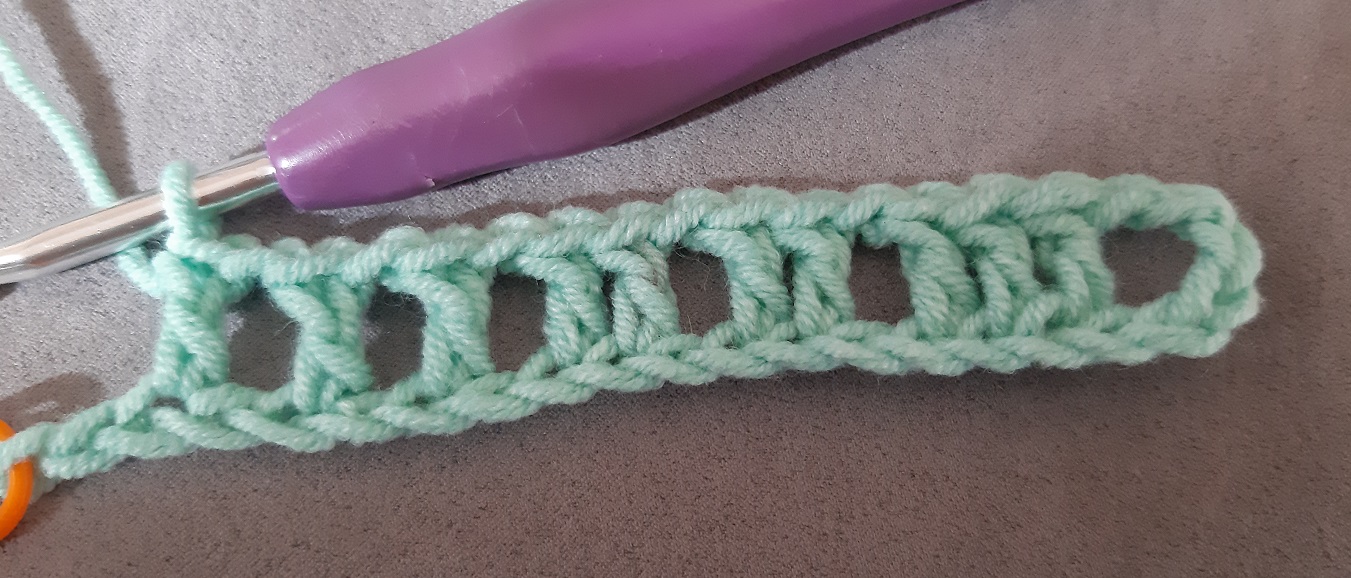
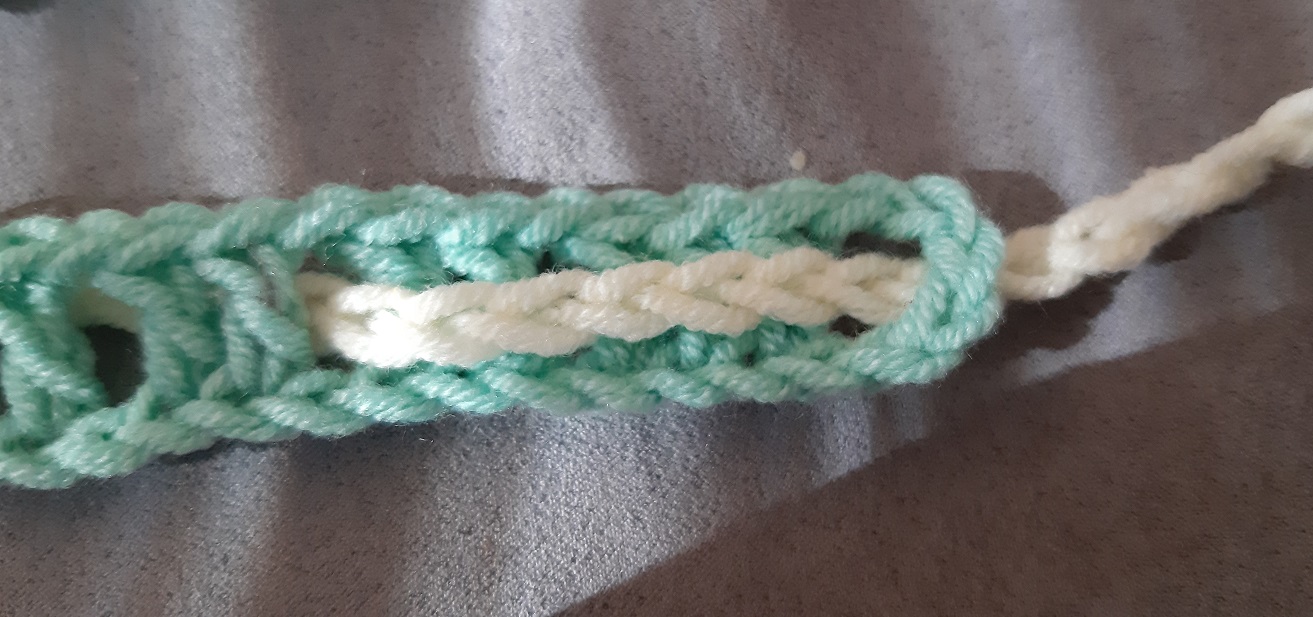
 After that it says b 11x. This means 11 clusters! So first 3 clusters of 1 dc, 2 clusters of 2 dc’s, 1 cluster of 3 dc’s, 2 clusters of 2 dc’s and another 3 clusters of 1 dc. Click again on the picture to see it fully.
It may sound a bit odd to call 1 dc a cluster also, but this makes that you can just use the instructions for regular interwoven crochet! You only have to think in clusters when you read the front-back instructions instead of single dc’s!
 The next instruction is again f 1x. Do you see how neatly the tail is laying?
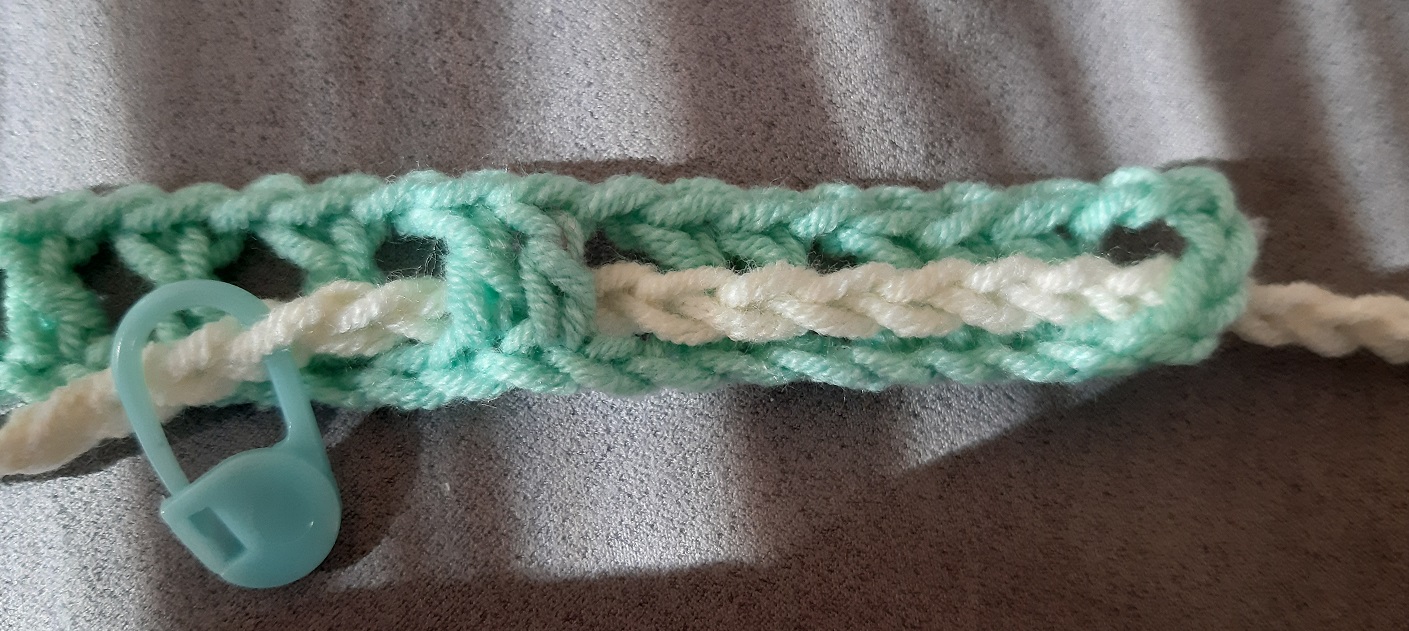
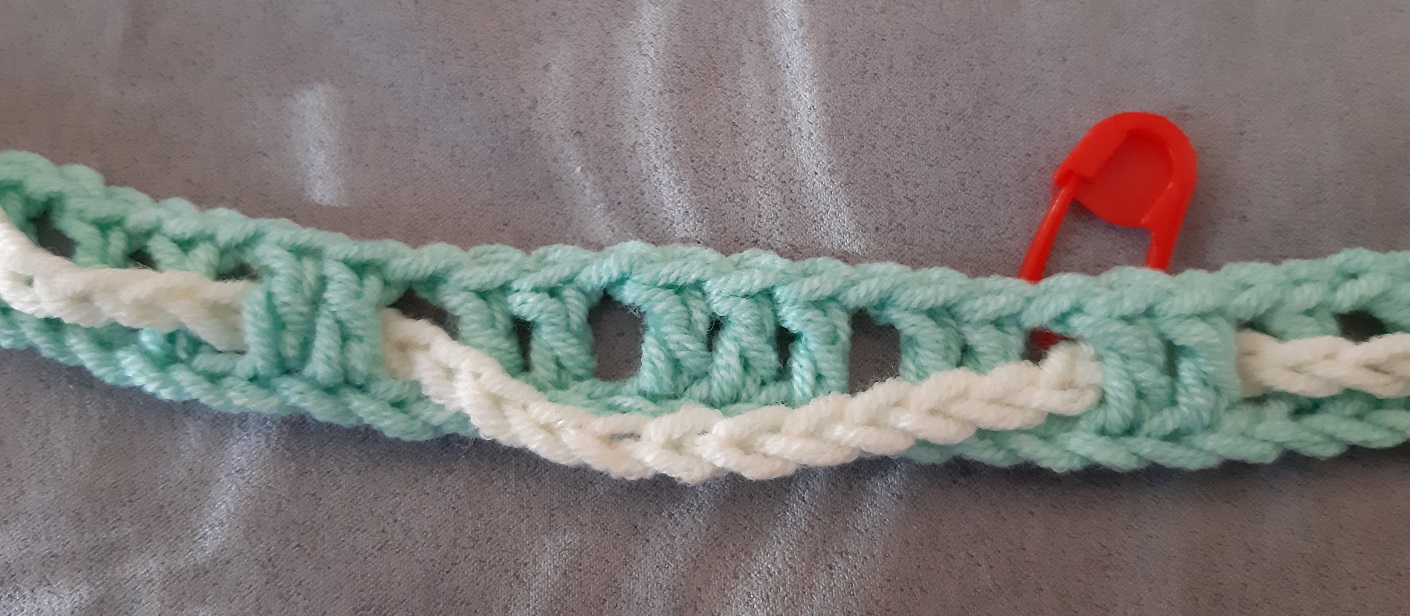 And after that b 3x.
 Row 1a is now finished!
General rule for single clustered interwoven for the a-rows is that you only have 1 chain between the clusters and that the number of dc’s varies. The number of dc’s per cluster and where to put them is given at the setup. The clusters stay at the same place and stay the same width during the entire project.
Next rows
Click here to go to the next page for the next rows.