
Introduction
This tutorial is about finishing the edges of your weave with a border by doing single crochets. I’m using the US-terms here, for the UK it is called a double crochet. It’s actually the same tutorial as the tutorial with slip stitches (you can find that here), but now with doing single crochets. This is again an in depth tutorial, with lots of pictures and drawings. You can click on each picture or drawing to see a larger version.
I made a video of this also, where I go into detail about whether you should do 2 or 4 stitches in the corners, and how to do that the best way, but you can also continue to read after the link to the video if you prefer. The video is a continuation on the previous video, so my advice is to watch that first!
On the pictures you will see my weaving frame with 24 nails on each side, 4 corner nails and 22 nails in between them on each side to be exactly. On the drawings you see 10 nails on each side, so that’s a little bit different than my loom. But I will make that clear as much as I can where that is needed. It’s possible that your loom has another number of nails on the sides, but that doesn’t make a difference in the way to work. I will clarify things, where counting is done, or where there’s a link with the drawing.
This tutorial is split into several pages, because it has a lot of pictures and drawings. You will find the buttons to skip to the next or the previous page on the bottom of each page.
The crocheting of the sides is done while the weave is still on the loom.
What’s the difference with slip stitches? And do 2 or 4 stitches per corner?
So why this extra tutorial? I admit, for the most part it is copy, paste, some extra steps, but I decided to repeat it anyway. If you do crochet, you will most certainly know the difference between slip stitches and single crochets, but if you don’t, you can see it all here right away, so that’s easy.
It’s also an intro to the next page (see here) on the ‘discussion’ on if it’s enough to make 2 stitches in each corner, or if you should do more. Really look at that page, so you can decide for yourself when you’ve gone through this tutorial! With the slip stitches, the 2 stitches in the corner were sufficient, but a single crochet produces a higher stitch than a slip stitch. And if you crochet squares, like granny squares, you also know that you have to make extra stitches in the corner. Your piece gets bigger with each round, so you have to increase stitches along the way. A conclusion for now: it is not really necessary, but maybe you like it just a bit more, so the choice is up to you.
Just 1 thing is important: make a consistent choice for all of your pieces!
If you’re doing a project where you have to attach several pieces together, like a shawl, a wrap, a poncho, whatever: be consistent in what you do! Do you choose to not do crochet borders, then don’t do it around any piece. Do you choose for a slip stitch border, then do that around every piece! Do you choose for a single crochet border, then decide if you will do extra stitches in the corners, or not! Each type of border has it’s own properties, in heigth, and in number of loops or stitches.
This tutorial uses 2 stitches in the corners, just like the slip stitch tutorial.
The goal: the same number of crochet stitches on each side
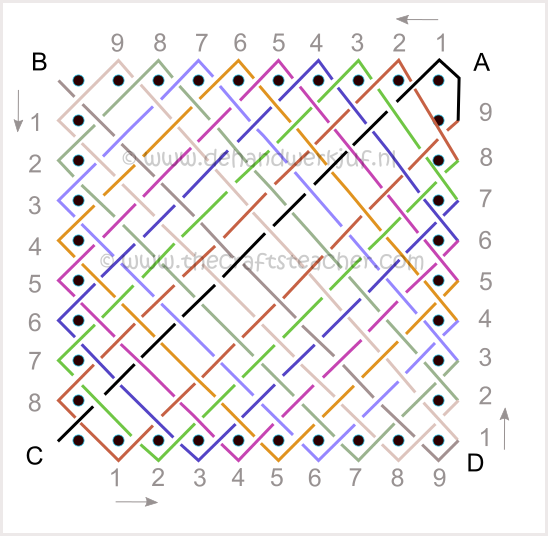
This is a drawing that I made for explaining how to weave (see here for the tutorial). I marked the corners (ABCD), and I numbered the loops that are around the nails. In this example you see that you have 10 nails (the black circles) on each side. Or to be exact : 4 corner nails with 8 nails in between them on each side. You see that there are 9 side loops on the top, on the left only 8, 9 at the bottom, and 9 at the right side. And that actually is not what you want for a crochet border.
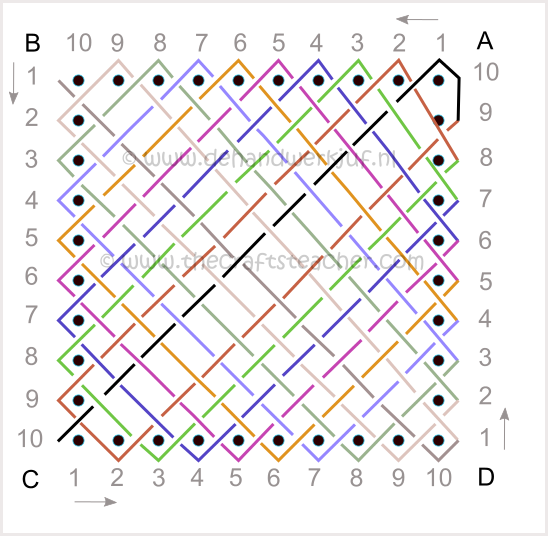
Preferably you would like to make a stitch around each nail, and 2 on each corner nail (which is 1 for each side), so that you will end up with 10 stitches on each side. I showed that in the next drawing. But to accomplish that, you have to make some ‘adjustments’. And you have to start at the right place.
Look especially at the last page, because it’s very important what you have to do there!
The start
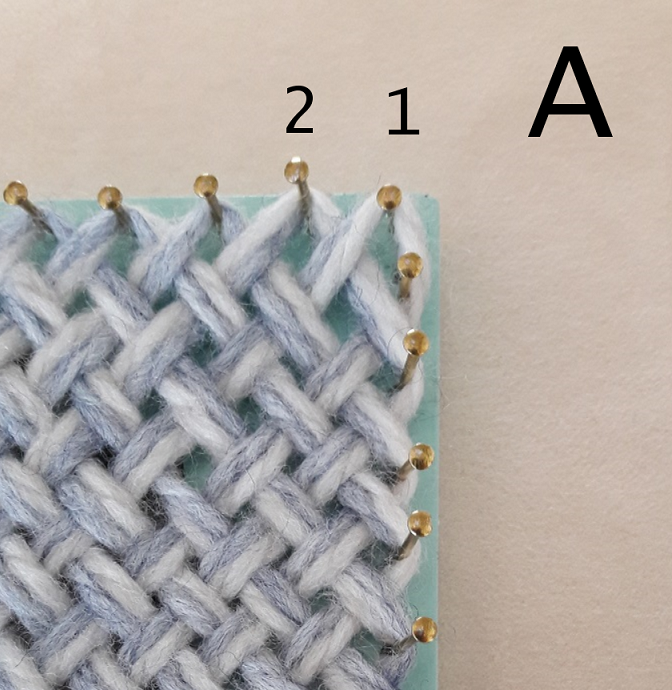 The starting corner is corner A. That’s the place where, at the start of the weaving, the thread goes around the 2 top right nails. The reason that you have to start there will get clear at the end of this tutorial.
Making a single crochet
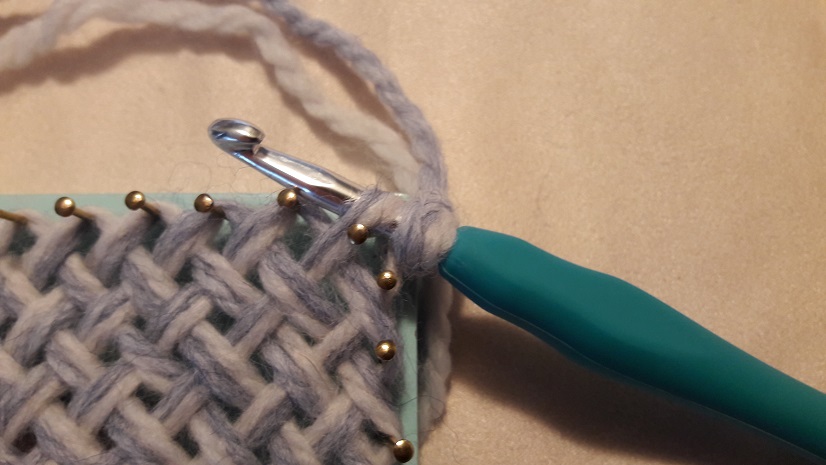
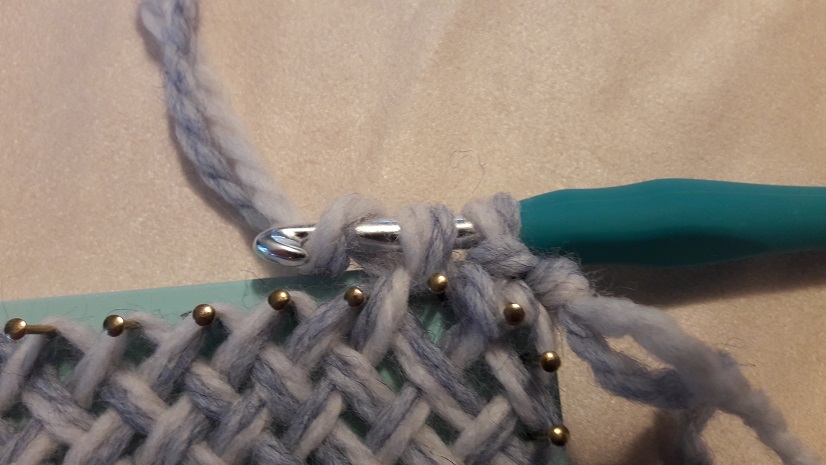
First I will explain how to make the crochet stitches. You start with making a slip knot and putting that on your crochet hook:

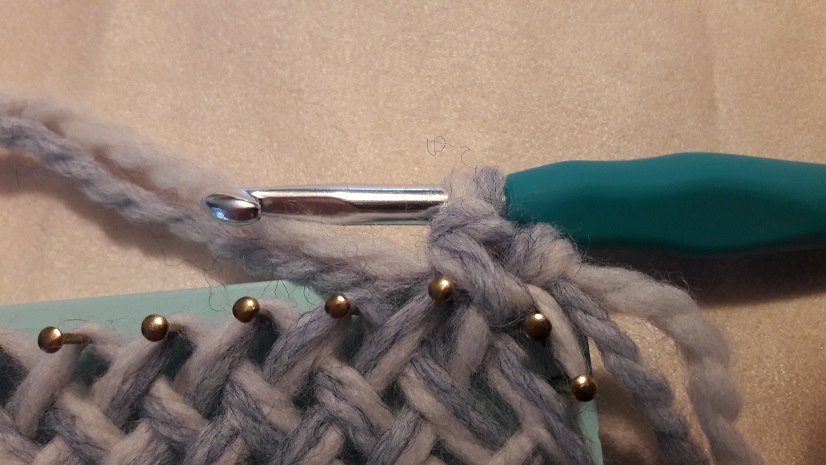
Next you put your hook through the first corner loop (at nr 1):
Put the yarn (that goes to the ball) over your hook:
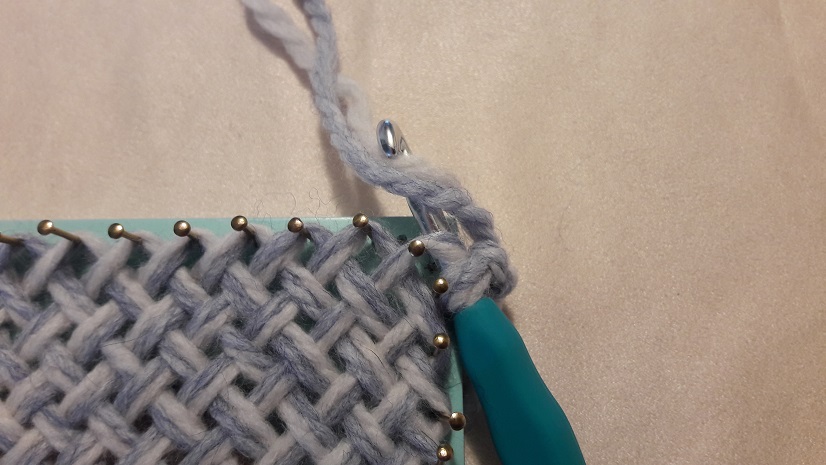
Pull the yarn through the corner loop. You now have 2 loops on your hook.
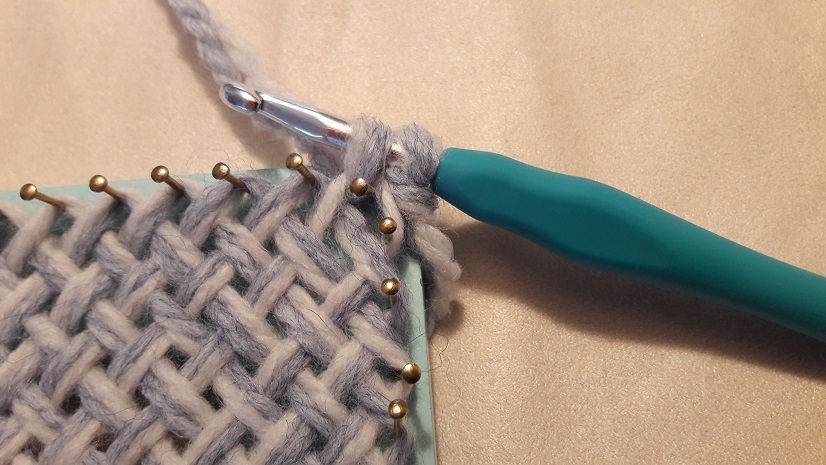
And now the difference with slip stitches. You have to do an extra step. Put the yarn (that goes to the ball) over your hook again:
Now pull the yarn through both loops on your hook:
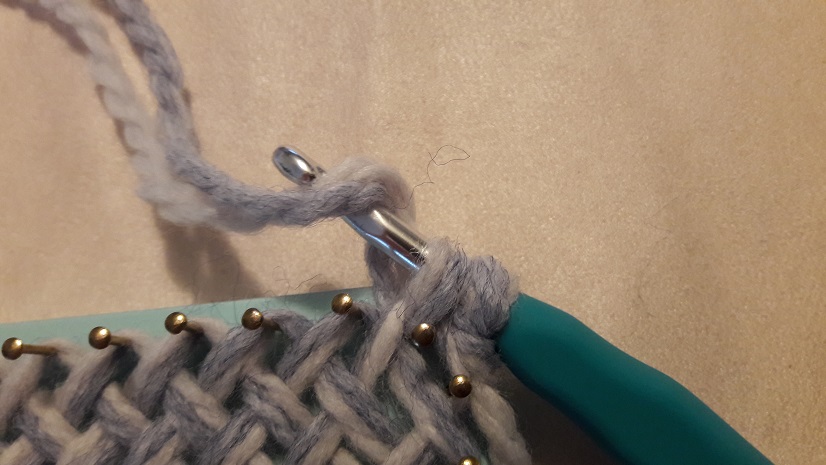
Next you do the same thing with the border loop around the 2nd nail. Put the hook through the 2nd sideloop:
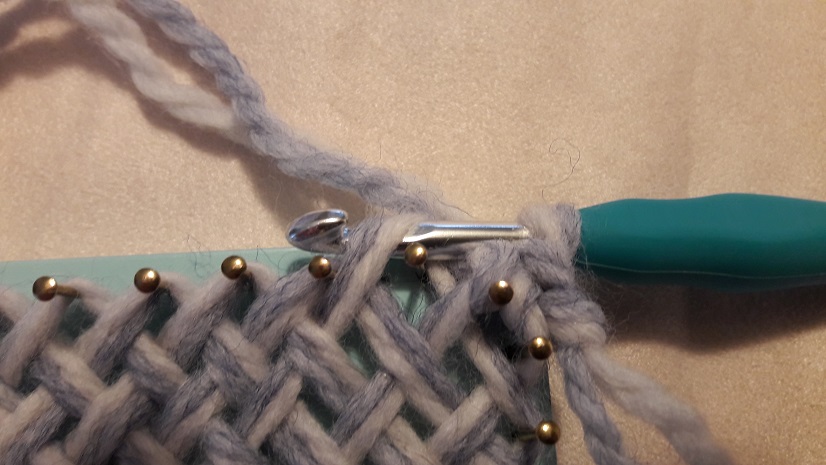
Again put the yarn over the hook:
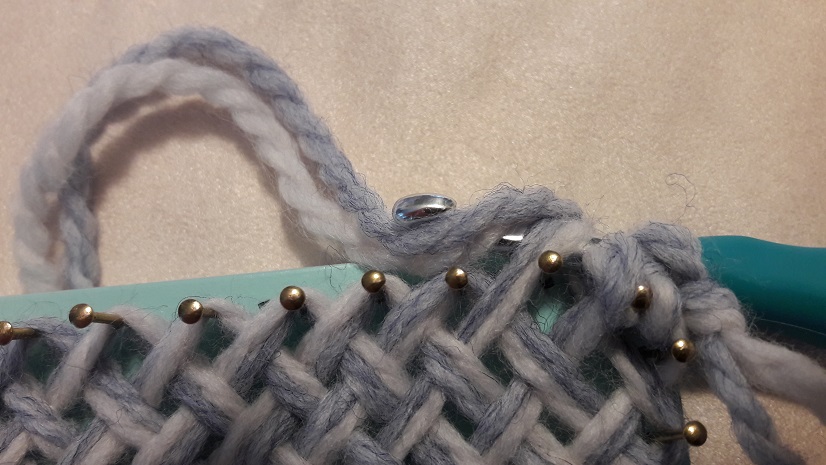
Pull the yarn through the 2nd sideloop:
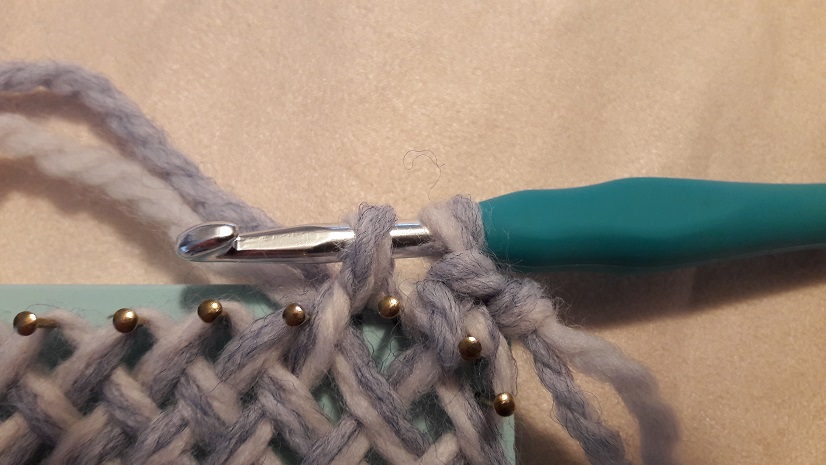
Now pick up the yarn again:
Pull the yarn through both loops on your hook again. You have now done 2 single crochets:
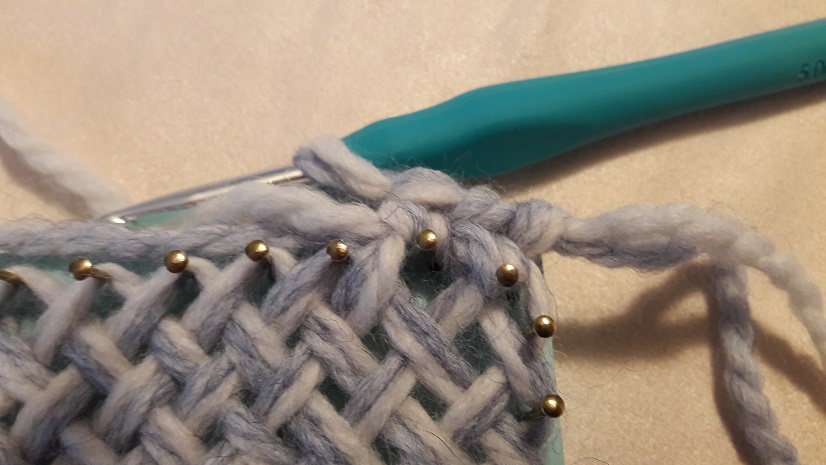
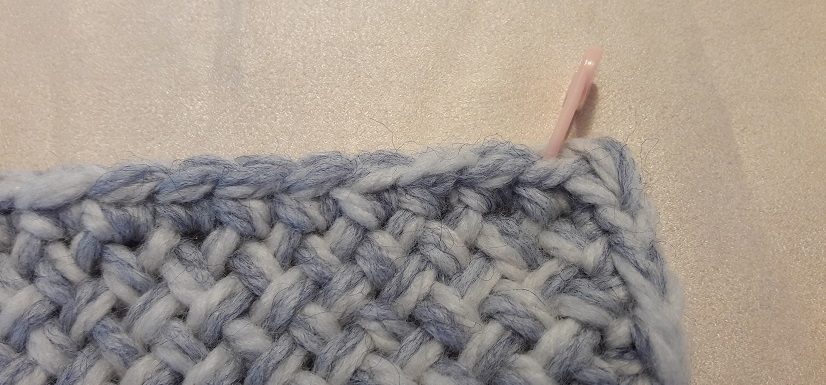
This is how it looks when you view it from the top:
You can clearly see 2 V-shapes. Mark the first stitch with a stitch marker or a piece of scrap yarn. That makes it easier for counting and to prevent you to go wrong.
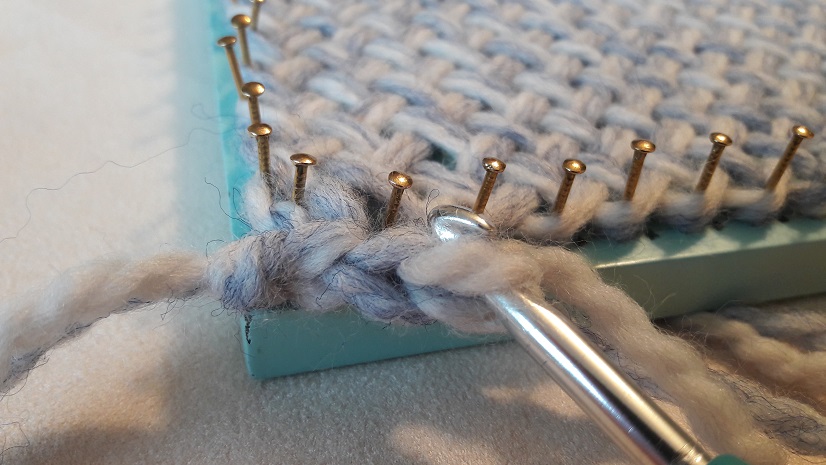
Now make a single crochet in each sideloop.
Continue on the next page for further explanation on how to deal with corner B.