
On these pages I show you how you can attach the squares that you have crocheted with the interwoven crochet technique ‘in the round’, using a flat join. This is a ‘join as you go’-method, which means that you join the blocks while crocheting the last row of a block. It is really super simple, and it limits the number of threads that you have to finish.
Pages of this tutorial
I splitted the tutorial up in several pages.
- Introduction and first join: that’s this page
- Next join: click here to go to that page
- Last join: click here to go to that page
The video
I made a separate video for this. Click here or look at the end of this page.
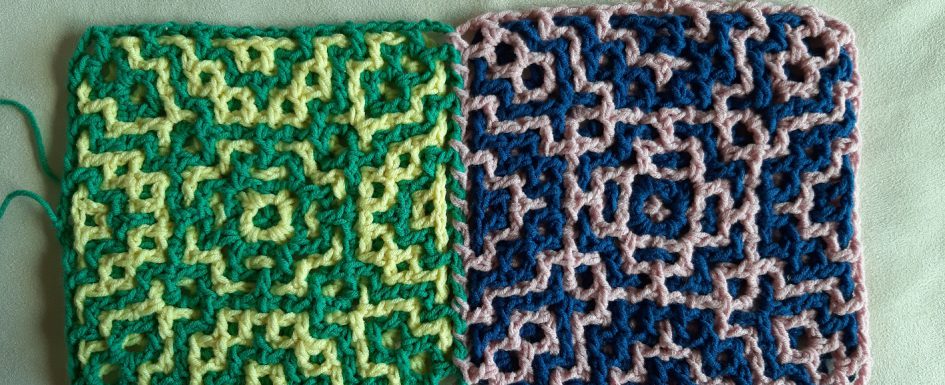
The borders

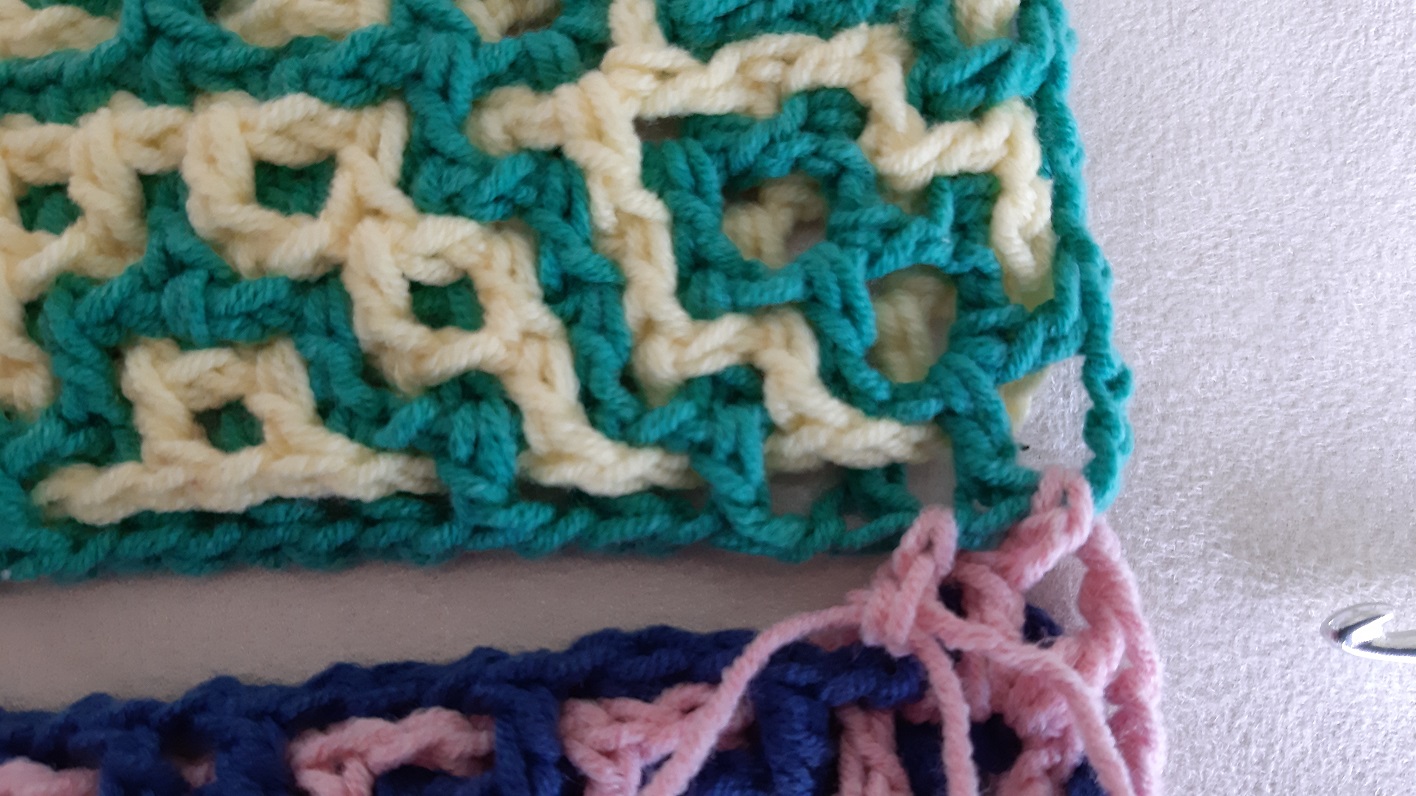
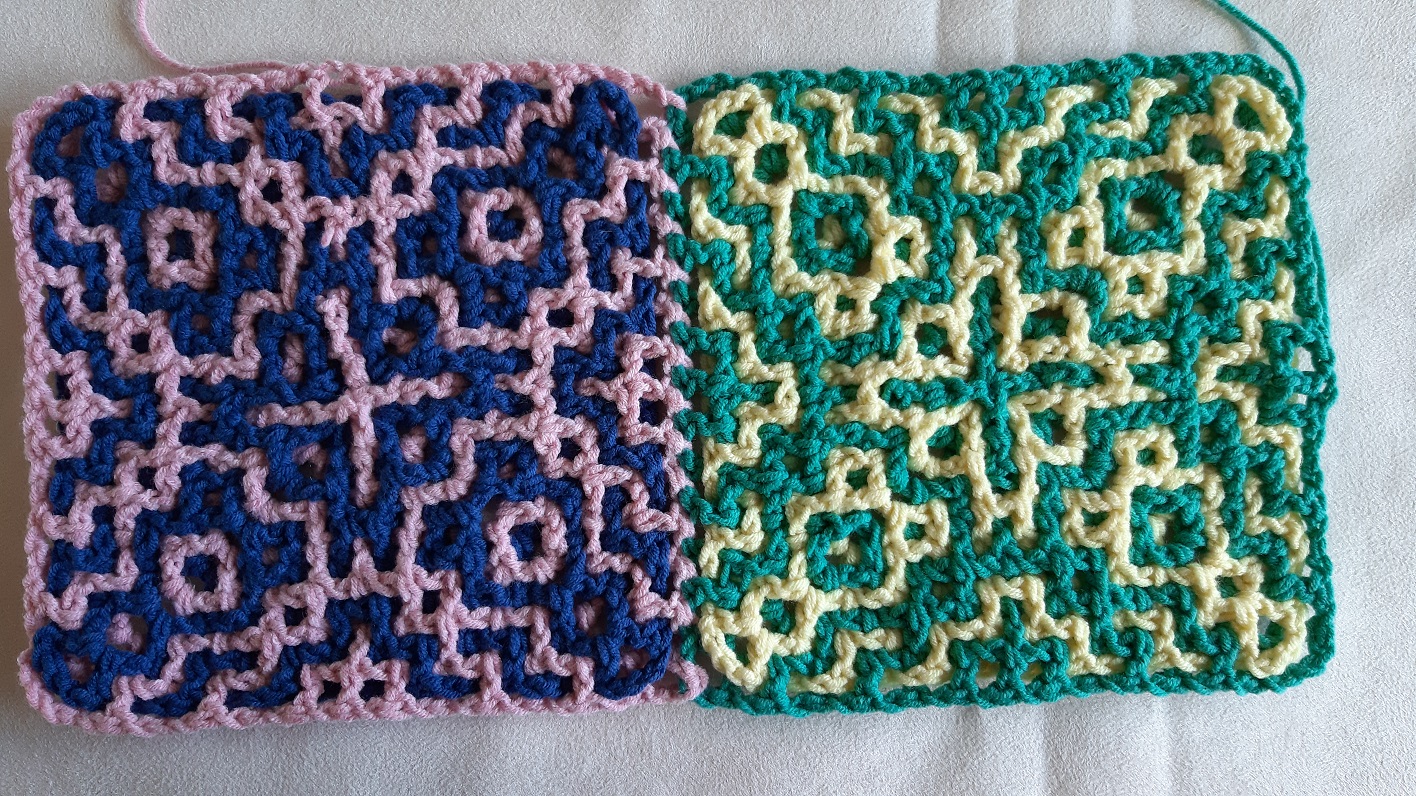
Here you see a sample of another pattern, where the borders are done in the same color. The join is ‘invisible’. You can of course do blocks in several colors with different colored borders, as I also did for this tutorial to make it clear, but if you want the join to be invisible like this, then it’s best to use the same color for the outer borders. You don’t have to use this through the entire block of course, you can also use color changes, like I showed in the instruction-video for working in the round.
By the way, do you see that I ended here with a border in color 2?
The first join
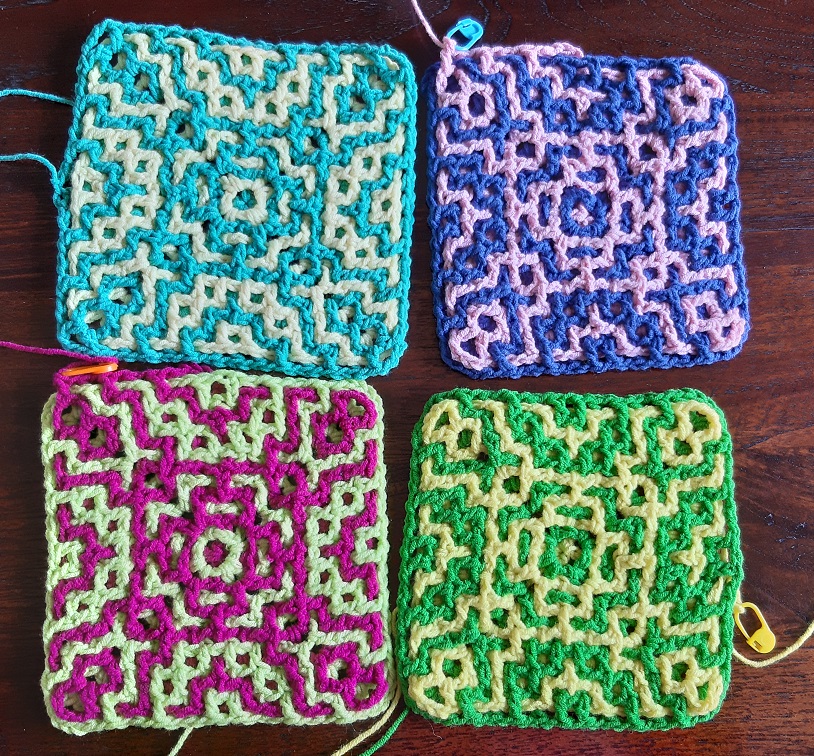
This is the order of the blocks that I want to do. You see that the top left block is already all finished. The last border of the next blocks still have to be made.
I put all blocks here with the same side up. You don’t have to do that! You can also alternate using the front and back if you want.
I saw that I made a mistake in 2(!!!!!!!!) of the borders of these blocks. Oops! I already finished the threads, and had no time to correct it. It doesn’t matter for the tutorial, so please ignore it.
Click on the pictures to see them full size.
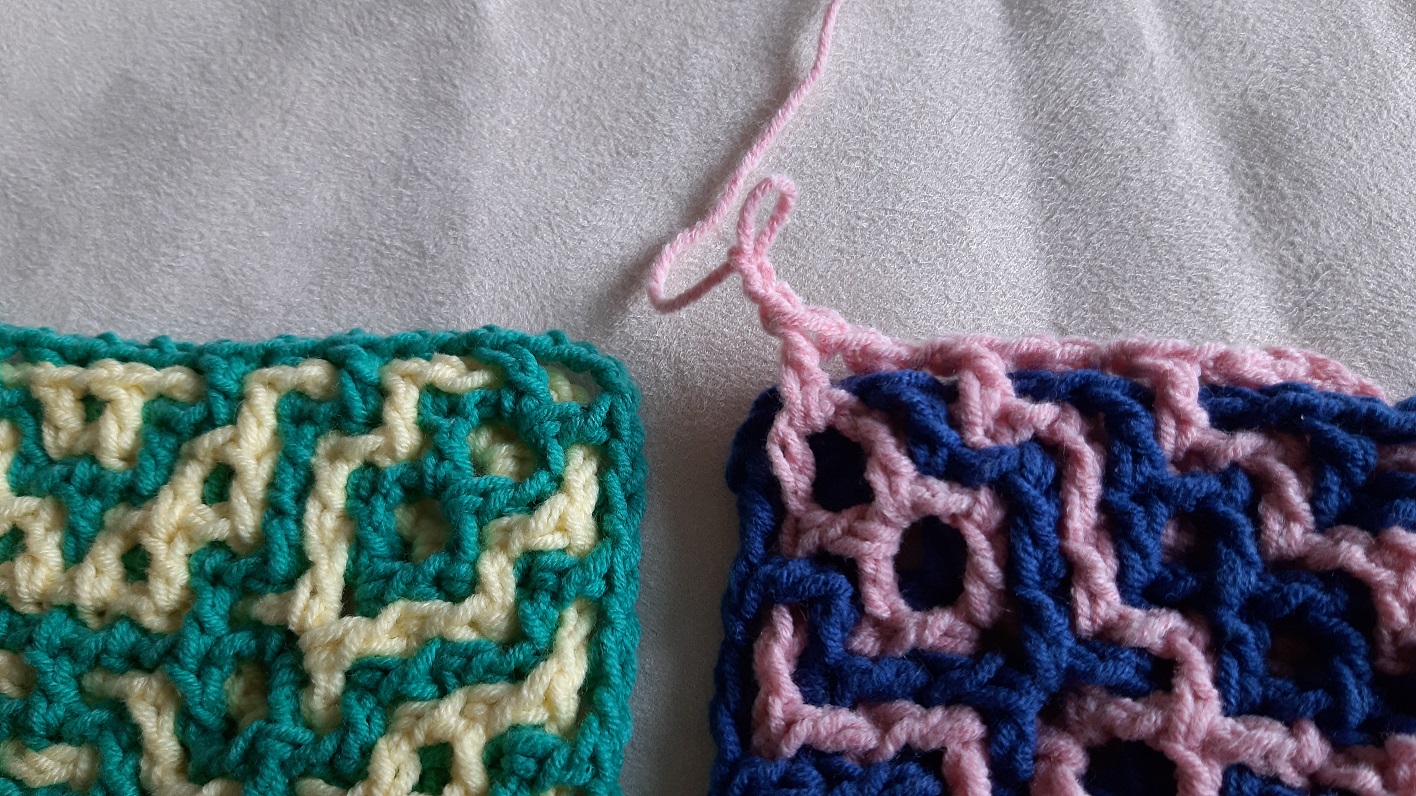
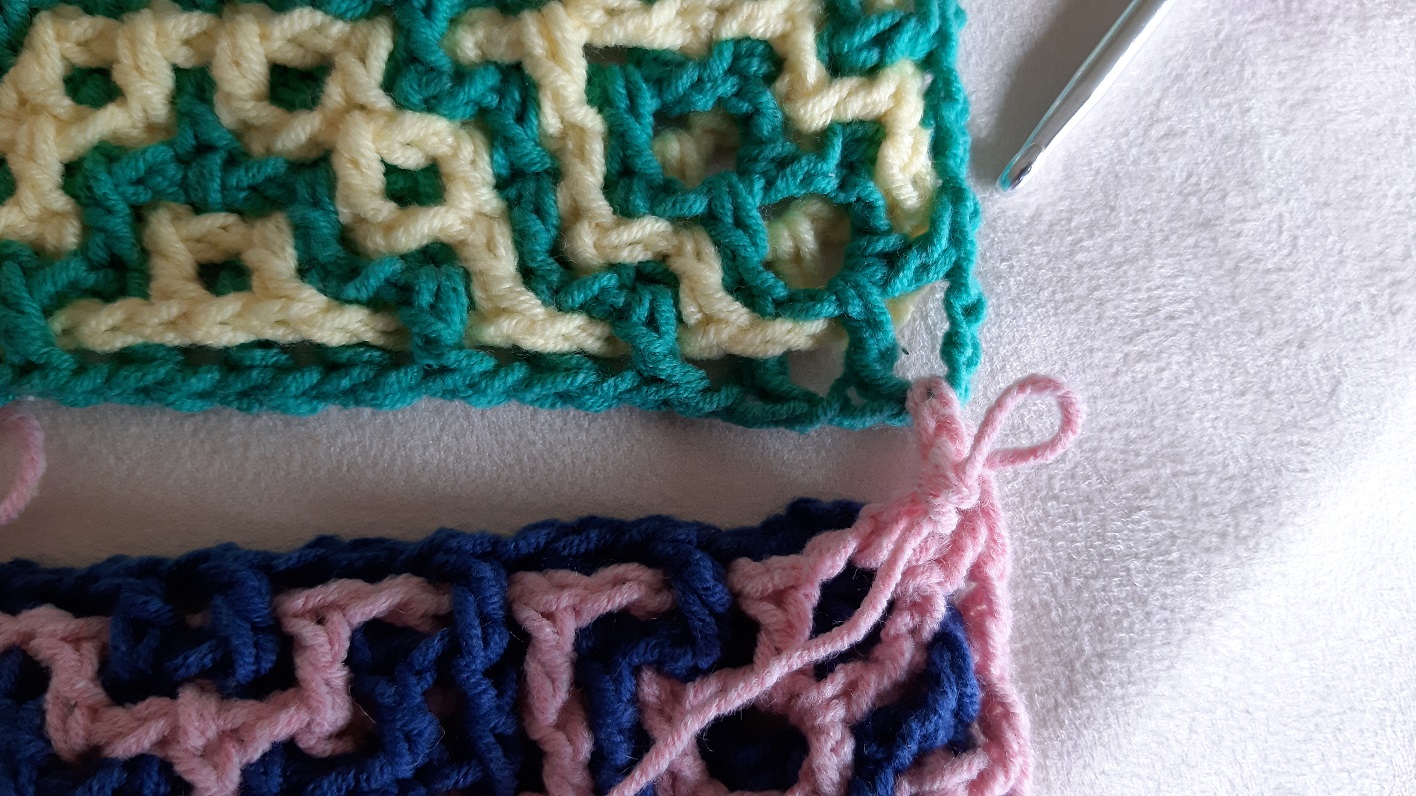
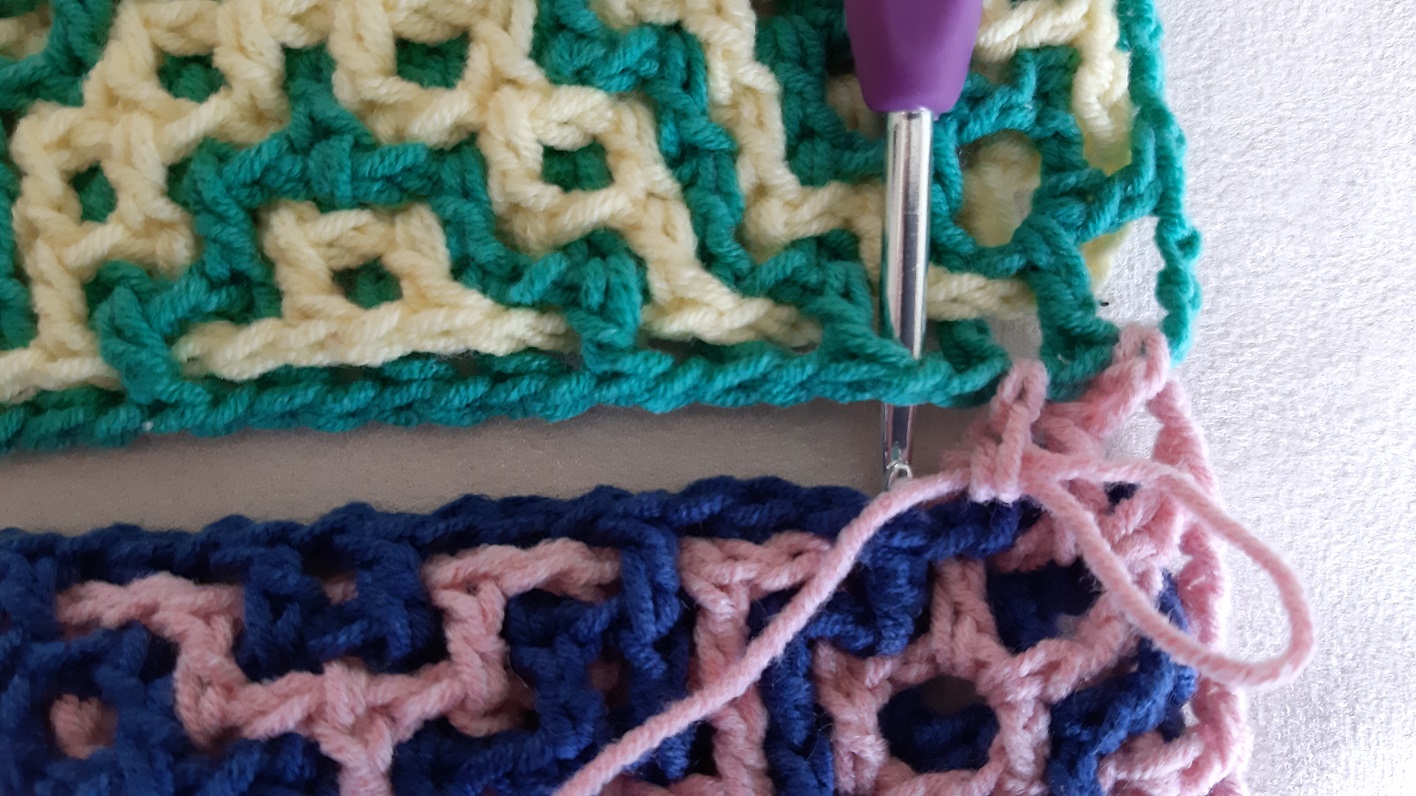
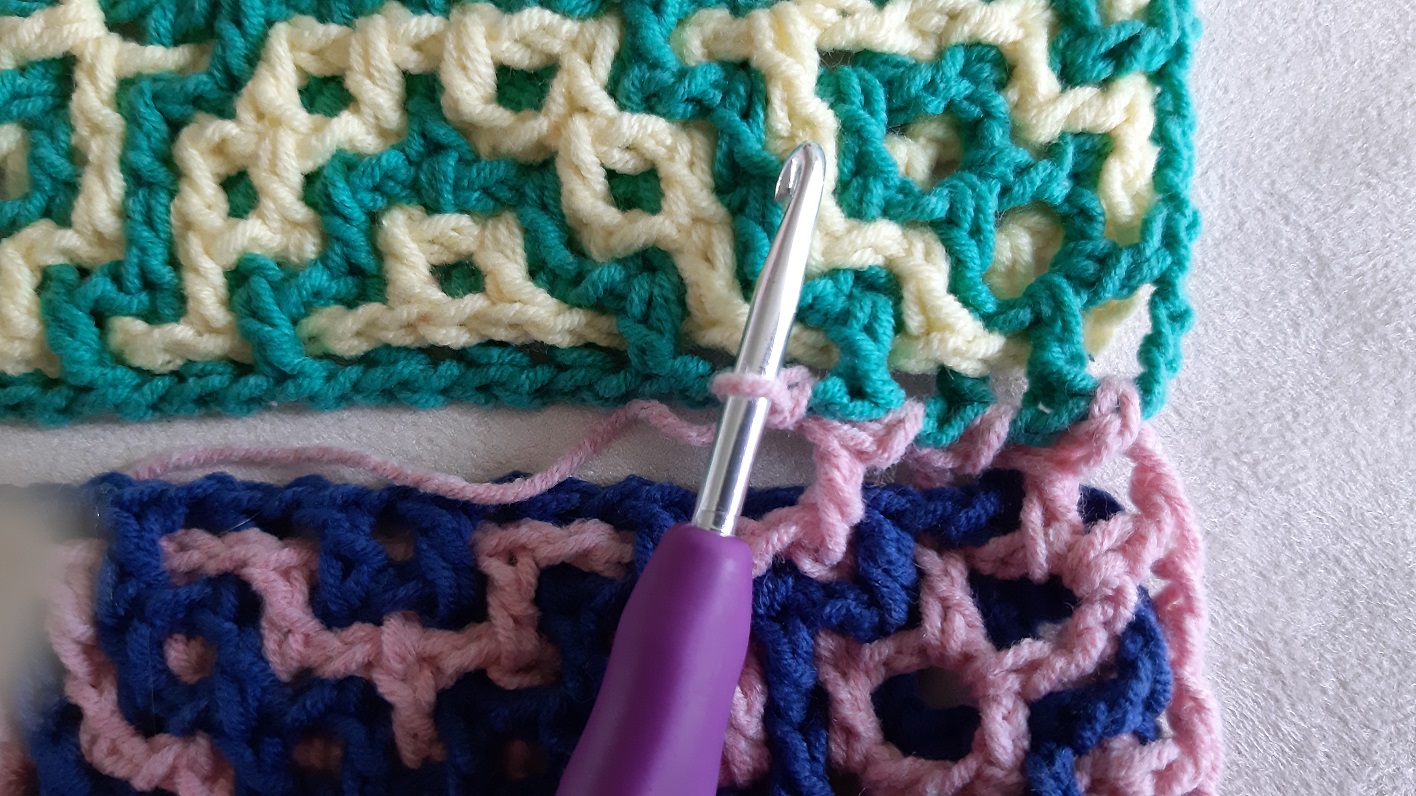
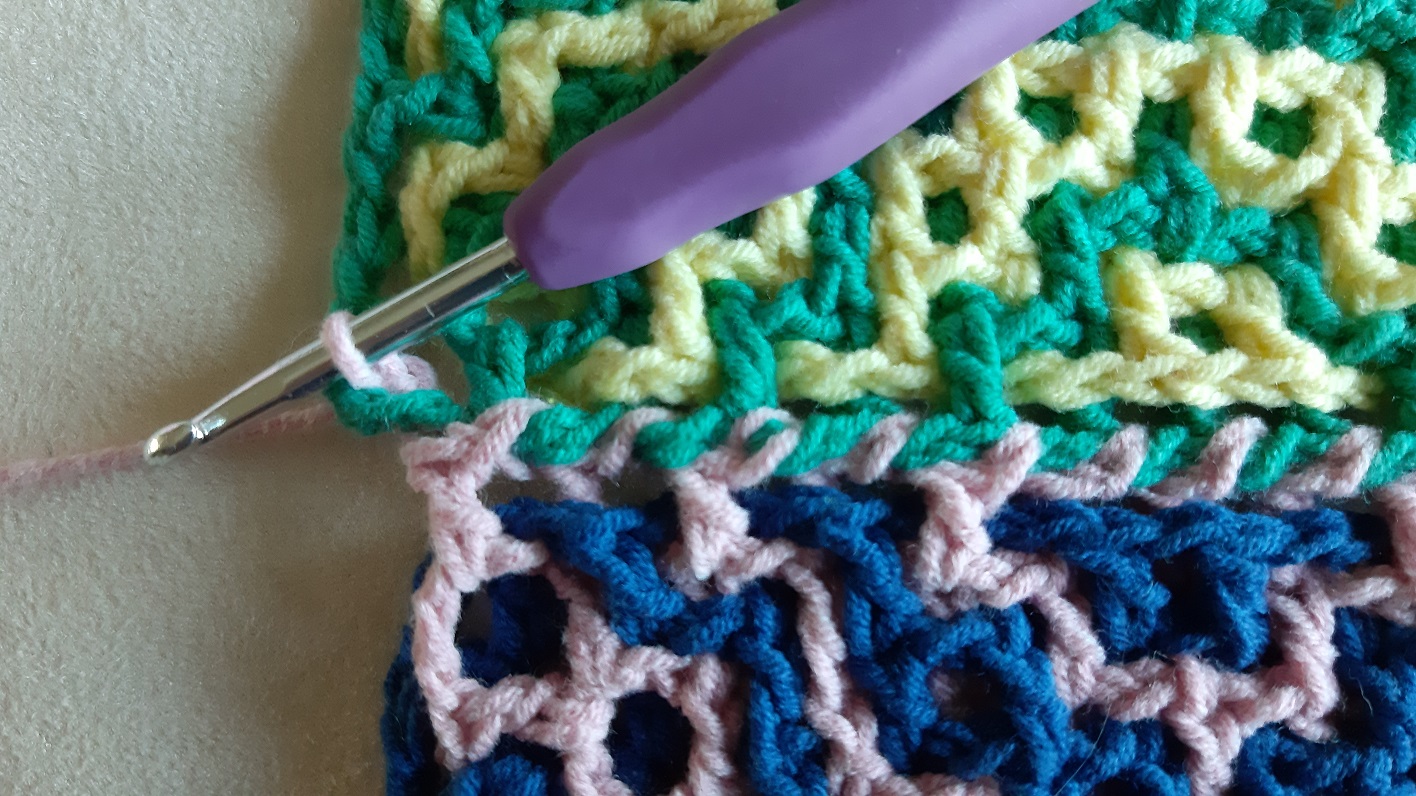
Here I did the first part of the first border (see the top in pink) and I did the first 2 chains of the corner.
Place the crochet hook through the chain space of the corner of the first piece.
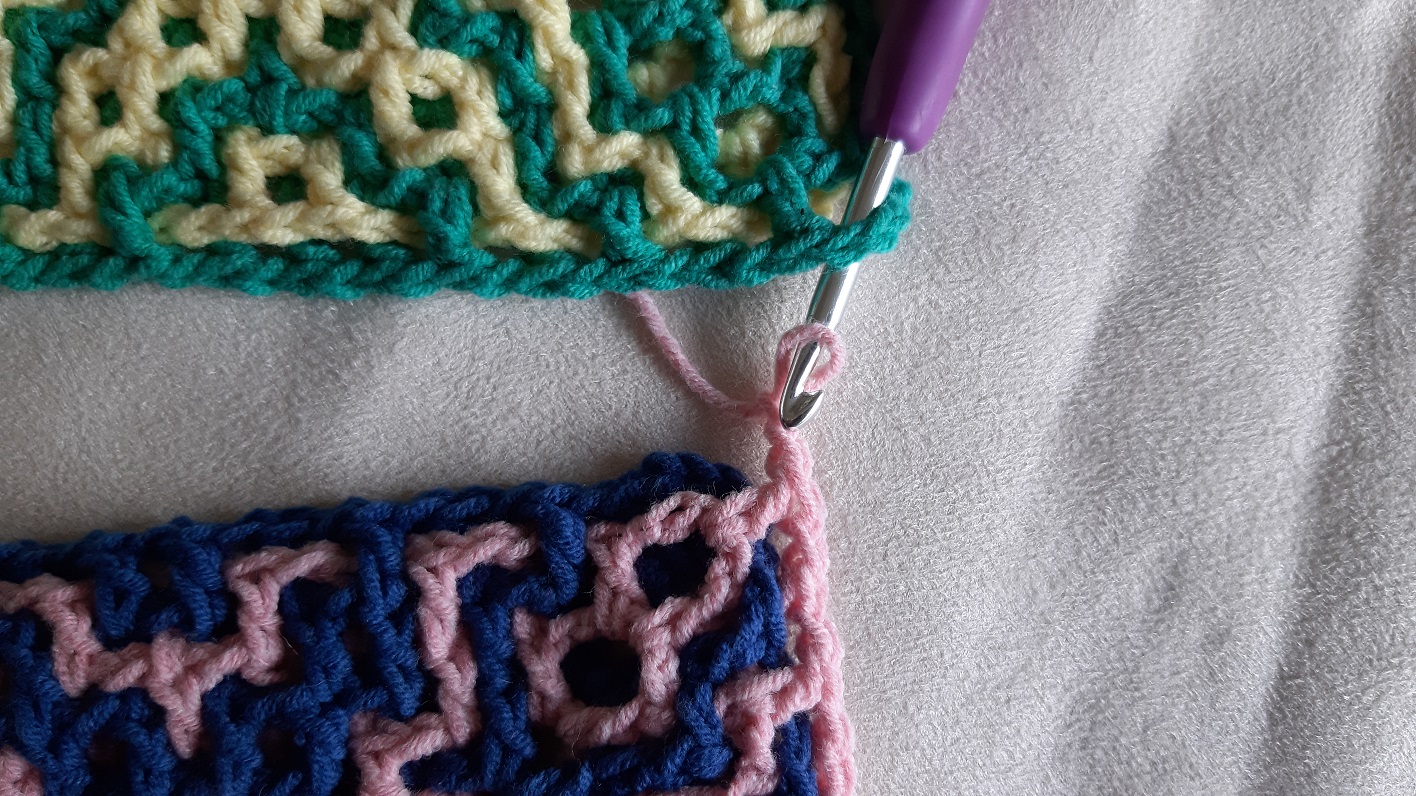
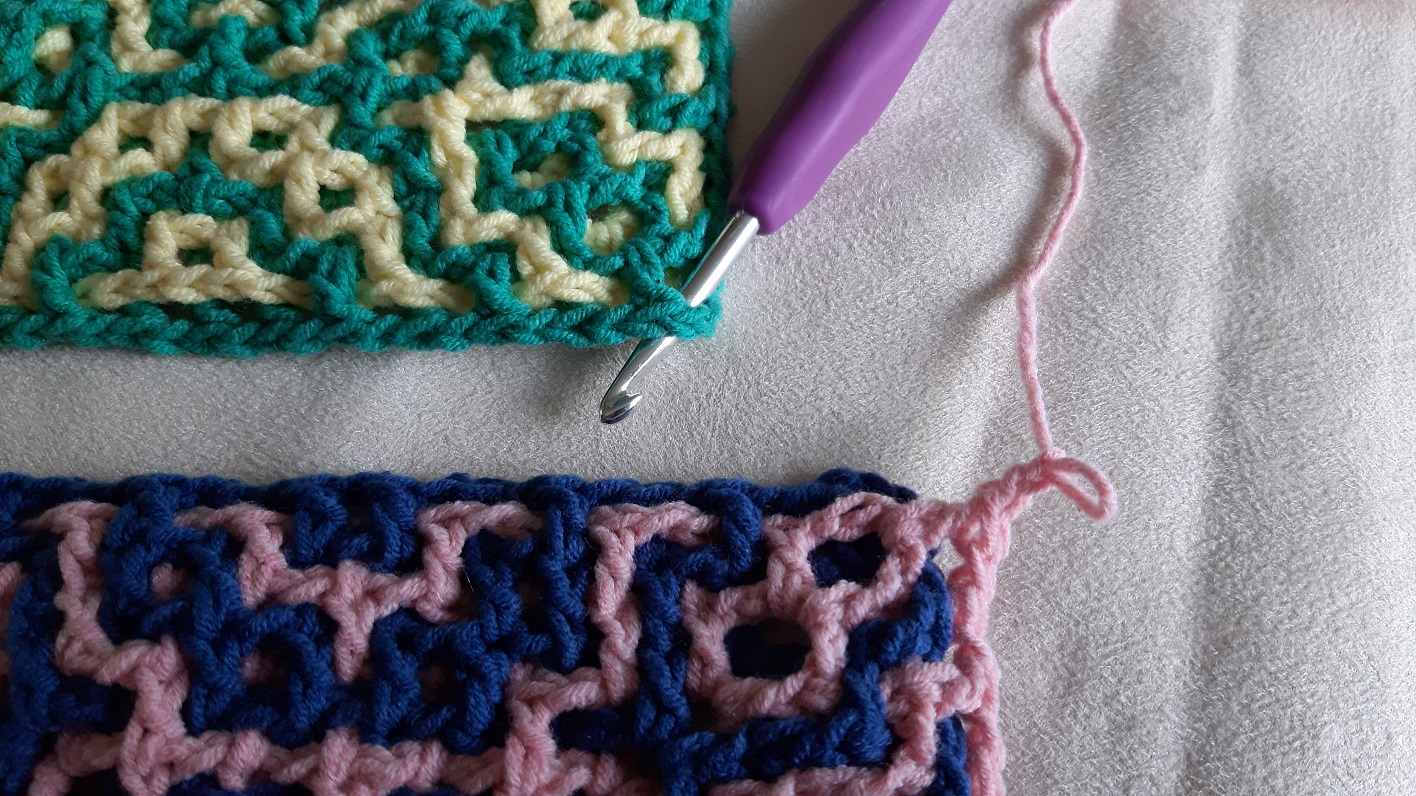
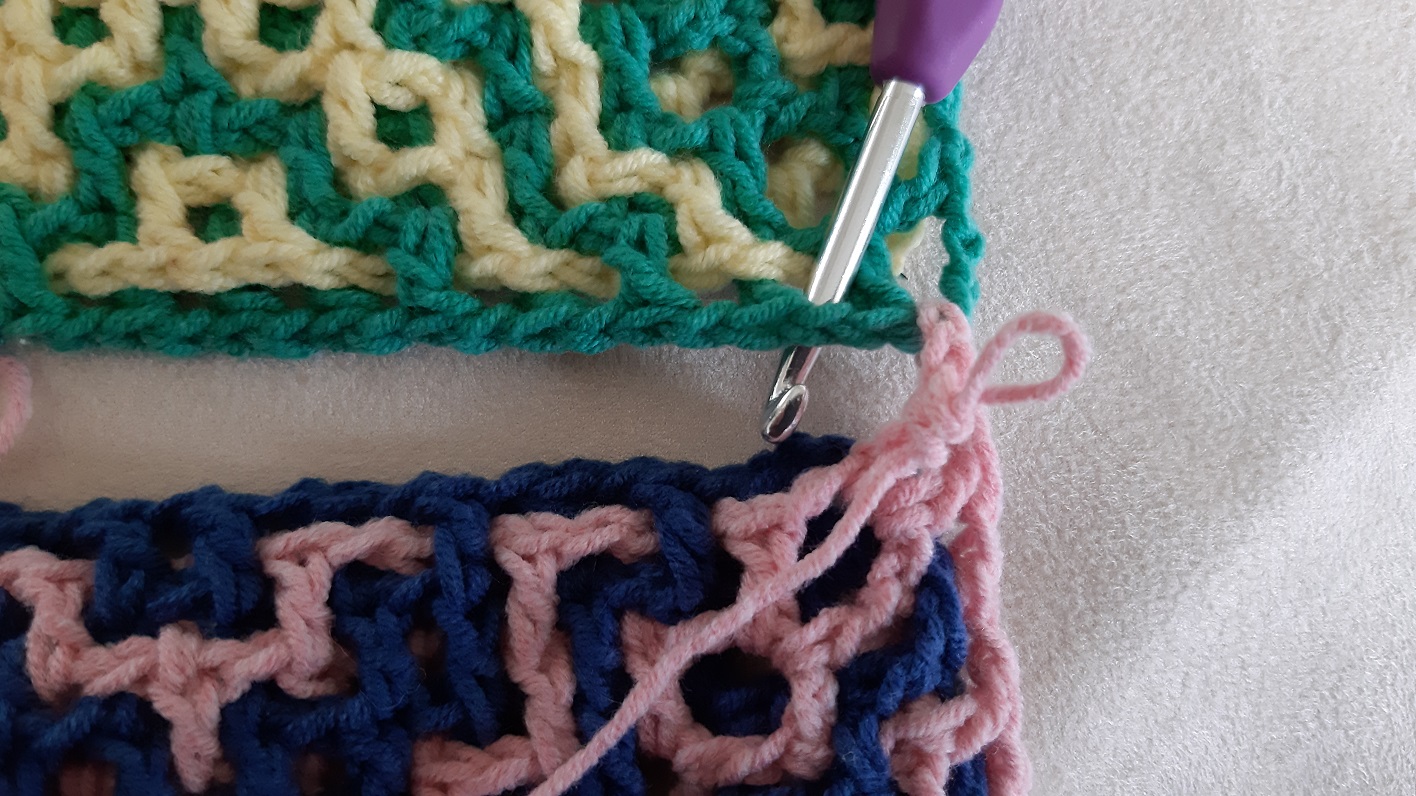
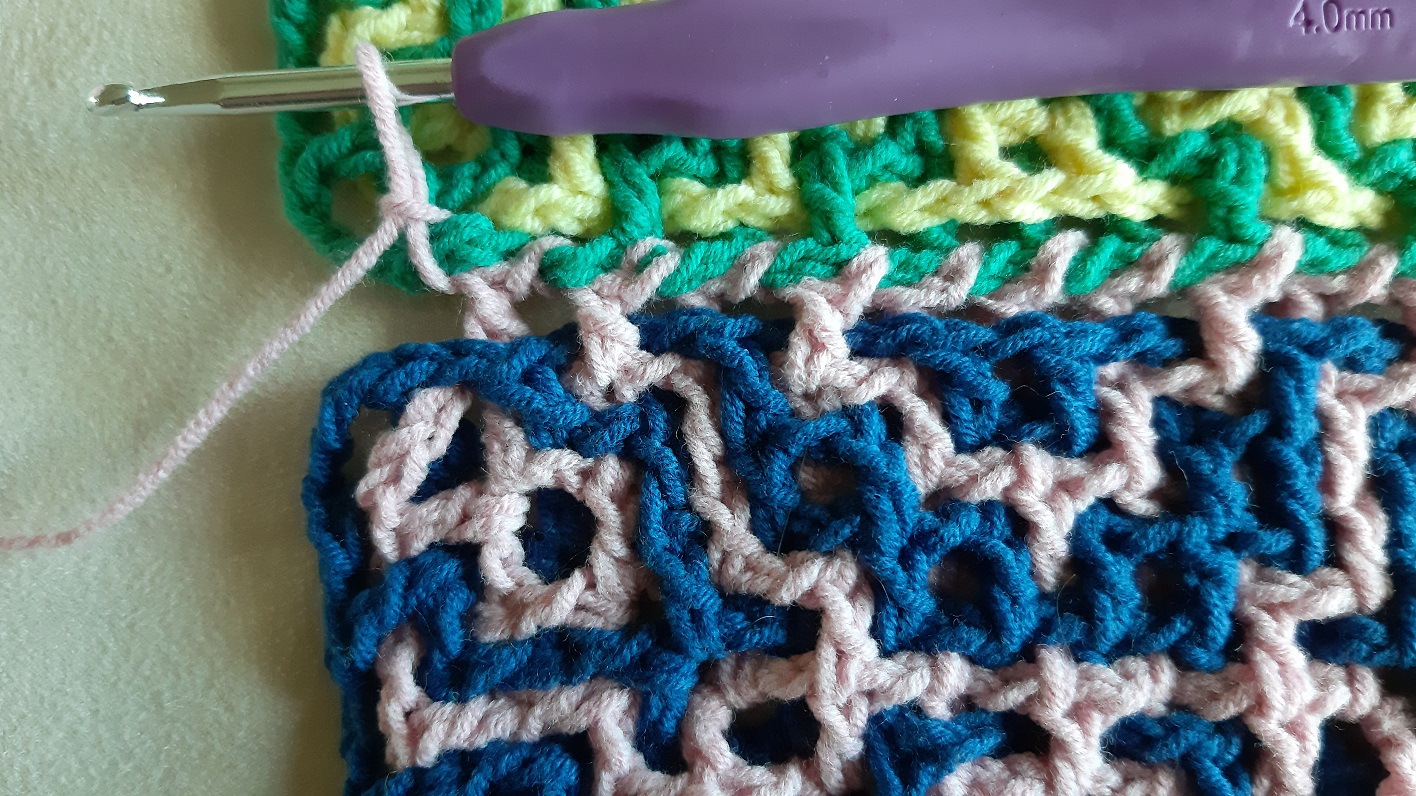
Now take up the loop of the first 2 corner chains of the second piece.
The loop is here pulled through the corner.
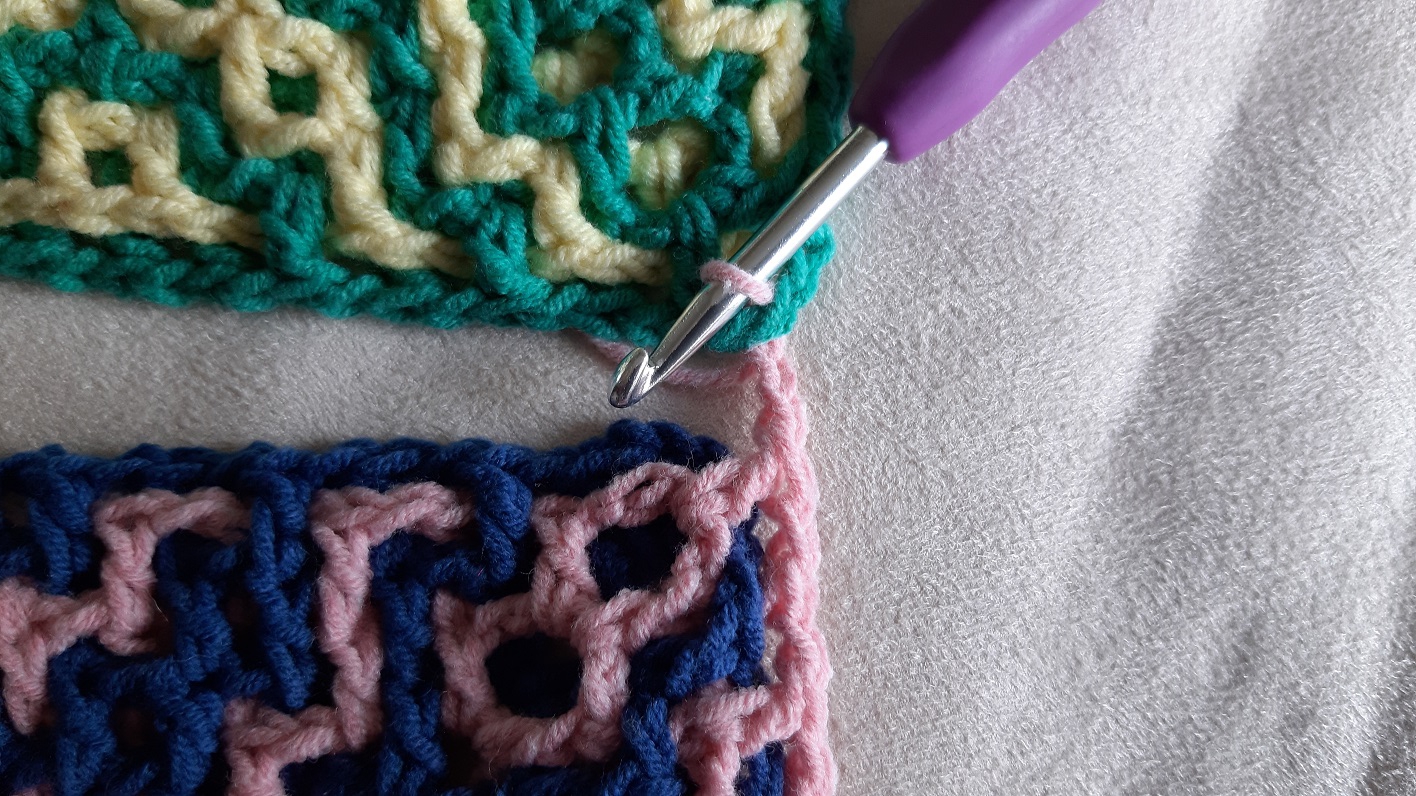
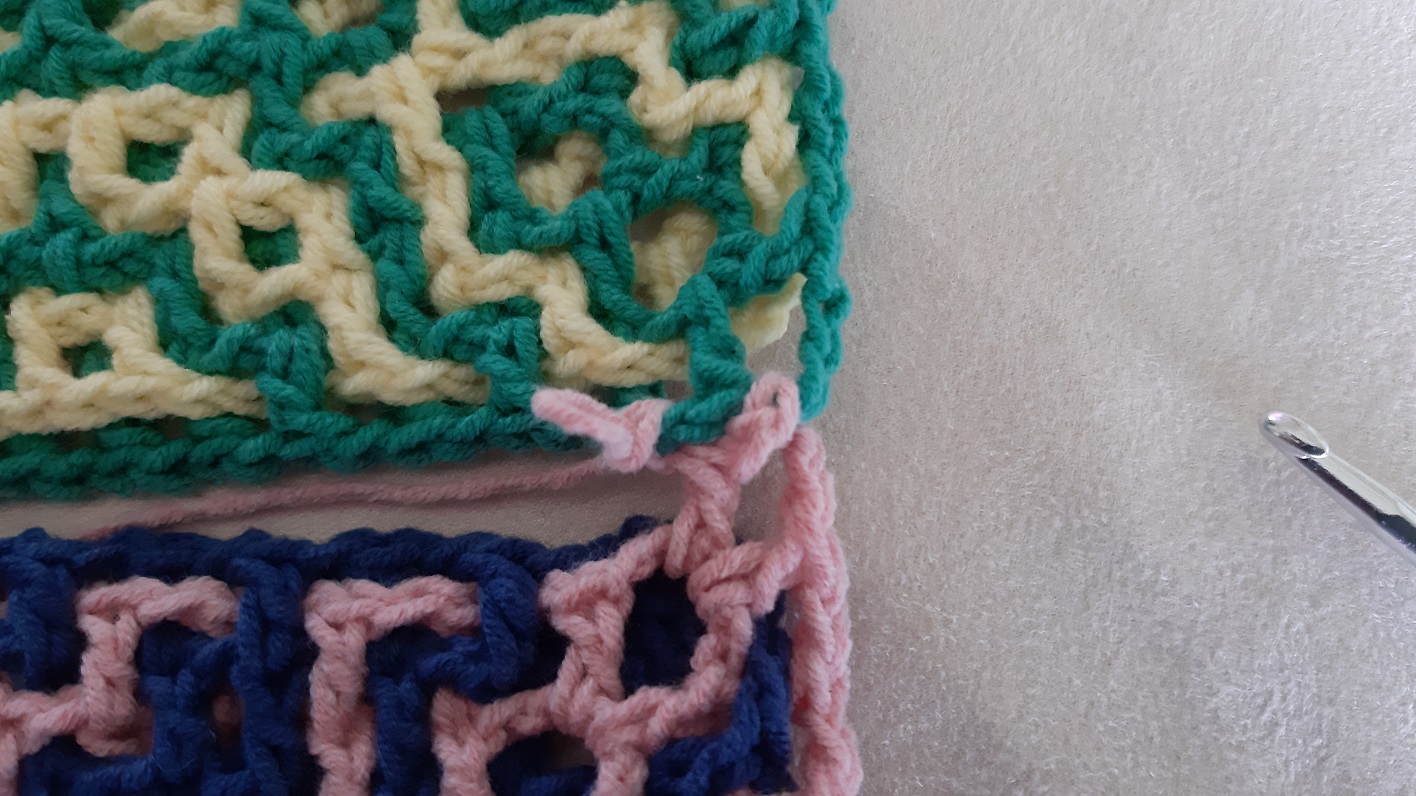
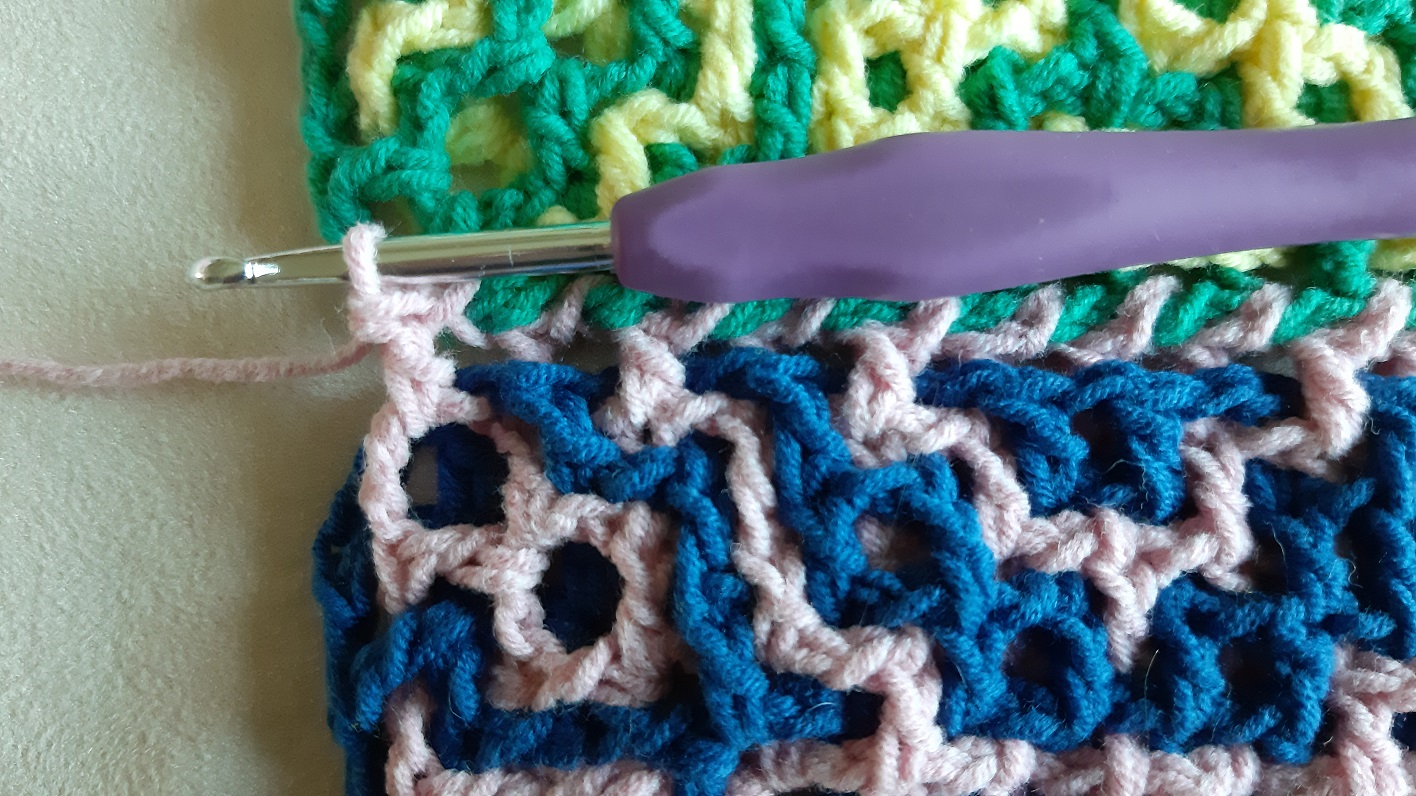
Now make the next 2 chains of the corner.
If you will now make the dc’s for the border, then just follow the instructions for the last border. In this case the instructions for the side say: *(f 1x, b 1x)* 3x, b 1x, *(b 1x, f 1x) 3x, c.
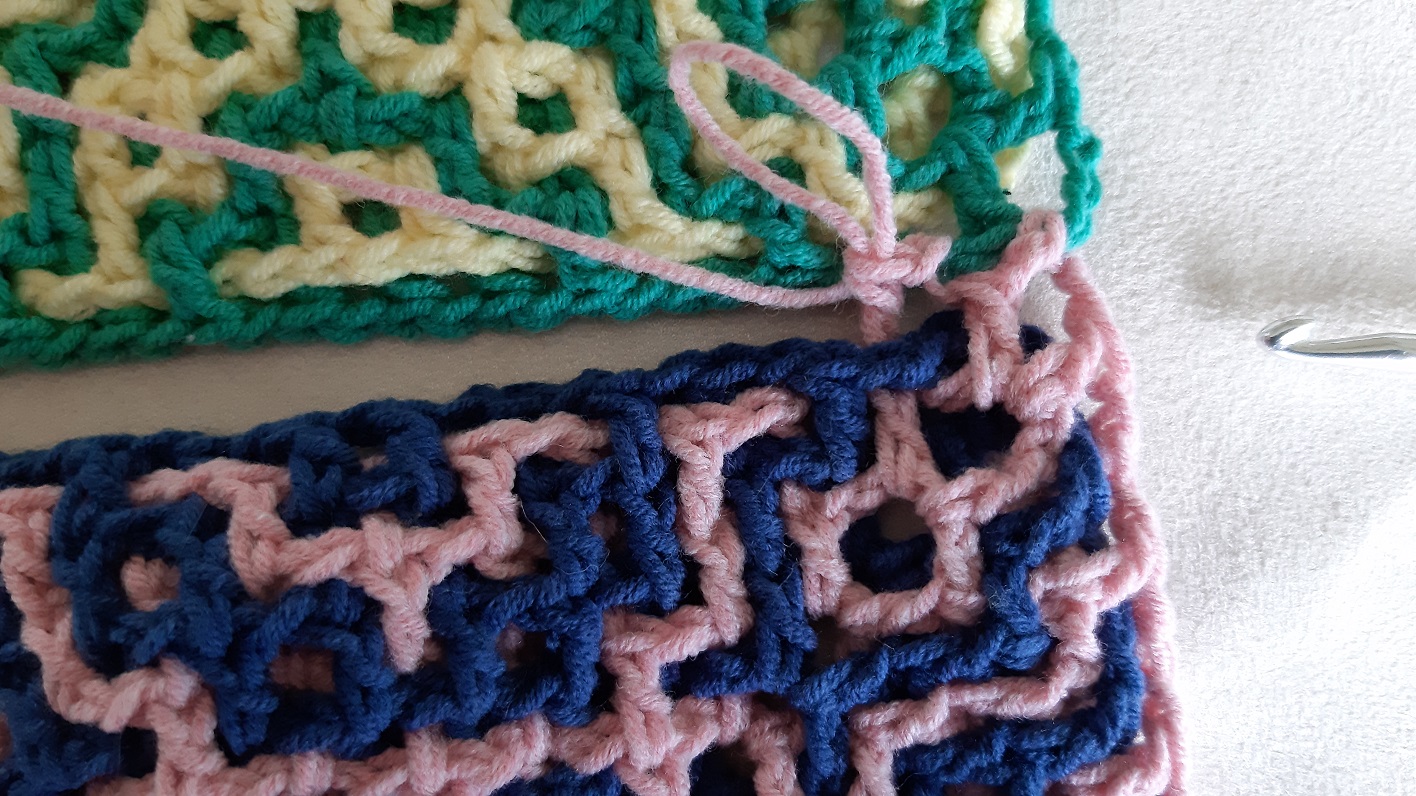
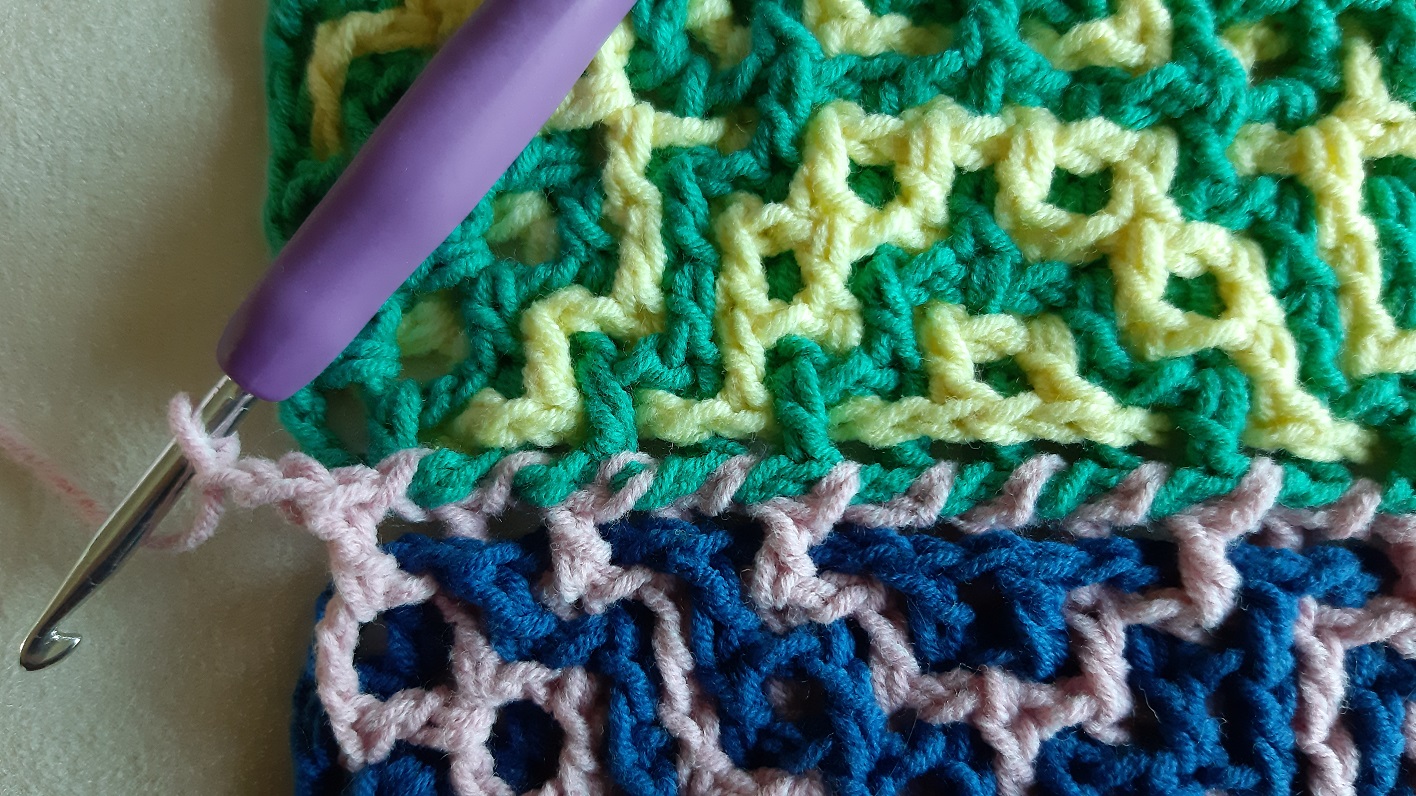
So the first dc in the corner has to be in front, as you can see here.
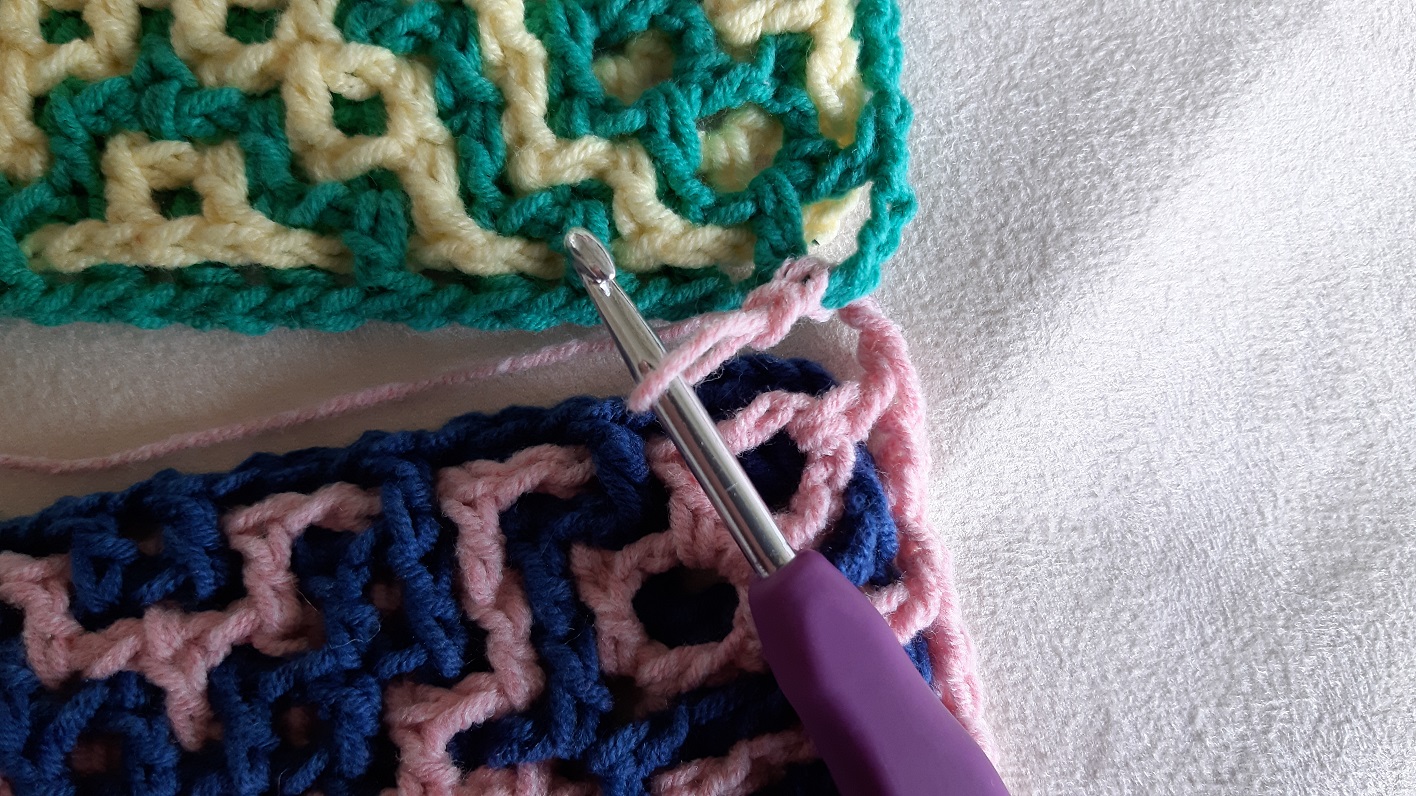
Now stop! Do not make the in between chain yet!
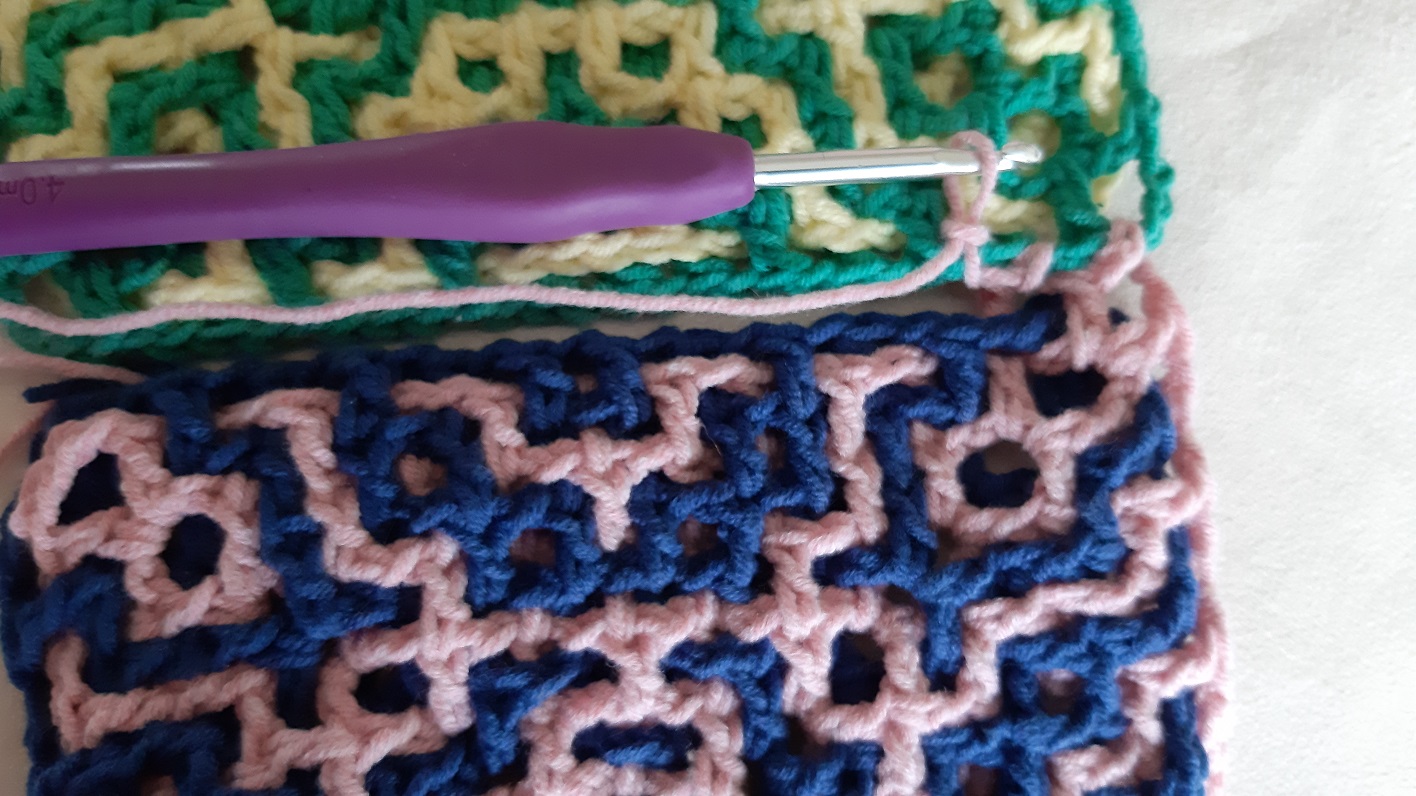
Take a look at your first piece and find the opening of the next square left of the corner.
Now insert the hook into this opening.
Pull the loop through this opening and then make the in between chain.
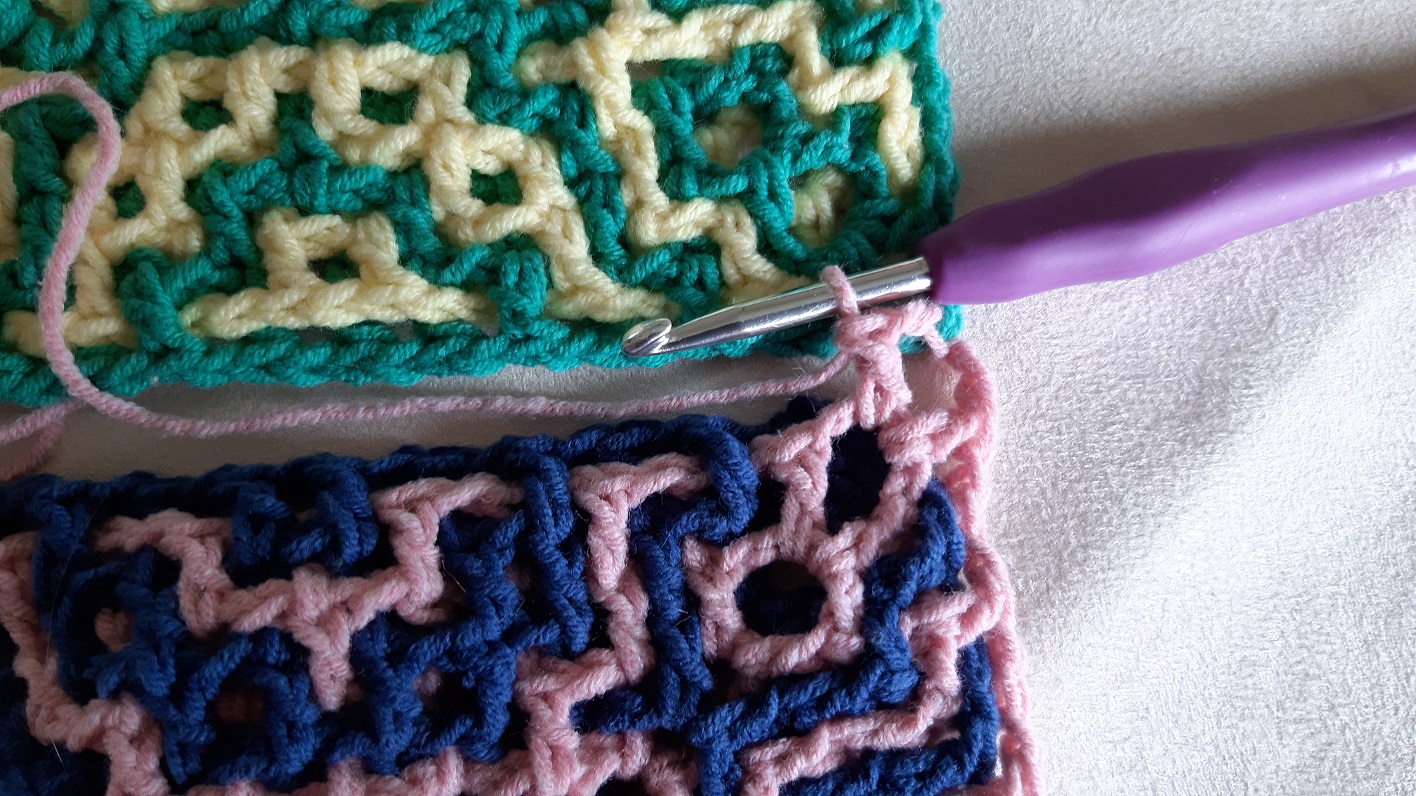
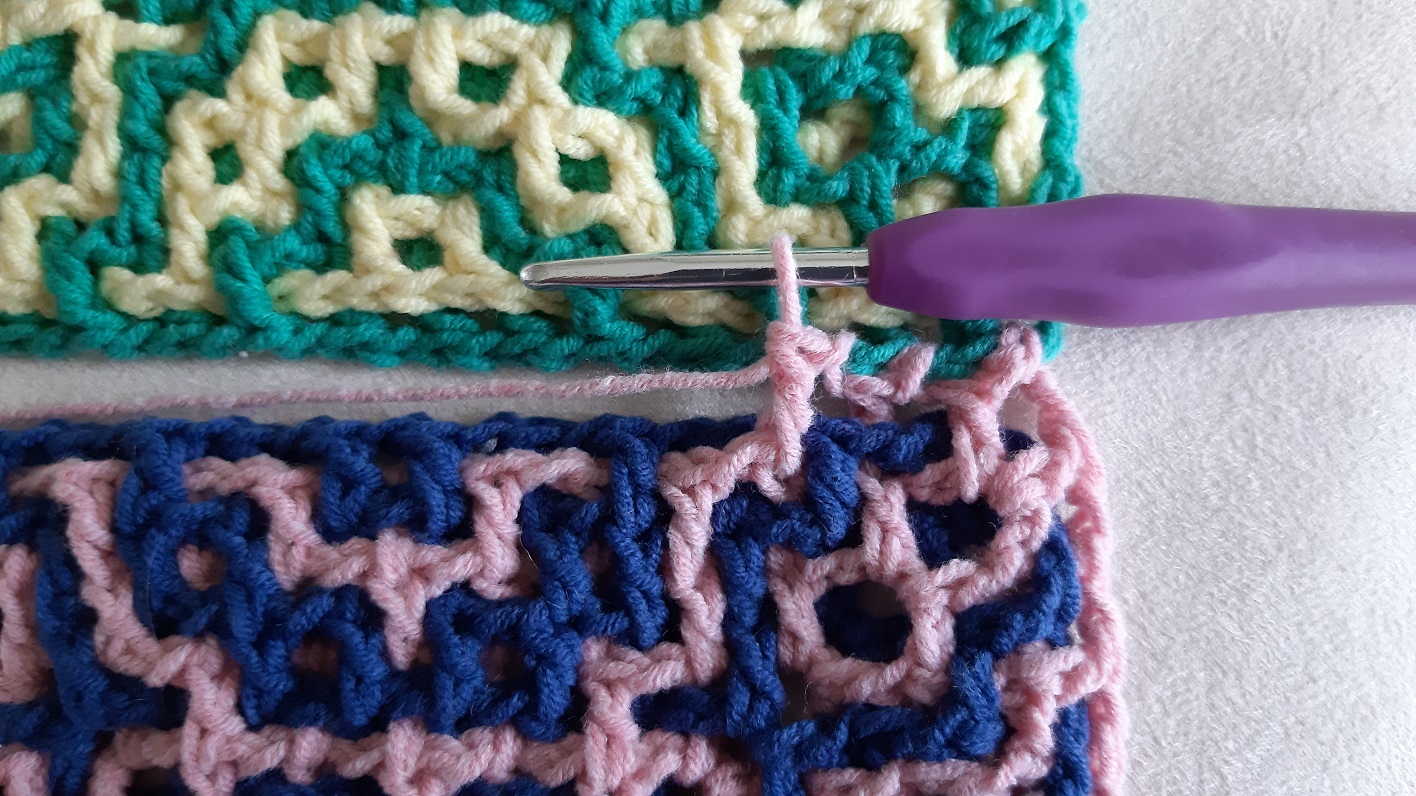
According to the instructions for the outside border we must do a dc at the back, as you can see here. Stop again and do not make the in between chain!
Look again for the next opening in the first piece left to the opening where you just worked through.
Insert the hook through this opening.
Pull up the loop through the opening and make the in between chain.
According to the instructions for the outside border we must do a dc at the front, as you can see here. Stop again and do not make the in between chain!
And do another chain in the next opening.
Continue like this the rest of the row. Don’t skip openings of the squares, also do not make 2 chains in 1 opening of the first piece, because the work will get skewed and you will not end at the right place at the end of the row.
The last 2 dc’s for the border is one at the back and one at the front in the corner. Here you see I made the dc at the back, and the last chain in the last opening just before the chain space of the first piece.
Here the last dc in the corner is made, at the front.
Now first do the first 2 chains of the corner.
Pull the loop through the corner.
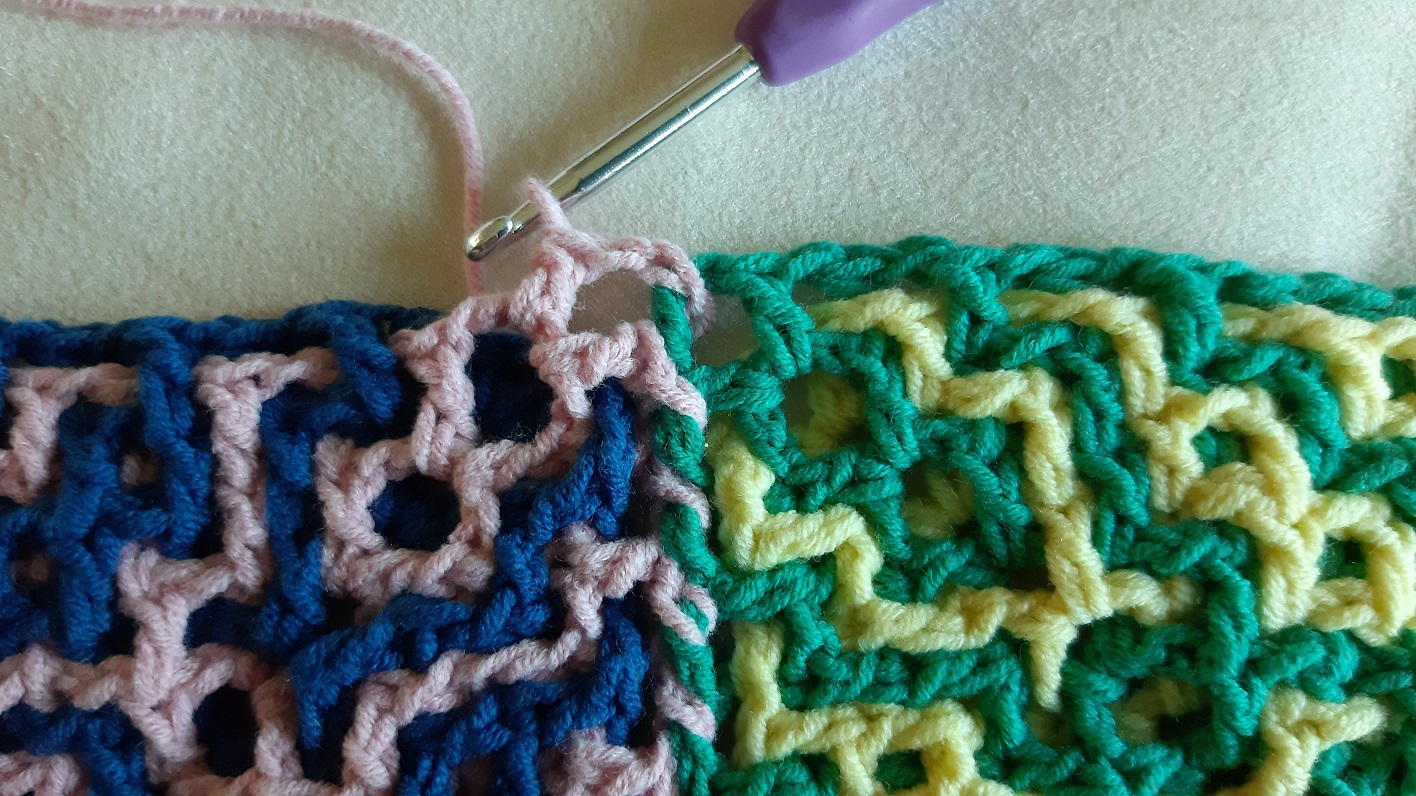
In this picture you can see I finished the corner: the next 2 chains are made, and I started the next side with a dc at the front in the corner.
You can now finish the sides of the second piece.
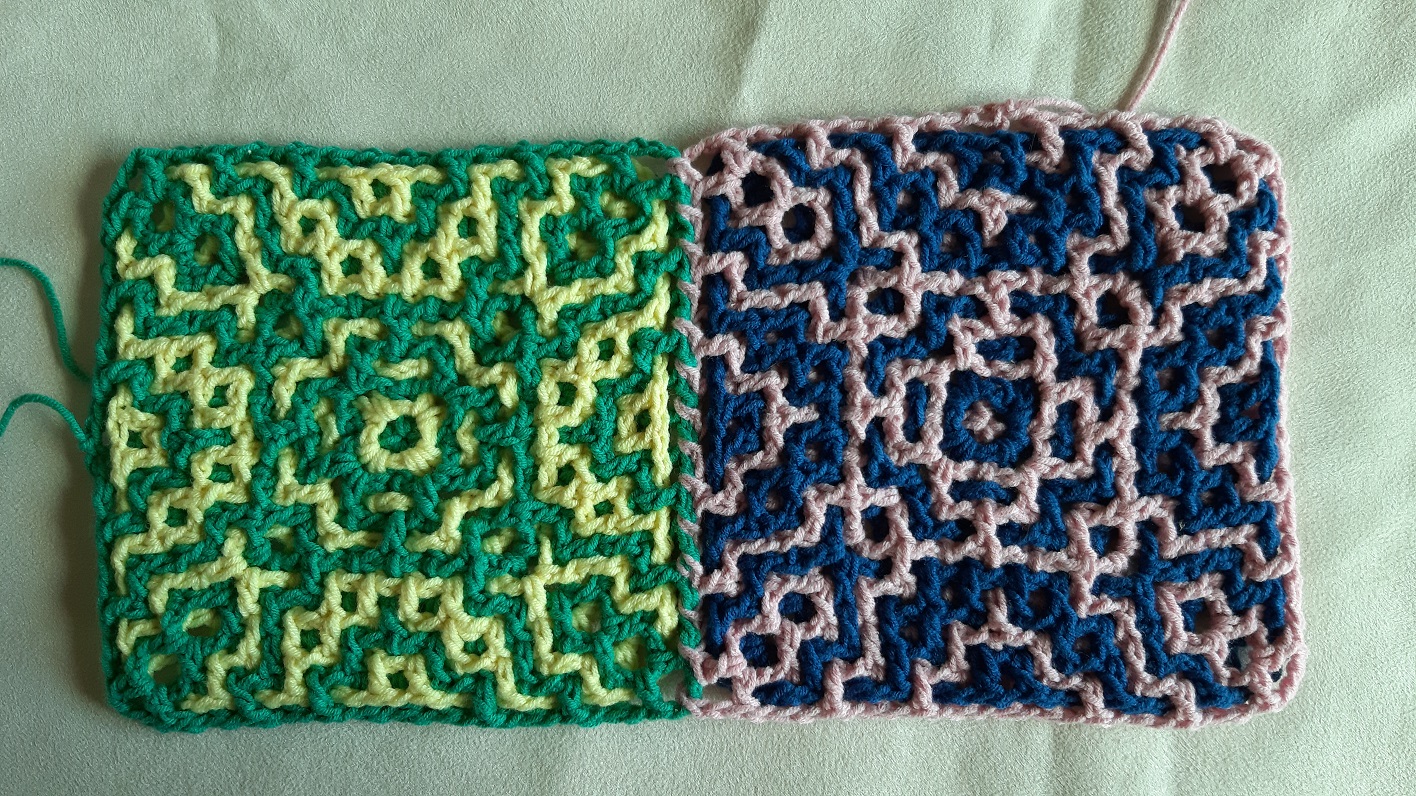
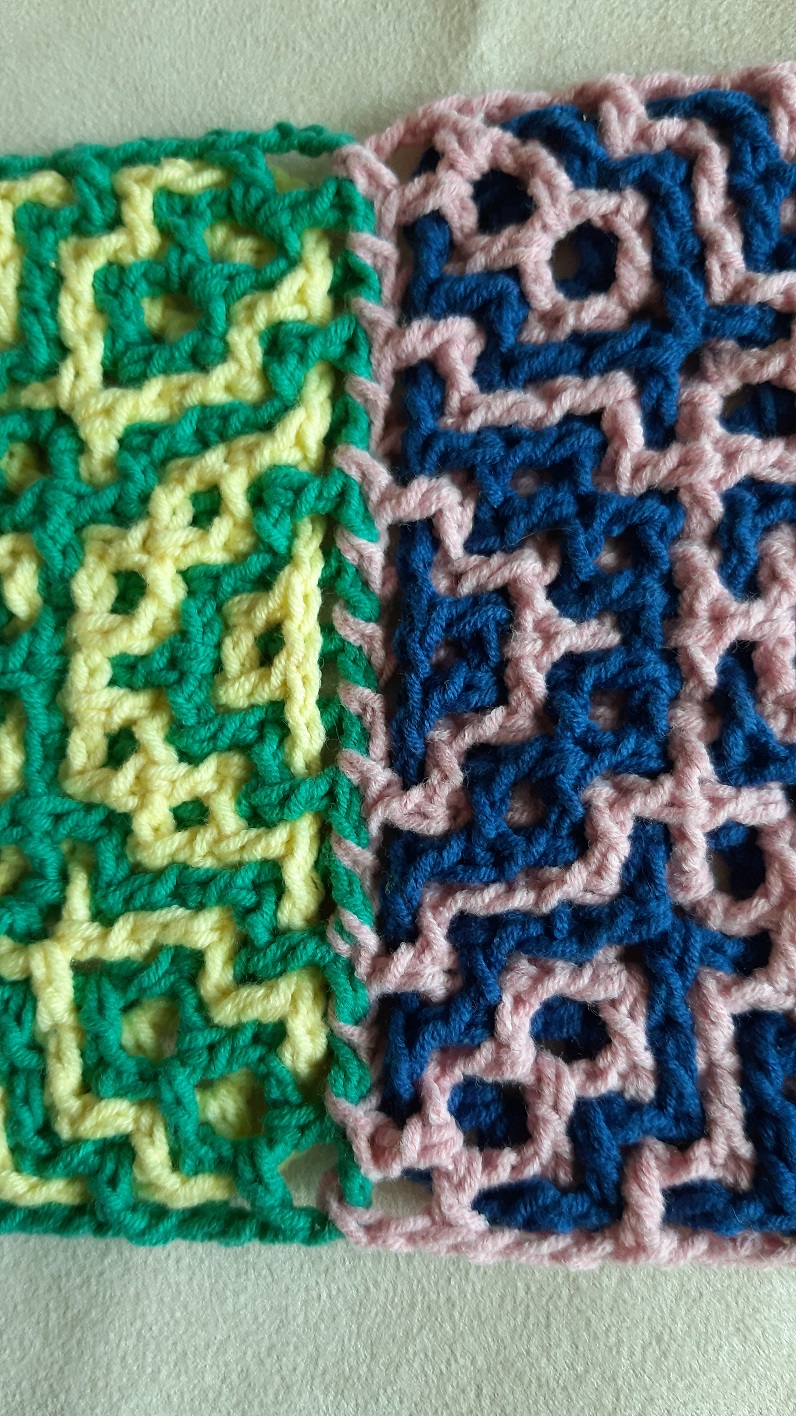
Here you see the result of the first join. The result also looks very nice at the backt.
Click here to go to the next page for the next join.