
Index
This tutorial is too large to show on 1 page, so it is spread over multiple pages. Use the links in the index below to go to the page where you want to be.
- Introduction, abbreviations and symbols, and start tutorial 1: click here
- Start tutorial 1, setup and first rows: click here
- tutorial 1: slanted lines, open structures, part 1: that is this page
- tutorial 1: slanted lines, open structures, part 2: click here
- tutorial 1: slanted lines, open structures, part 3, working at the back side: click here
- tutorial 1: slanted lines, closed structures, part 1, with triangles pointing upwards: click here
- tutorial 2: slanted lines, closed structures, part 2, with triangles pointing downwards: click here
- combining structures and summary: click here
- tutorial 3: click here
Video
For the basics with open structures you can watch this video: https://youtu.be/HXDFq8Cg82U.
The instruction chart

This is the chart for the next piece. Row 2b is repeated, to give you the image of the diagonal lines. A diagonal line runs over at least 3 rows. You can see here that the lines start in row 3b, and then go to the left or right where the arrows indicate, and end in row 2b, which we have already crocheted on the previous tutorial page.
Row 3a: a bit of solid squares
This row includes a section of solid squares with the corresponding notation.
|
Notation: Row 3a – front: color 2 to front, side st, 3f 7x, side st This is standard notation for solid quares. The 3f means that you make 3 stitches in the front, right next to each other! This is different from f 3x, where you make a front stitch 3 times with chain stitches in between! Moreover, we repeat this 7 times, with 1 chain stitch after the 3 stitches next to each other.
|
You can see here that no strange things happen in the written instructions that you are not yet familiar with. In the pattern chart, however, you see slanted arrows, but you don’t do anything with them yet! So the cells where there is an ‘f’ with an arrow, you simply crochet as ‘f’.
This is an odd row, so read the instruction chart from right to left. Place the written instructions next to the chart again, and you will clearly see that the 7 3f’s are three stitches next to each other, followed by a chain stitch.
|
|
Row 3b: slanted lines!
Yay! We’ve come to the slanted lines! We are also going to make combined stitches, because the slanted lines here are combined with a mesh stitch.
I have written out the stitches to make below, but be sure to watch the video!
|
Notation: Row 3b – front: f, b 2x, *([fr+b], b)* 2x, [fr+b+fl], *(b, [b+fl])* 2x, b 3x I’ll write this out in full first without the repetitions between the asterisks: f, b 2x, [fr+b], b, [fr+b], b, [fr+b+fl], b, [b+fl], b, [b+fl], b 3x
We’re going to break this into pieces.
|
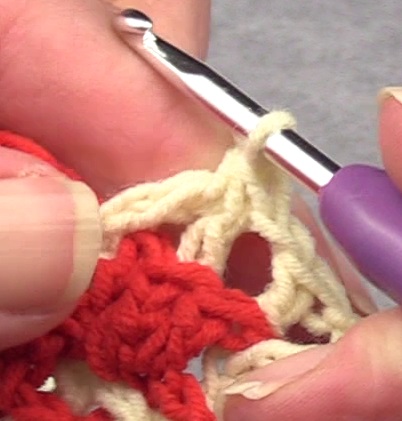
Making a [fr+b]
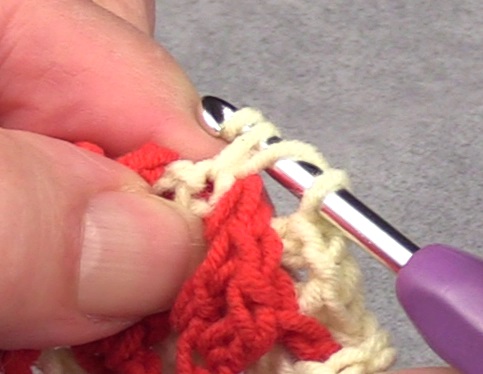
Start like a regular dc. In the photo, I inserted into the mesh stitch of the previous row and the loop is pulled through. Now make a yarn over (as shown in the photo). Normally you would pull the yarn through the next 2 loops on your hook, but for an extended double crochet, now pull the chain through the 1st loop only!
Here you see the result of pulling the yarn through the first loop. Now make another yarn over and pull it through the first 2 loops on your crochet hook.
 This is the result. The stitch is not ready yet. This was the ‘fr’.
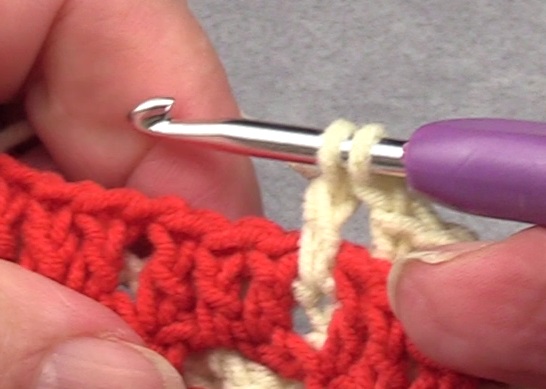
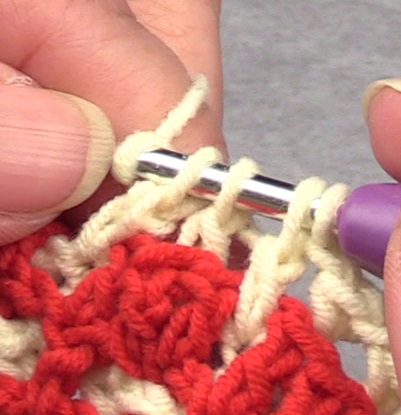
 Now we’re going to make the ‘b’ of the [fr+b]. Insert into the next mesh stitch.
 Make the double crochet until you have 3 loops on your hook as shown.
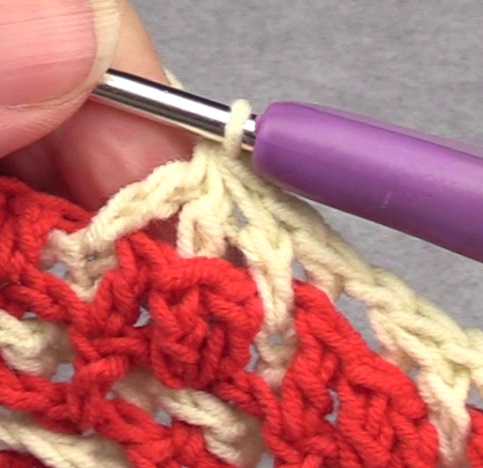
 Make another yarn over and pull the yarn through the 3 loops on your crochet hook. The result is 1 stitch made over 2 stitches at the base.
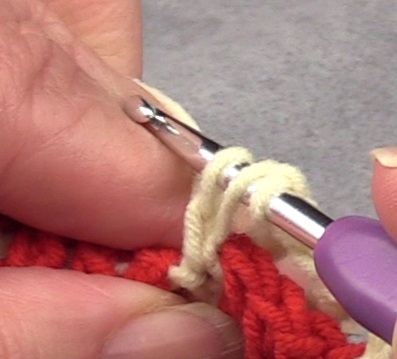
Making a [fr+b+fl]
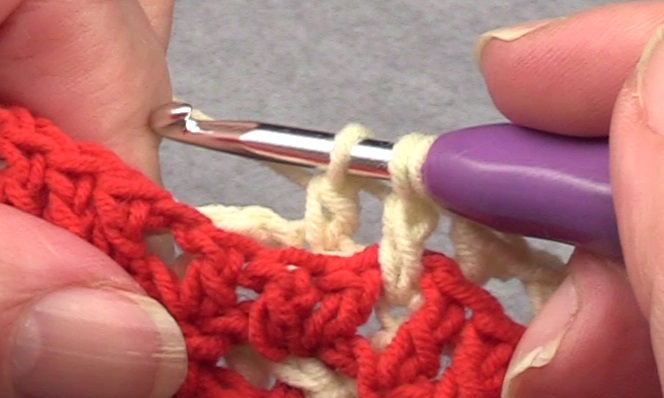
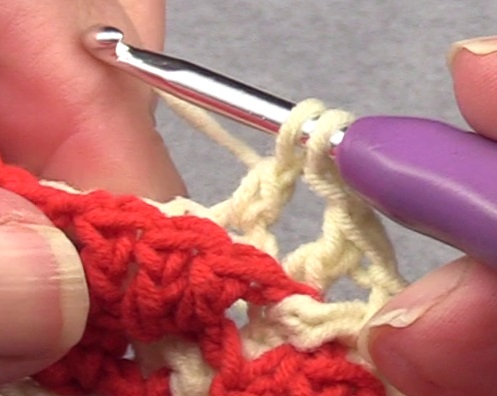
You start by making a [fr+b] as before, but you stop when you haven’t finished the ‘b’ yet. There are now 3 loops on the hook.
Now first make an extended double crochet to the left, the ‘fl’. In the photo you see the situation where you first pull the yarn through the first loop only .
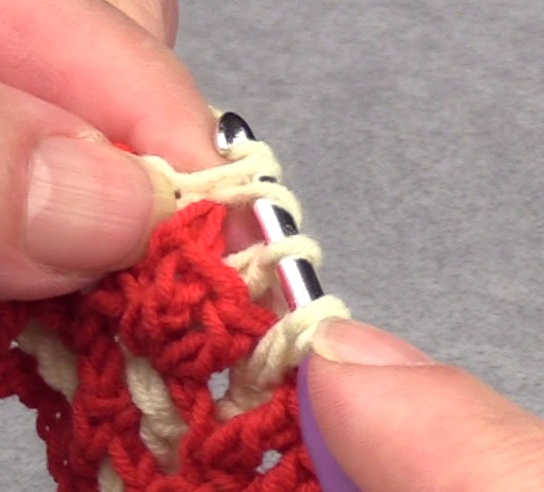
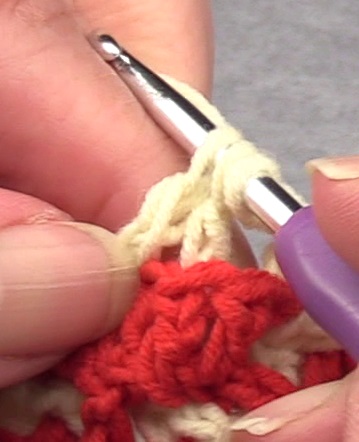
 Here the ‘fl’ is made, but to the point that there are 4 loops on your hook.
 Make another yarn over and pull the yarn through the 4 loops. Here the stitch is completed. The result is again 1 stitch made over 3 stitches at the base.
Making a [b+fl]
 First you make a back stitch, the start of a double crochet.
 Then you make the ‘fl’, an extended double crochet.
 And here the combined stitch is completed.
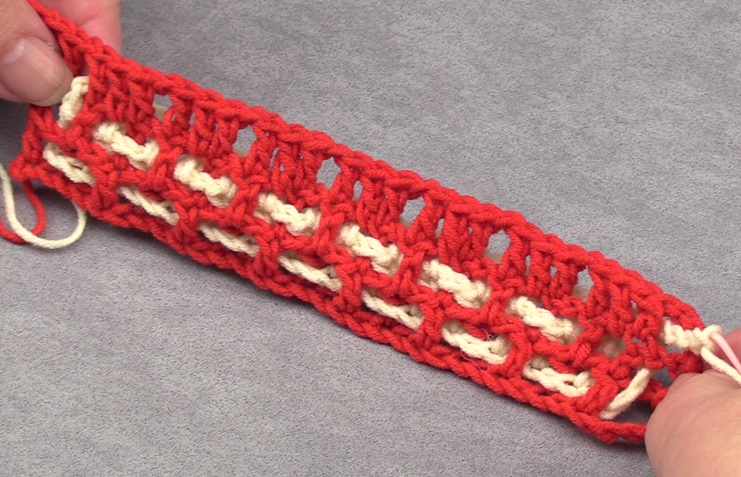
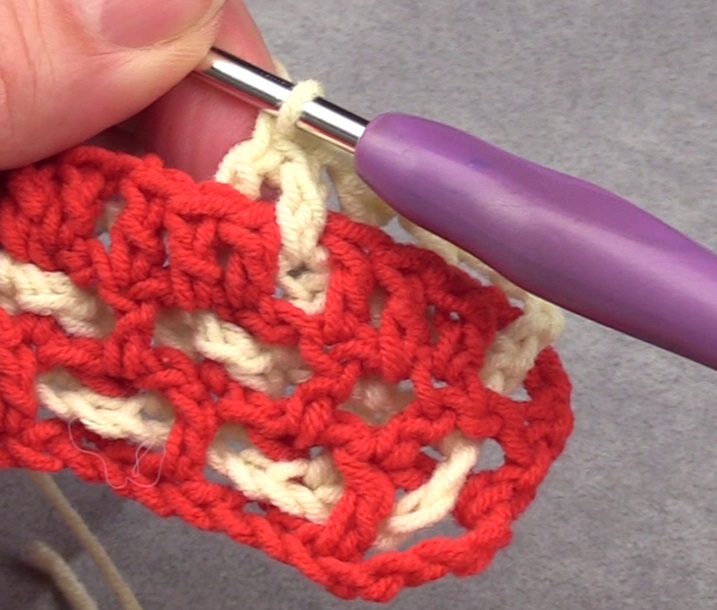
 And this is the result of row 3b.
Nof finished yet!!!
To make the slanted lines look a bit neater, you have to do something special in the next row. This is explained on the next page: click here.