
Balanced mosaic knitting is a way of mosaic knitting that I developed to address an issue with regular mosaic knitting with large graphical designs, and which creates a slightly different look of the stitches compared to regular mosaic knitting. This makes the technique especially suitable for graphical designs. I have named the technique ‘balanced mosaic knitting’. I would appreciate it if you would mention me as the developer of this method when using it in publications or videos. I hold the copyright of the material on my website and YouTube videos.
Mosaic knitting
When I published the Hooked and Locked Cal for the interwoven crochet technique, there was a lady in one of my facebook-groups, that showed me she did the design in knitting. It looked great, and I started looking for the technique. I finally ran into it in the course Techniques for Exciting Colorwork by Faina Goberstein, that I saw on one of the free watching days of Bluprint (formerly Craftsy). It turned out to be mosaic knitting, which uses a clever way of slipped stitches.
I started working with it on small sample pieces with a design of the butterfly that I made for the HAL CAL. You see here some examples how it looked in both the stockinette as the garter version (click on the thumbnails for the full picture). I still was the phase of trying out which way of doing the borders looked best by the way.
Why balanced mosaic knitting?
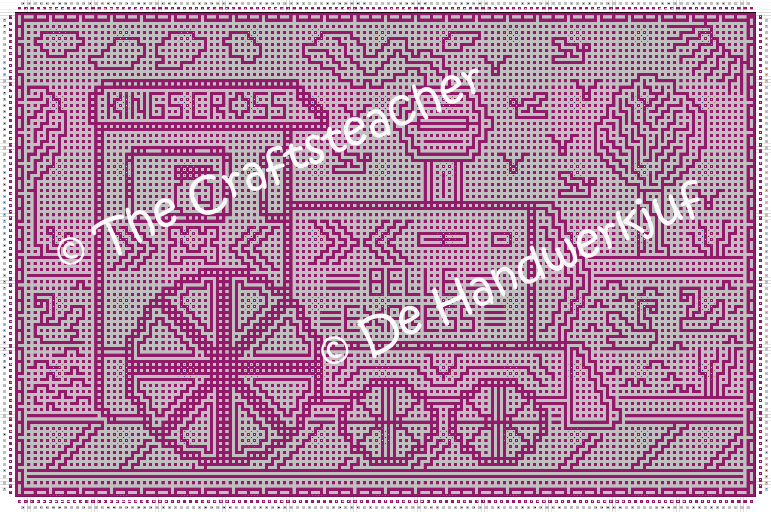
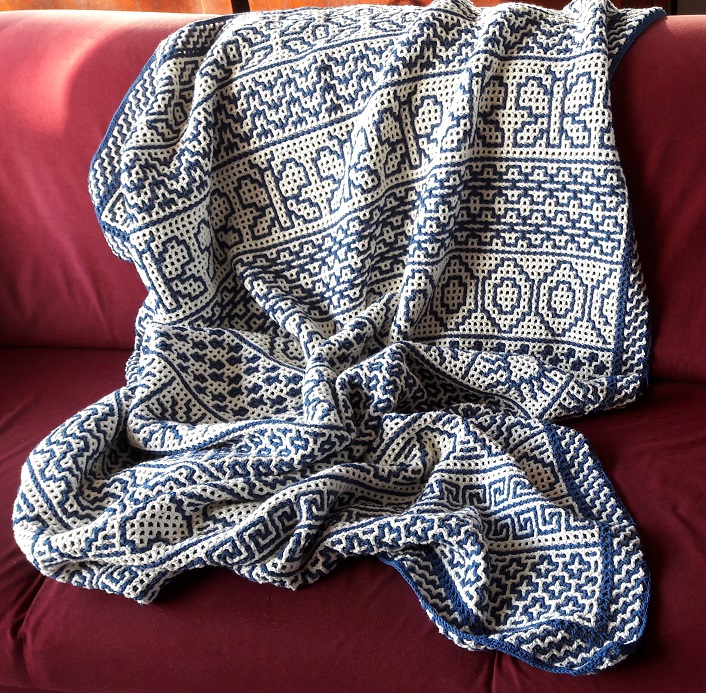
I loved how it looked on these pieces, but I was also very curious how it would look if I would apply it on larger pieces. I didn’t find it enough ‘proof’ for adapting my designs for mosaic knitting. Of course, the lady in my Facebook group had done it, and it looked good on the pictures, but I’m a careful person… If I make a tutorial for something, than I really want to have done it myself in a serious way. I had the design of the big HAL CAL blanket, and I had the design of the Belle Express to Kings Cross, not a small one either, both for interwoven crochet, so I thought it was a good idea to try it with that. And thank goodness, because I ran into an issue that didn’t make me quite happy.
What was the issue
I started knitting with the Belle Express, and along the way I noticed it was a bit wobbly. Now that doesn’t have to mean anything yet, because that can straigthen out when you block the piece. And it also was a bit difficult to see on my circular needles. I tried to stretch it out while it still was on the cable of my circular needles, but I wasn’t quite convinced, because I had to stretch it out a lot.
In the meantime I started thinking about how to measure the yarn-usage. So I started making some new samples, and I also thought it would be fun to make a new design for the tutorials.
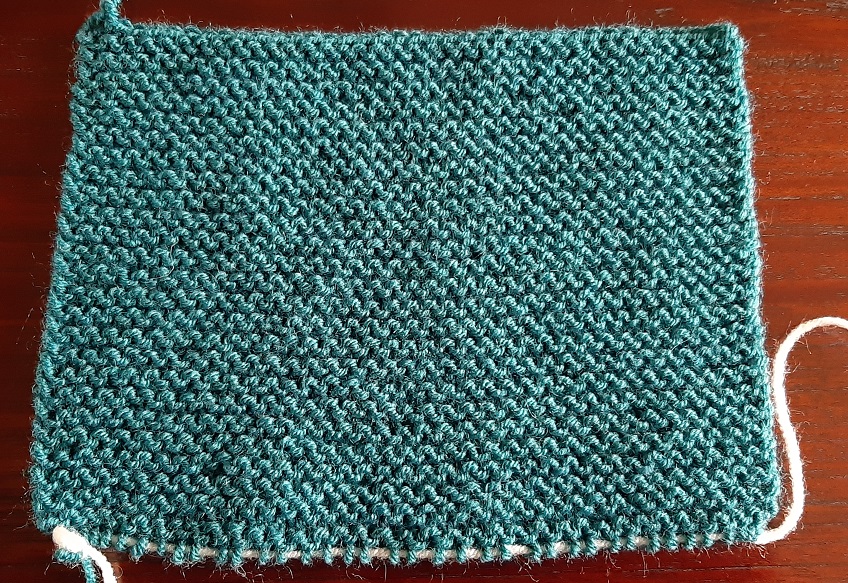
Step 1 was knitting a sample in garter stitch. Done here with 37 stitches. In the picture it looks a bit skewed, because of the angle of taking the picture, but in real it’s really square 🙂 .
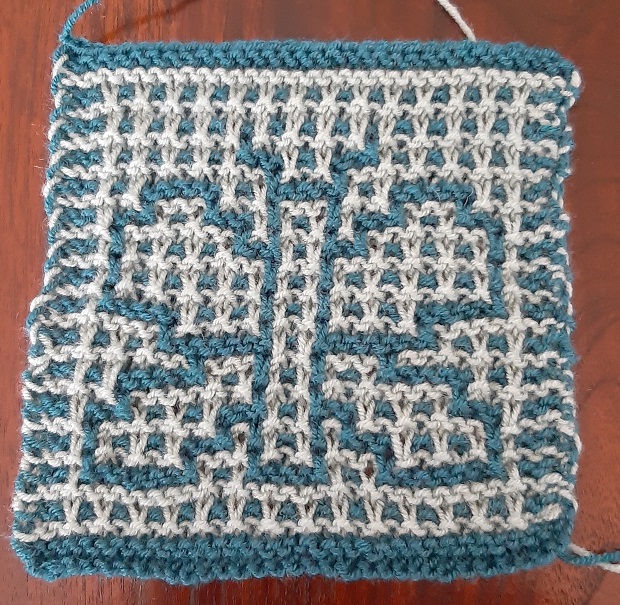
Step 2 was knitting the sample in regular mosaic knitting in the garter version. This was also 37 stitches wide. And I saw it was significantly narrower than the other sample! Hereafter you see in the picture I put the 2 pieces on top of each other with the left sides aligned, and you see how much wider the sample in just garter is. And this with only 37 stitches. The Belle Express is 247 stitches wide in knitting, so that started me to worry a bit.
Analyzing
This made me start thinking. I realised that the slipped stitches made the work pull in. Yes, I know, if you would make each slip in a way that this doesn’t happen, by making the loop of the yarn after the slipped stitch long enough, you wouldn’t have this ‘issue’. I have done enough fair isle knitting and I never had any trouble with it, but there’s always a difference between theory and practice. At least for me. And I also saw in the measurements of the yarn usage, that I used less yarn, because of the fact that a knitted stitch is just longer because of its shape than a short slip-loop. In other words, a row of 37 stitches with slipped stitches used less yarn than a row of 37 stitches without slipped stitches.
And what to think about one row having significantly more slipped stitches than another row? Like with my Belle Express? Well, chances are high that you will get waves, because one row is actually wider than the other row. This can be compensated reasonably good when the row right after it has enough slipped stitches, but in my Belle Express are places where you have a couple of rows after each other with long parts of the same color. And you knit these rows even twice.
For me it had become quite clear that I hadn’t recognized the issue with the small samples in mosaic knitting, simply because the issue just doesn’t show up with ‘short’ repeats. That’s why you can safely use regular mosaic knitting with narrow objects or if your pattern uses narrow pattern repeats.
Thinking about a solution
But now what to do with my HAL CAL? And my Belle Express? Because I wanted to make them available for mosaic knitting.
My first idea was to increase the number of slipped stitches in rows with long consecutive stitches in one color. But how to do that? How would this actually look? And how would I distribute that in a good way? And how would I describe that in a pattern description? This simmered in my head for a while, and I started experimenting, but I found my ideas a bit vague, not structured well enough.
Eureka!
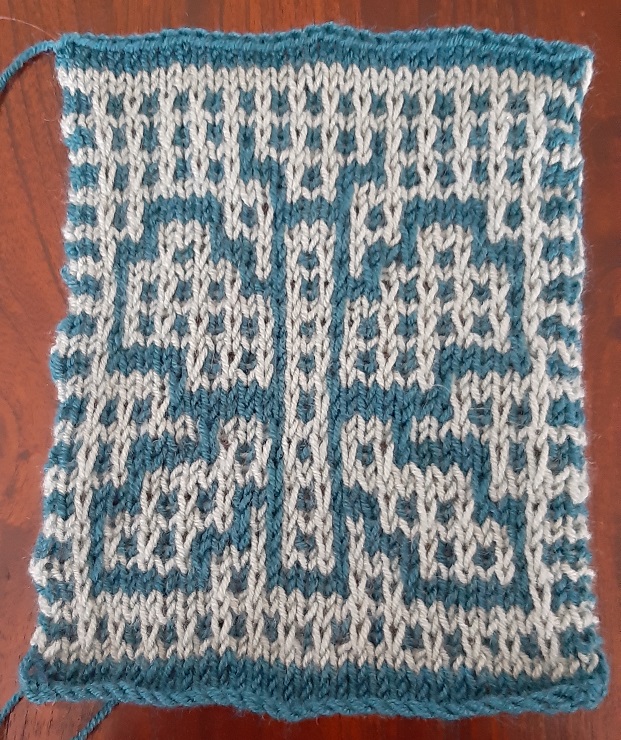
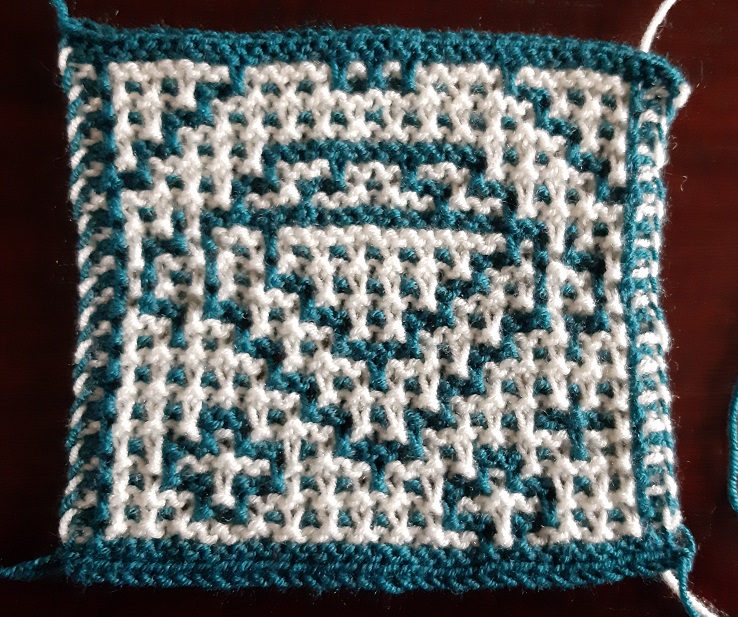
Until, after a good night sleep, I thought to apply this more ‘consistently’. What if I would make every row have the same number of knit stitches and slip stitches? I saw another issue there still, but what if I would apply this to every returning row? Because then you would have a forth going row that would just be knitted in pattern, which would leave the colors and the pattern intact, but you would compensate the issue right away in the next row. Well, it seemed to me that this would really be worth a try. So I started to try it out on a small sample! And see here the result.
I was very very pleased with how it turned out! I compared it also with my two other sample pieces, and you can see that in the picture after this. The work was pulled in even a bit more (of course), and it was a bit shorter in height also (also explainable), but it looked good. And, quite important for what I wanted to use it for: the proportions also stayed good! (With stockinette it is always stretched out, by the way, as you can see in the picture earlier on this page!)
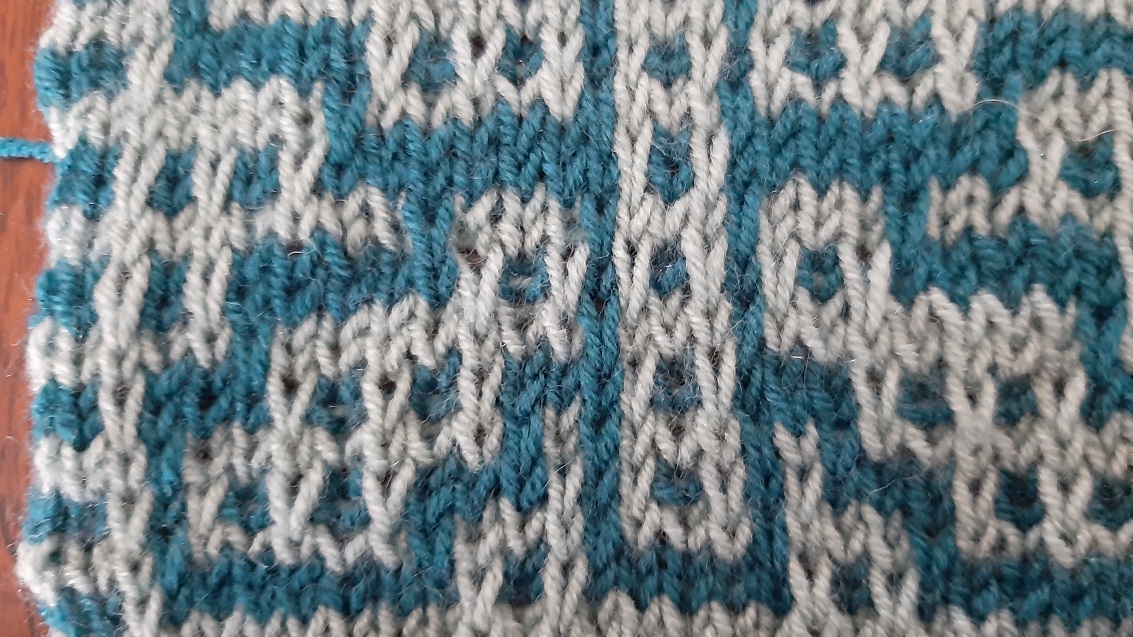
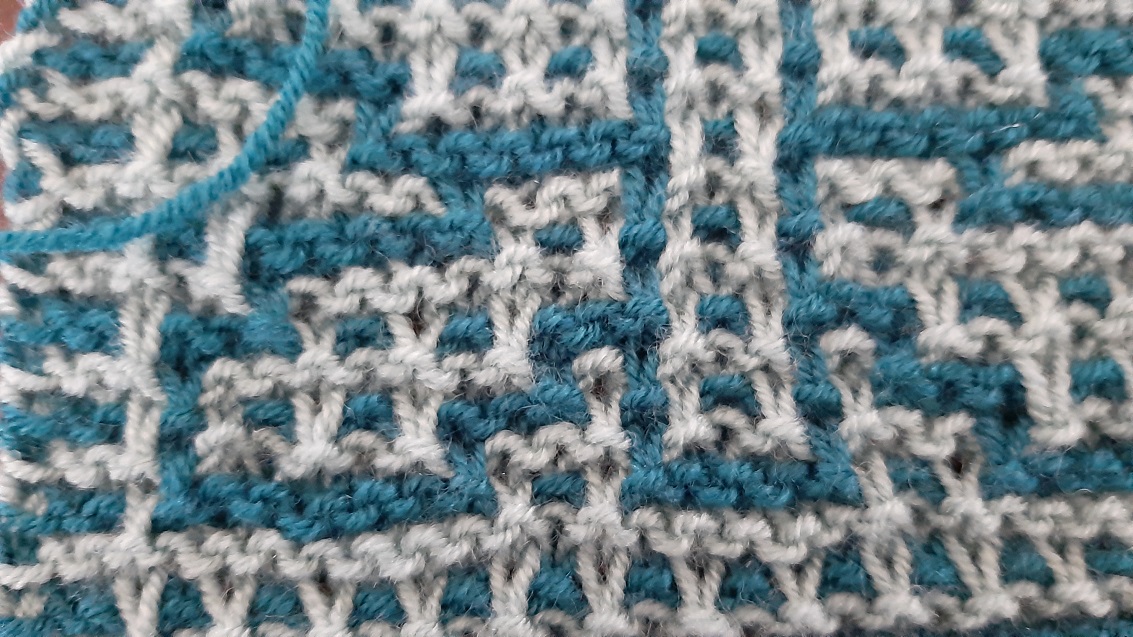
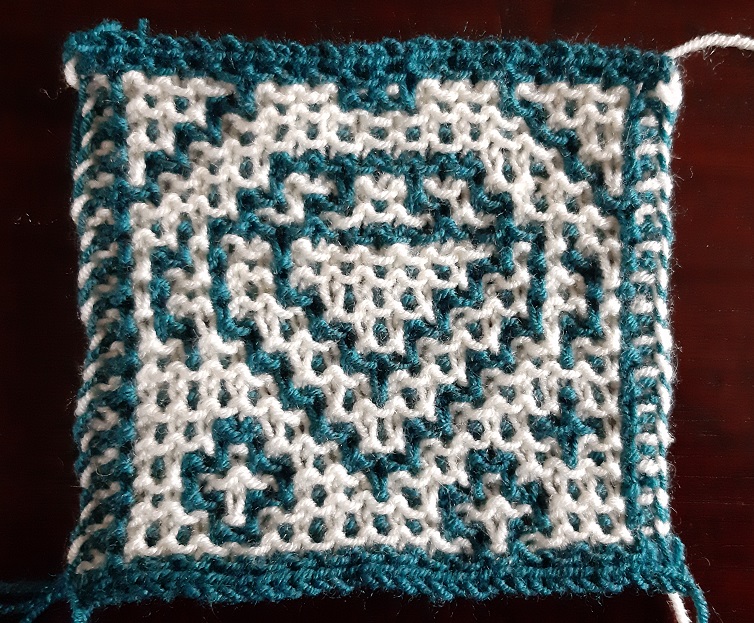
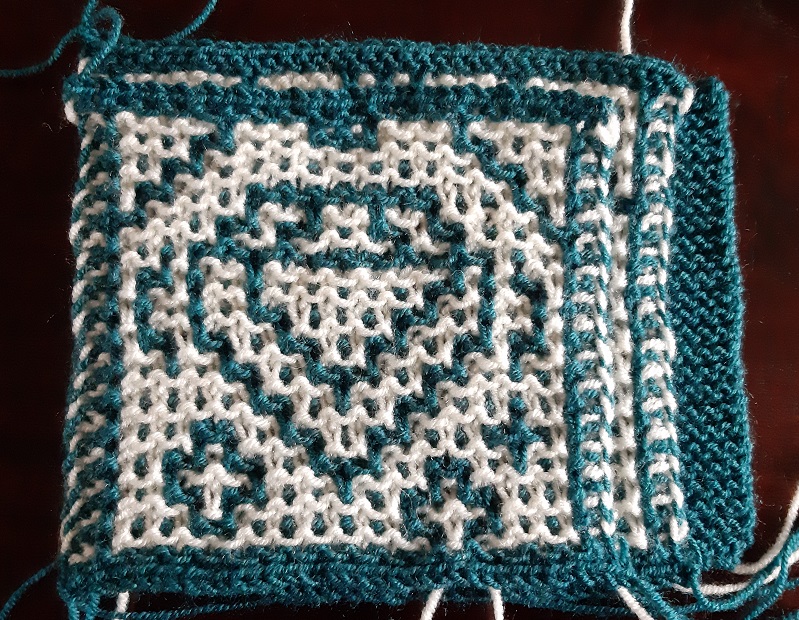
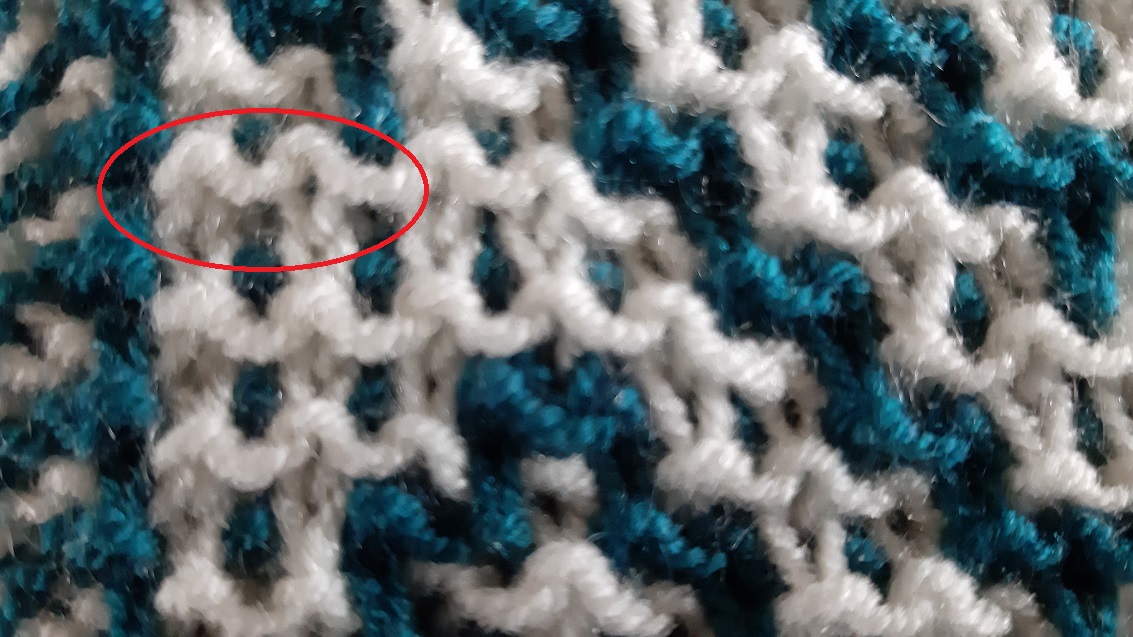
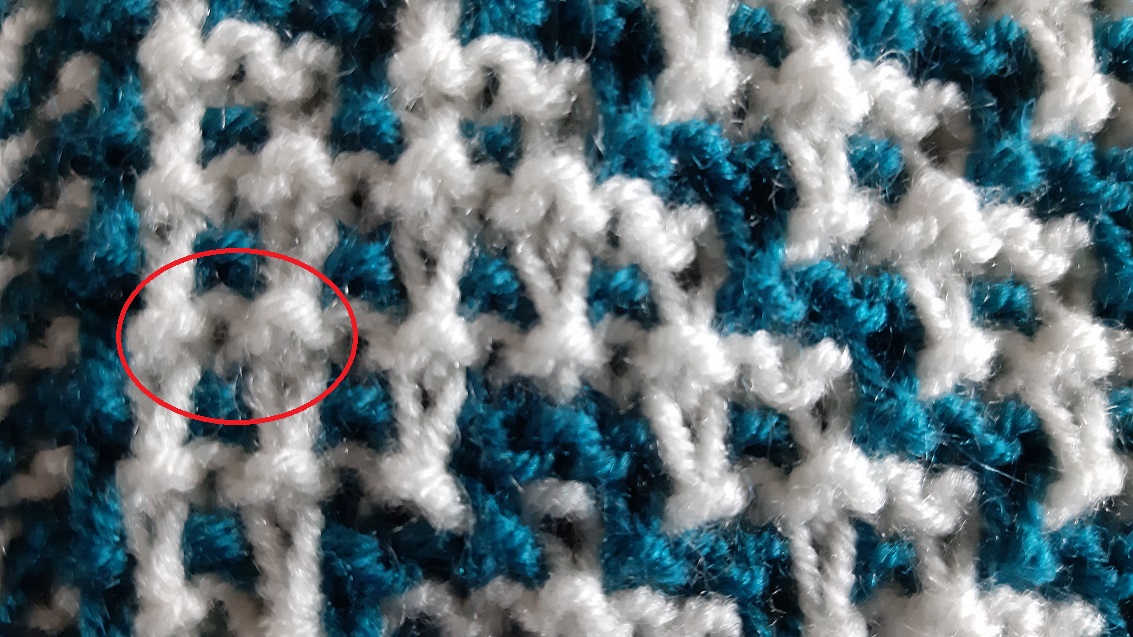
Something else I noticed, was that with this balanced method the look of the work slightly changed. It still looks very similar to regular mosaic knitting, but the lines of the pattern show a bit clearer, which is good for knitwork for graphic designs.
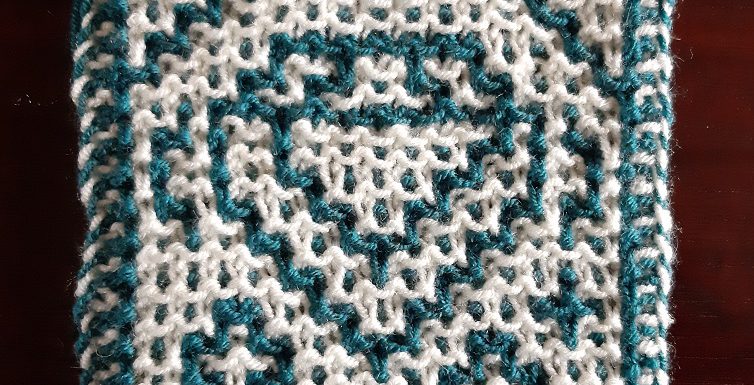
Here you see 2 detail pictures where the difference in the technique becomes clear. I marked it with a red circle. You also see here that the background color (here the dark seagreen) is pushed more to the back with balanced mosaic knitting, and the foreground color is more on top, because the slip-loops are laying on top of the work , which is better for figurative works.
And how about larger pieces?
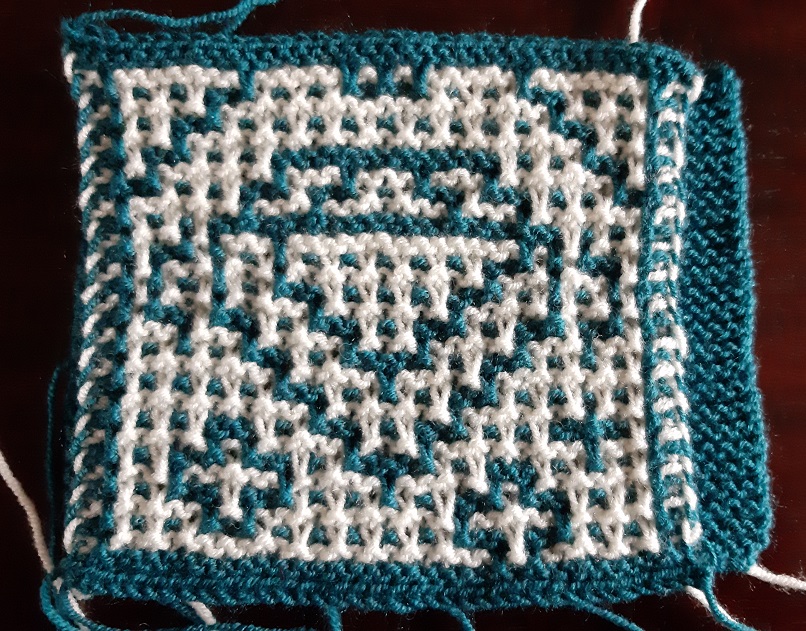
Of course, I didn’t stop after this, because I wanted to see this work on large pieces. So I started all over with my Belle Express, and it became quite clear very soon that the issues with the waves were gone. It even showed clearly while the work was still on my circular needles, so even without blocking! There was another issue that showed up with the sides, because I thought of something that didn’t turn out good, again because I didn’t notice it on a small piece, so I figured out a solution for that too.
Faster knitting with an adapted pattern chart
Something else I noticed along the way, while knitting and using the original pattern charts for the sample pieces and the Belle Express, that I needed to count quite a lot. And that took me a lot of time. More than what I wanted, so I figured out a way to reduce the counting, which speeded up my knitting really really significantly. I will show this also in the tutorial.
So are you ready for the tutorial?
Because I now have everything figured out for you how to do this balanced mosaic knitting. On the next pages I explain everything with pictures, text and accompanying videos.
Availability of the patterns
My patterns are available in my Ravelry shop: https://www.ravelry.com/stores/the-craftsteacher-designs. And also take a look at the Ravelry shop of my youngest daughter: https://www.ravelry.com/stores/the-craftskid.