
Overview of the tutorials
This tutorial of the first 5 blocks is split into a couple of pages, so that you can go quickly to the page you need. Here you find the overview with the links.
- Choosing colors and crochet symbols: click here to go the page
- The practice piece: click here to go the page
- Block 1, the middle part: that’s this page
- The low border around block 1: click here to go the page
- Block 2, the first 2 rows: click here to go the page
- Block 2, the interwoven rows and the end border: click here to go the page
- Block 3: click here to go the page
- Block 4, with stitches on the front in row 1a: click here to go the page
- Block 5: click here to go the page
- The border: click here to go the page
The videos
I’ve made videos for the first couple of blocks to explain and show you everything you need to know. Click here to see the playlist with all videos.
You can watch the videos for this part here: https://youtu.be/5T4vTRYxvUU and https://youtu.be/aCuW9R29ZYc.
Block 1: start with regular interwoven crochet
In this part we will start making the middle block. This block is actually just regular interwoven crochet like you are used to do. But at the end we will do a bit extra, to prepare the work for the log cabin pattern. You can find the downloads of the patterns of the first couple of block on the overview page: click here.
In this first part of this tutorial I will show you a bit about making this block, just to help you get going or for those who are less experienced in interwoven crochet. I will go through it very fast. If you don’t understand the terminology, or how to do this, please first do the practice piece of this CAL (click here), check out the super beginners page (click here) and also do the practice piece of the HAL CAL 2018 (click here).
Tips – Read this before you start!
Also check out the photo tutorials to see what I mean with these following tips!
1. At the start of a row it is custom that you do 4 chains: 3 chains for the dc and 1 in-between-chain. If you do your chains very loosely, than see if you’d better do just 3 chains in total. Try it out until you’ve made the starting rows of block 3. If the borders of your blocks are too ‘wide’, you will notice that when crocheting the starting border of a new block (like at the start of block 3, when crocheting into the sides of block 1 and block 2) the side at the front of your work, that stands out a bit to the top by working back post stitches, looks a bit wonky.
2. Work the last dc of the ‘regular’ rows into the chain opening of the corners. You don’t need to work into a chain, because when doing a starting row of a new block, you will do back post stitches, that make everything fall into it’s right position. It is just simpler and faster for this project to do it like this.
The phototurial for the middle block
 Row 0a: setup 11 chains, place a marker into stitch 9, do 3 or 4 more chains (see the tips for how to start a new row).
Row 1a: Forget about the ‘front’ or ‘back’ instructions for now. Make a dc into the chain with the marker, skip 1 chain, then a dc into the next, and so on until you have finished the row.
 Row 0b: setup 9 chains, place a marker into stitch 7.
Row 1a: since color 2 to front has to be at the front, and all the dc’s of color 1 have to be at the back, this means that the setup row of color 2A has to be put entirely at the front, so no weaving through is needed.
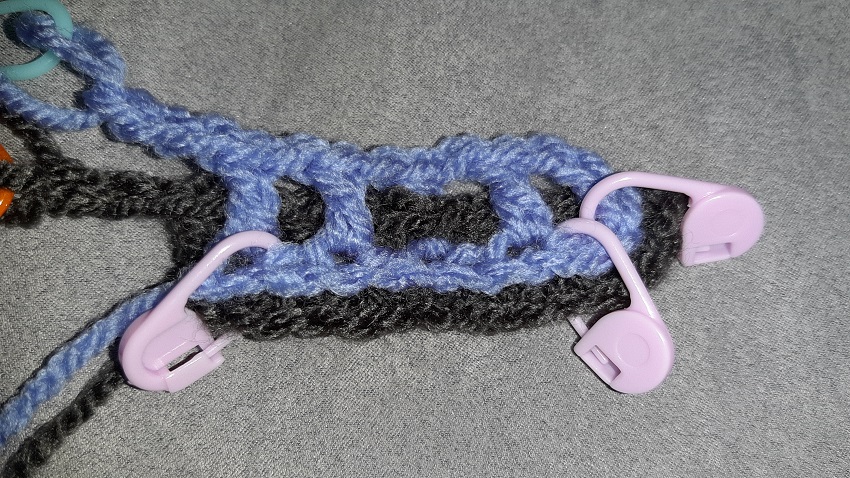
Row 1b: f 2x, b 1x, f 2x
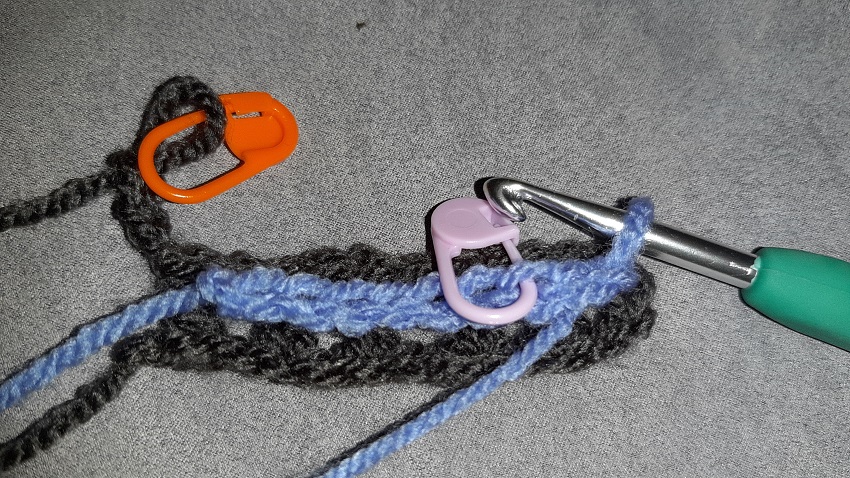
Make 3 or 4 chains (the first dc plus in-between-chain), a dc into the marker at stitch 7. These are the ‘f 2x’.
To keep everything in place, place markers to have the side dc of color 2A in front of the first hole of color 1 and the next dc in front of the next hole of color 1.
I have marked the third hole of color 1 with the blue marker, because that’s the place where the next dc has to be made.
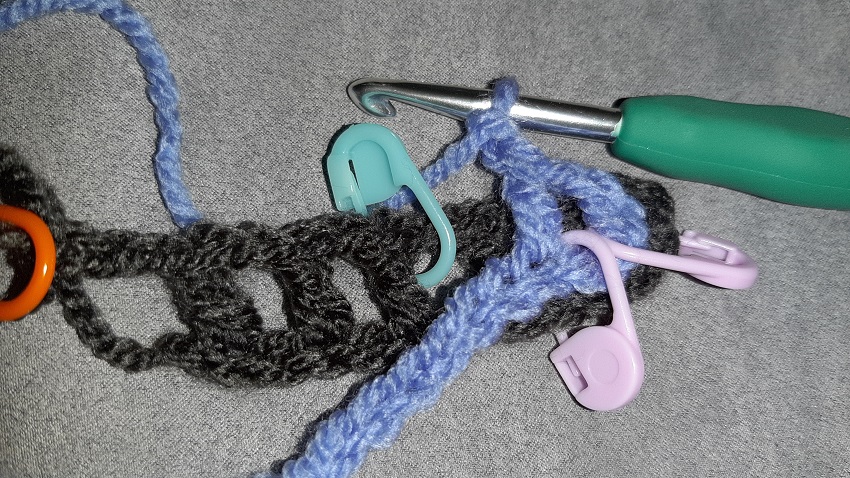
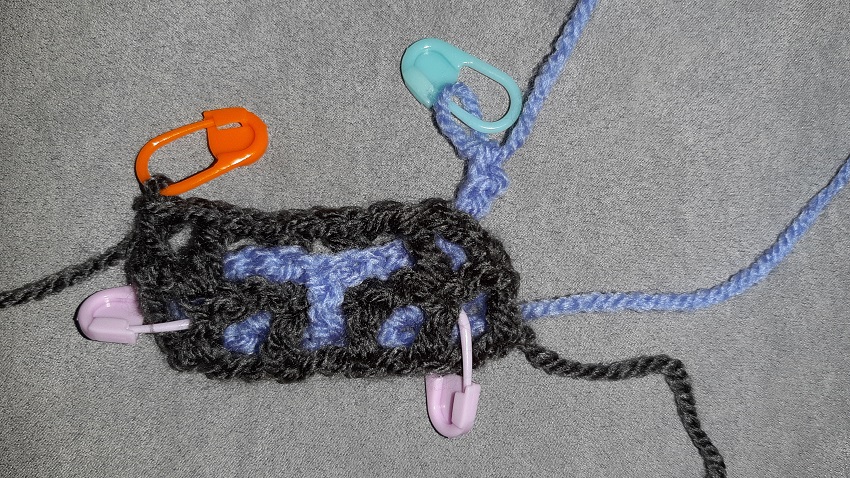
 The ‘b 1x’ at the back of the third hole
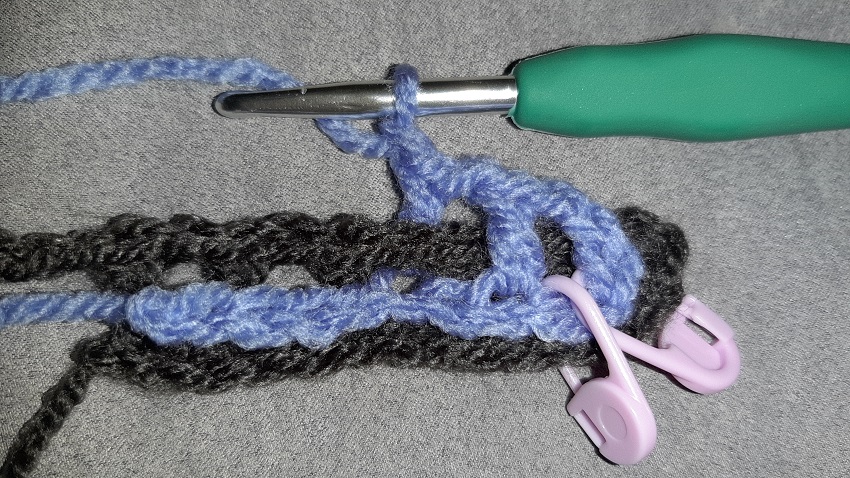
 And the next ‘f 2x’. Keep the left corner in place by adding a marker.
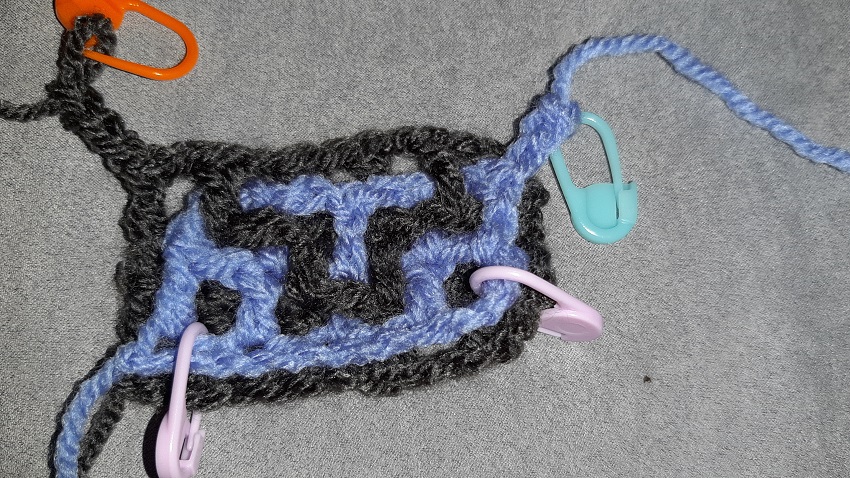
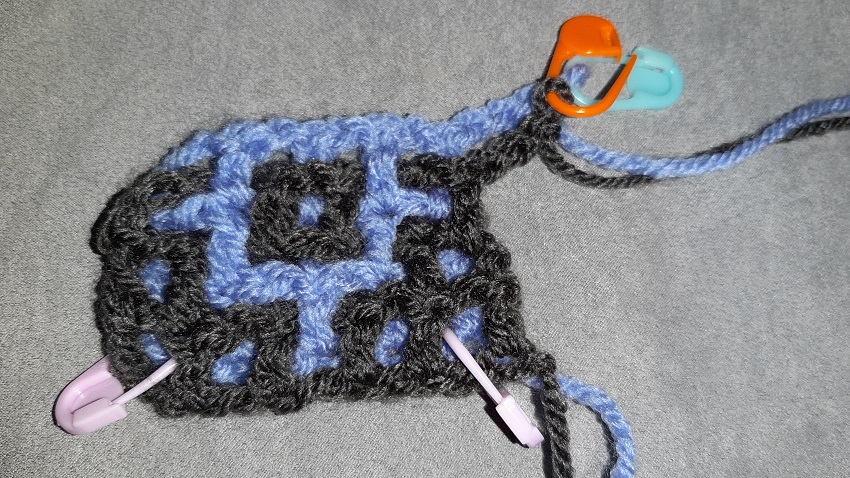
 row 2a done (back)
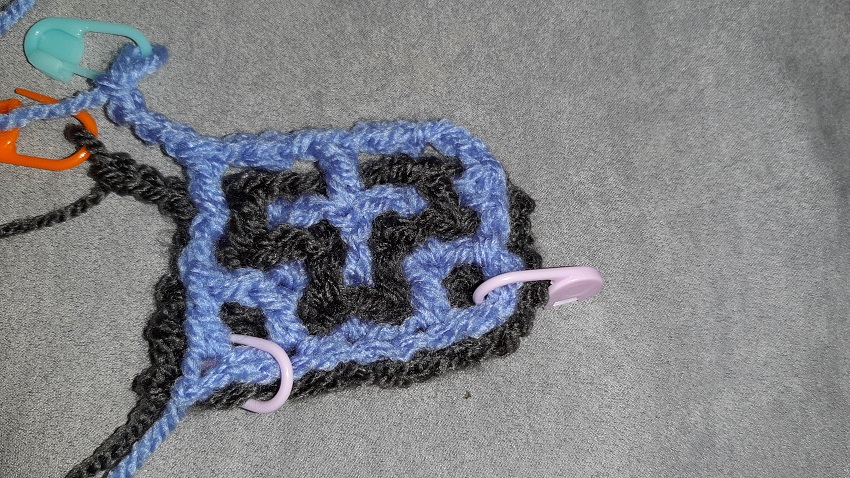
 row 2b done (back)
 front view after row 2b
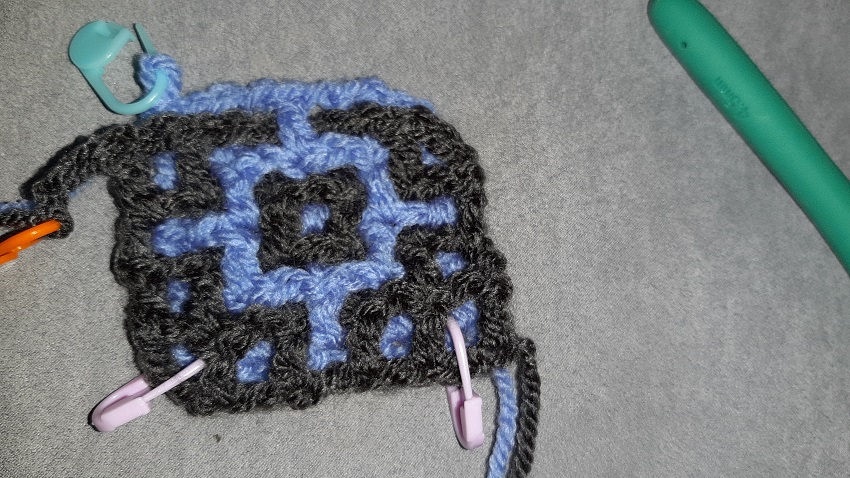
 row 3a done (front)
 row 3b done (front)
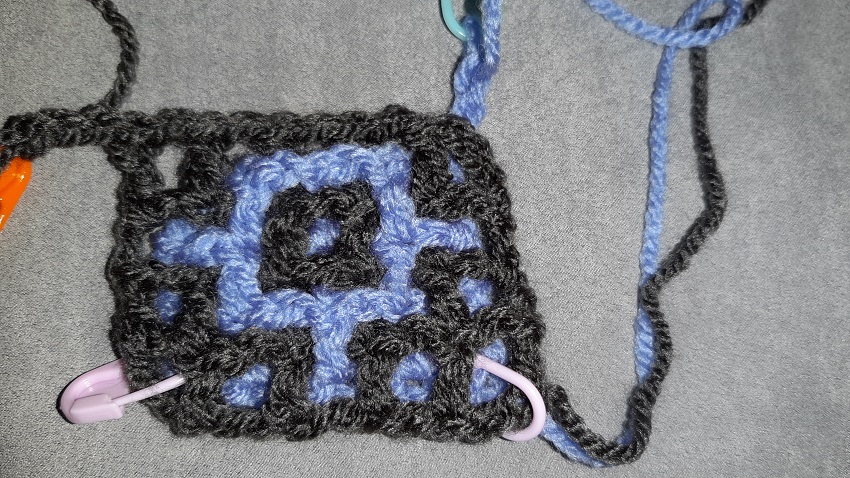
 back view after row 3b
 row 4a done (back)
 row 4b done (back) (do not cut the yarn!)
 front view after row 4b
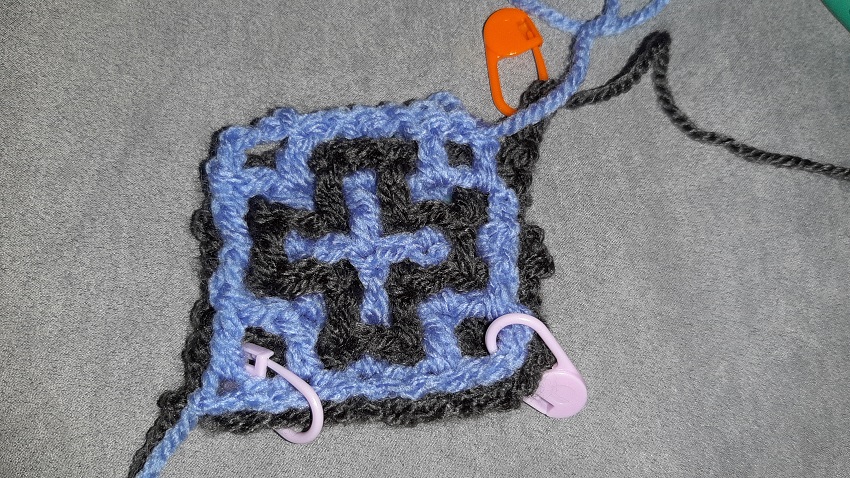
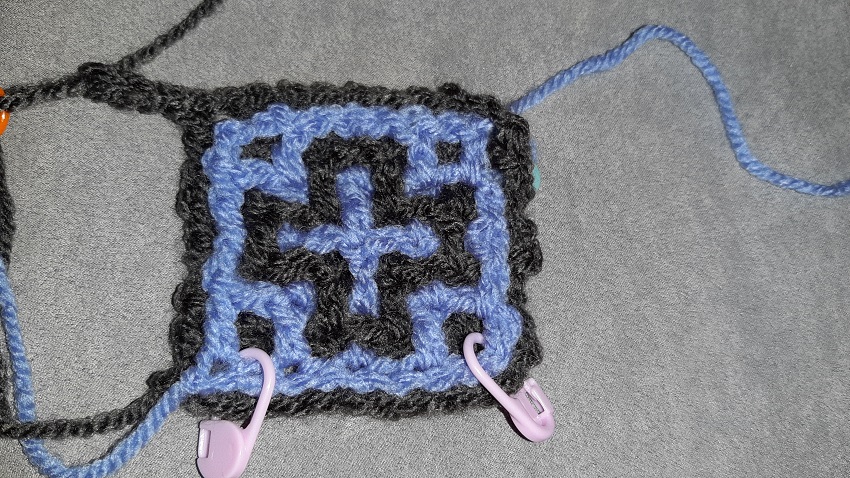 row 5a done (front)

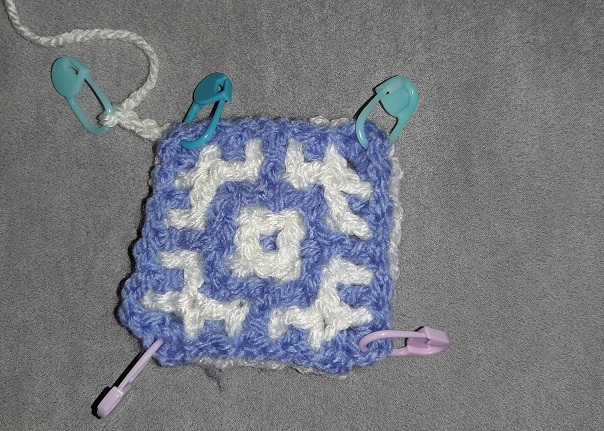
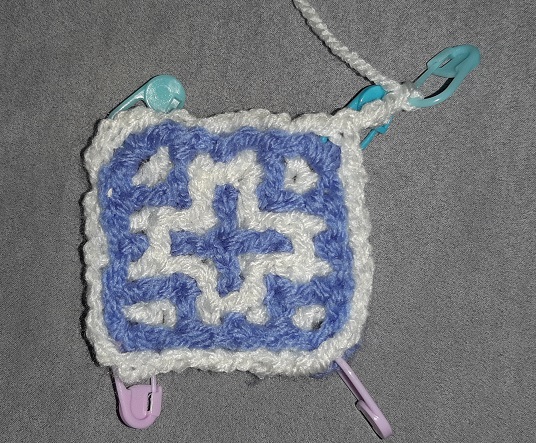
This is how it looks with a light background color. Front and back.
Click here to go to the next page for making the border around block 1.