
Index
This tutorial is too large to show on 1 page, so it is spread over multiple pages. Use the links in the index below to go to the page where you want to be.
- Introduction, abbreviations and symbols, and start tutorial 1: click here
- Start tutorial 1, setup and first rows: that is this page
- tutorial 1: slanted lines, open structures, part 1: click here
- tutorial 1: slanted lines, open structures, part 2: click here
- tutorial 1: slanted lines, open structures, part 3, working at the back side: click here
- tutorial 1: slanted lines, closed structures, part 1, with triangles pointing upwards: click here
- tutorial 2: slanted lines, closed structures, part 2, with triangles pointing downwards: click here
- combining structures and summary: click here
- tutorial 3: click here
Tutorial 1: open and closed structures with combined stitches
DOWNLOAD THE PATTERN WITH THE WRITTEN INSTRUCTIONS HERE
DOWNLOAD THE INSTRUCTION CHART HERE
Artdeco CAL 2024 yarn usage
You can use this tutorial piece for checking your yarn usage. Below you find a table of the stitches used in this pattern. Per color the numbers of stitches are given. Full slant means the diagonal extended dc’s and mid slant means the ‘middle’ dc’s. This will all come clear when you follow the tutorial. Using this you can predict your yarn usage. Simply measure how much yarn a stitch takes for you and the yarn you’ve chosen to use. I admit that the combined stitches use a bit less than when each type of stitch is made separately, but better safe than sorry, don’t you agree?
For the Artdeco CAL of 2024 I used Alize Cotton Gold. I used about 39 m of color 1 and 32 m of color 2. The piece is 16.5 cm wide and high.
| c1: # ch | c1: # dc | c2: # ch | c2: # dc | c2: # full slant | c2: # mid slant |
| 154 | 342 | 225 | 210 | 24 | 12 |
Video
Watch this video for the setup: https://youtu.be/mte4nSzYWy0.
Intro tutorial 1
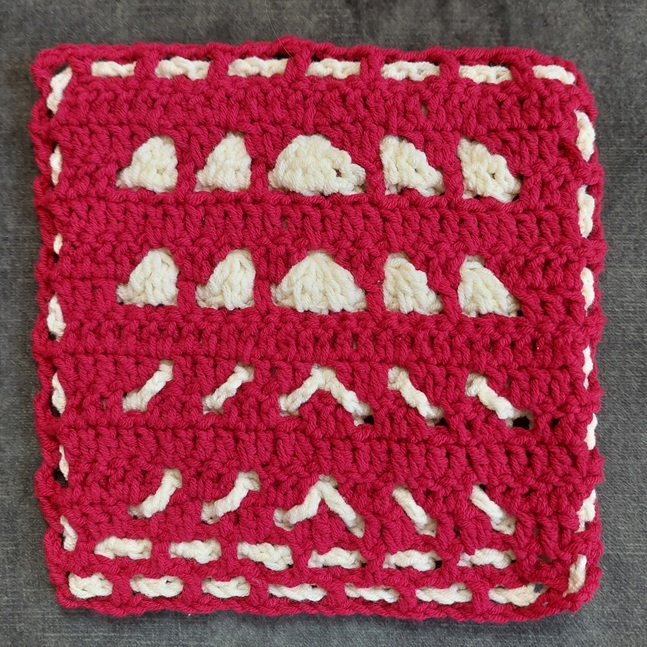
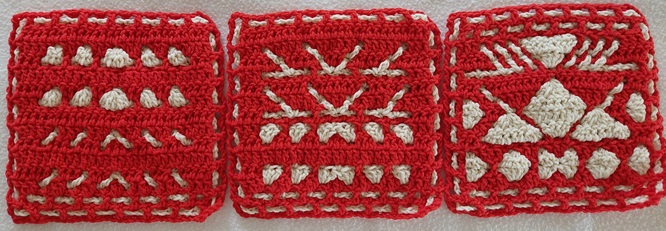
This is the first step we will take in creating slanted lines. I’ll show you how that works when you work at the front side, and then we make the same figure while working on the back side. First we create ‘open’ structures, and then ‘closed’ structures.
For this the solid squares technique was used for the background color.
The setup first includes a brief repetition of the basic technique with open squares and the solid squares technique and associated notations. In these samples I made the first few rows without slanted lines, so that you have a base of the grid first. Everything is then ‘nicely in place’, which provides a solid basis on which to continue working. However, in my patterns it may happen that you immediately have slanted lines at the bottom of the design, but if you understand the technique, this will not be a problem for you. The setup will at most be a little more difficult, but stitch markers are always a good help!
Important: The stitches of the grid must always be crocheted! If you are going to crochet a diagonal line, it will always be combined with a mesh stitch!
This may sound a bit vague now, but you’ll see what I mean by this later.
Setup and first rows
Click on the photos to see them in their entirety and full size.
Row 0a: setup 31 st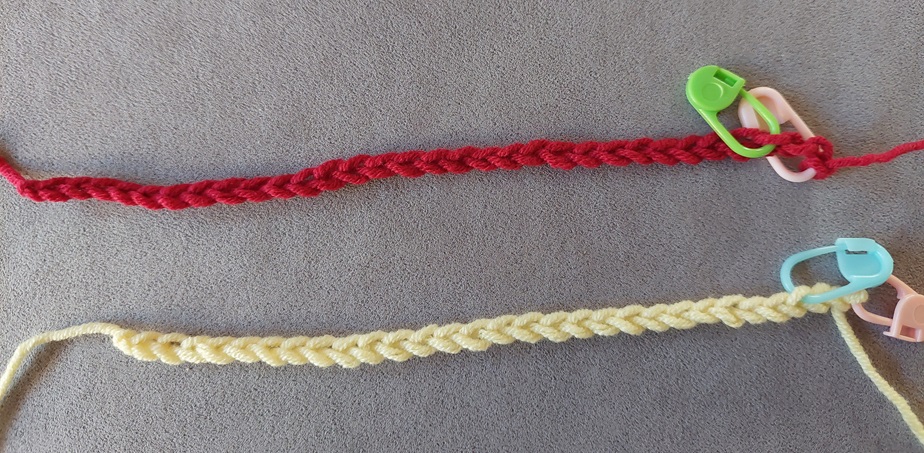
Row 0b: setup 29 st
As a reminder, I never add turning chains to this. These belong to row 1a and row 1b! If you would like to use a different way of setting up (see for example my HAL CAL of 2018!), you can simply use this as the number.
As always, I place a marker 2 stitches before the end, i.e. in stitch 29 for color 1 and in stitch 27 for color 2 respectively.
Row 1a – front: color 2 to front, side st, *(f, b)* 7x, side st
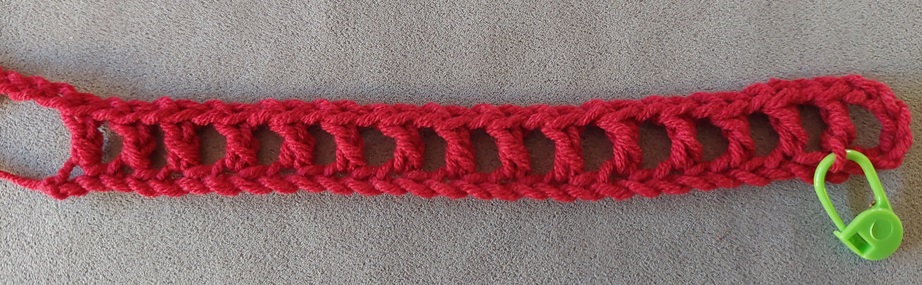
For row 1a I always use the ‘weave through’ method, so first make the squares as step 1.
Make 3 turning chains for the side stitch, plus 1 inbetween-chain, and make the squares. There should be 15 in total ((31/2) -1 = 15).
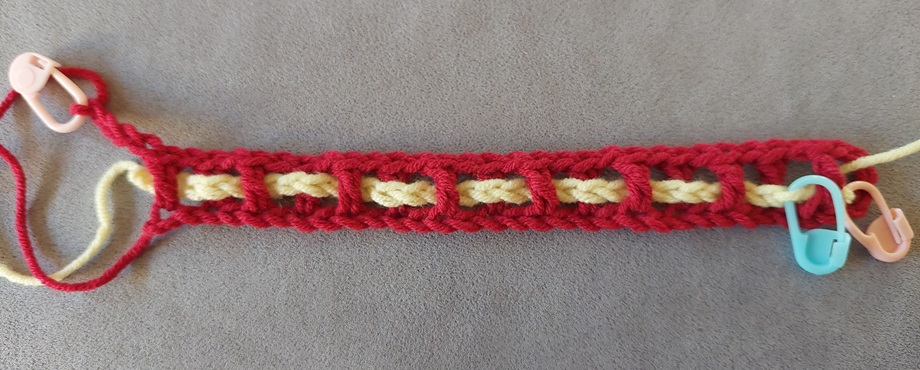
In step 2, weave through color 2, using the instructions from row 1a.
Color 2 should go to the front, so start the weaving at the front. The stitch on the side with the 3 turning chains is the side stitch.
The next double crochet should be at the front (f), the next double crochet should be at the back (b). And that repeats itself 7 times.
Click on the picture for a full view.
|
Notation: color 2 to front, side st, *(f, b)* 7x, side st Previously my notation was *(f 1x, b 1x)* 7x. I have now made that shorter. If a stitch is only made once, you will no longer see a ‘1x’, which makes it a bit shorter. Furthermore, this is the usual way for noting the stitches to be made. So first the side stitch (the 3 turning chains), a stitch at the front, a stitch in the back, then 1 in the front and 1 in the back, repeated 7 times in total. A repeat of multiple stitches is between ‘*(‘ and ‘)*’. And of course the row starts with the instruction of where to place color 2, and then a side stitch, and the side stitch at the end.
Sure, the comma doesn’t come before the closing bracket, but *(f, b,)* would also look a bit strange. |

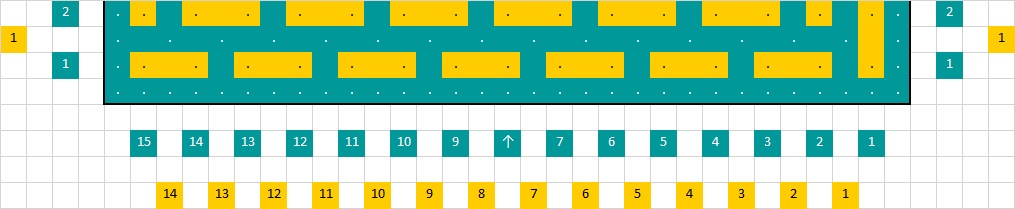
This is the first part of the instruction chart.
You see on the bottom 2 rows that the stitches are indicated with a ‘c’ (= chain). The lines at the beginning and end of the b rows are there to indicate that this is not a stitch. This is formed by the double crochet of the side stitches of the a-rows.
For row 1a, front, read the drawing from right to left. Every stitch is mentioned here! So first the ‘sst’ (= side stitch = 3 chains), then a ‘c’ (= 1 chain), then ‘f’ (= front), then a ‘c’, then a ‘b’ (= back), and so on. Take a look at the written instructions and see if you see the match.
The drawing does not directly show where color 2 should be placed, as it is in the written instructions, but it is actually quite simple to discover whether you should place color 2 to the front or to the back! Look at the start of the b row directly above. The b row is also worked to the front of the piece here (this applies to all odd rows), so look on the right side in row 1b. The first stitch is an ‘f’. So that means you have to put color 2 to the front to be able to make the first stitch of row 1b at the front.
The dots
 What is the meaning of those dots in those cells? If you know my ‘normal’ pattern charts (you can see them in the various tutorials for the basic technique, or click on the picture next to this), then you know that these are the places where the stitches of the grid or mesh are crocheted.
Interlocking or interwoven crochet is a filet crochet, in which 2 filet meshes are crocheted together in an ingenious way, so that you can use them to make patterns. The mesh is the basis for everything else you do with it. I left them in the instruction chart, just as a reminder that those are the positions where the mesh runs. So you can ignore them when making the crochet stitches themselves. A ‘.f’ is simply an ‘f’ for crochet purposes. Later it becomes clear that the grid remains important, especially when we start working with the solid squares!
Exception: You will see later that the dots are not shown where we create slanted lines. That will be discussed later.
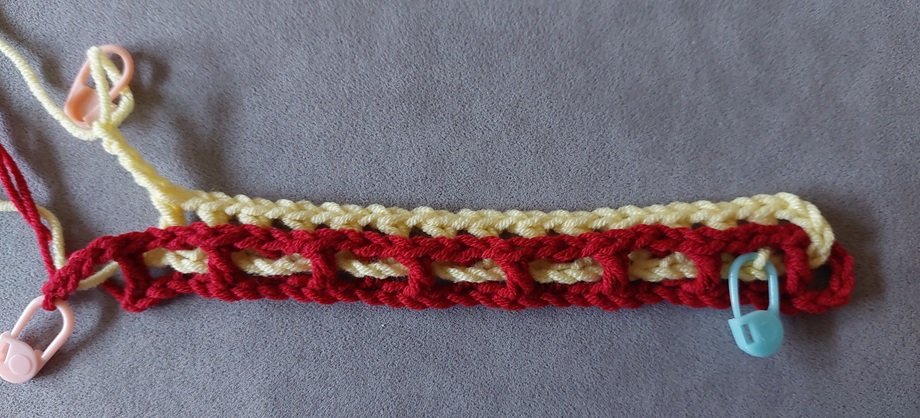
Row 1b – front: f, b 14x
For row 1b with color 2 we make 1 stitch in the front, and then 14 stitches in the back.
 |
 |
|
Notation: f, b 14x This is again standard notation. Do not confuse this with, for example, *(f, b)* 14x. And don’t confuse this with the situation that this should be 14 consecutive stitches, then it would have said 14b. That is the notation used for solid squares. So a 14x is 14 times one stitch at the back with inbetween chains.
|

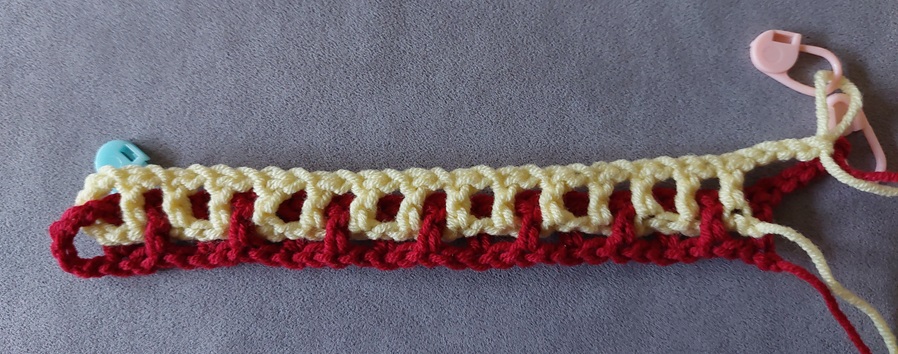
Row 2a – back: color 2 to back, side st, *(b, f)* 6x, b 2x, side st
When you look at the instruction chart, you have to read from left to right this time! This applies to all even rows. To see where to place color 2 when you start with row a, in this case look at the b row above it, on the left..
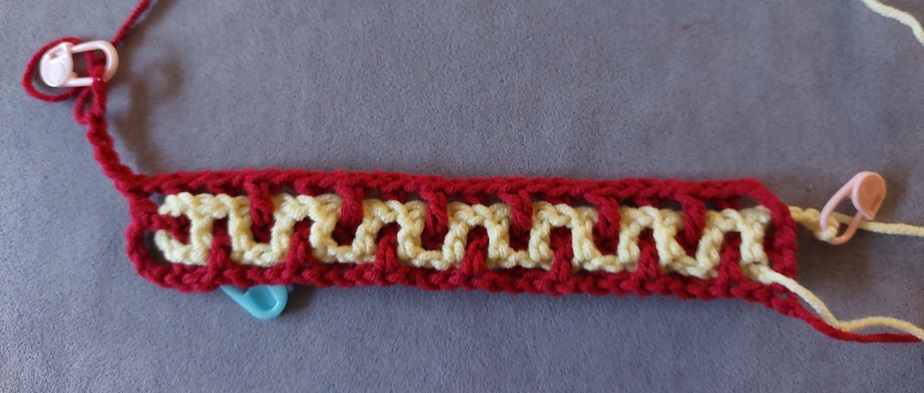 This is the side you worked on, so the back of the piece. |
 This is the front side of the piece. |
|
Notation: color 2 to back, side st, *(b, f)* 6x, b 2x, side st This is again standard notation for open quares. The *( and )* indicate a repetition. Everything in between is part of the repetition. After the *) it says how often you have to repeat the piece, in this case 6 times. |
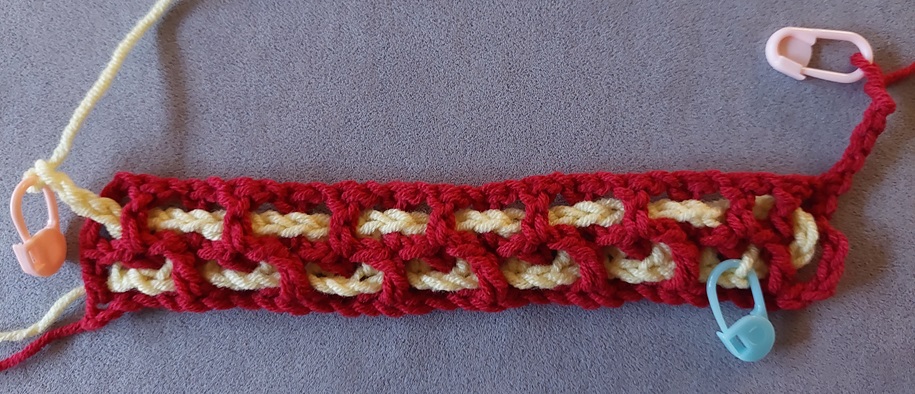
Row 2b – back: b, f 14x
Also read the instruction chart from left to right for this even row.
 This is the side you worked on, so the back of the piece. |
 This is the front side of the piece. |
|
Notation: b, f 14x This is again standard notation for open quares |
So far we haven’t done anything special. This is a part to get the mesh ‘fixed’, without throwing you into the deep straight away.
Go to the next page where we will first start with the solid squares part, and then we will create the diagonals. Click here.