
The pattern
Download the file with the information here (click on this).
Download the pattern here (click on this).
Download the A3 pattern charts here (click on this).
Tutorial for the setup
I have some pictures down here to guide you through the setup. With 273 stitches it is easy to make a mistake, but by clever using markers you will definitely manage to do this correctly the very first try!
Click on the pictures to see them completely and full size! I first show the pictures here as ‘thumbnail’, to have the page loading quickly, but you won’t see everything in the thumbnail. So read the text and click for details!
Adding 2 extra stitches?
Before you start crocheting the blanket, you might consider having 2 extra stitches! I know from other designers that they use that for starting and ending a row. You might want to do that, especially if you don’t like to make standing double crochets. I mentioned this in the tutorial for the overlay method (at row 3), so decide this before you start. This also allows you to do other ways of doing the border. Just pay attention that the written instructions start at you second stitch and end 1 stitch before the end of the row!
Row 1 plus placement of the markers
 Click on the picture!
For row 1 you first set up a chain of 273 chains, then 1 turning chain, and next crochet back 273 single crochets, starting in the 2nd stitch of the hook. You can do a chain of chains, but also use other methods.
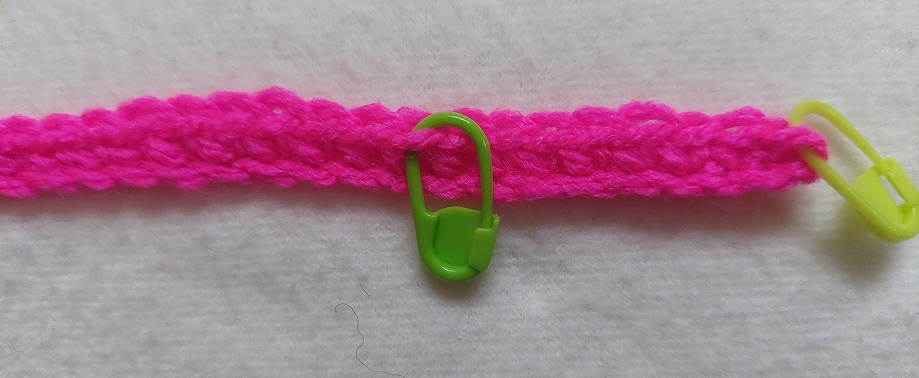
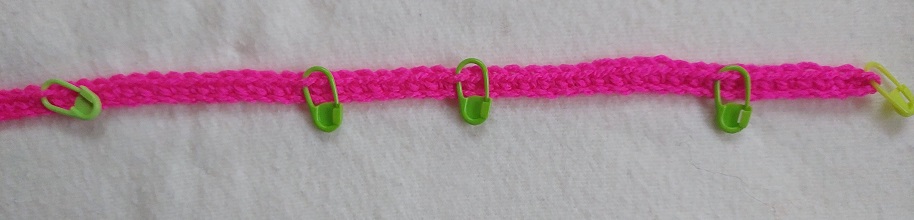
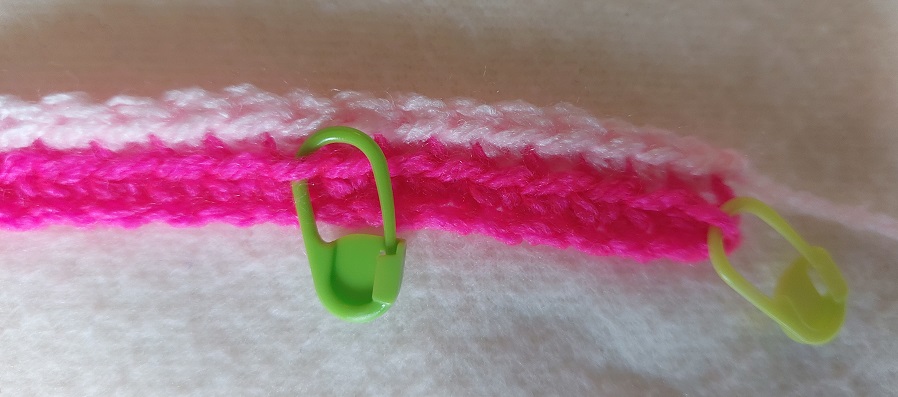
For the preparation of row 3 you will now place markers in row 1, into the stitches where the double crochets of row 3 will be made. Do this now, because it’s very easy to count at this moment! You could still do it after you’ve done row 2, but it’s visibly the best now. Important: place the markers into the front loop only, like in the picture!
When you look at the instructions of row 3, you can see where the dc’s have to be made *( dc 1x, sc 7x, dc 1x, sc 13x)* 12x, dc 1x, sc 7x, dc 1x.
- Place a marker into stitch 1,
- skip 7 stitches,
- place a marker into stitch 9,
- skip 13 stitches,
- place a marker into stitch 23,
- skip 7 stitches again,
- place a marker into stitch 31,
- skip 13 stitches,
- place a marker into stitch 45,
- and so on.
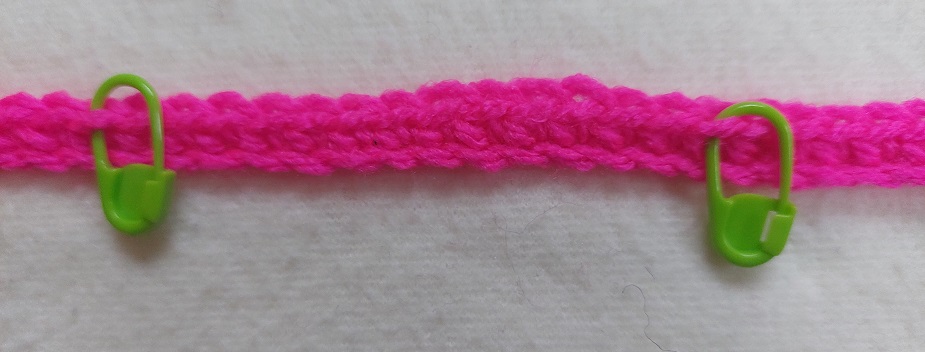 If you’ve done this correctly you will end up at stitch 273! Here you see the marker in the next stitch (click on the picture, because the tiny picture doesn’t show very much…).
 More, click on the picture again!
Row 2
 Row 2 is super simple, just crochet single crochets in every sc of the previous row. You will only work into the back (or top ) loop, because the front loop will be used to insert your hook when crocheting the dc’s of row 3.
Row 3
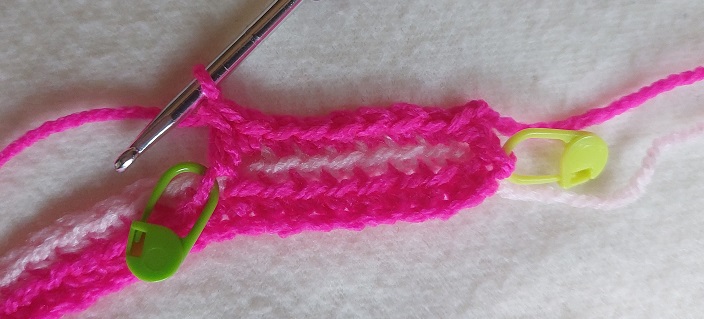 Now we will follow the instructions of row 3: *( dc 1x, sc 7x, dc 1x, sc 13x)* 12x, dc 1x, sc 7x, dc 1x. You can see now that that the dc’s have to be made at the positions of the markers. This way you can crochet this row correctly in 1 try, if you have counted correctly when placing the markers 🙂 .
 Click on the picture again. Here you see that I crocheted to the next marker.
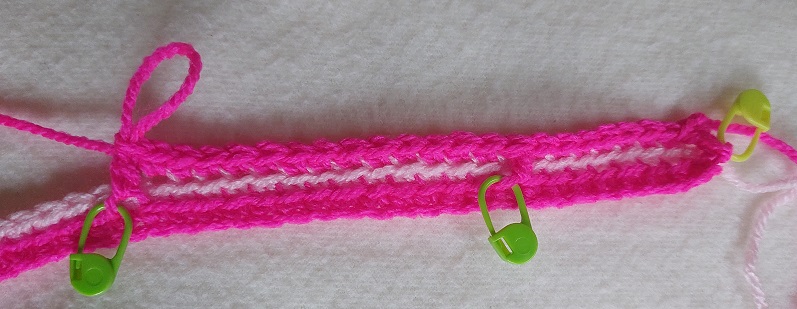
Row 4
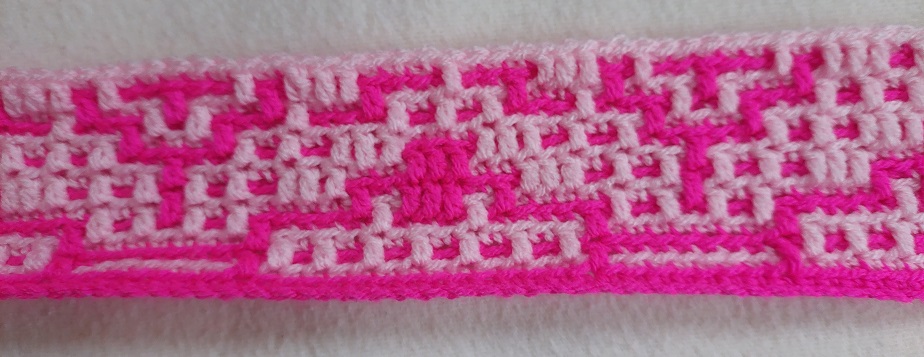
 Here you have 2 more pictures of row 4 to check if you’re doing good. Once you have done a couple of rows, you have a nice reference for the next rows, also if you look at the charts.
 And another picture.
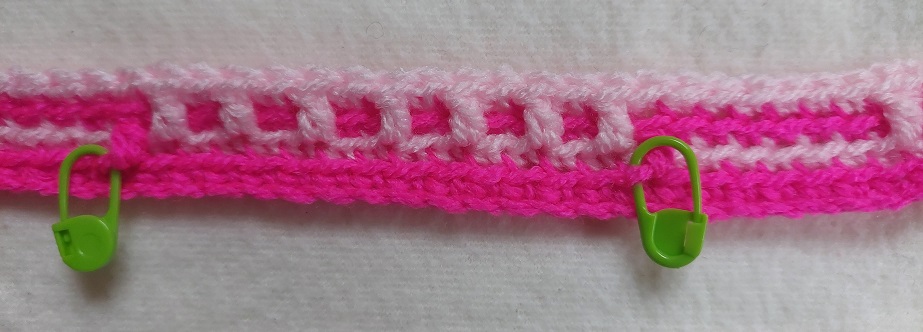
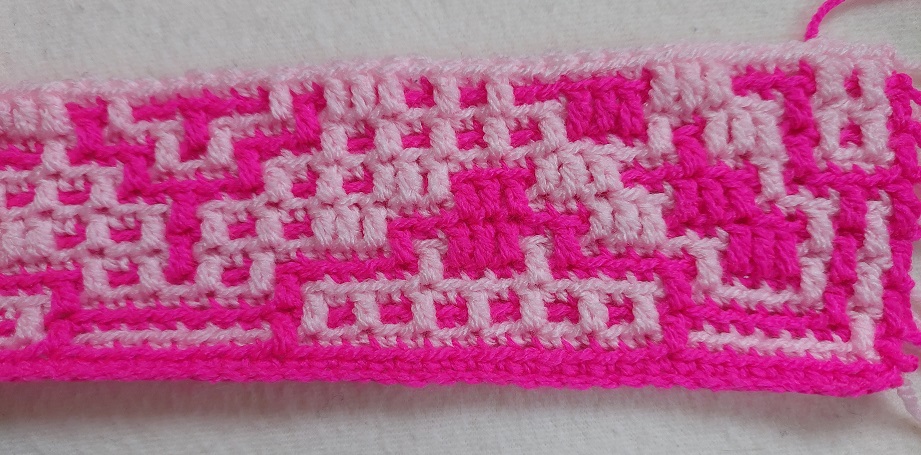 And here a picture of a couple of rows further.
Tip!
With each new block you have to ‘regroup’ 🙂 . See with large solid areas in the same color if you can place markers in ‘clever’ places. Take a look at 2 rows further, or at the pattern chart, where to cleverly place the markers. This has really helped me!
Wishing you lots of fun crocheting the blanket!