
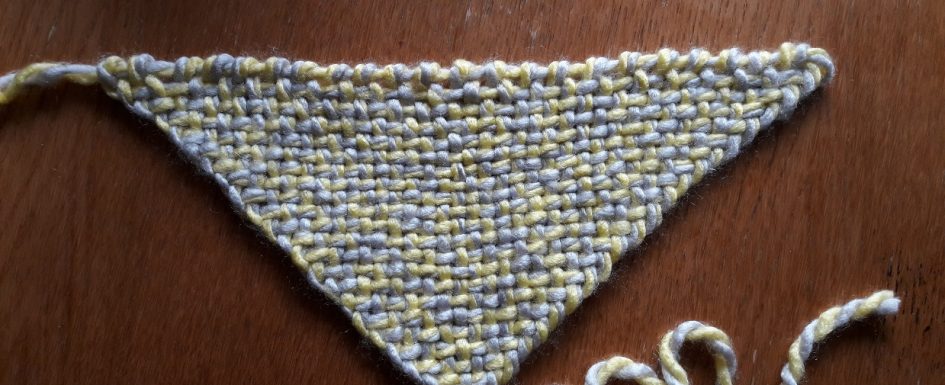
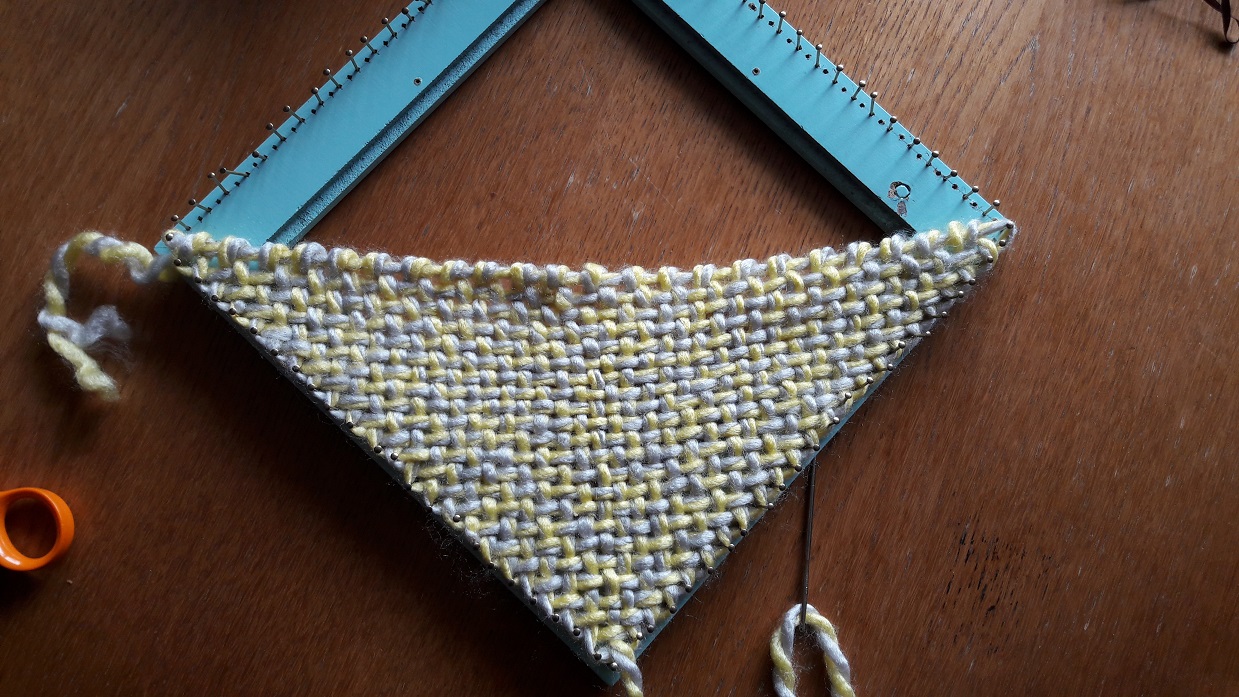
Is it possible to weave triangular shapes on a square pin loom? Yes, you can! And that is what I will show you in this tutorial! If you don’t remember exactly how to weave a square on the bias, just look here for that tutorial (with links to the video’s!)..
Looking back for a moment to weaving on the bias
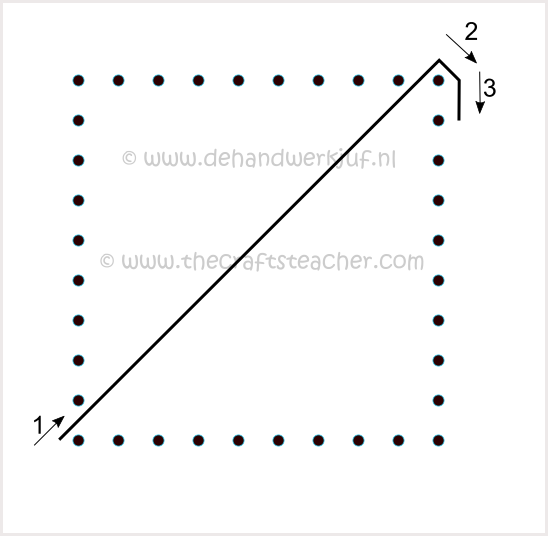
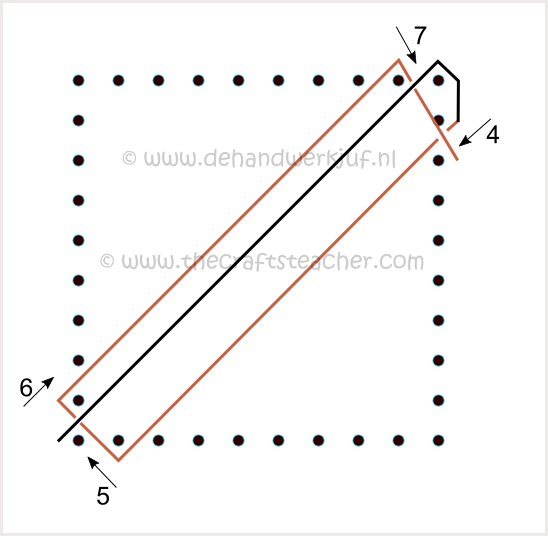
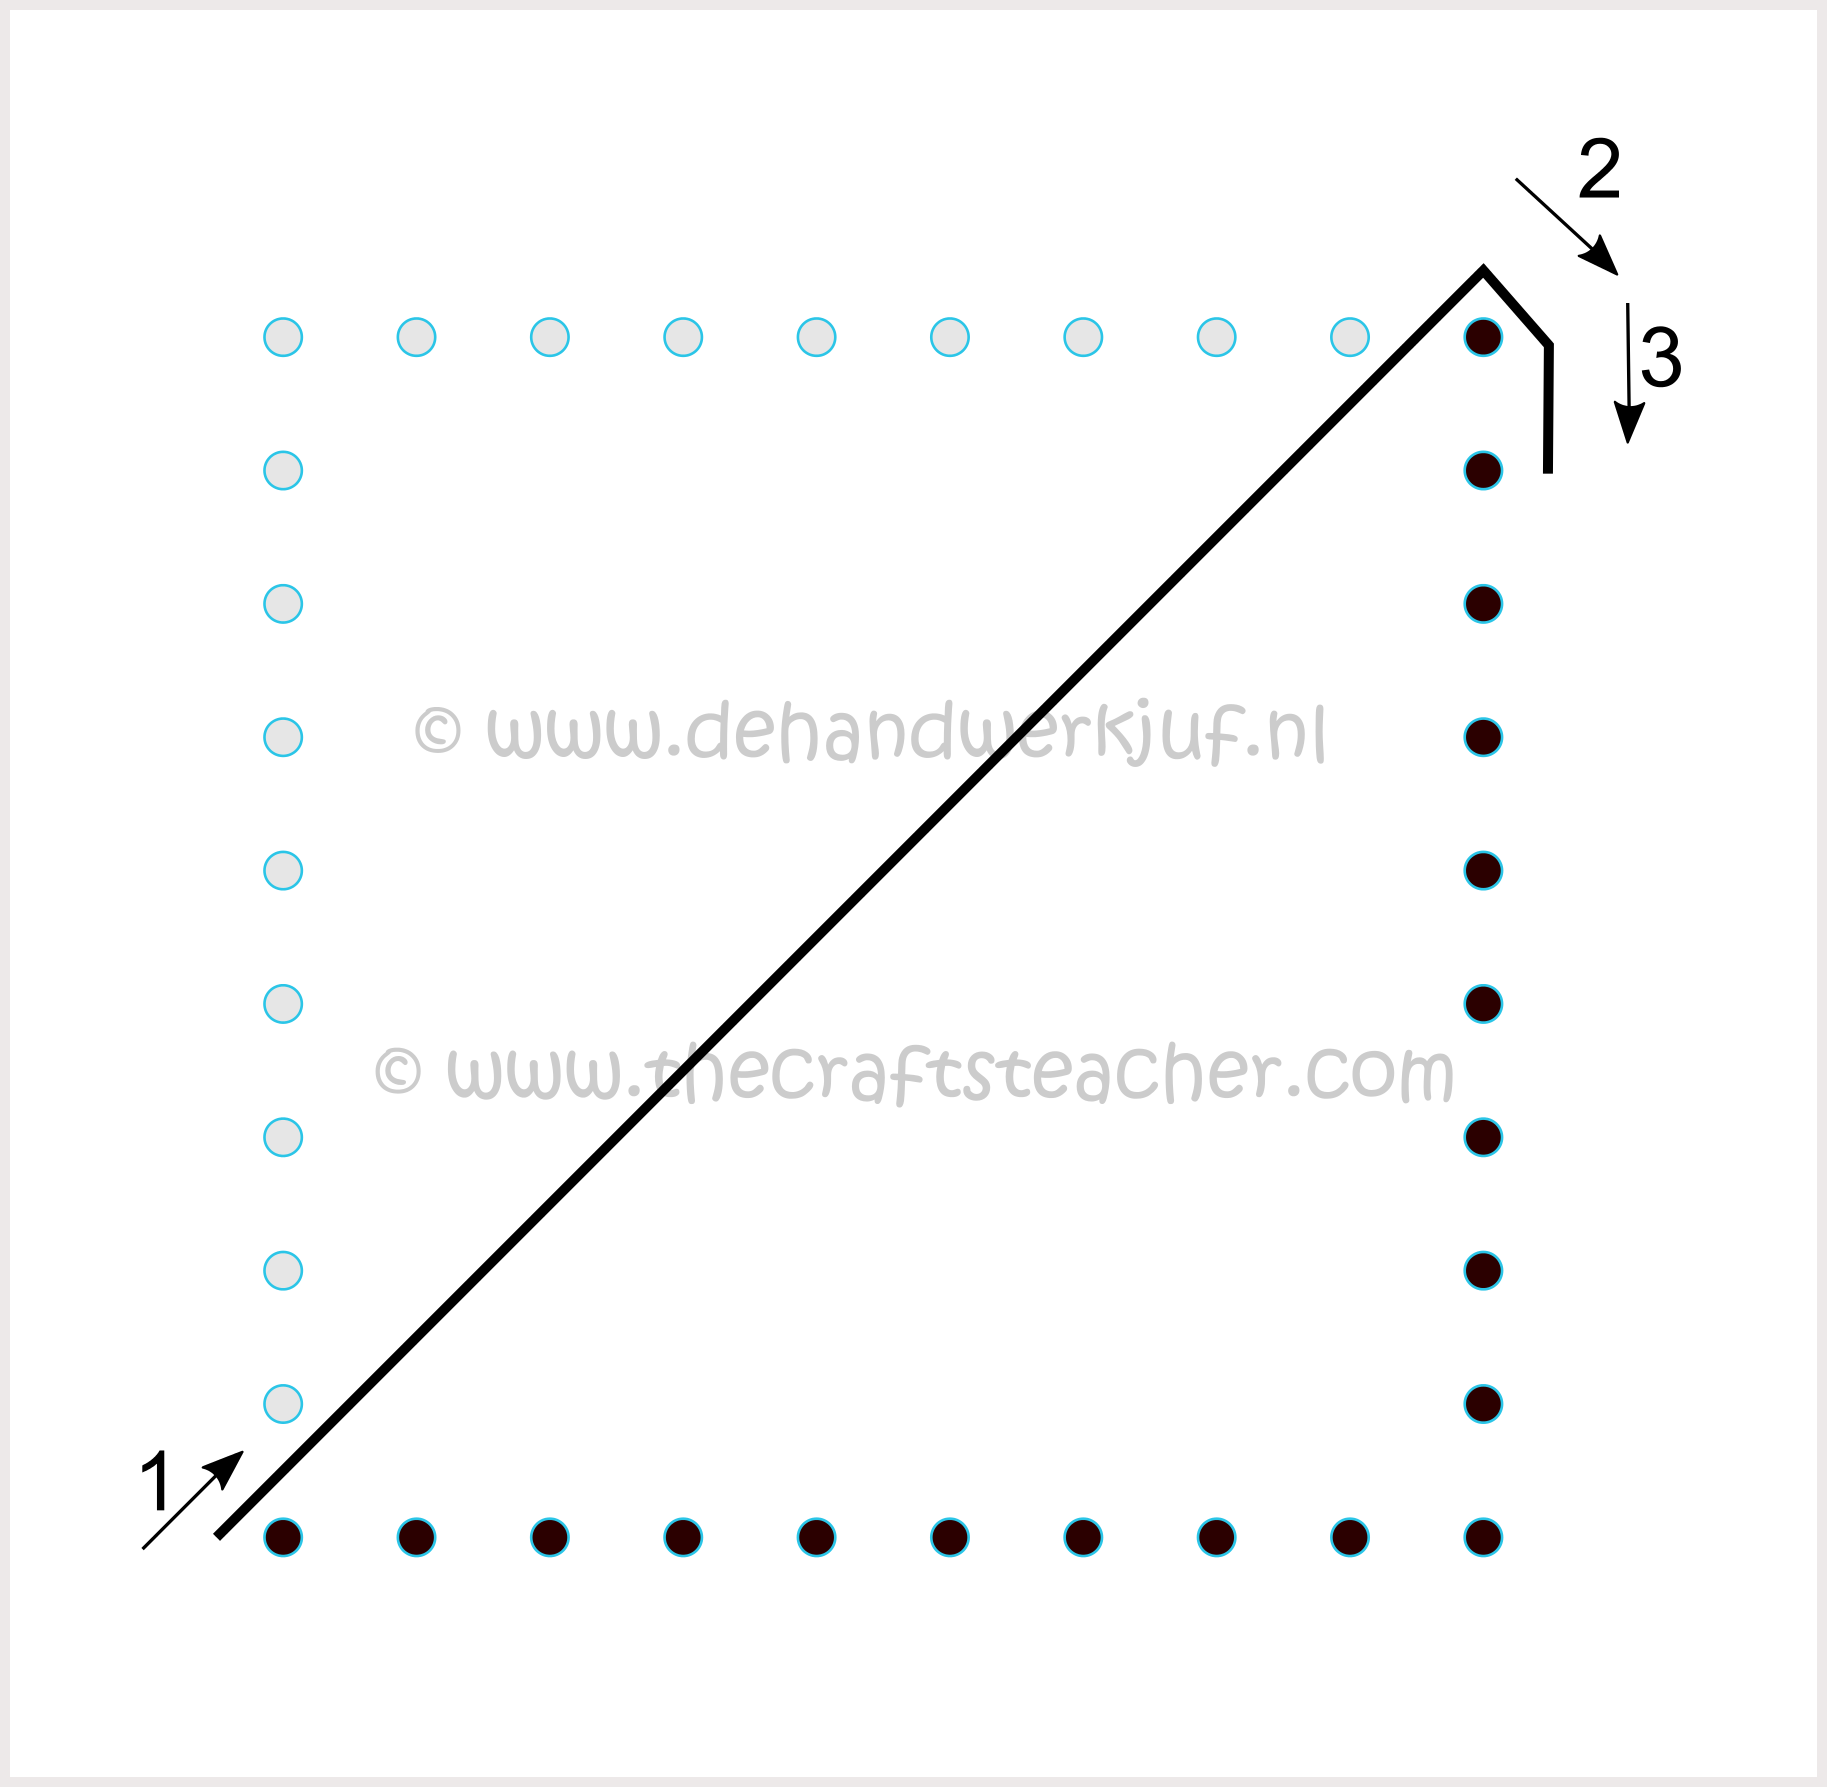
With ‘regular’ weaving on the bias, you started with putting the first thread on the loom from bottom left to the upper right (from nr 1 to nr 2) and you went around the upper 2 nails (from nr 2 to nr 3). In step 2 you brought the thread back down again (from nr 4 to nr 5) and next you went under the first thread. The upper loop of the yarn stayed above this first thread and was pulled through to the upper right to nr 7. The weaving was mirrored. What happenen on the left side, the over-under-over-under, also happened on the right.
But this time I only want to make a part of the weave, and I don’t need the part above the middle diagonal thread when I want to make a triangle.
What did not work
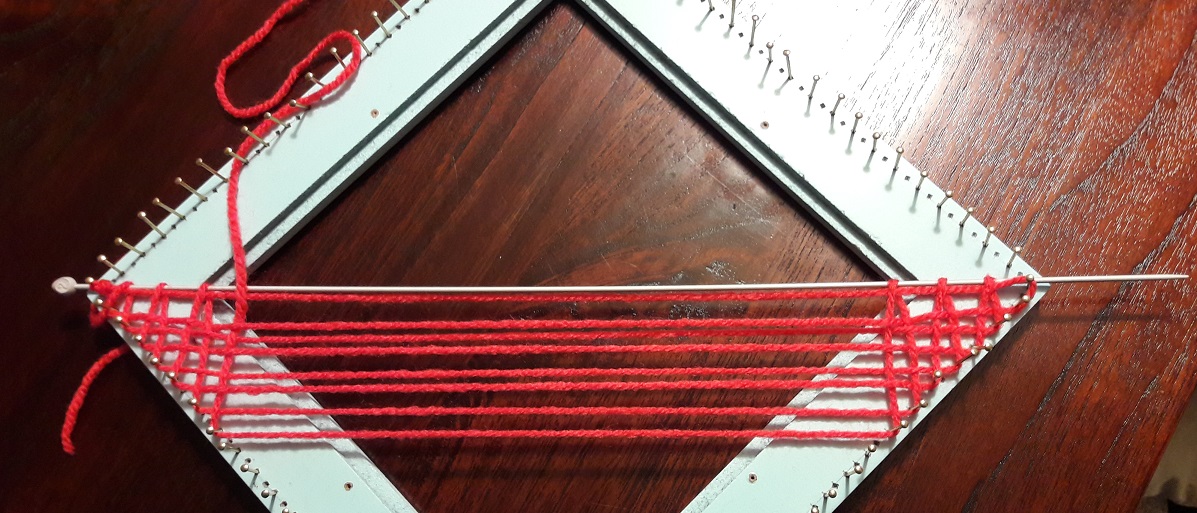
I know, maybe it’s a bit strange to mention in a tutorial what doesn’t work, but I also like to take you on my discovery travels, to try to stimulate you to just try something yourself. You will ony gain more insight by doing so! So, some pictures and some explanation on what didn’t work. I showed it with some thin red yarn to show it clearly. Click on the pictures to see an enlarged version.

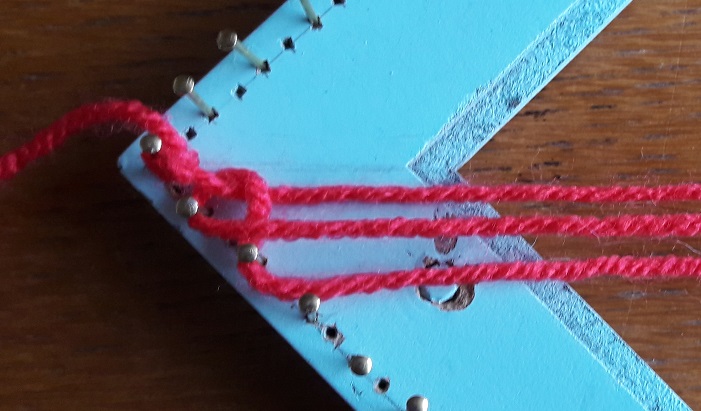
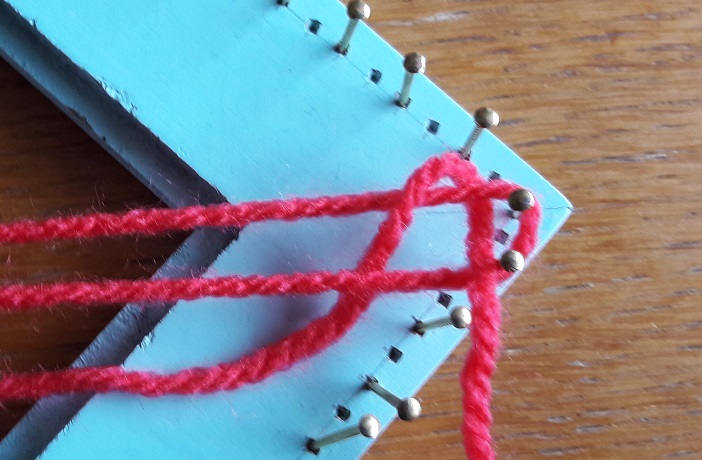
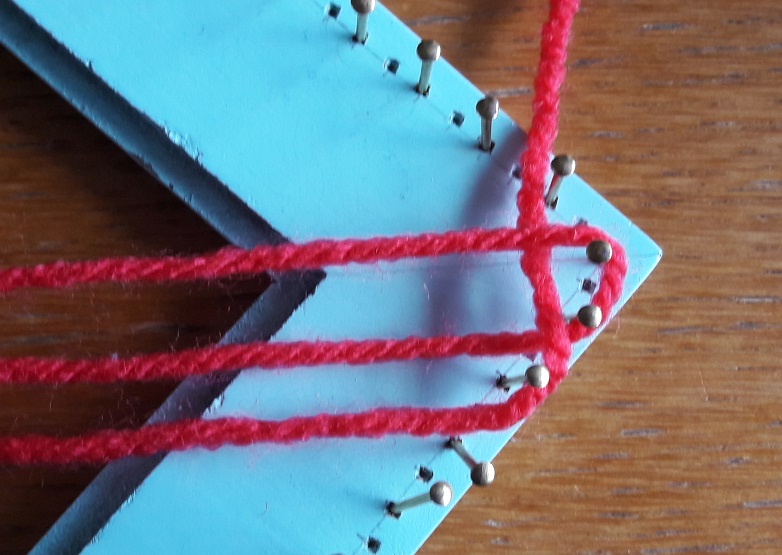
First this picture, that shows what normally happens when weaving on the bias. Step 2 of the drawing above is done here. My first idea was to take the upper red thread, that went around the nails (at nr 6 and nr 7 in the drawing), to take it off, and ‘fold’ this back and pull or weave it through. So, folding the upper red thread over the middle diagonal thread to go to below, and then under the lowest thread.

As you can see in the picture, that looked very promising!
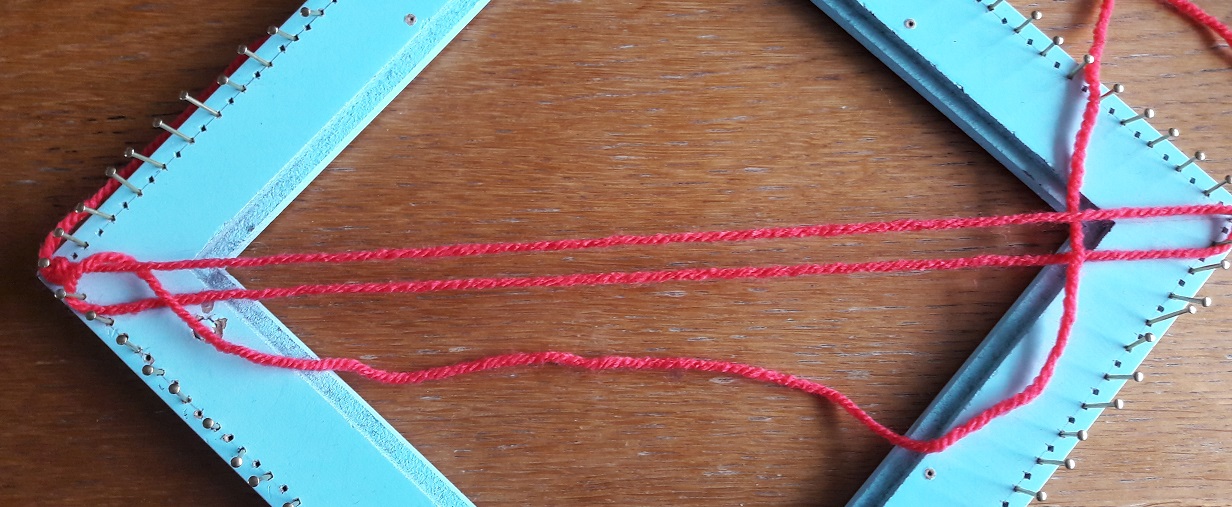
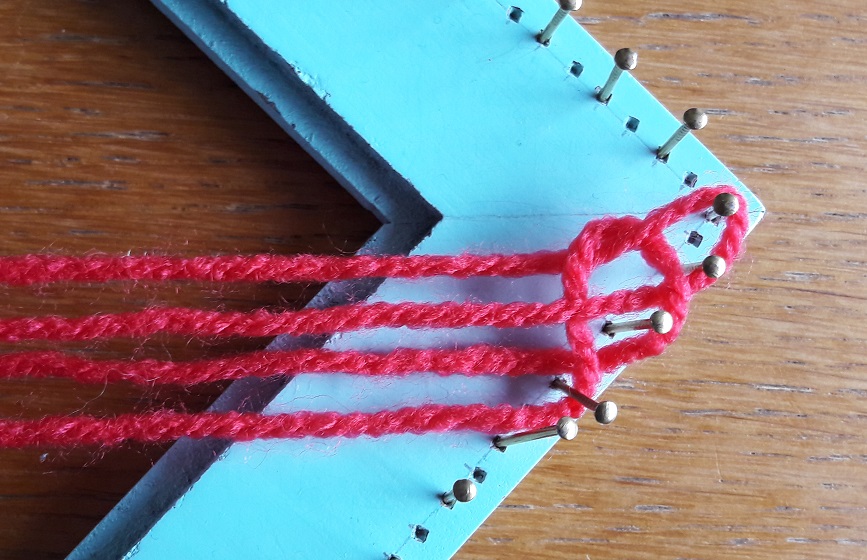
When I laid the thread around the first free nail on the left side, that looked good. So, to the other side:
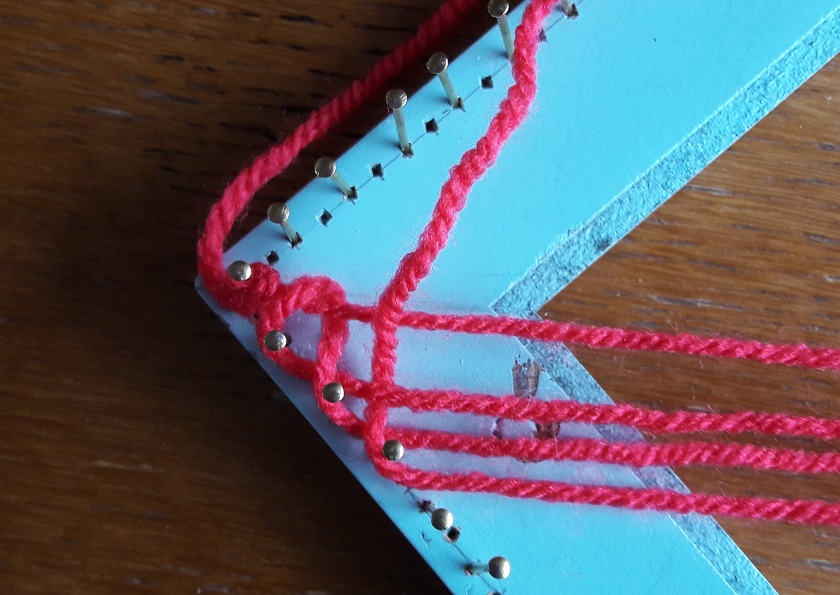
Oops! You can see it. I could put the lower thread around the 3rd nail, counted from the top, or maybe the 4th nail, but there we have the thread that goes to the ball of yarn, that has to go the left again. And you cannot do that this way.
Okay, what now?
How can it be done
When I learned to make square weaves on a square pin loom, I learned, when weaving the yarn through, to start with going under the first thread, over the next, and so on, and always end with going under the last thread. Especially in the beginning that was something I really had to remember. But I always wondered: maybe you might as well start with going over the first thread, under the next, and so on. I never tried it, but my feeling says it shouldn’t really matter. With that in mind, I figured: ‘could that be the solution?’ So, just tried that, and guess what 🙂 !
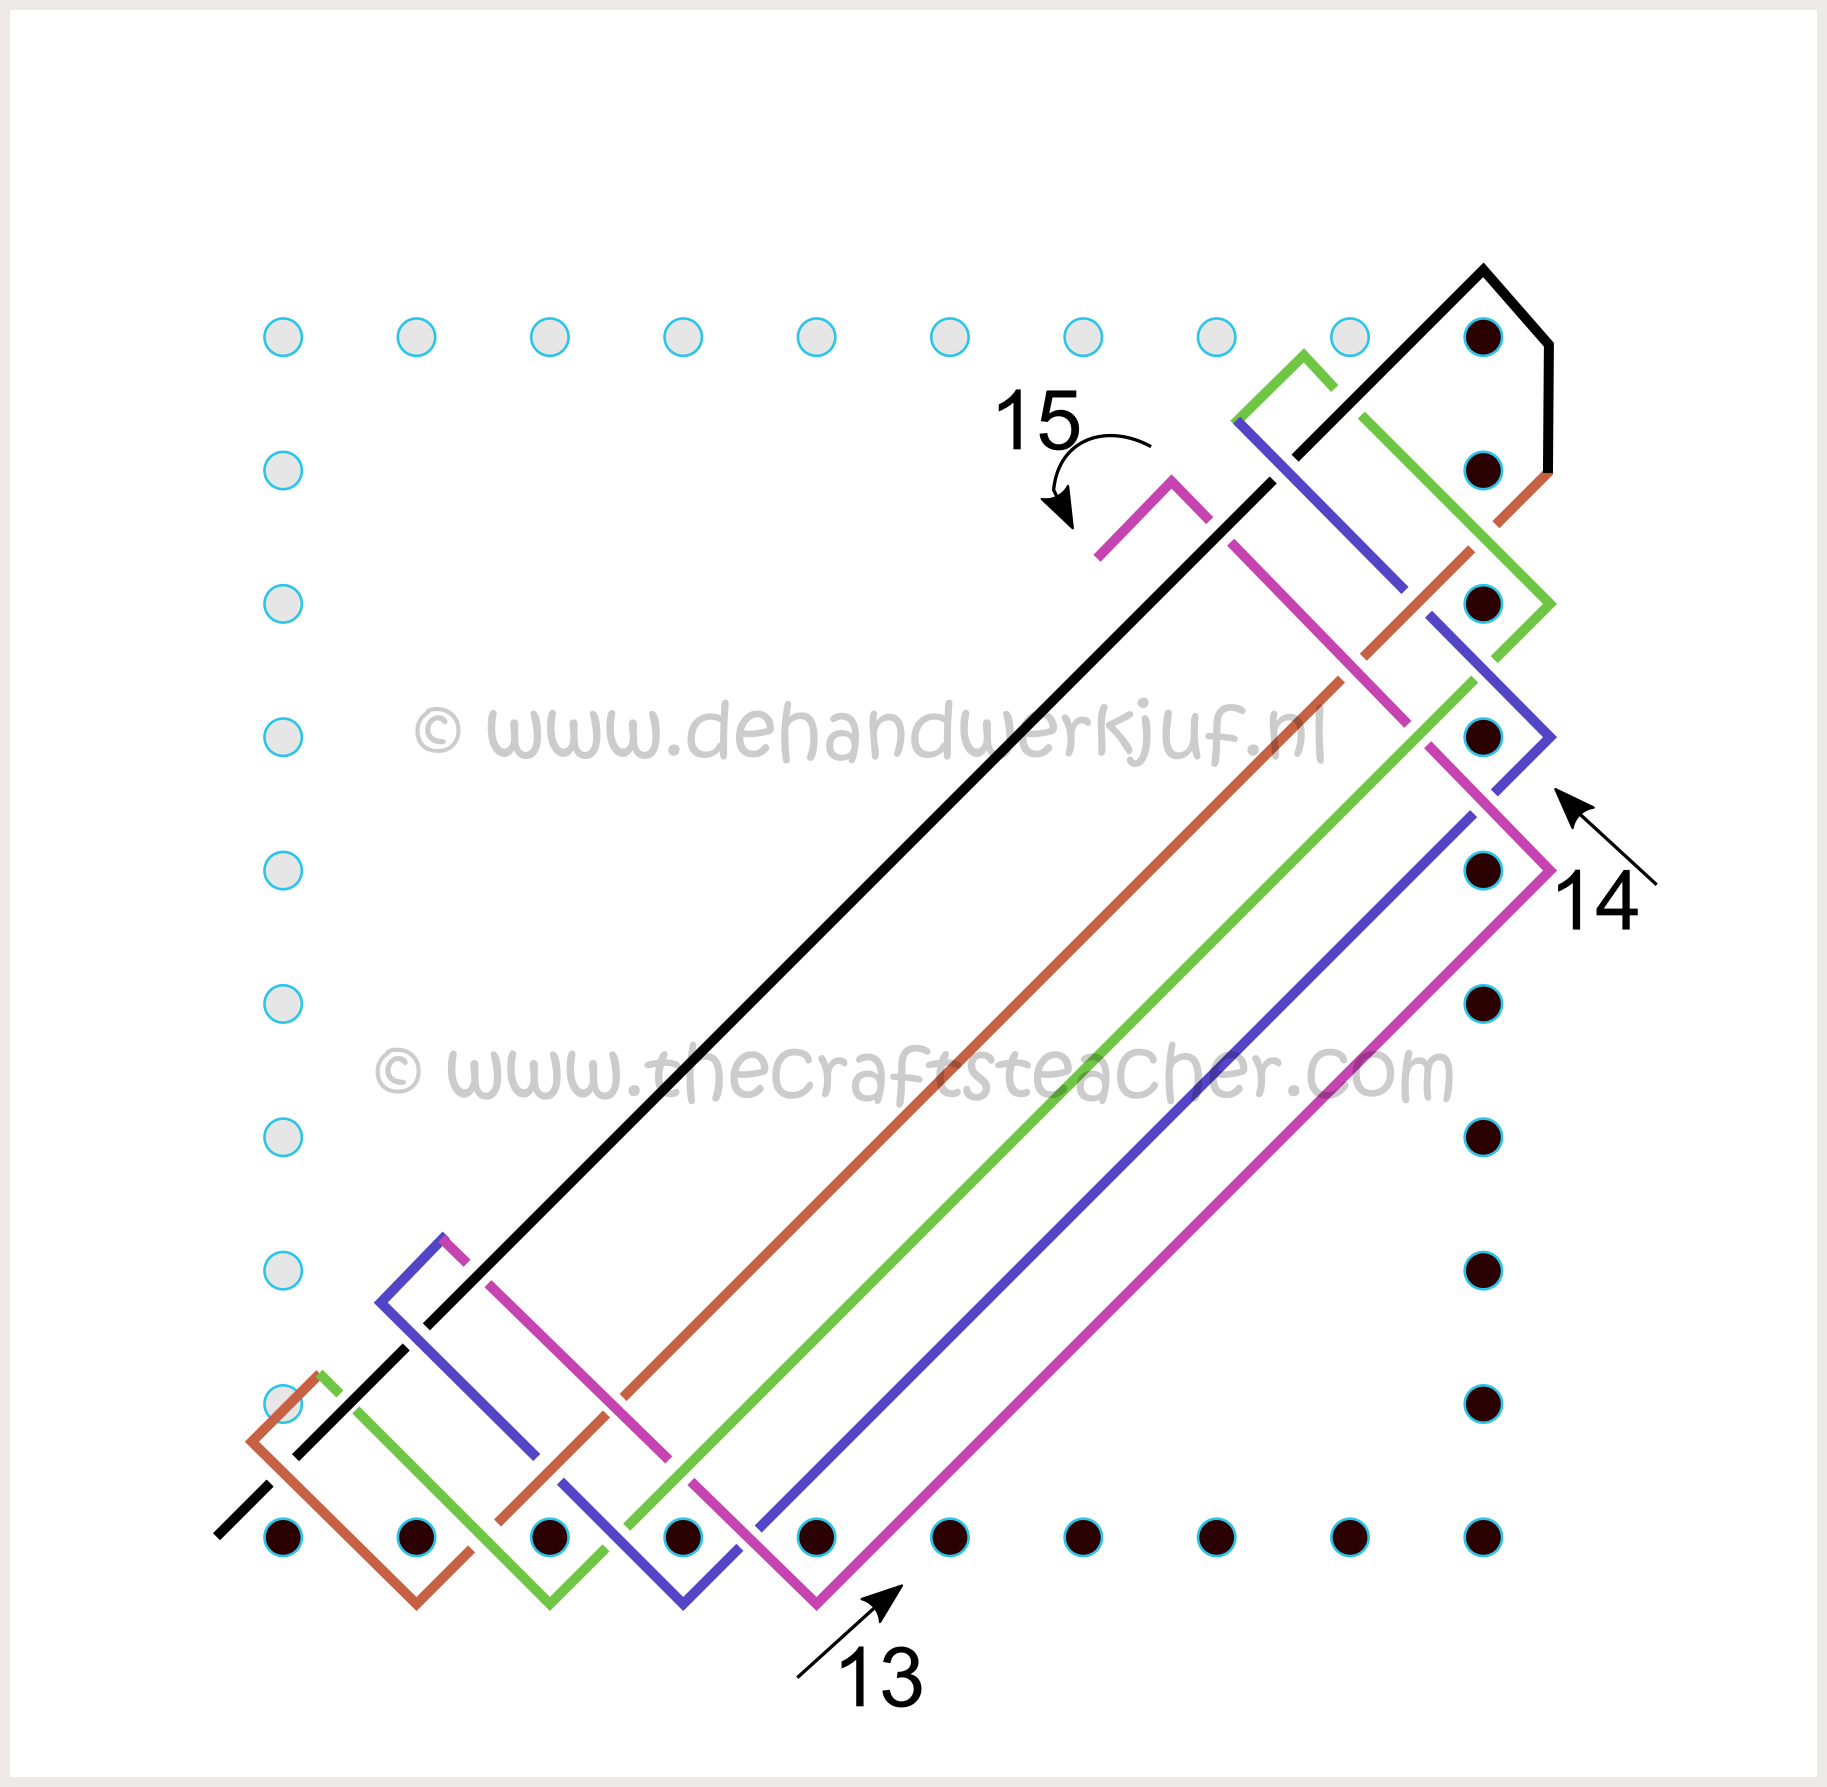
Steps 1 and 2

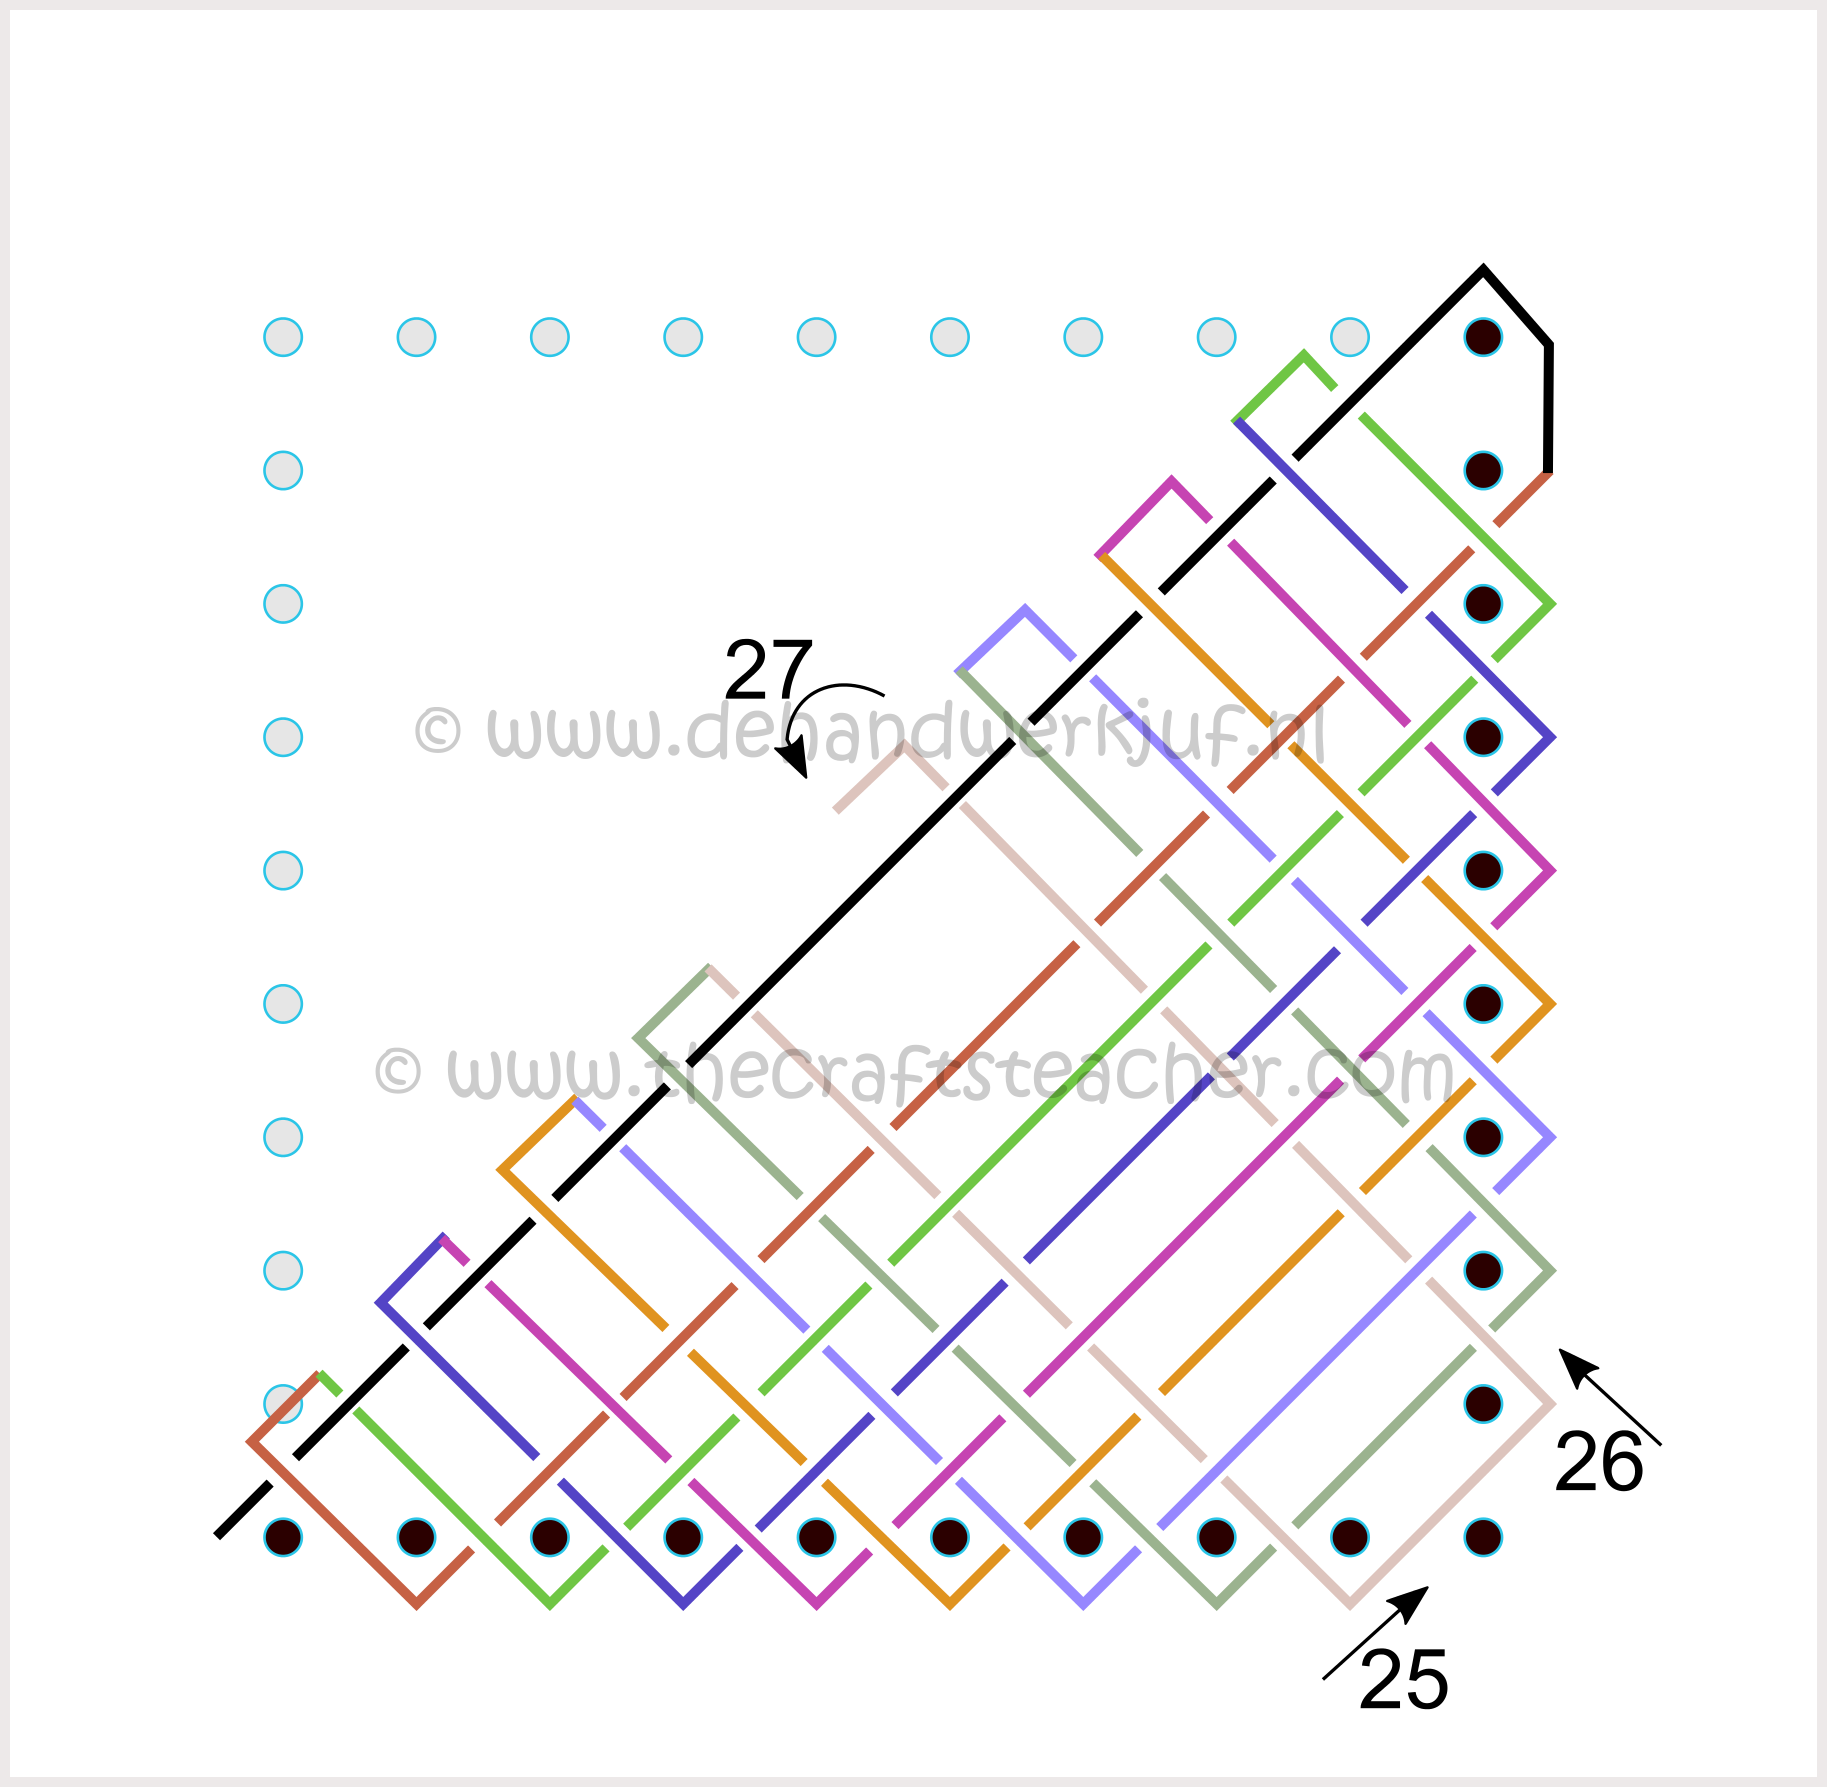
The first step is just as usual. Step 2 is a little bit different. When the yarn goes to the left (see from nr 5 to nr 6), the weaving thread goes over(!) the first thread (the black line)!
Step 3
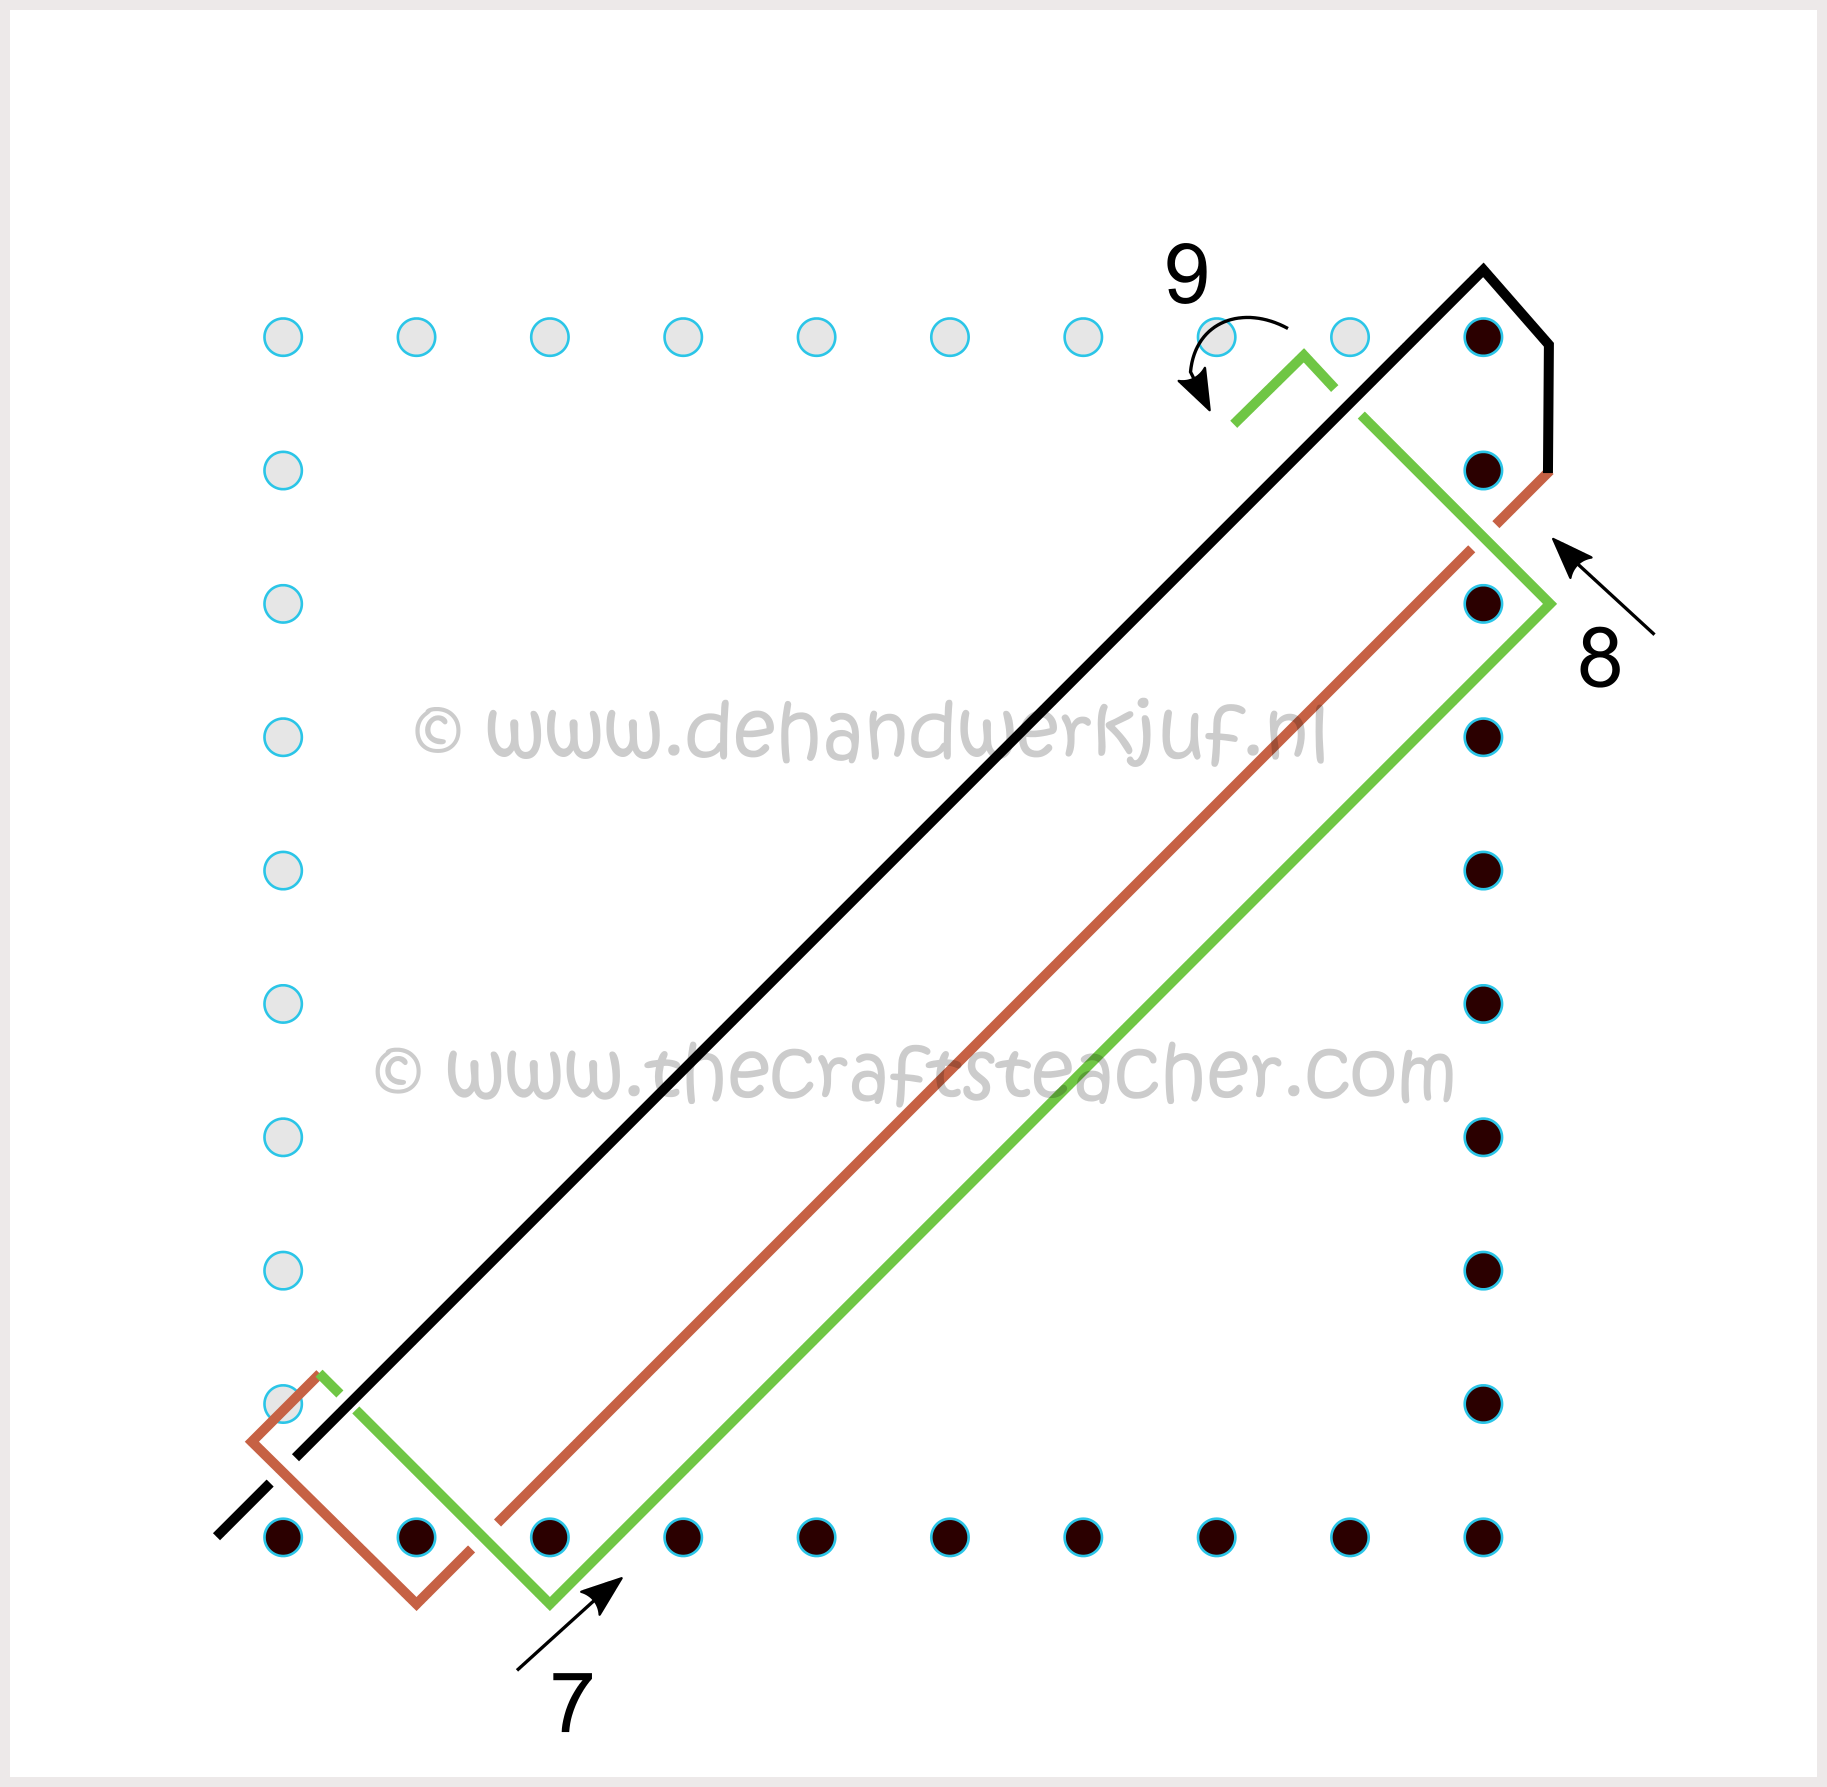
Now the thread (the green line) goes back to the bottom (from nr 6 to nr 7), and you go under the first or top thread (the black line) and over the second or lower thread (brown line).
The thread is put around the next free nail and the loop is pulled up to the right (from nr 7 to nr 8). There the loop is put around the next free nail, and now the weaving, that is done on the left side, is automatically mirrored at the right side.
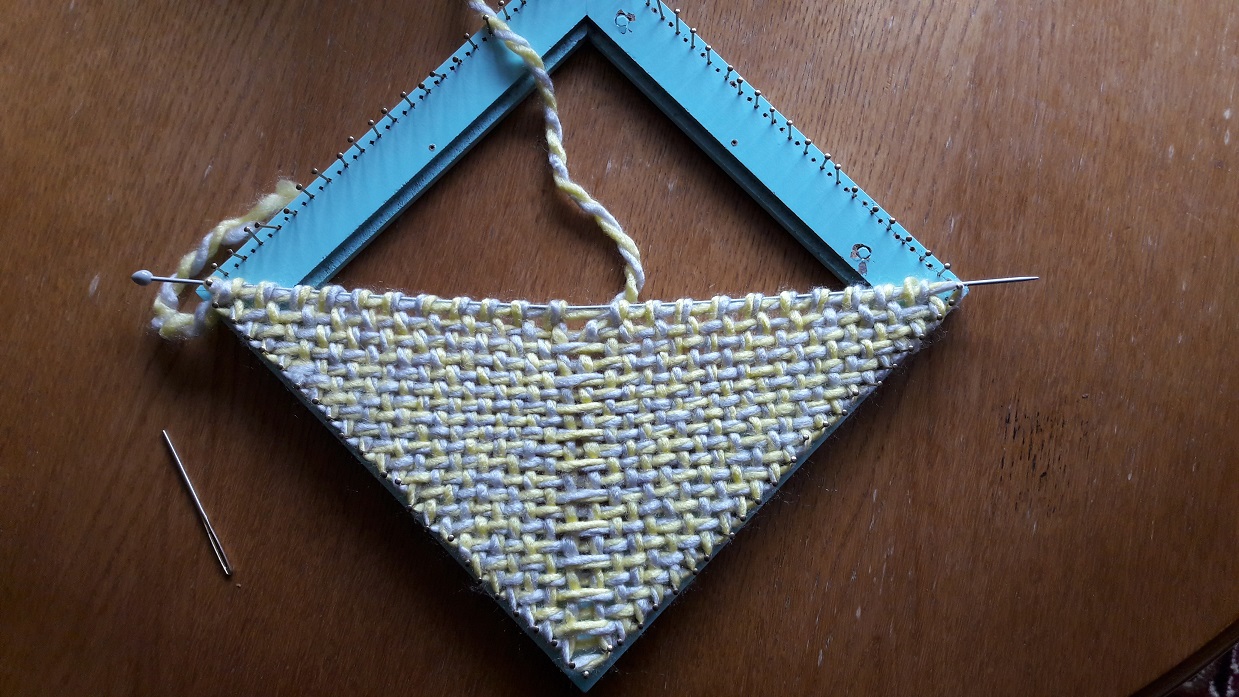
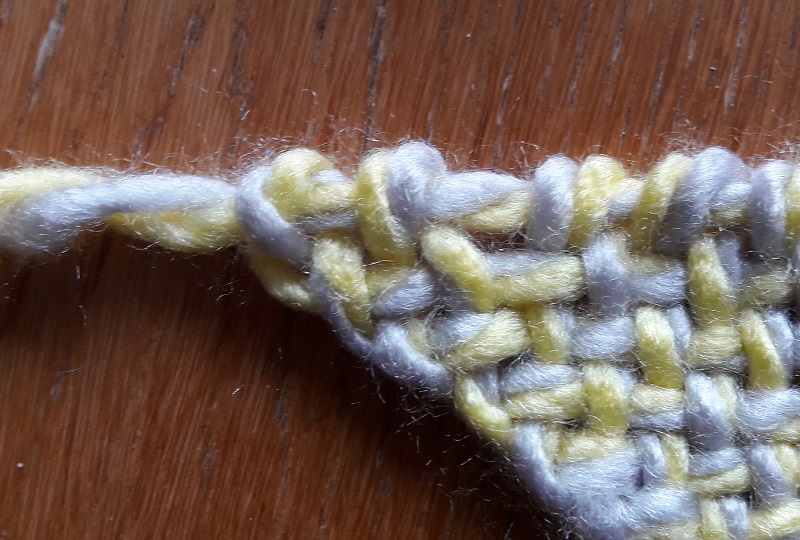
On the detailed pictures here after you can see how it looks for real.

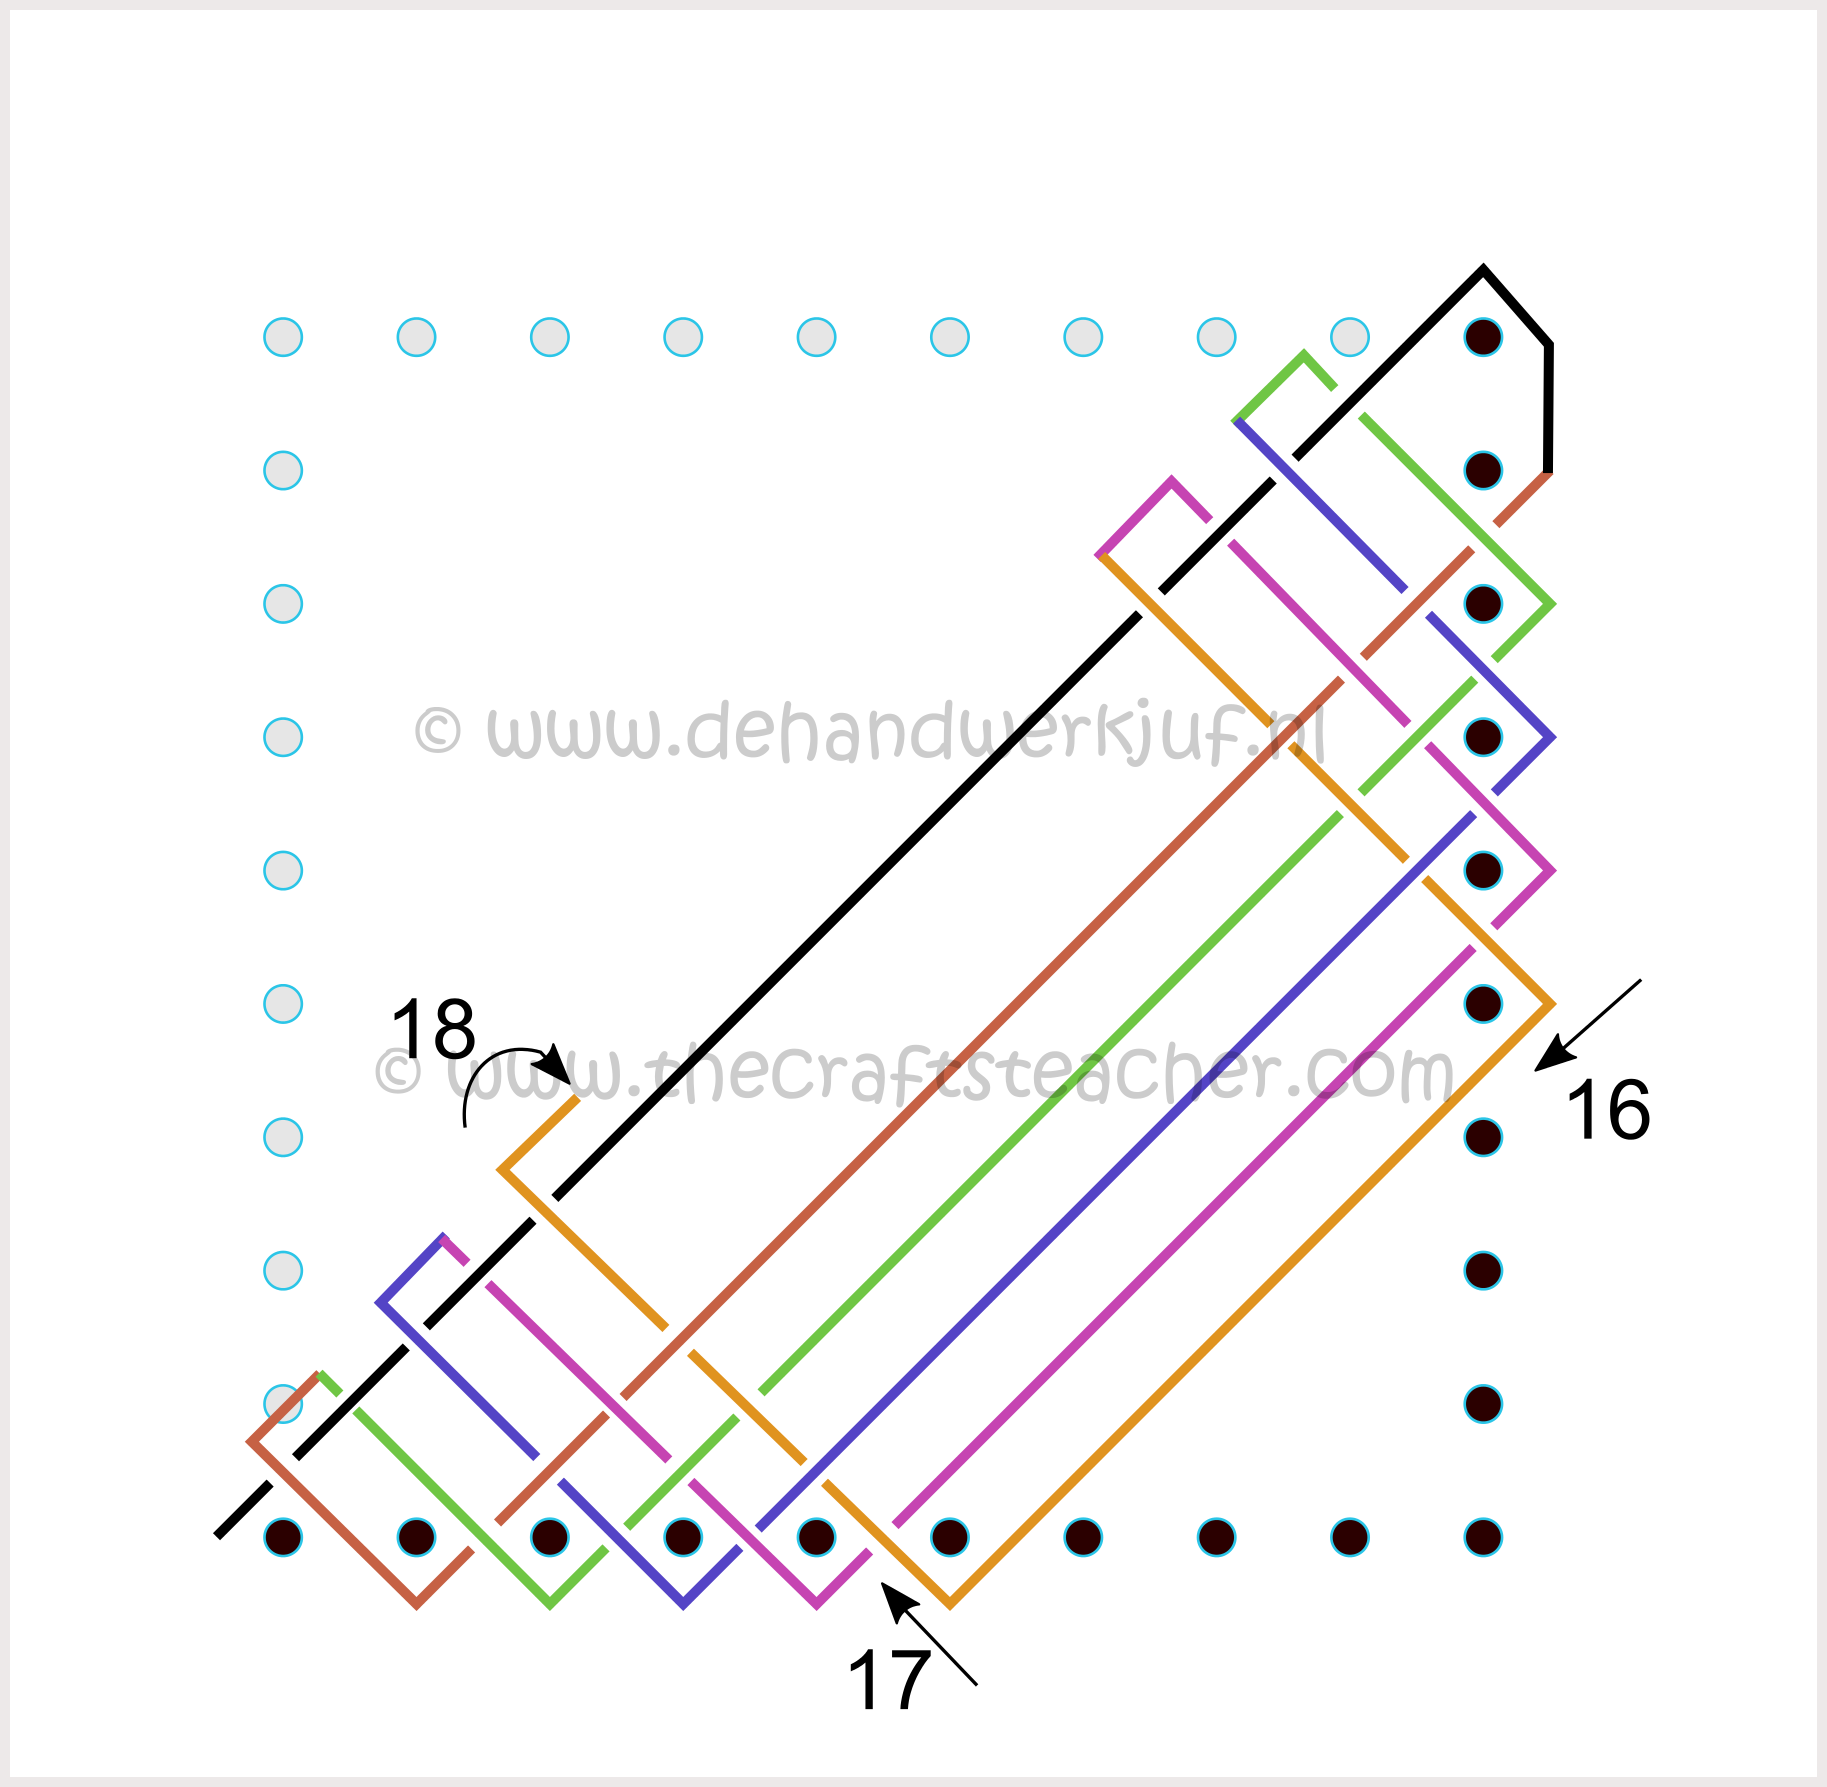
Step 4
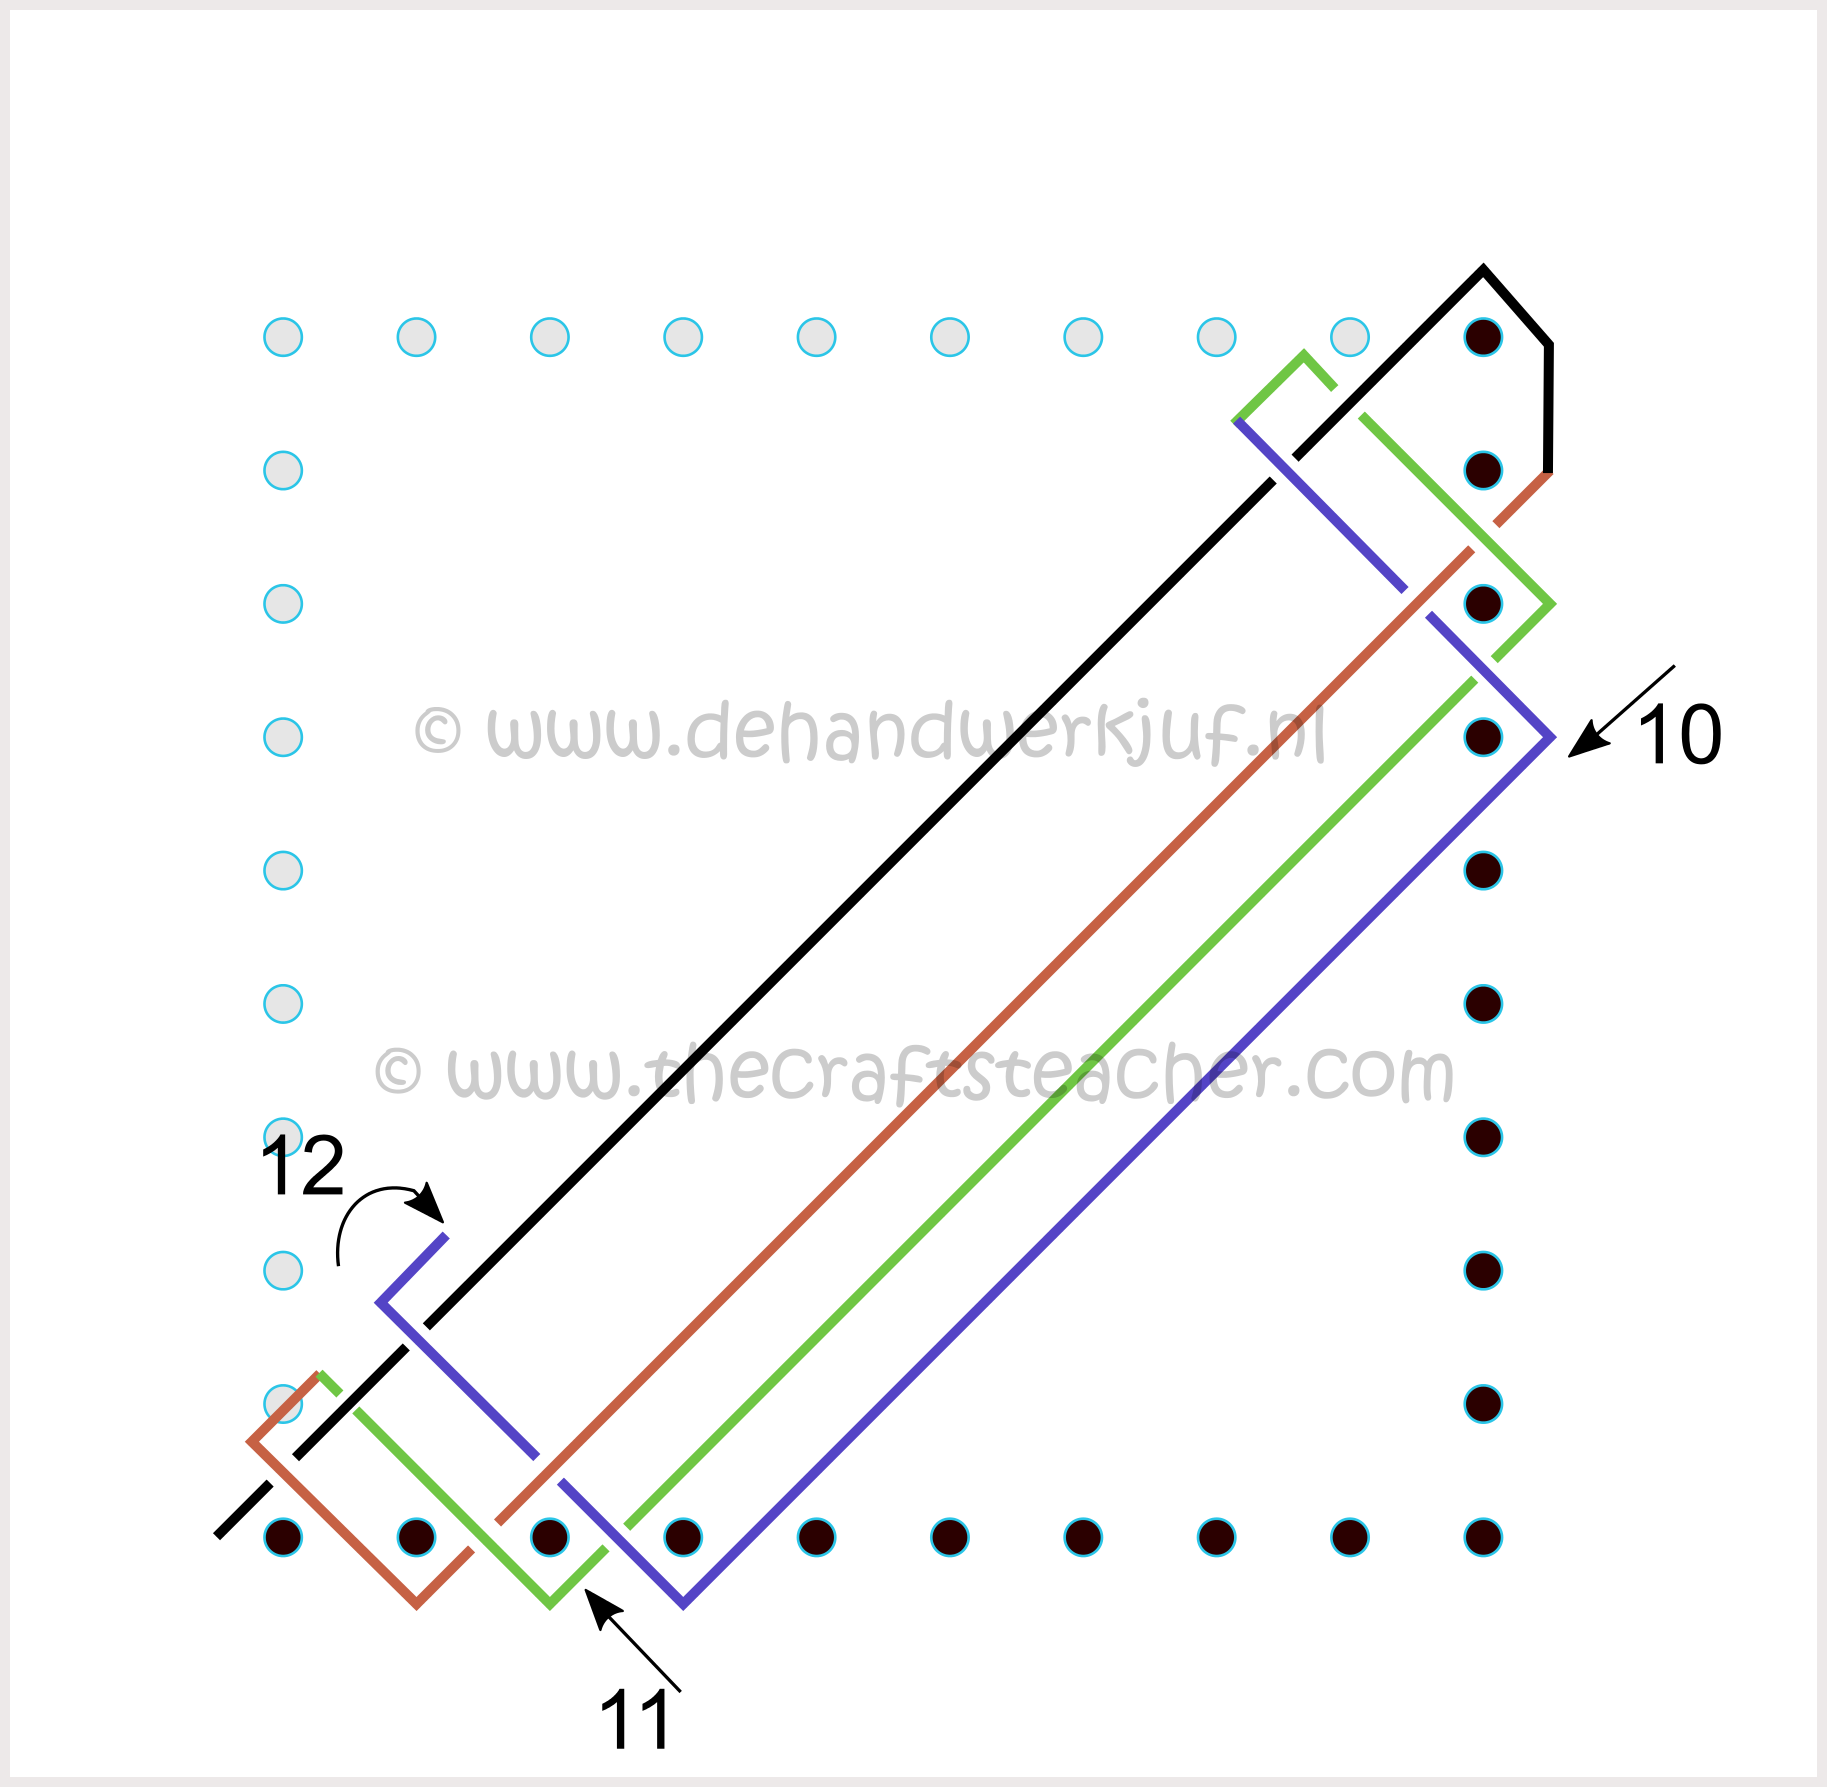
At nr 9 we will make a turn around the middle diagonal thread, and this time you go back over(!) the thread, under the next and over the last. The loop is now again at the bottom side of the piece, and can be put around the nails at nr 10 and nr 11. The result of the weaving at the upper right side is automatically mirrored at the left side this time. You now have the same starting position as after step 2. In the pictures you can see how it looks for real.
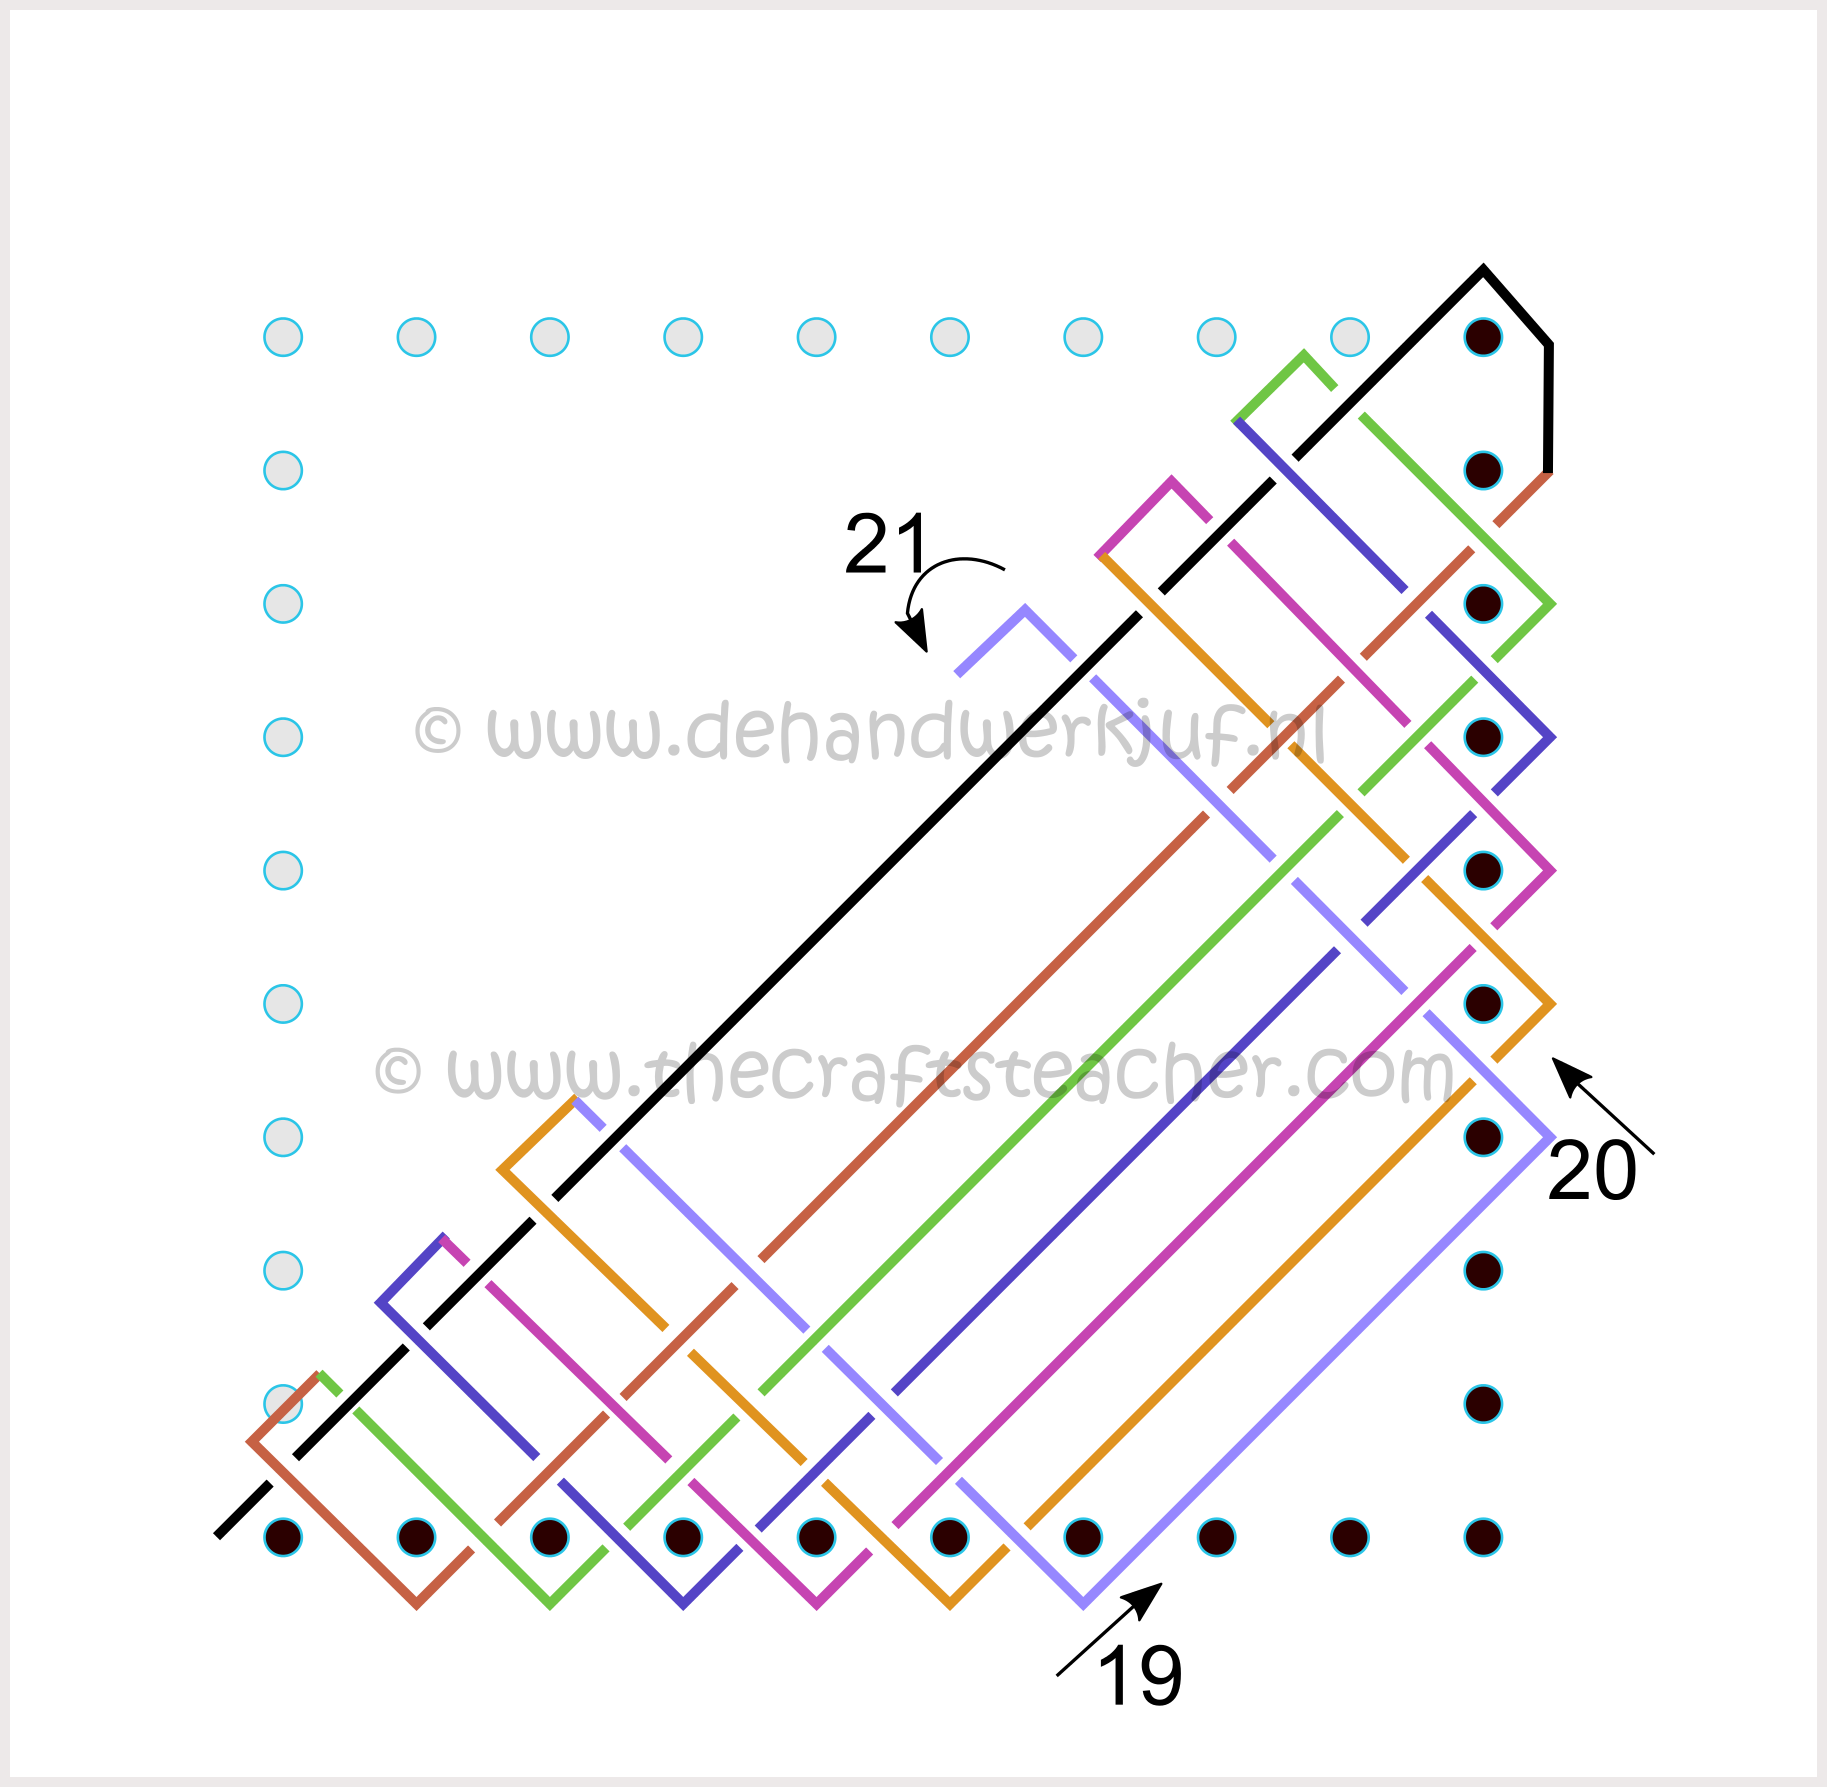
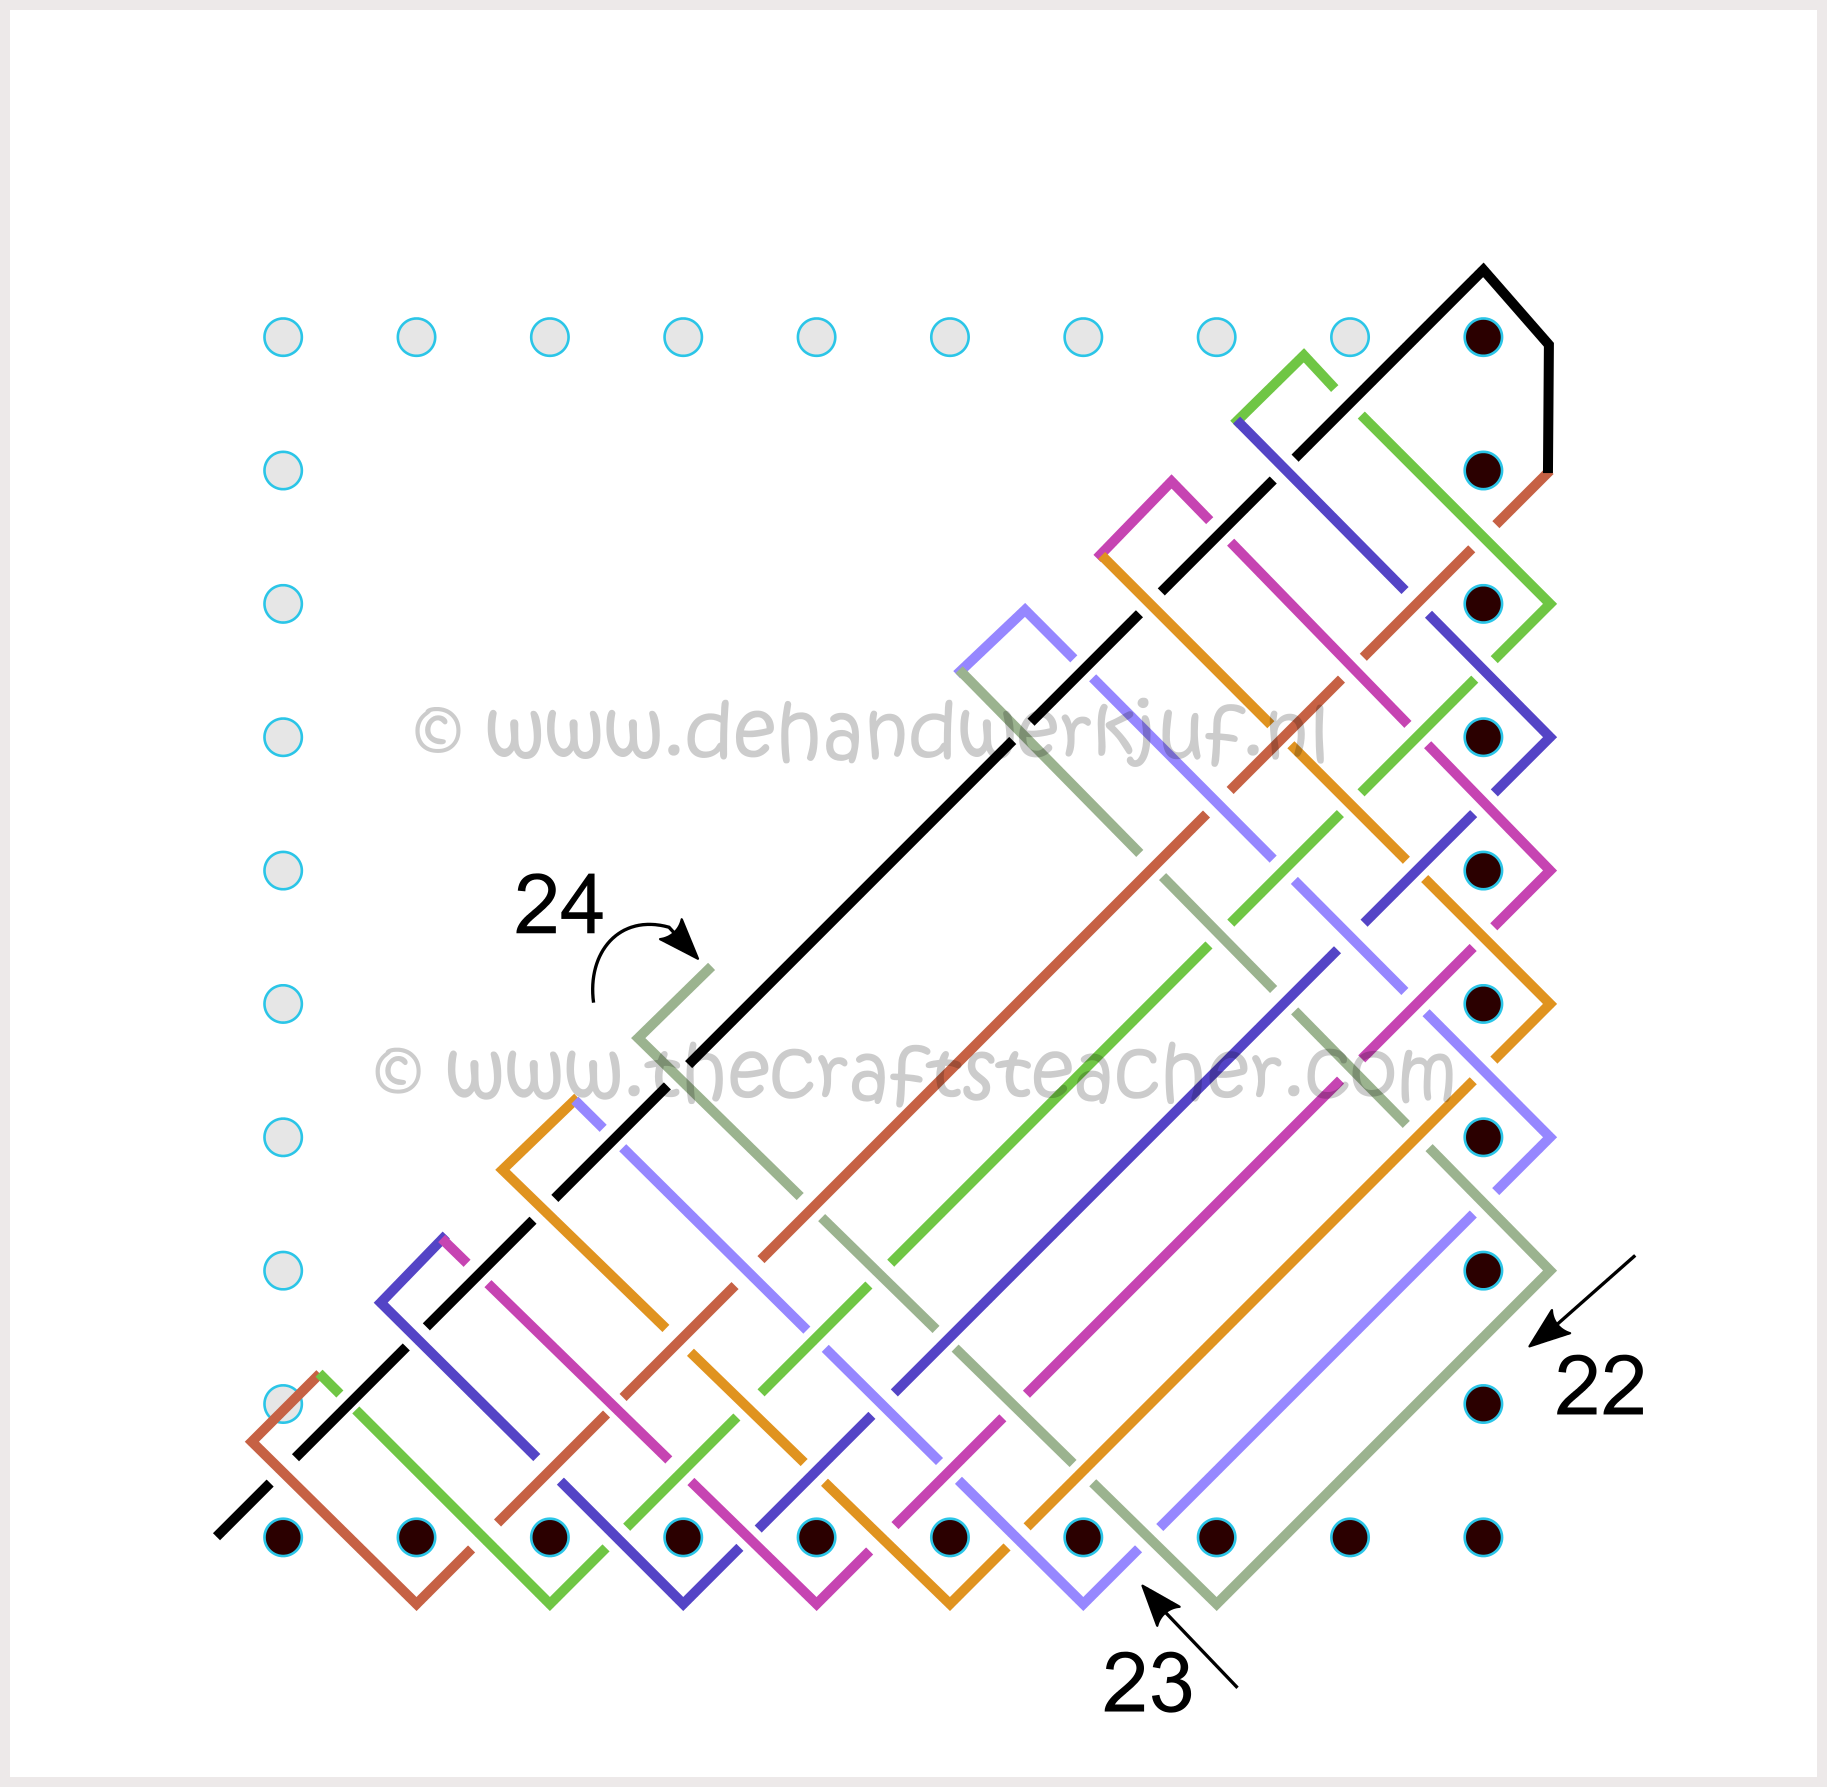
The same repeat over and over
What happens now is just a repeat of the previous steps.
- At the left side of the piece when weaving the yarn through, you go down under the thread, and the weaving is mirrored at the right side.
- At the right side of the piece when weaving the yarn through, you go down over the thread, and the weaving is mirrored at the left side.
Next steps
The final step
You now have gone around the last 2 nails, and now it is time, just like with the regular weaving on the bias in a square, to cut the thread in order to weave the yarn back through, through the middle to the corner point.

And now you have to pay attention for a moment. In my drawn example I ended at the upper side of the piece. I have 8 nails on each side of the loom in between the corner nails, an even number. If you have an odd number of nails between the corner nails, you will end up at the lower side of the piece at the last row. So look closely if you have to start weaving with your needle by going over or under the middle thread! But, I have no doubt you will see that right away! In my case I have to go over the mddle thread.
Some tips
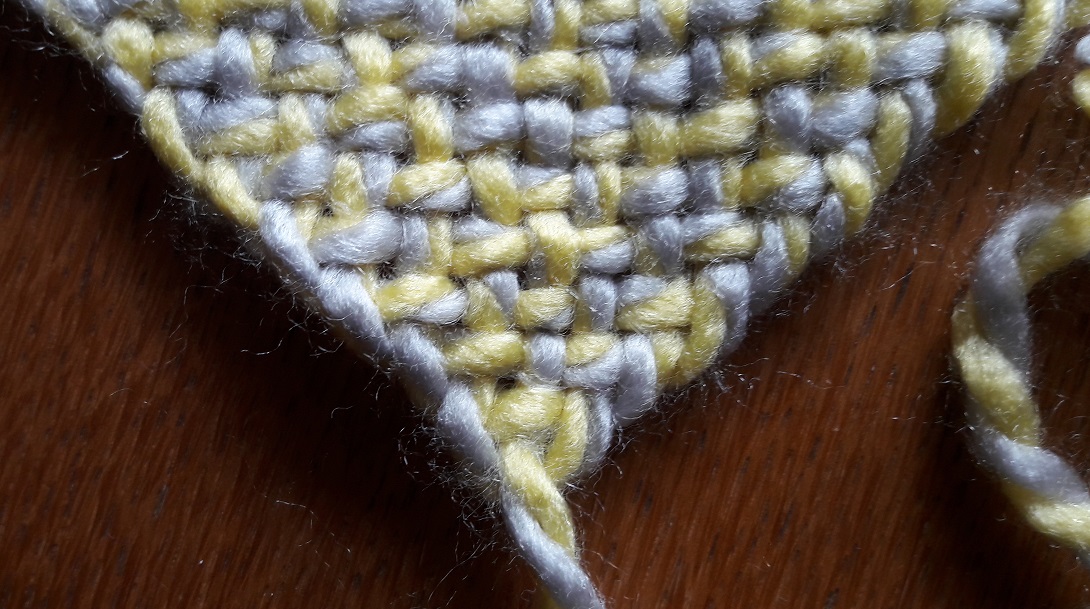
You don’t have nails in the middle of your loom on the diagonal, so, first of all, you don’t have a ‘guide’ or hold fast how the threads have to go straight nicely, so you have to depend on your own sight. That is really quite easy, especially when working with the right yarn thickness. The more you come to the middle and the end of your weave, the clearer it gets. You can always correct the lines neatly.
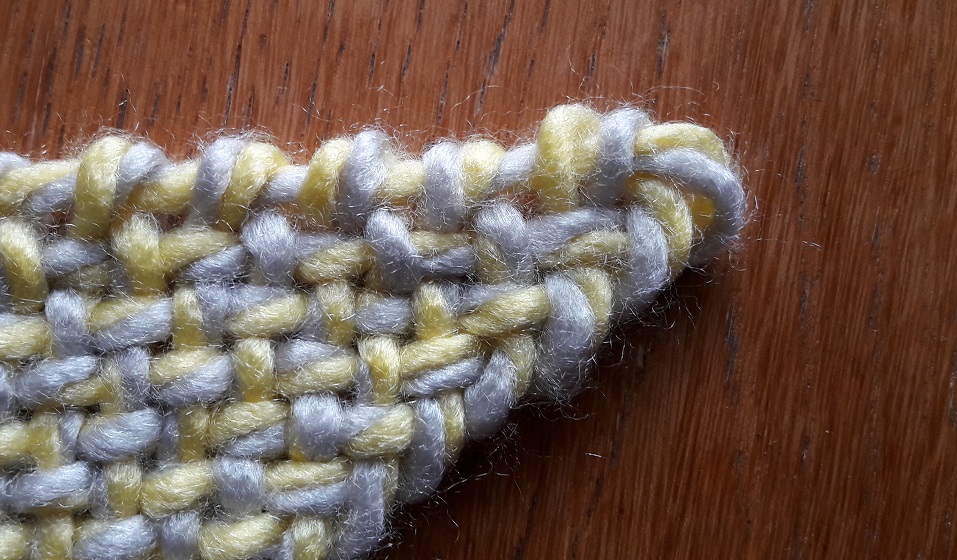
Second: as you already can see in the detail pictures at the corners, the weave can draw in in the middle. And I have two tricks to prevent that from happening.
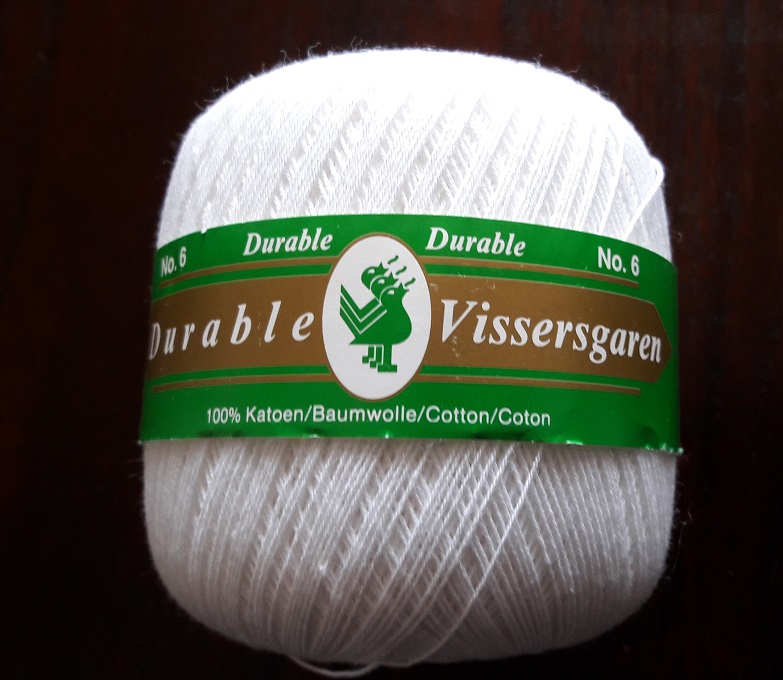
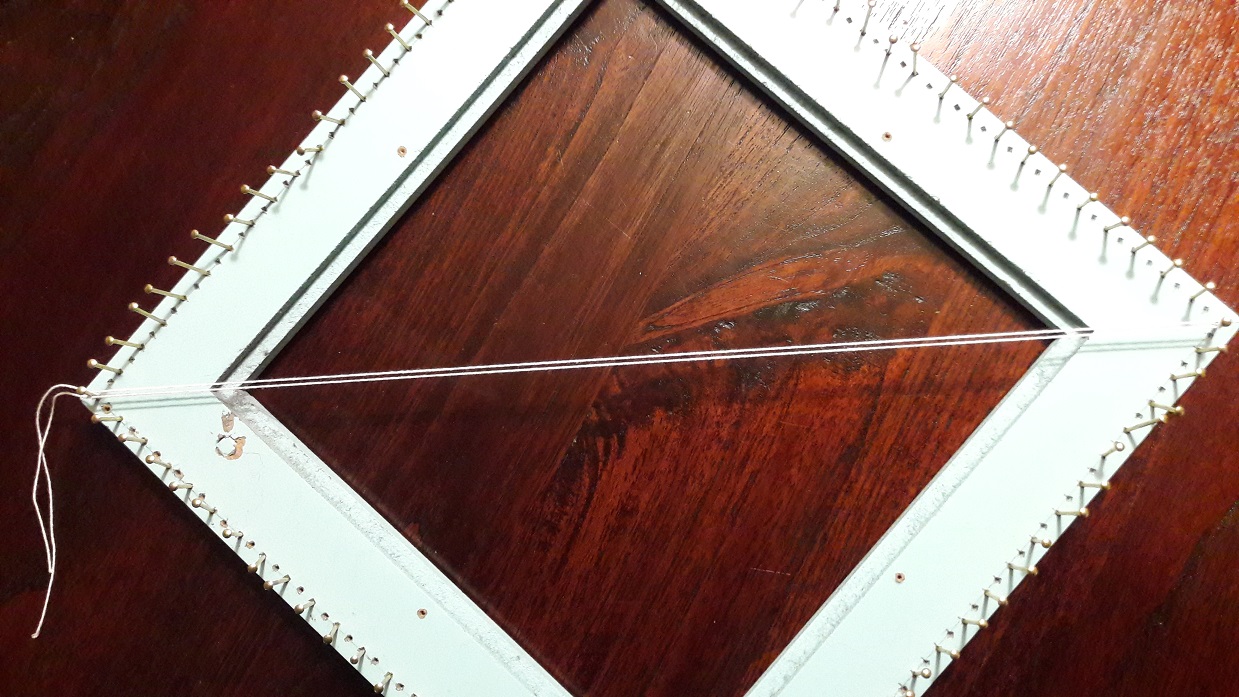
Trick 1: Use a strong line of yarn. This is a trick I learned when weaving a double thickness on a regular weaving loom. You can also use a helping guide line with that to prevent your middle ‘seam’ from pulling in. Take a yarn that’s super strong and has no stretch, and also that’s not too thick. I used this Durable vissersgaren. It’s super strong, very thin, ideal for this. I put a thread around the two opposite corner nails, pulled it taut, with quite some tension, and made a knot in the ends. Don’t knot it onto the nail, so you can just remove it and reuse it again later (if you don’t lose it 🙂 ). And then just start weaving. Pretend these two threads are just part of your middle thread. Keep in mind that these extra threads are just guiding threads. You really shouldn’t pull on it by putting tension on the weaving thread. Let everything lay down in a relaxed state! When you’re finished weaving, and you pulled the piece of the loom, you can simply pull these helping threads out.
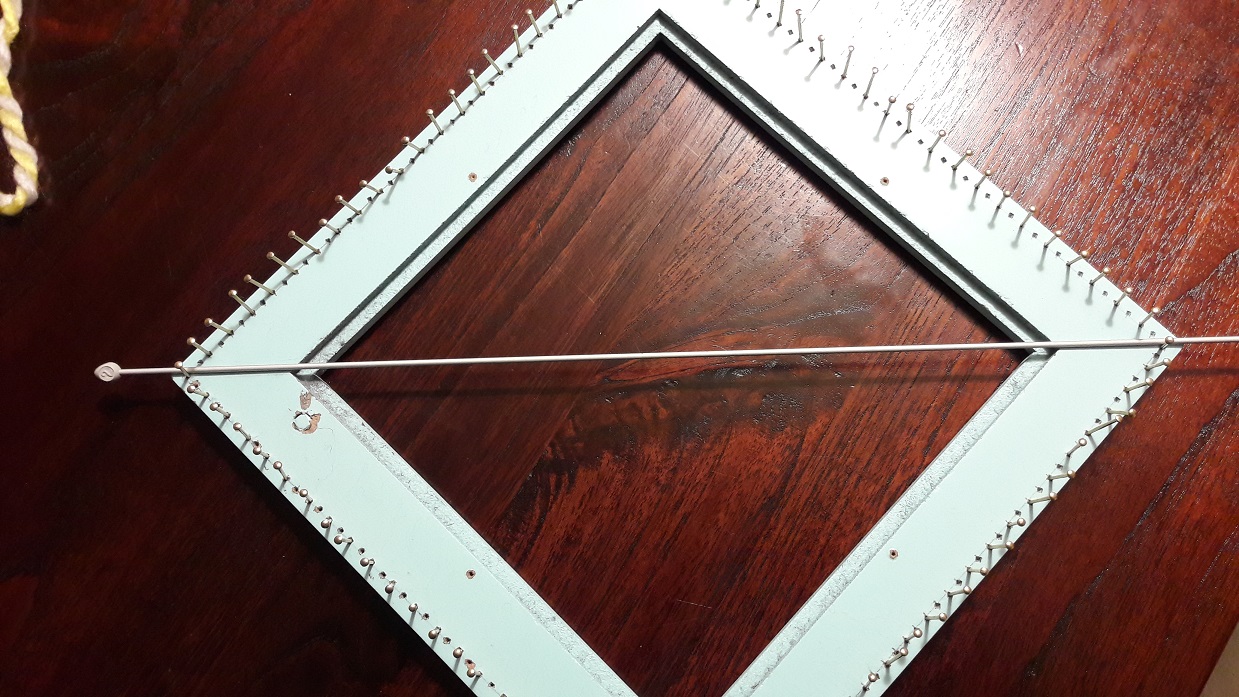
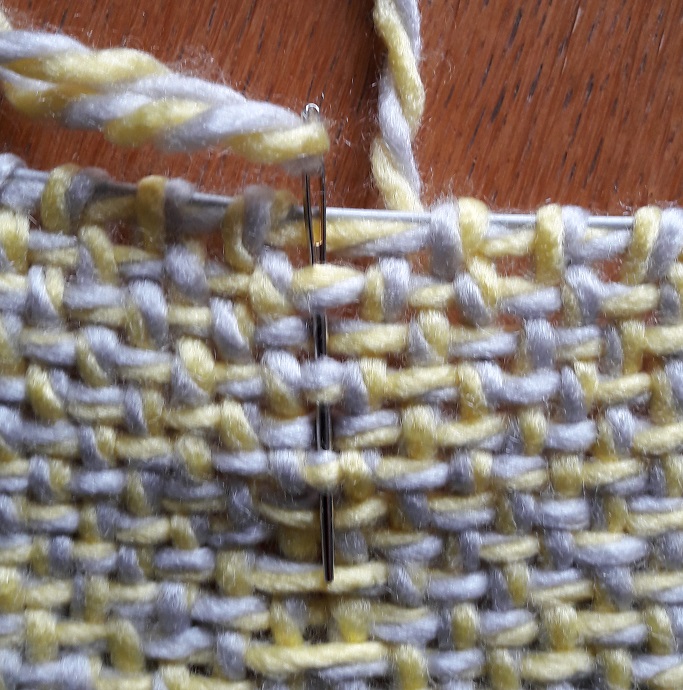
Trick 2: Use a thin knitting needle. Changes of pulling in the middle are even smaller. I also added a picture how this looks while weaving. And the same rule for this applies: no tension on the threads! When removing the knitting needle you really don’t want to have the middle pull in after all!
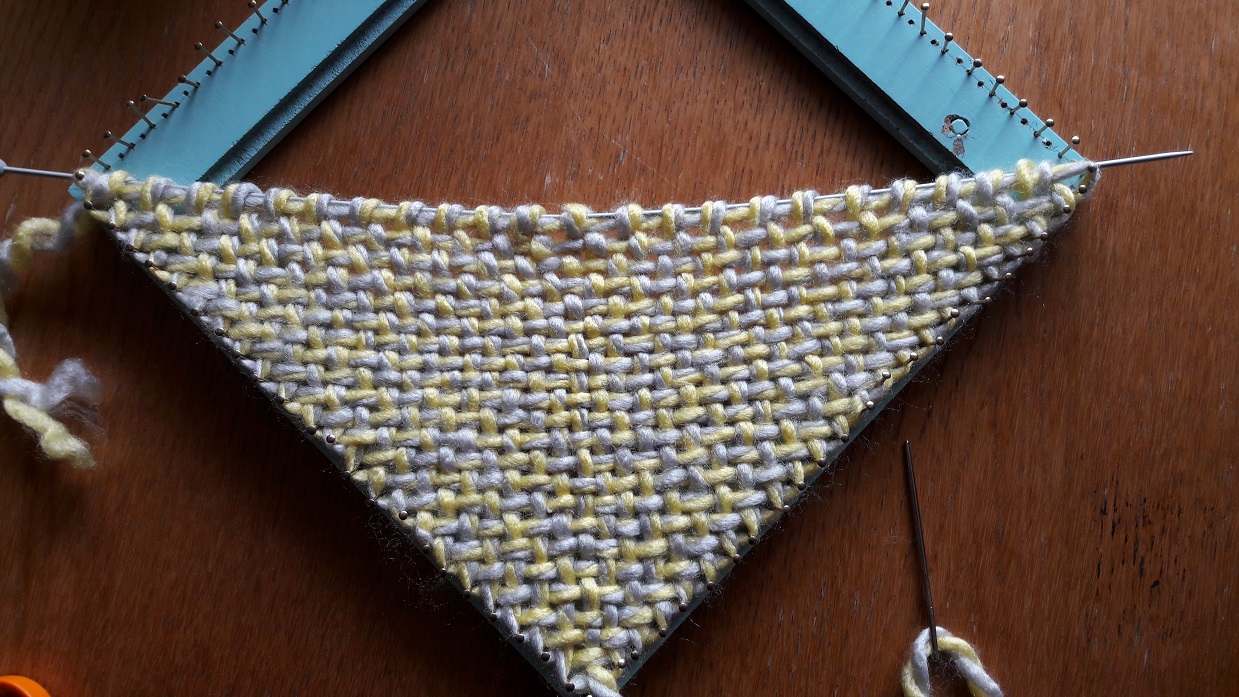
Some pictures
The video
Well, I didn’t make the video yet on how to do this, but it’s on my list to do this first the moment we will be filming again. The moment I have it on my YouTube channel, I will post the link here. You can also go to YouTube and subscribe (go to my channel here), and switch on the alarm, so you will be notified right away when I released a new video!