
Index
This tutorial is too large to show on 1 page, so it is spread over multiple pages. Use the links in the index below to go to the page where you want to be.
- Introduction, abbreviations and symbols, and start tutorial 1: click here
- Start tutorial 1, setup and first rows: click here
- tutorial 1: slanted lines, open structures, part 1: click here
- tutorial 1: slanted lines, open structures, part 2: that is this page
- tutorial 1: slanted lines, open structures, part 3, working at the back side: click here
- tutorial 1: slanted lines, closed structures, part 1, with triangles pointing upwards: click here
- tutorial 2: slanted lines, closed structures, part 2, with triangles pointing downwards: click here
- combining structures and summary: click here
- tutorial 3: click here
Video
For the basics with open structures you can watch this video: https://youtu.be/HXDFq8Cg82U.
The instruction chart
 This is the instruction chart that you also saw on the previous page. In this part of the tutorial we will focus on row 4a, which features something new. Remember that we are now working on the back of the piece, so the instruction chart must be read from left to right if you want to work from this.
Row 4a: a bit of solid squares with some extras
|
Notation: Row 4a – back: color 2 to back, side st, 4b & b{ir}, *(2b & b{ir})* 2x, *(b{il} & 2b)* 2x, b{il} & 4b, side st Color 2 to back: you see that the first stitch in row 4b is a stitch at the back (the ‘b’), so you put the yarn to the back. In this case it is towards the front of the piece. The following is partially standard notation for solid quares. The 4b means that you make 4 stitches at the back, directly next to each other without chain stitches in between them, at the front of the piece! Note: the 4th stitch is made into the underlying chain opening. Then comes something new: ‘& b{ir}’. The ‘&’ means that what follows next is worked directly behind the previous one, without working an in-between chain. This is something you should also remember when we start creating closed structures. The ‘b{ir}’ means that you have to make a back stitch, but you have to insert on the right side. This stitch is made where a diagonal line runs at the front of the work. It is therefore very important which side you insert, so that the diagonal line continues to run smoothly! Look at the photos below or watch the video to see how to do this. Important! This is actually a solid squares part, and that always consists of an odd number of stitches in total. So 4b & b{ir} is a block of 5 stitches. The first and all odd stitches are made in a mesh stitch, the intermediate stitches into a chain space or an underlying double crochet. Further on in the instructions you will see ‘b{il}’. This means that you insert on the left side. This is followed by a 2b. So this is a set of 3 back stitches, right next to each other. The ‘b{il} & 4b’ is a set of 5 stitches in total. |
Making a b{ir}
A tip in advance: if you find it difficult to see what to do, you can go to the next page to see how to do this when you make row 7a. This is crocheted onto the front of the piece, so you can see what is happening a little better. You only have to do it ‘in reverse’ for the next part, because here you are working on the back side.
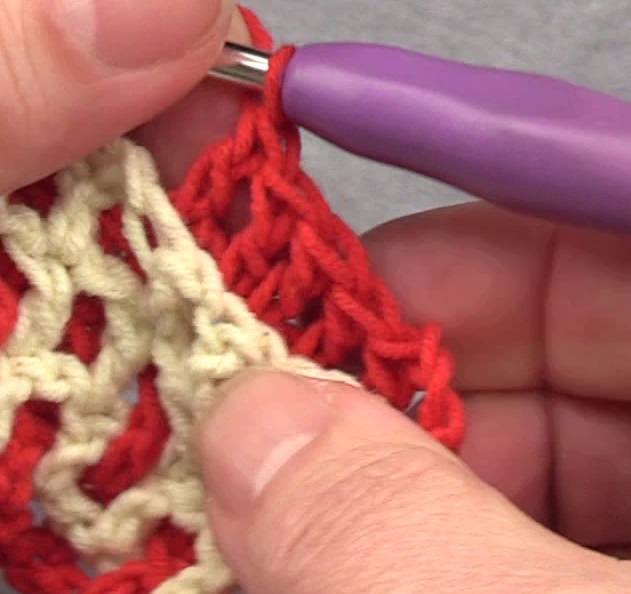
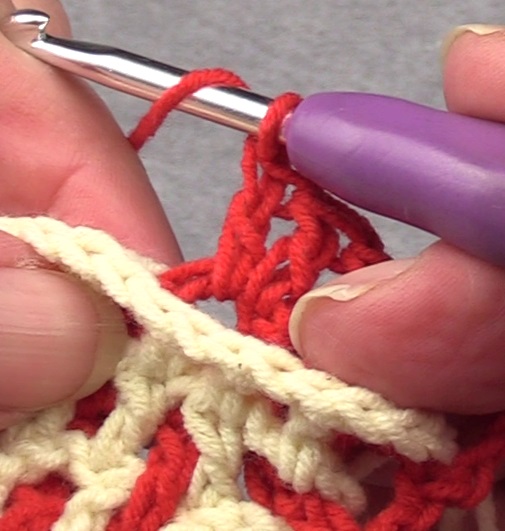 Here you see a screenshot of the 4th double crochet made into the chain-space (of 4b & b{ir}), just before the ‘b{ir}’.
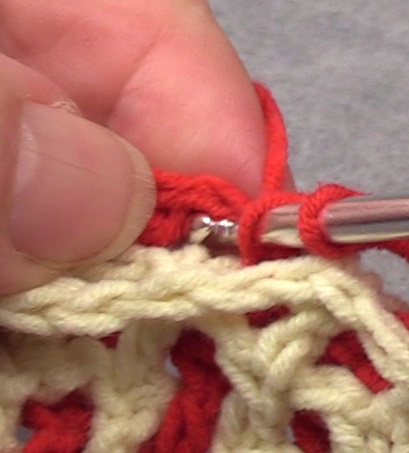
 Here I have turned the piece upside down so that you can see the front. You will see the diagonal line at the tip of the crochet hook.
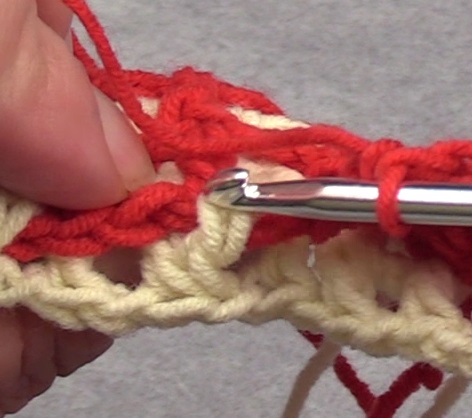
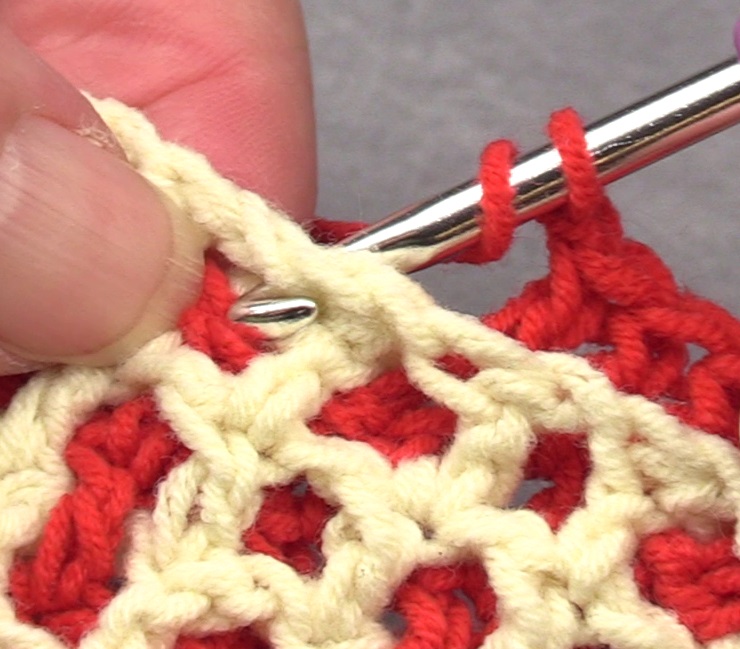
 You now need to work in the next mesh stitch, this is where the crochet hook is pointing. Sometimes you have to pull the stitch slightly to the right to be able to work on the right side of the diagonal line.
 The 5 stitches are done.
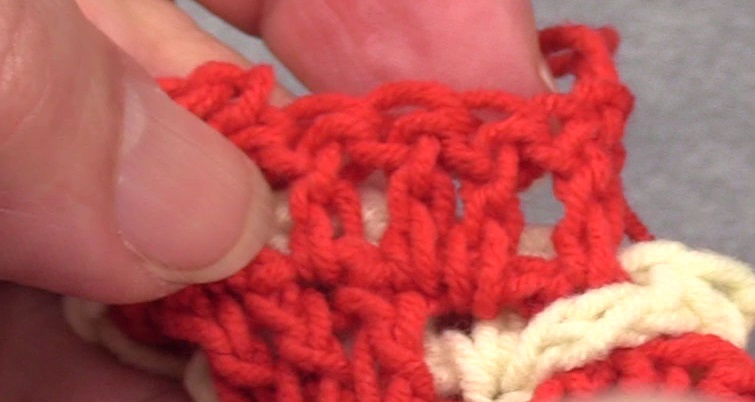 And this is what it looks like on the front of the piece.
 Here the next part is also done with the 2 repetitions.
Making a b{il}
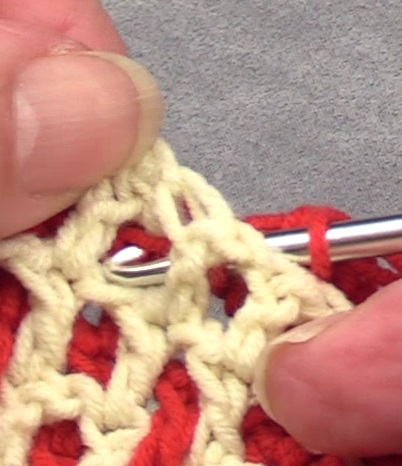
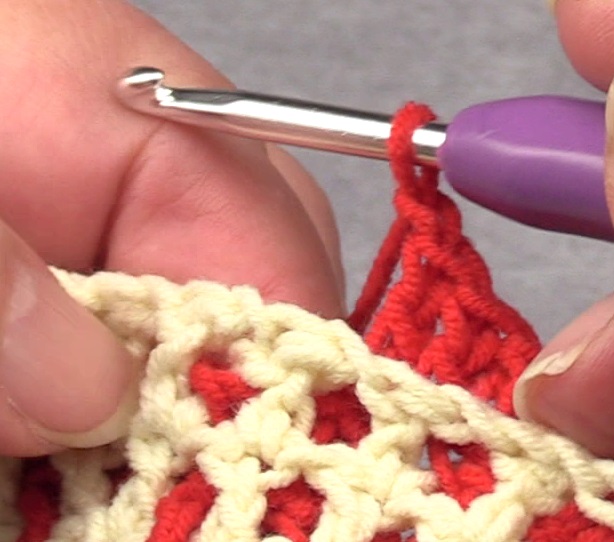
 This is the start of the first repetition of ‘b{il} & 2b’. This time the needle is inserted on the left side of the diagonal line that is on the front of the piece. To do this you sometimes have to pull the stitch a little to the left.
 The next stitch (the first of 2b) is made in the chain space.
 The 3 stitches next to each other have been made.
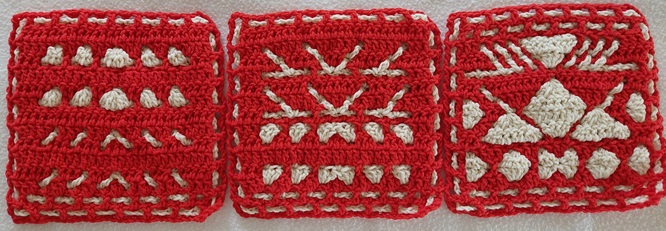
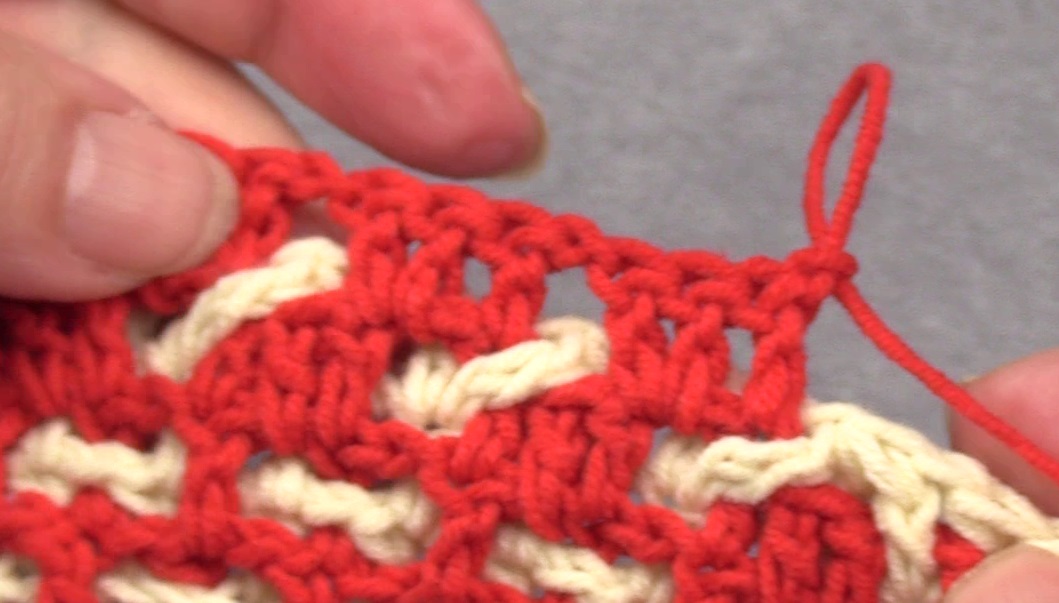
 The result of round 4a. You can now see that the slanted lines look much better!
The next rows
The next rows up to and including row 6a are regular solid square rows. Please see the download of the pattern for this.
Next comes some of the diagonal lines as you work on the back. Go to the next page (click here) for the next part of the slanted lines tutorial, the open structures.