
Overview of the tutorials
This tutorial is split up into a couple of pages and I also have pages with more pictures of the bottom border, so I give here an overview so that you can go quickly to the page you need.
- Introduction and overview: click here to go the page
- The practice piece: click here to go the page
- The setup: that’s this page
- Rows 2a and 2b: click here to go the page
- Rows 3a and 3b: click here to go the page
- Rows 4a and 4b: click here to go the page
- Rows 5a to 6b: click here to go the page
- Rows 7a to 8b: click here to go the page
- Rows 9a to 10b: click here to go the page
- Rows 11 to 14: click here to go the page
The videos
I’ve made videos for the first couple of rows to explain and show you everything you need to know. Click here to see the playlist with all videos.
Overview of the videos:
- Introduction and start: click here
- Weaving through and row 1b: click here
- Rows 2a and 2b: click here
- Rows 3a and 3b: click here
- Rows 4a and 4b: click here
The pattern
Download the file with the information here (click on this).
Download the pattern here (click on this).
Tutorial for the setup
The setup for the first row is always, well, let’s call it ‘a thing’. When you do that for the first time and haven’t got a lot of interwoven crochet experience, then it will take quite some effort. With the following photo tutorial you will certainly manage it! What is very important is this: take your time, go sit in a comfortable place and take care of avoiding any distractions! Do not feel uncomfortable when it takes a lot of time, the first rows to row 1b just take time! After this the grid is ‘set’ and you will be able to crochet the row after this much faster.
Follow the following steps carefully, so it will go right in just 1 time. Better take a bit more time and do it right right away, than taking it out 5 times! I do not go into superdetail a lot, so if this is your first time, then also take a look at my other tutorials of previous CALs if it’s not completely clear yet.
Click on the pictures to see them fully and full size! I first show the pictures here as a ‘thumbnail’, to take care that the page loads quickly, but this means you just don’t see everything. So read the text and click for the details!
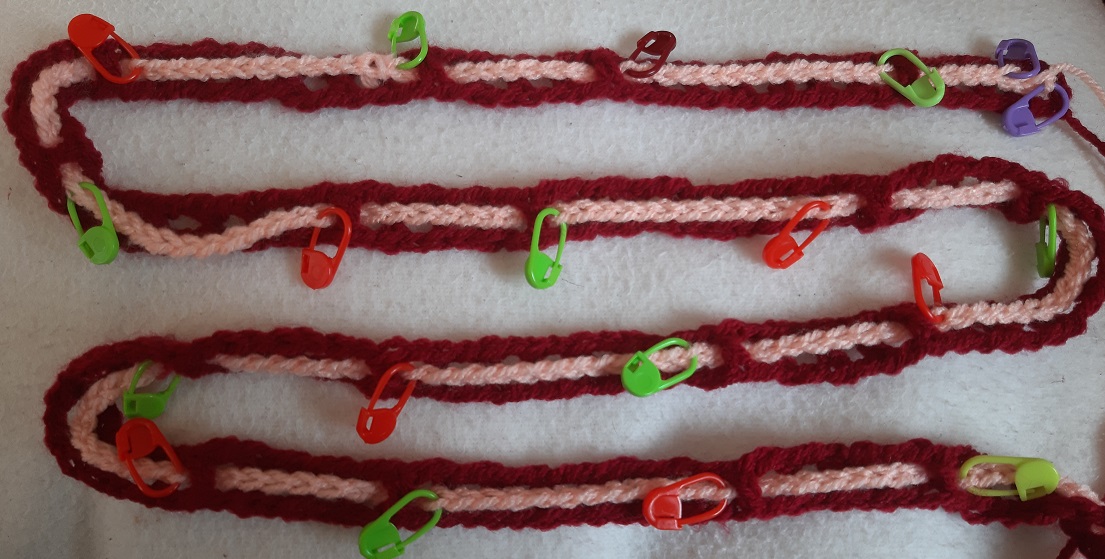
Row 0a and 0b plus placing the markers
For row 0a (red) you setup 273 stitches. This is without the turning chains. You can do a chain, but also use other methods.
For row 0b (pink) you setup 271 stitches. For this it is just the easiest to make a chain.
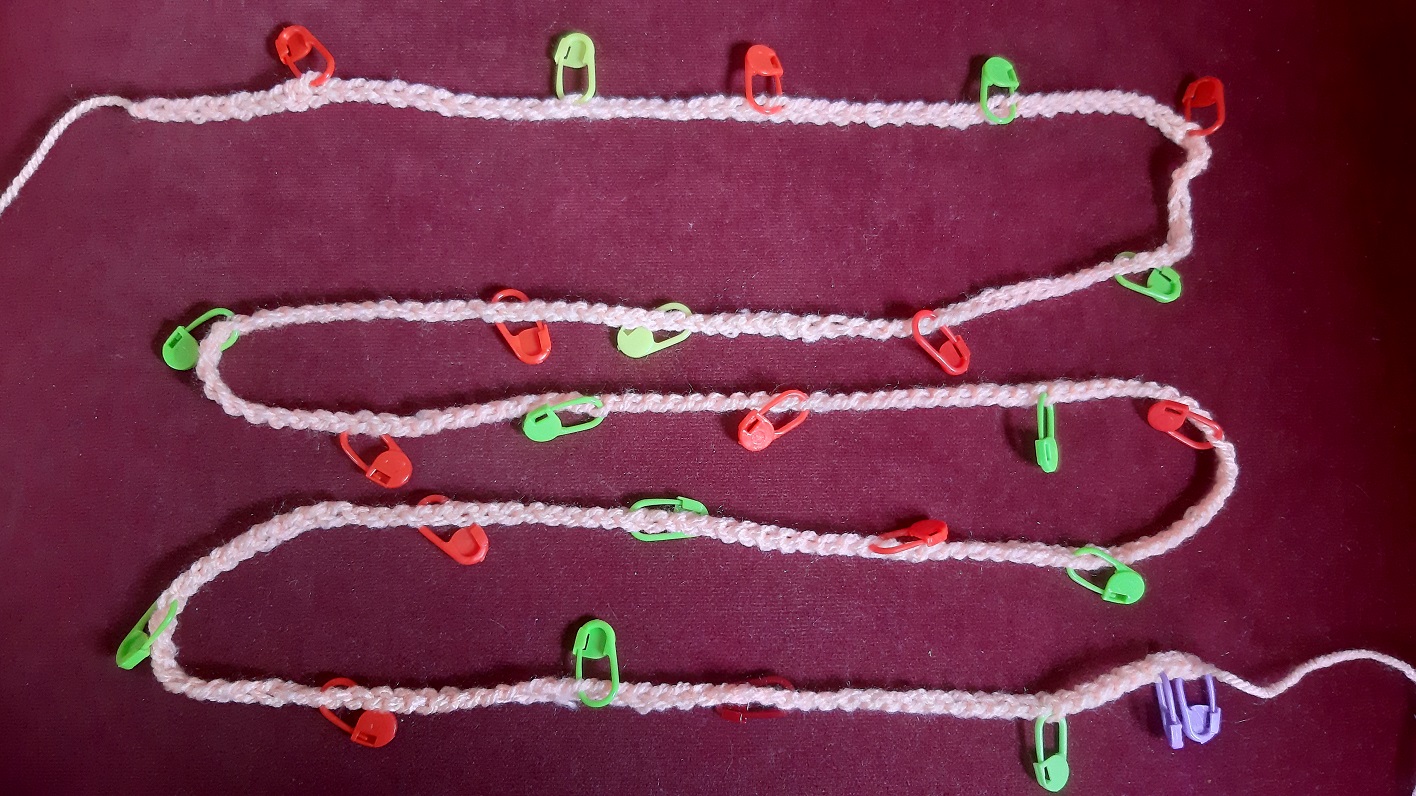
As a preparation for the next rows you will now place markers into row ob into stitch 9 (red), 21 (green), 31 (red), 43 (green), 53 (red), 65 (green), 75, 87, 97, 109, 119, 131, 141, 153, 163, 175, 185, 197, 207, 219, 229, 241, 251 (red) and 263 (green). Also place a marker into stitch 269, as usual. There you will make your first dc (after the turning chains).
Make it easy for yourself and place the markers into the top loop, like in the picture (click on it to see it clearly).
Row 1a and 1b: weaving through and smart use of the markers
 Now first crochet all squares of row 1a. You do not need to look at the instructions about front or back, that will come when we will be weaving through. You now have 136 squares.
The next step is weaving through the pink row. Important with this is to weave the chain through without turning it, so that you will have the spot where you will have to insert your hook in the right position.
Place the squares of the row in color 1 correctly: the place where you ended and the yarn comes out is at the top left. Don’t get confused about the red thread that you see in the picture at the bottom right: that’s the start of the yarn and is at the bottom right. I’ve used the method of the ‘foundation stitches’ where you crochet the bottom row and the squares at once. (Maybe I will make a tutorial for that….)
When weaving through the instructions of row 1a are important. The side stitch instructions can be ignored.
We start with ‘color 2 to front’. This means that we will start with color 2 at the front side of the work (on top). After this the instructions say *(b 3x, f 1x, b 6x, f 1x) 12x, b 3x. This means that the first 3 dc posts of color 1 will be behind the pink chain: b 3x. The first post at the start at the right is the side stitch (the turning chains), that doesn’t count. After that it’s f 1x: so the next dc post will be in front of the pink chain. For this first bring the chain to the back and then right away to the front after the post. Next b 6x: the next 6 posts will be behind the pink row, and then again f 1x: again 1 post behind the pink chain.
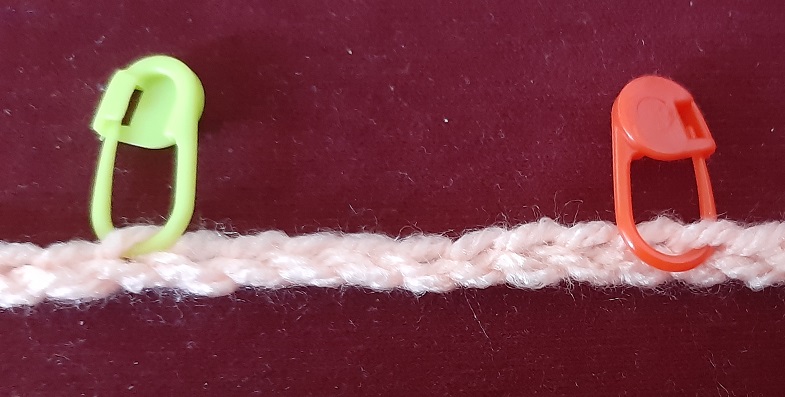
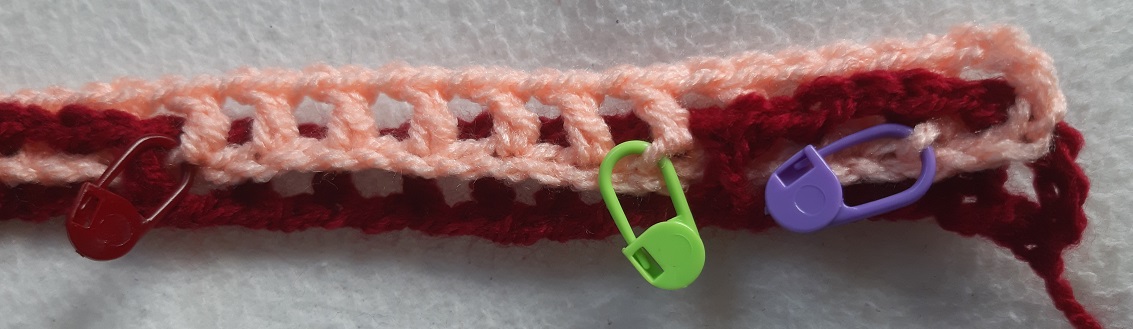
 And now we will prepare for the help of the markers: take care that the first green marker is after the first post at the front, and the red marker right before the next post that’s at the front.
Skip the next ‘box’ with the 3 posts that are behind. The next green marker will be placed again directly after the post that is before the 6 posts that are at the back and the red marker directly at the end of the ‘box’ with the posts that are at the back. Repeat this until the end. The picture shows you exactly how it looks when you click on it. Don’t get confused: the chain swirls around from one side to the other, so parts are upside down :-).
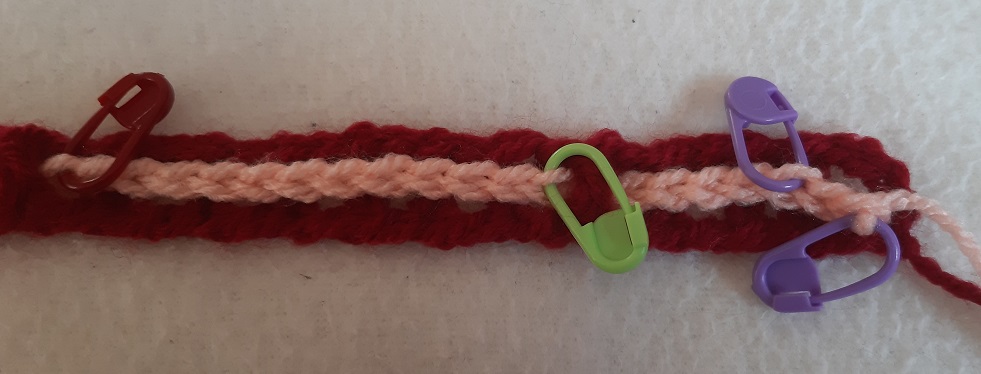
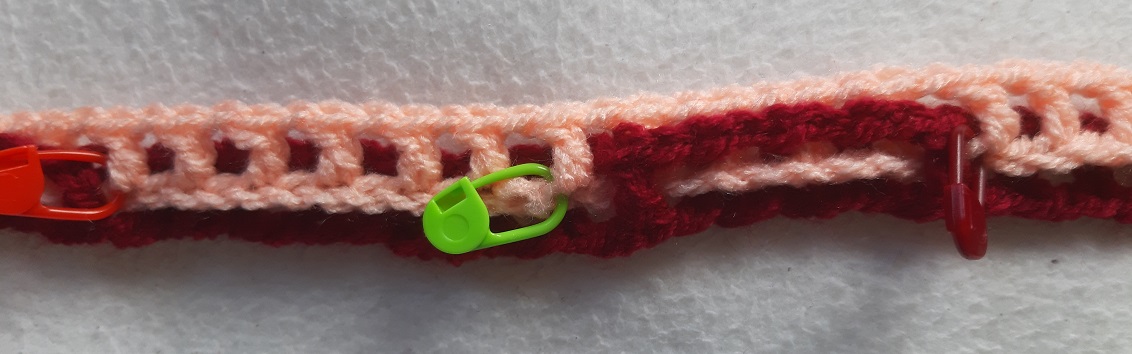
 When you will crochet row 1b you will see how the markers help you to do this row in 1 pass without errors. Even if you make a mistake, you will notice right away and you will only need to redo a very small part. For the one hundredth time, click on the picture to see it fully :-).
These are the instructions for row 1b: f 1x, b 3x, *(f 7x, b 4x)* 11x, f 7x, b 3x, f 1x .
Make the first 3 turning chains and the in-between chain: these are at the front of the work: f 1x.
Then b 3x. You will crochet the first real dc at the back at the place where the purple marker is in stitch 269. After that you will crochet again 2 times a dc and the in-between chains. After that 7 dc’s in front. The first dc of this set will be crocheted at the position of the green marker, the last dc of this set at the red marker. After this b 4x.
 Here I show a picture of the pattern chart, so that you can get a feeling about how the picture matches with the chart.
 Each time you start a set of dc’s of f 7x, you will start again at a green marker and end at the red one. This way you know for sure that you don’t make the stitches at the wrong places and crocheting this first row is done very quickly! And to see it clearly…..you know what I’m about to say….. click click click 🙂 🙂 :-).
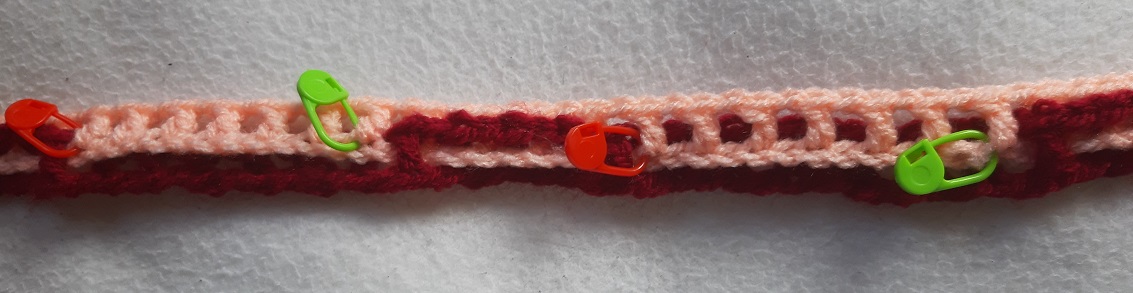

And here also a part of the pattern chart.
On the next page I will show you the next rows: click here to go the page.