
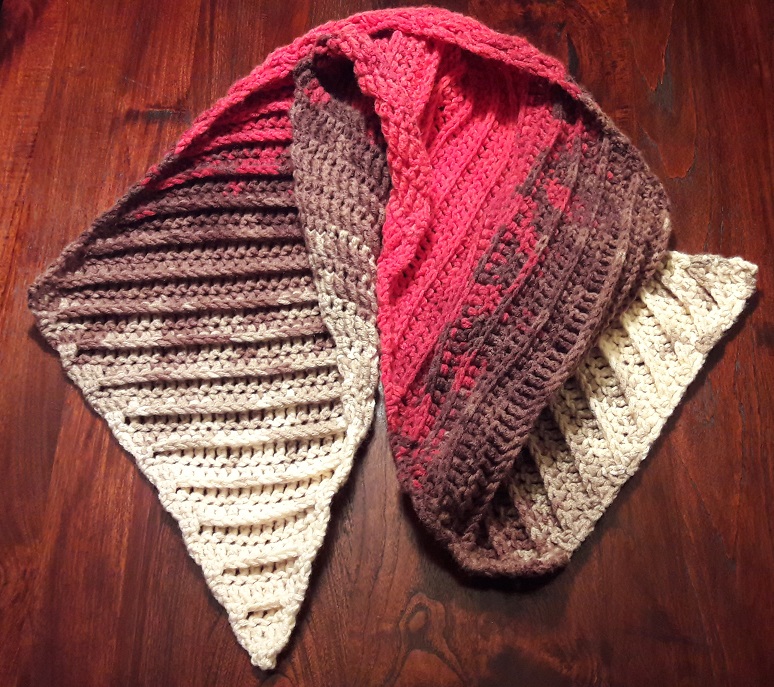
You’ve probably seen my wrap or shawl made with Alize – Superlana Maxi – Long Batik in a trapezium shape, but if you prefer to make a rectangular shape, you can do that with some minor adjustments. You can find all information about the yarn here.
I made a little piece to give you an idea how it looks then. In the pattern I used 8 stitches in a row, but of course you can change that to your own likings. You can make short rows, so that you will crochet your shawl lengthwise, but you could also make your rows long, so that you will crochet it ‘widthwise’ (is that an English word???). It depends on which direction you want your striping of the yarn to happen. Again the backside is very nice also, so it could just as easily happen that you prefer that side 🙂 .
The pattern
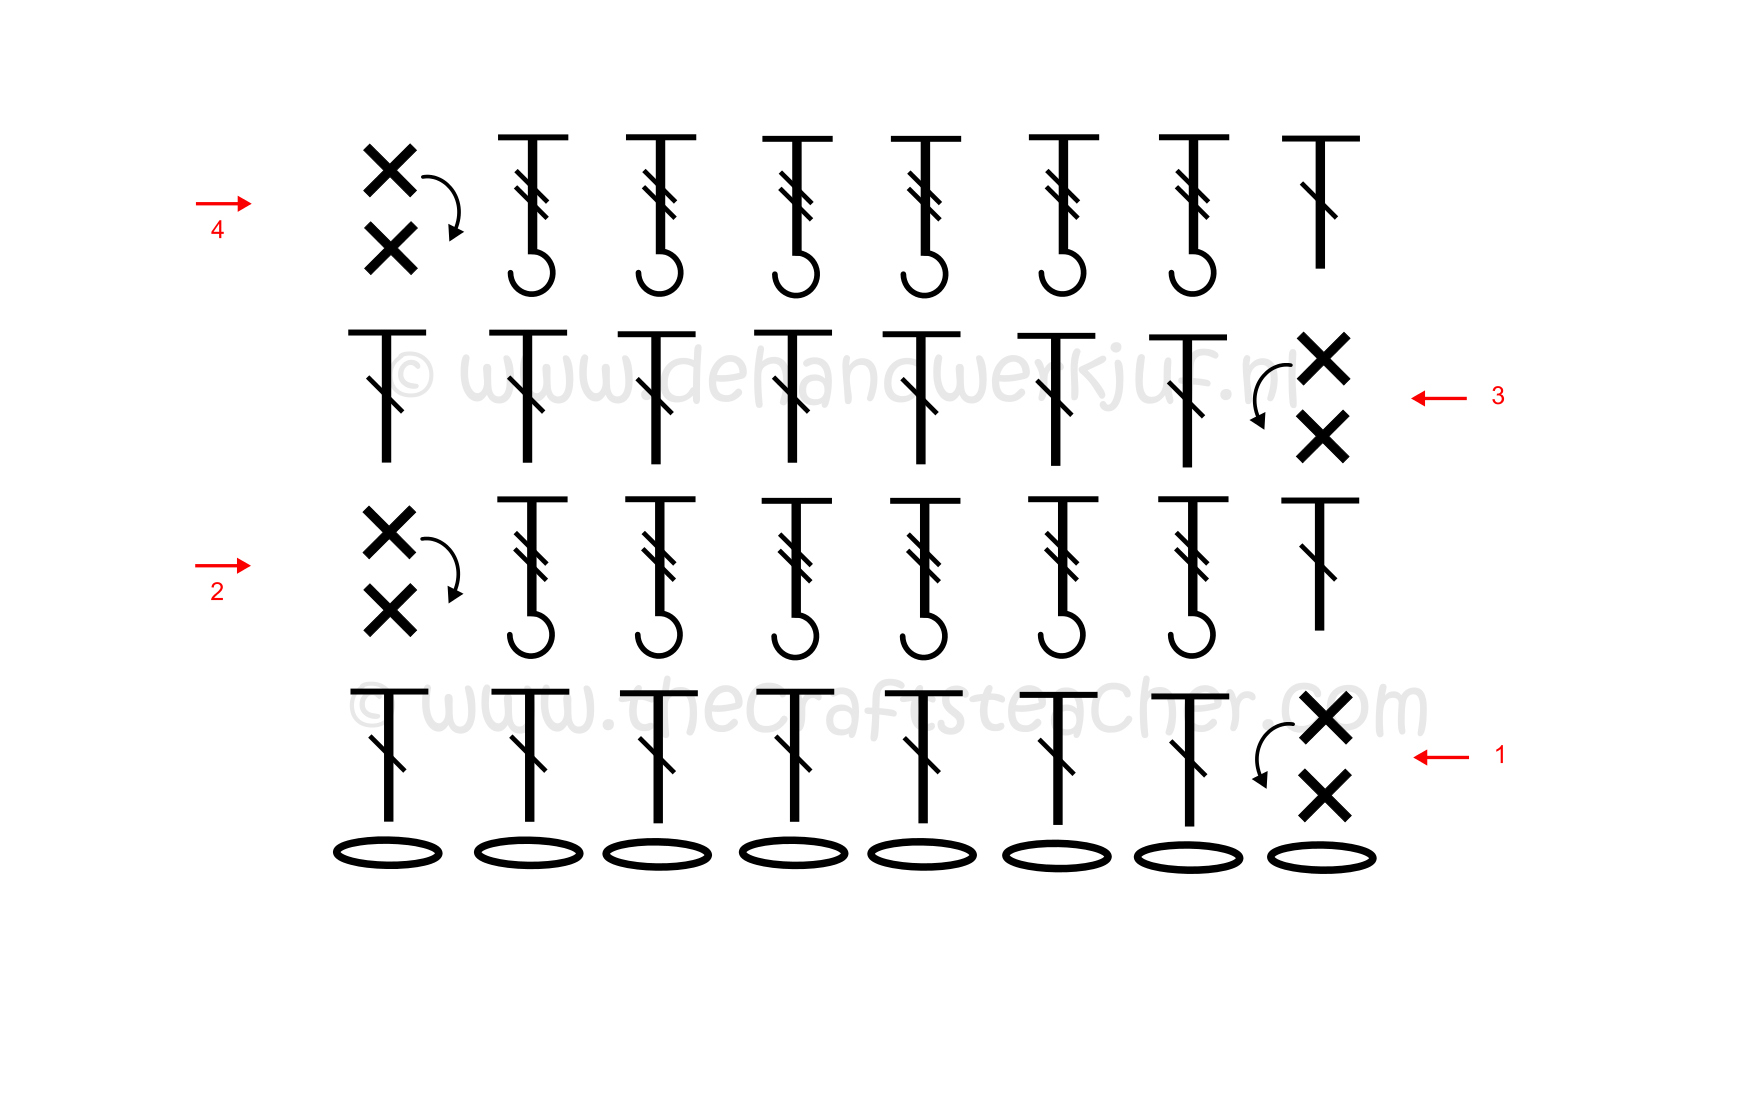
The set up:
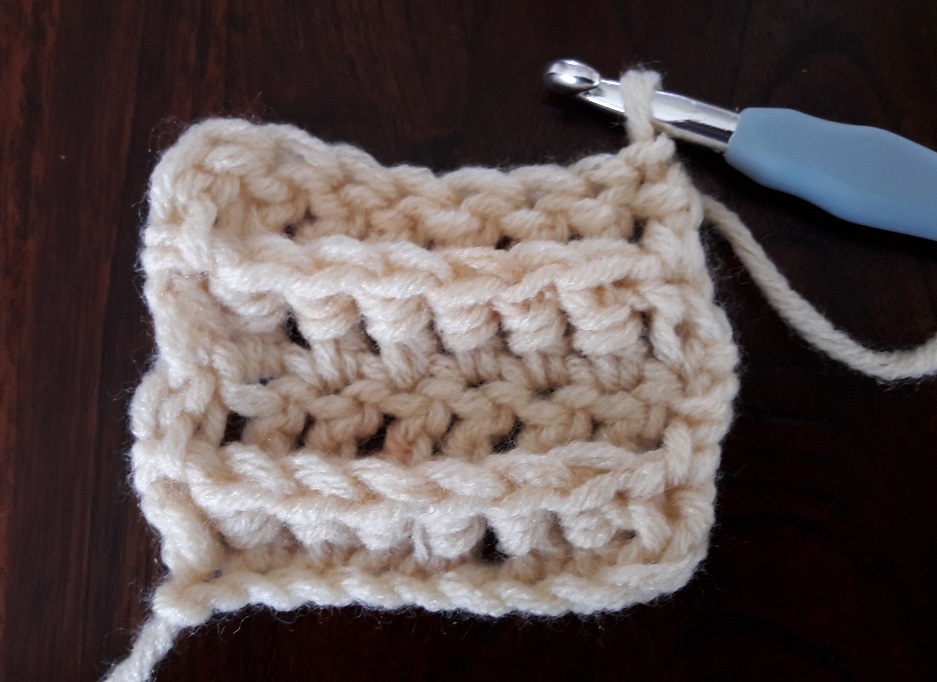
I started the pattern with making 8 chain stitches.
Row 1:
Start with making a starting double crochet in the last stitch of the previous row. I described here how to do this. You can also watch that in the first video of the trapezium shawl. The links to the video’s can be found there. Next make 7 double crochets in the rest of the chain stitches.
If you find it a bit too difficult making a starting double crochet rigth after the set up, you can also use the way of making 3 chains for making the first double crochet of the row, but do use the method of the starting double crochet in all other rows: it really looks much better!
Row 2:
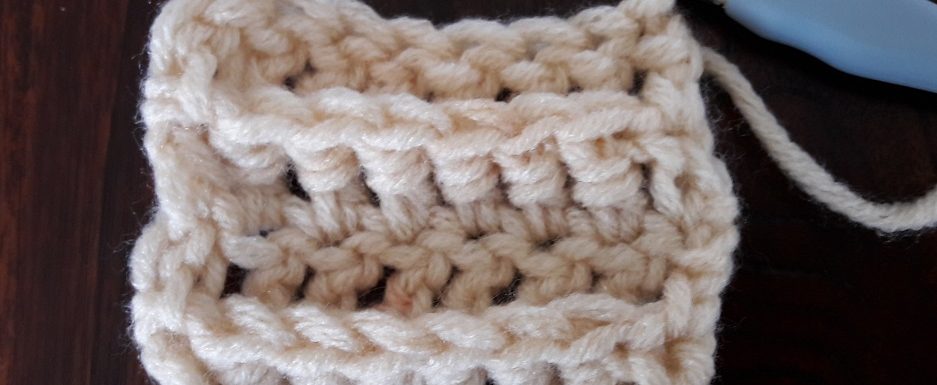
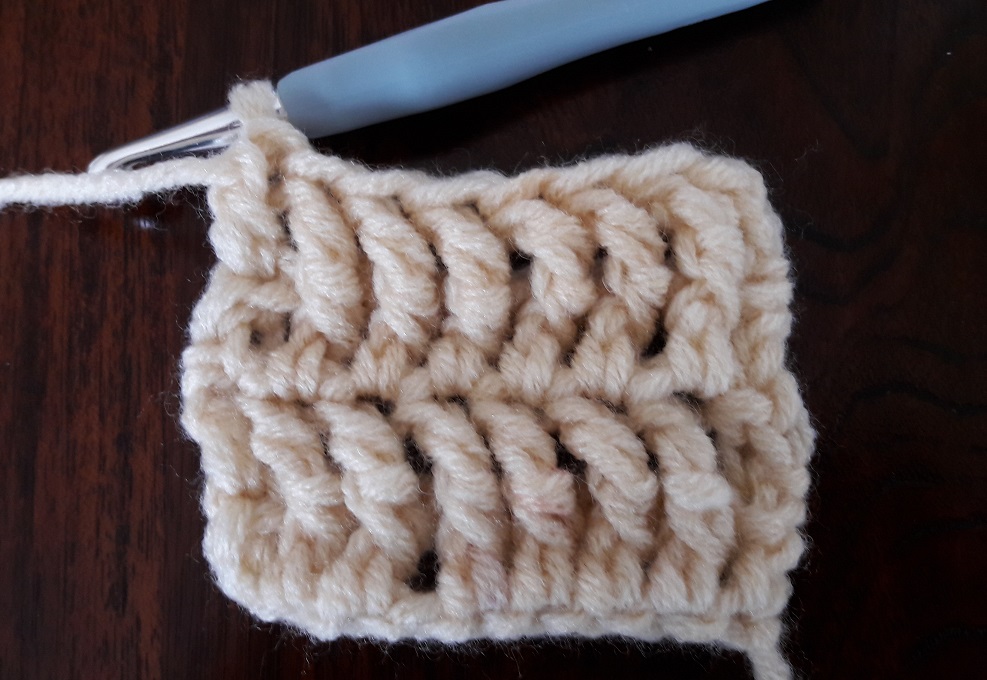
Start with making a starting double crochet in the last stitch of the previous row. Now make a front post triple crochet around the posts of the double crochets of the previous row. End with a double crochet in the last stitch.
Repeat the rows 1 and until you’ve reached the desired length or heigth of your shawl or wrap. Or until you’ve reached the end of your yarn 🙂 .