Index
This tutorial is too large to show on 1 page, so it is spread over multiple pages. Use the links in the index below to go to the page where you want to be.
- Introduction, abbreviations and symbols, and start tutorial 1: click here
- Start tutorial 1, setup and first rows: click here
- tutorial 1: slanted lines, open structures, part 1: click here
- tutorial 1: slanted lines, open structures, part 2: click here
- tutorial 1: slanted lines, open structures, part 3, working at the back side: click here
- tutorial 1: slanted lines, closed structures, part 1, with triangles pointing upwards: click here
- tutorial 2: slanted lines, closed structures, part 2, with triangles pointing downwards: click here
- combining structures and summary: that is this page
- tutorial 3: click here
In this section I’m going to show you how to combine structures, just to show you once. If you follow the instructions on the previous pages of the tutorial step by step, you should be able to do it, but it may be a bit much at first, so I’ll show it here with some photos.
You can also see the below in this video: https://youtu.be/nmO37qBS4C0.
The instruction chart

This part concerns the parts in the instruction chart that are outlined in red.
|
Notatie: [b+fl] & fml & [f+fml+fl], b, [fr+fmr+f] & fmr & [fr+b] Here you see combined stitches together with the parts with the ‘&’ in between. Just follow the rules step by step. Watch the video or photos below to see how to make the stitches. |
Here are some screenshots from the video.
We first start with the structure on the right: ‘[b+fl] & fml & [f+fml+fl]‘.
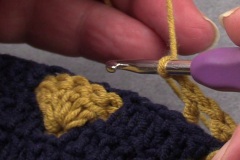
This is the starting position. You see the v-shape with the 5 stitches at the top that we will be working in. We start with the combined stitch ‘[b+fl]‘.
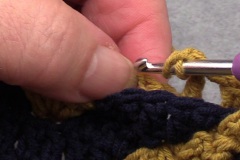 This is the place where you will make the back stitch.
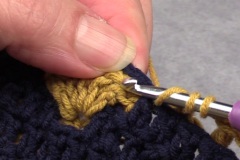 We make the ‘fl’ in the first stitch (the rightmost) of the 5 of the v-shape.
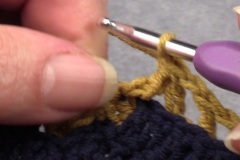 The combined stitch ‘[b+fl]‘ has been created. In the photo the back stitch leans a little to the left, but that’s because I pulled the stitch a little to the left. You don’t make an in-between chain now, because of the ‘&’.
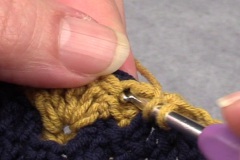 You now make the ‘fml’ in the same stitch as the ‘fl’, because you are working to the left. Remember that you haven’t actually reached the next mesh yet, which comes after the mesh stitch where you made the back stitch of the combined stitch.
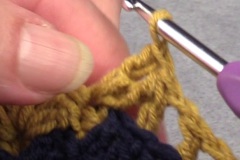 This is where the ‘fml’ was created. You don’t make an in-between chain now, because of the ‘&’. You now have two stitches at the top, one from the combined stitch, and one from the ‘fml’.
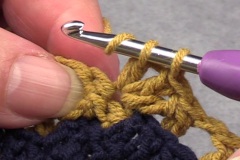
Now immediately comes another combined stitch: ‘[f+fml+fl]‘. This is made over several stitches at the base, and will result in 1 stitch. The first ‘f’ is made here, in the same stitch as the ‘fml’ we just made. Also remember that this is the stitch that completes the grid stitch, since we just worked forward to the left.
Take a good look at the photo. The next stitch, just above my thumb, is the next stitch where you will insert for the ‘fml’.
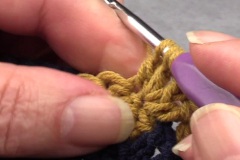 The ‘fml’ has been created. Also notice that the stitches are not finished yet.
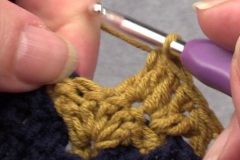 And here the ‘fl’ has been made, in the 3rd stitch of the set of 5 of the v-shape below. The 3 stitches are also worked together. Now you can crochet an in-between chain, because there is no ‘&’ now.
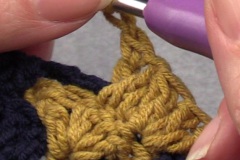 Before we move on to the next combined structure, a back stitch is first made. This is also made in the 3rd stitch of the v-shape, because the mesh needs to be completed.
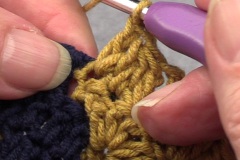
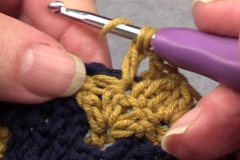 This is the second part: ‘[fr+fmr+f] & fmr & [fr+b]‘. We’re actually going to mirror things now. First the ‘[fr+fmr+f]‘. The first stitch, the ‘fr’ is made here. Remember again that you are working to the right, to the previous grid stitch, so again in the 3rd stitch of the v-shape below.
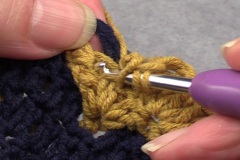 Then the ‘fmr’ in the next stitch, the 4th of the v-shape below.
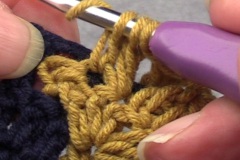 The ‘fmr’ has been created. Here you can see again that the stitches are still waiting on the hook to be finished.
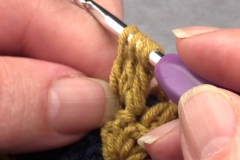 And finally the ‘f’. Unfortunately, you cannot clearly see that the stitch is made in the 5th stitch of the v-shape.
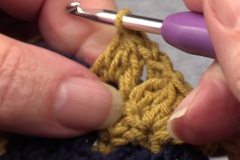 The 3 stitches have now been crocheted together into 1 stitch.
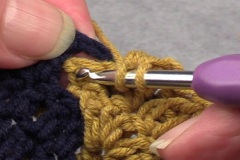 The ‘separate’ fmr is now worked again to the right, in the previous grid stitch, i.e. the same stitch where the ‘f’ of the previous combined stitch was made. This is the place where you need to insert.
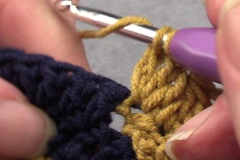 And then a combined stitch. The ‘f’ was created here. If you look closely you can see the stitch still waiting on the hook.
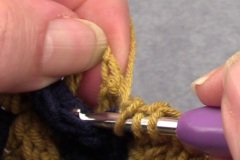 This is the next stitch where you will make the stitch at the back.
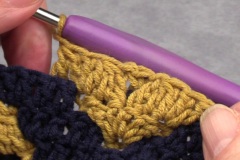 The combined structure is now completed.
Resume
Here is a brief point-by-point explanation of how you can quickly remember the written instructions.
- Do you see square brackets? Then it is a combined stitch, which is worked over 2 to a maximum of 5 stitches over the base, but results in 1 stitch. The stitches are not completed in between, but are crocheted together when the last one has been made.
- Do you see an ampersand (‘&’)? Then you make the stitches to the left and right of it without an in-between chain. Complete the stitches individually, taking into account a combined structure before or after the ‘&’. A structure like this is worked in 1 stitch at the base (with the exception of the combined stitch that is almost always part of this closed structure, at the beginning or end) and results in multiple stitches at the top.
- The regular front and back stitches and the ‘middle’ stitches are regular double crochet stitches, the ’45 degree’ angled stitches are extended double crochet stitches.
- Think about where the mesh stitches go and where the previous grid stitch is that you have already worked in, and what the next grid stitch is that you still have to work in! And never forget to complete the grid after working forward with stitches to the left.
Tutorial 3
I have made a separate piece on the next page to practice your new skills. Click here to go to the next page.

