
Tutorial for the setup of the interwoven crochet version
The setup for the first row always is, let’s call it, ‘a thing’. If you do it for the first time and even have little experience with interwoven crochet, than it takes quite some time. With the following phototutorial you should succeed! But what is very important, is this: take your time, sit in a good place and take care you have as little distractions as possible! I have been working on rows 1a and 1b for almost 2 hours! So don’t get scared if this takes you a long time! It really is just the first 2 rows that take this much time. After that it’s just quite simple.
Follow the following steps closely, then it will go right right away in 1 time. Better to spend more time and have it right the first time, then frogging 5 times!
Click on the pictures to see them fully and full size!
Setup 241 stitches with color 1. I used the long tail method (see the video of the HAL CAL 2018 at the setup).
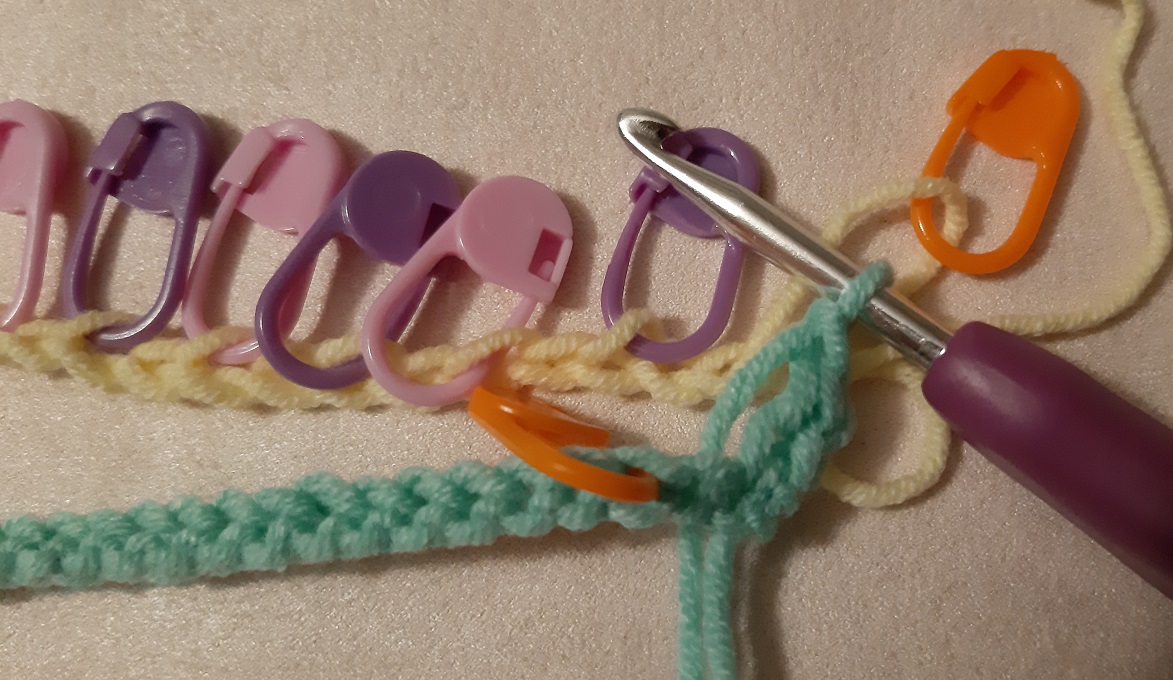
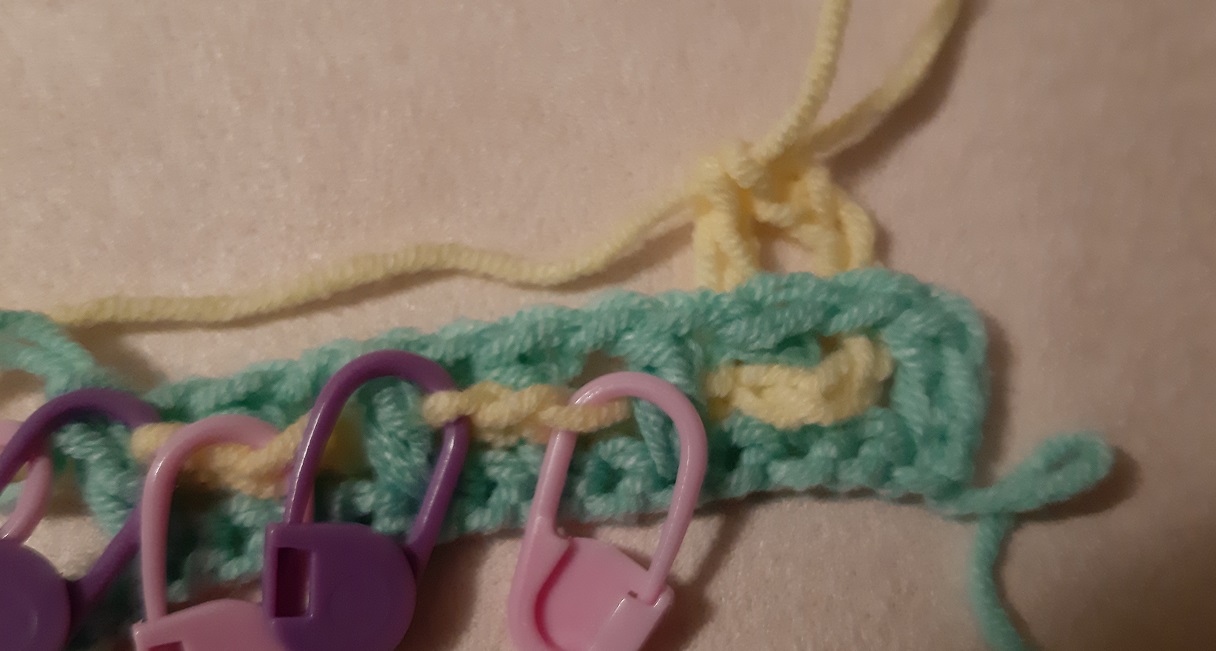
I put markers into stitch 20, 40, 60, …, 180, 200 and 239(!!!!) for counting, but they will be handy further for checks. See the orange marker in the picture in stitch 239. This will be the place where the first dc after the side stitch will be made.
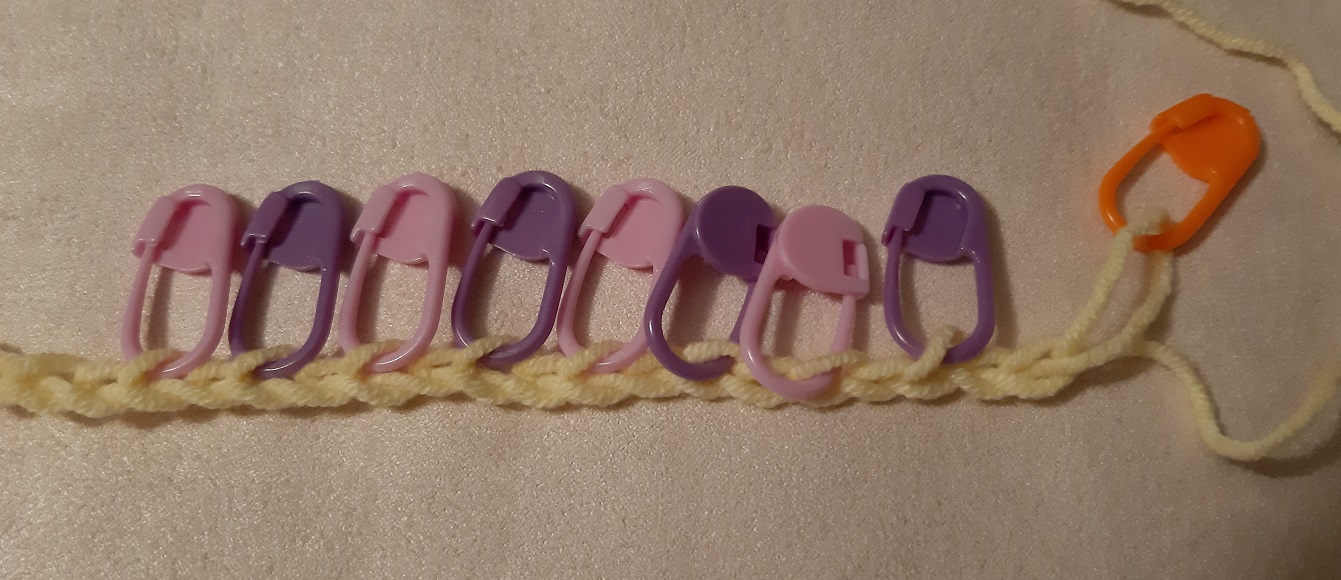
Make 239 chains with color 2. I put markers for counting into stitch 40, 80, 120, and so on. Leave them in, because they will be checkpoints later.
Here at the end I place markers in 2 colors! This is essential for the ‘trick’ to make the setup right. There is a purple marker into stitch 237, a pink in 235, a purple in 233, a pink in 231, and so on.
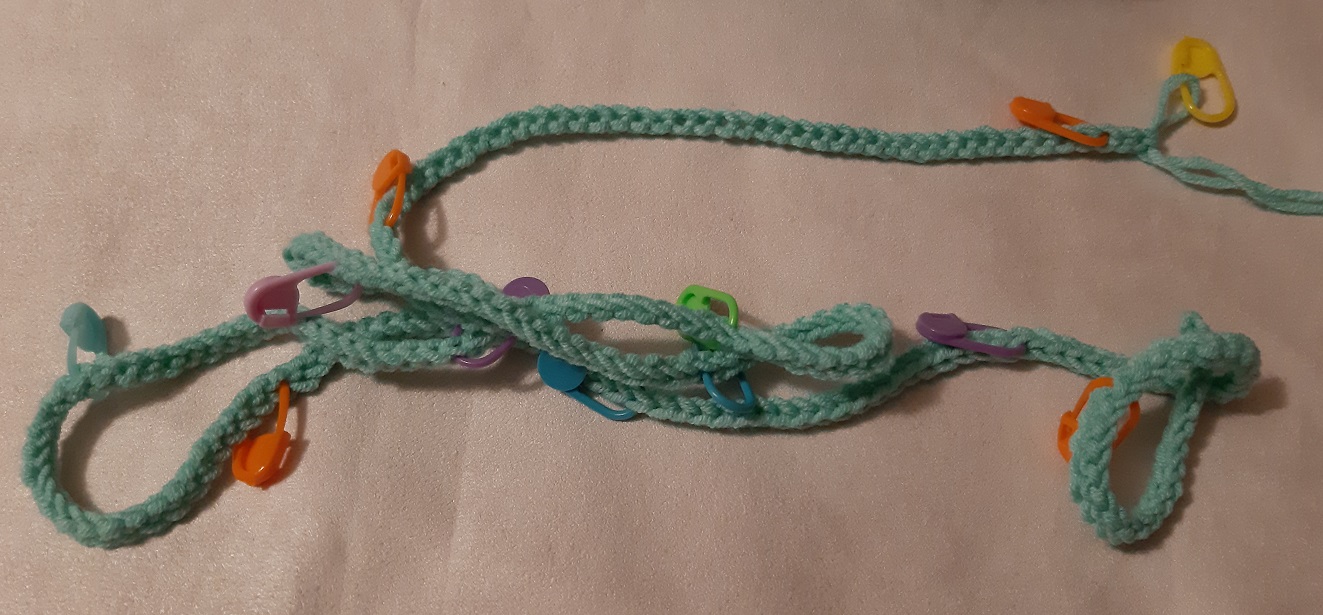
We will now crochet rows 1a and 1b bit by bit and alternating, so that you will have 2 rows finished at the end. This also has the advantage you have a check if everything goes right.
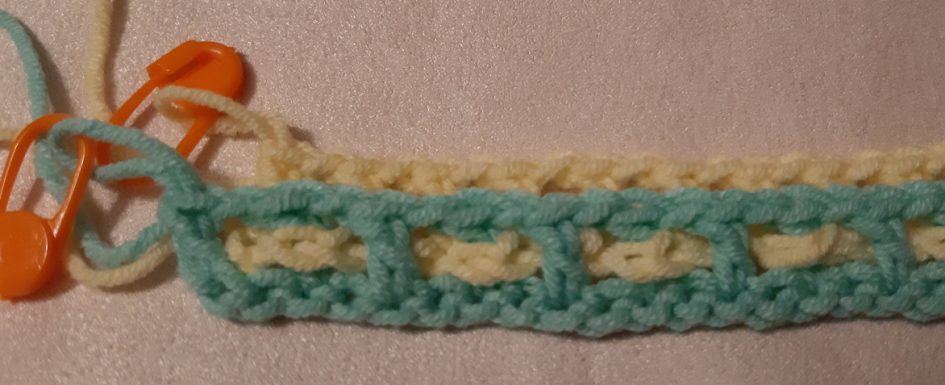
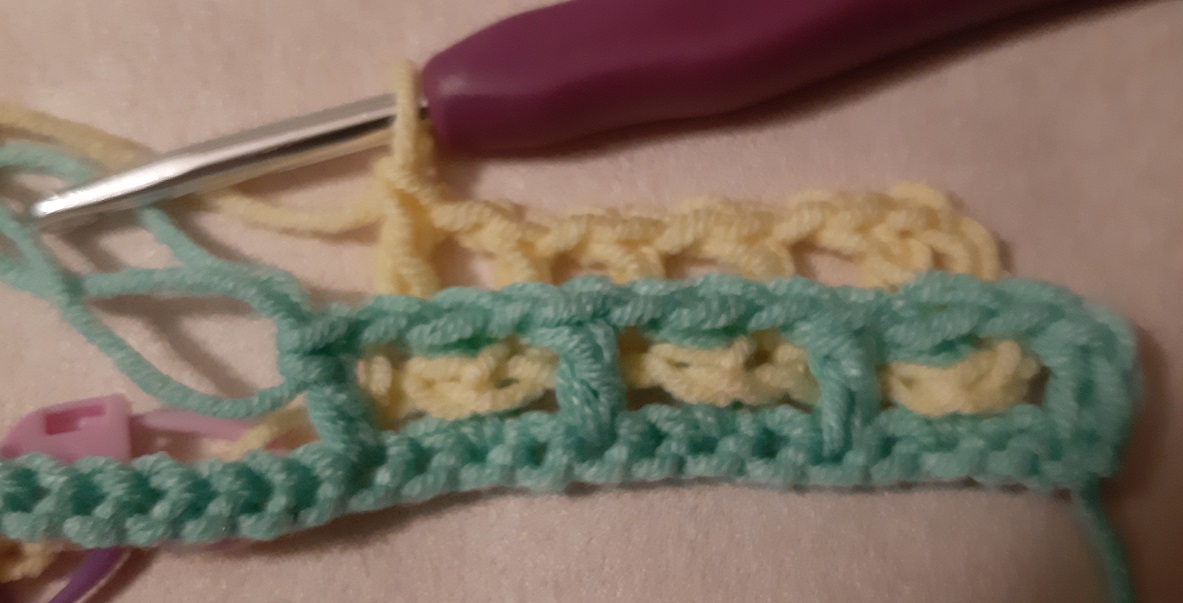
I made the side stitch here plus the in between chain. I used the method of 2 sc’s on top of each other as a first dc, but you could also do just 3 chains. Of course the in between chains have to be added.
The instructions for row 1a say you have to put color 2 to the back. You see that here: the yellow is behind color 1, the green.
The instructions for row 1a say that you have to do back and front 59x. Here the first dc behind the yellow chain is made. Take care that the purle marker is at the front. Always take care that the yellow chain is laying neatly with the v-stitches facing you and the markers on top! This really is important!
The next dc has to be made at the front now. You see that here in the picture. Here you also see that the purple marker is in front of the second square! Don’t forget to make the in-between chains!!! I will not mention this further, so remember it yourself. Same for color 2 of course.
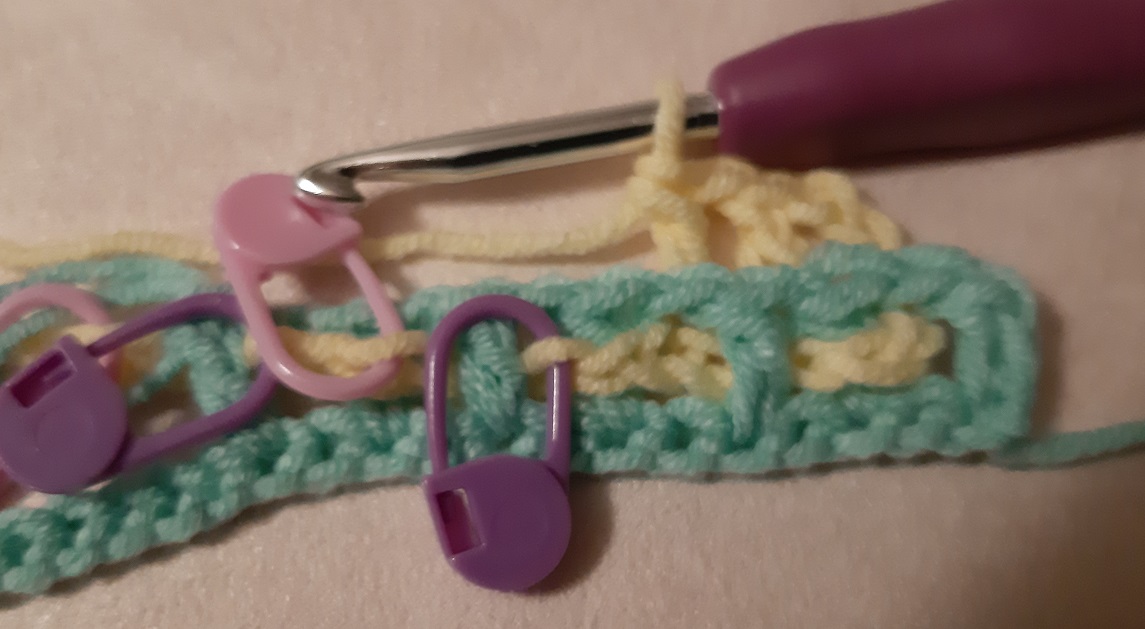
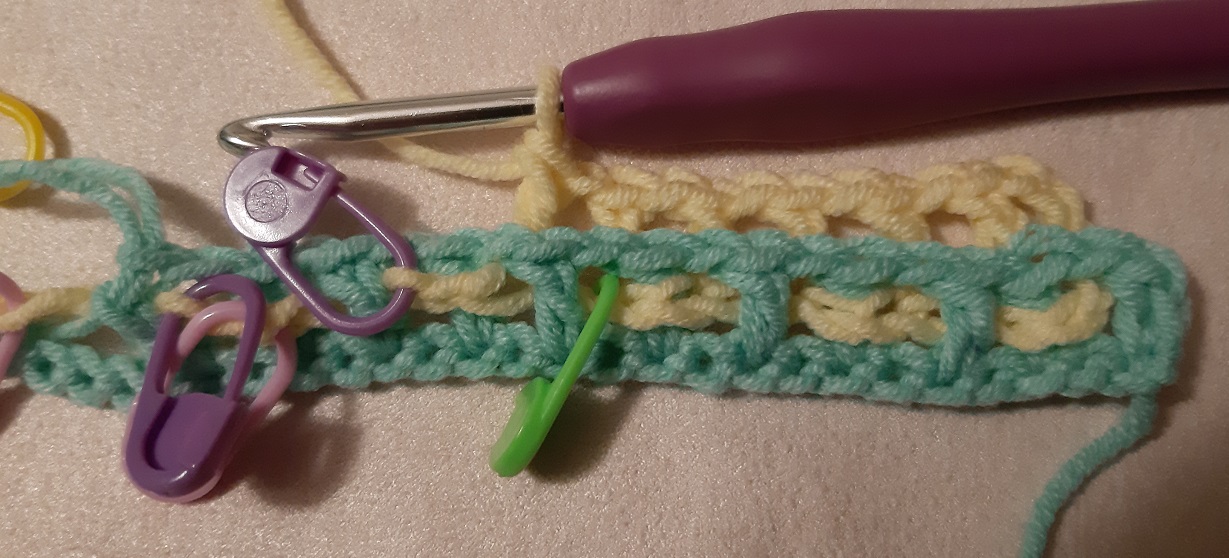
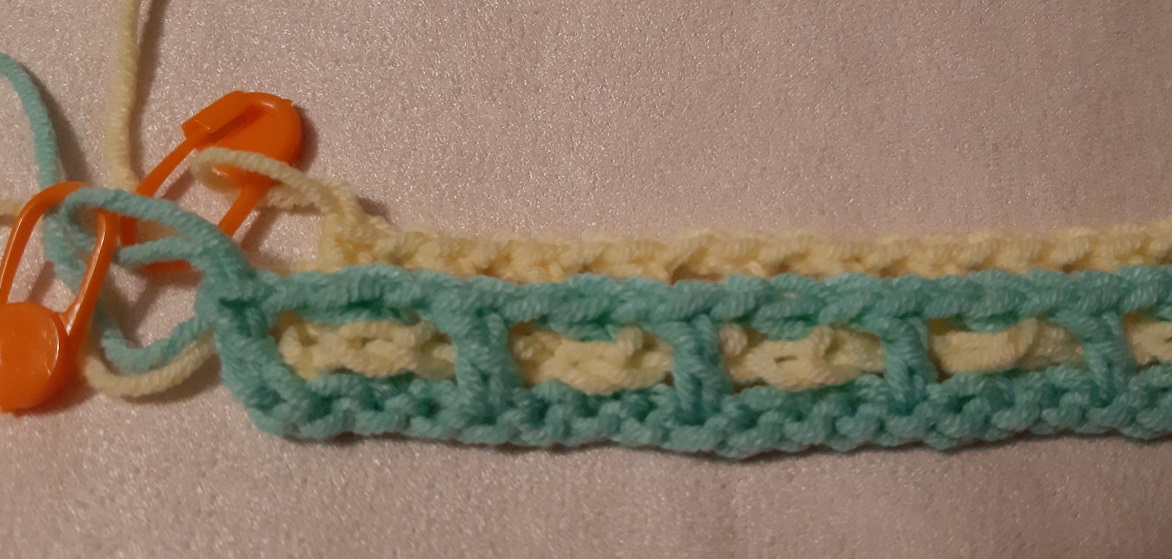
The next dc in the back. Put the pink marker at the front.
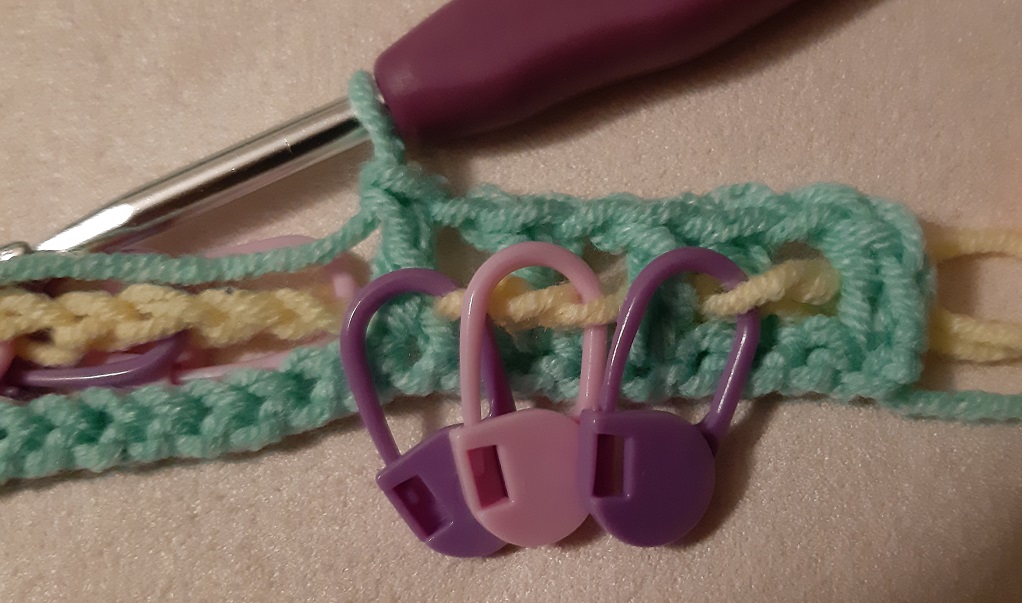
The next dc is at the front again. I admit, it is hard to have the purple marker right away at the right spot at the front while making this dc. Sometimes I just crochet the dc first and then put the marker into the right spot. You can see here the pink marker is in front of square 3, and the purple marker in front of square 4. And this is what you have to do consistently: a pink marker just after the dc in front (in front of an odd square), a purple marker always just before the dc in front (in front of an even square).
Here is anaother dc in the back. The pink marker is in front again.
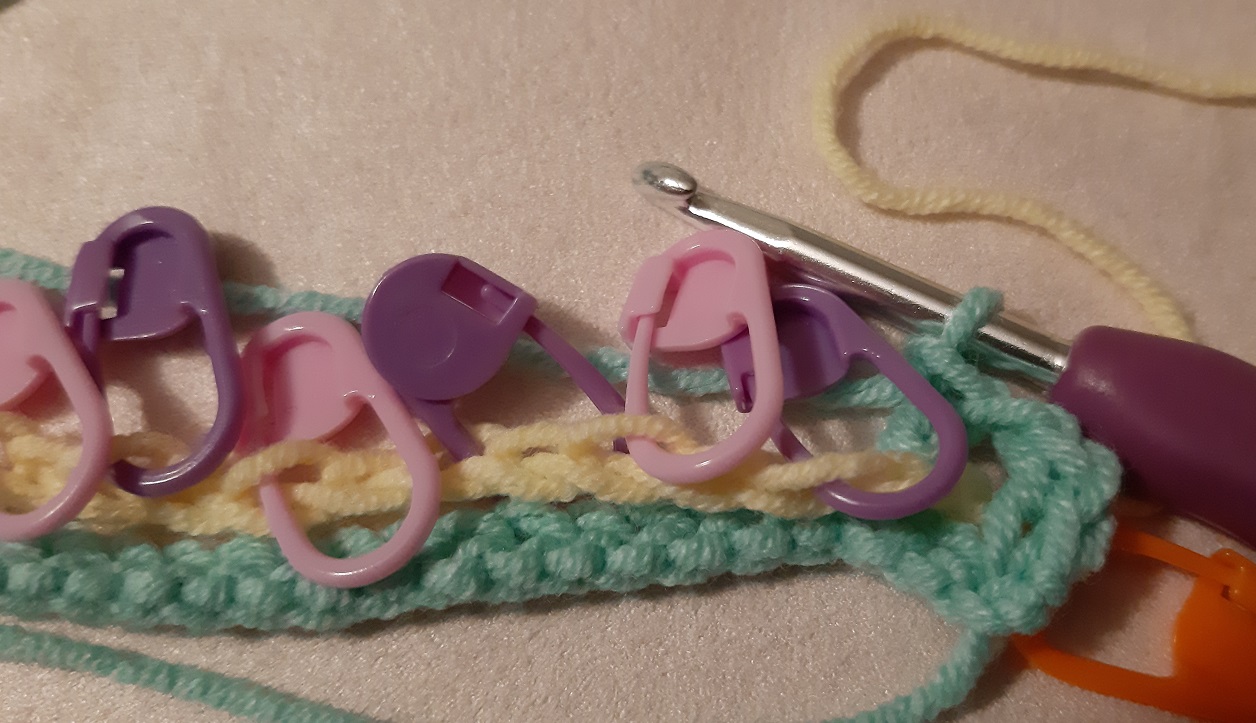
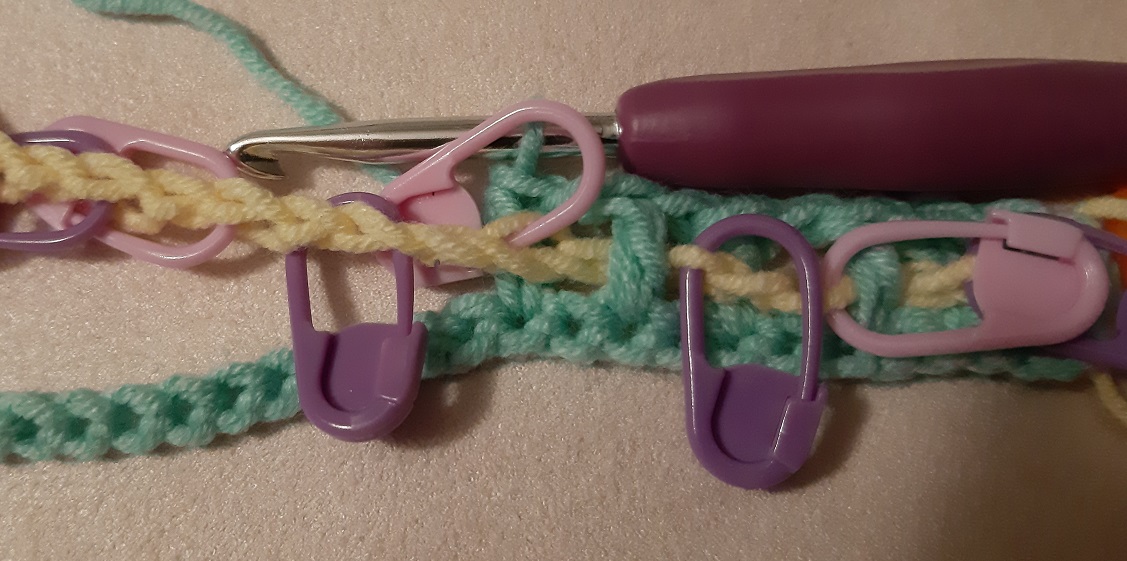
Again a dc in front, and the pink and purple marker at the right place, so in front of square 5 and 6. Stop now with crocheting with color 1. By the way, take care you still have some markers left in the chain, so that you can easily see where to put the next markers later.
The instructions for row 1b say all stitches have to be made at the back, so that’s easy.
Crochet the first dc in yellow. You work into the back. If this is not the case, you didn’t put the yellow chain at the back at the start, so you have to start over again. Here I did 3 chains plus 1 in between chain, and this (starting) dc is now behind square 1.
Now do the next dc at the back. Take up the loop where the purple marker is. You see here that the second dc of this row is behind the second square.
The next dc is now made into the loop at the pink marker. This third dc is behind the third square.
And again a dc at the purple marker.
A dc at the pink marker.
And one more time a dc at the purple marker.
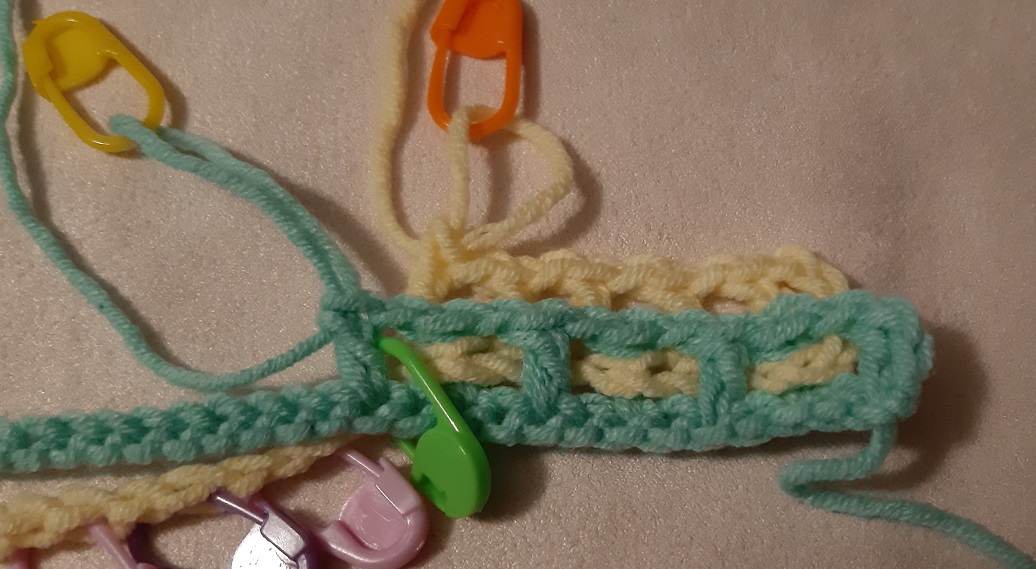
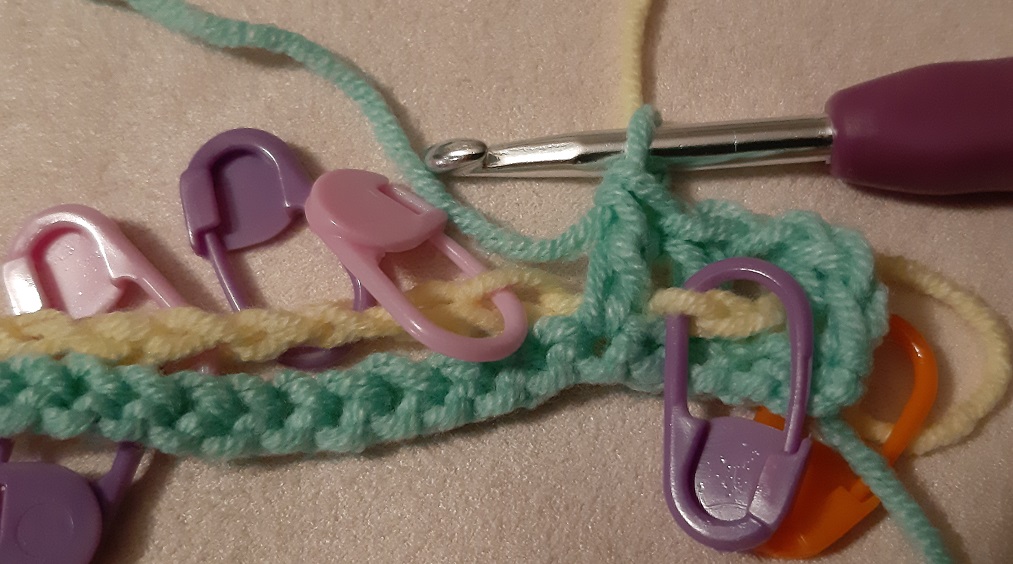
I like to keep everything in place. Here I placed a green marker just before the green dc and after the yellow dc.
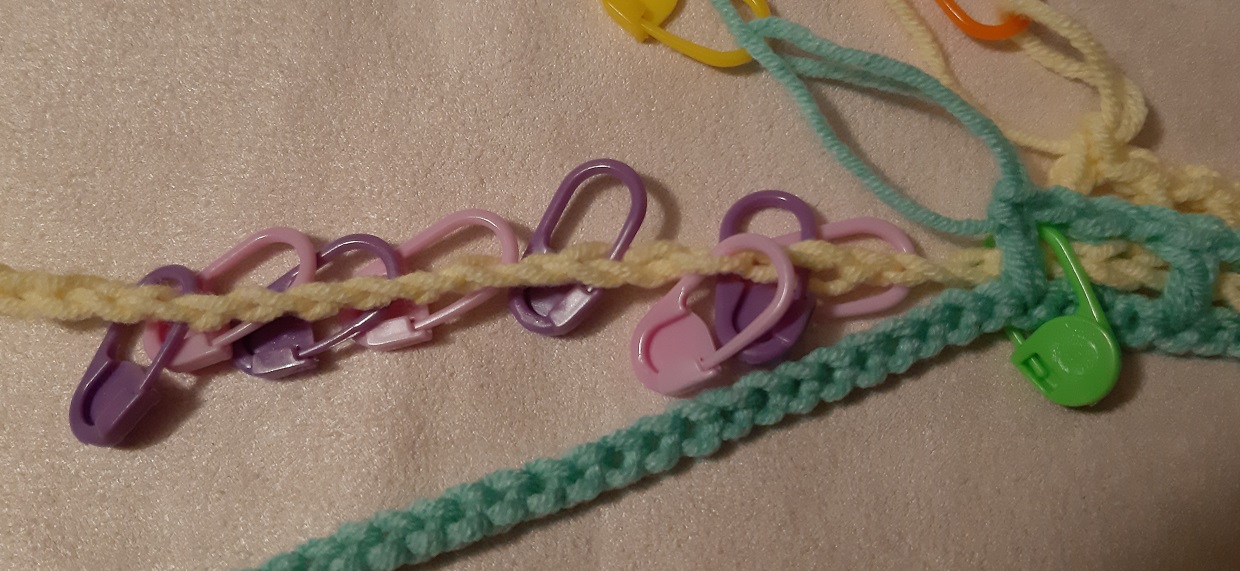
Place the markers again into the chain of color 2. So alternating pink and purple again with 1 stitch in between. Now you see why it is handy to not crochet that far that you ‘used up’ all the markers that were placed earlier by doing the first part.
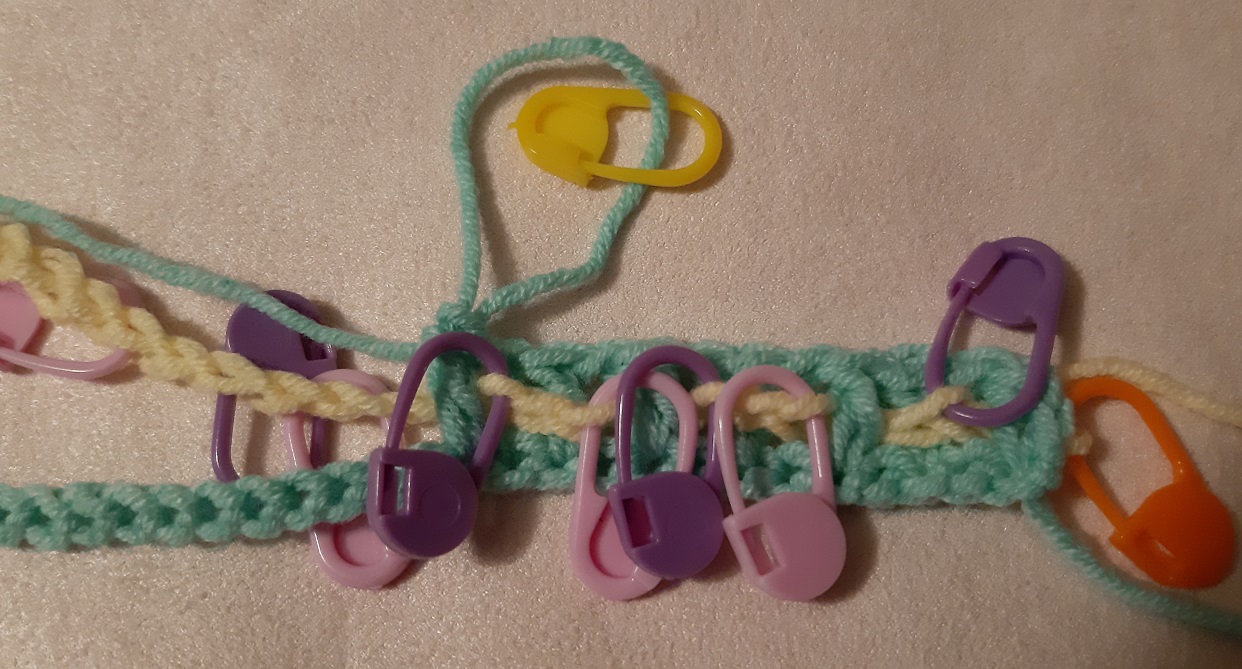
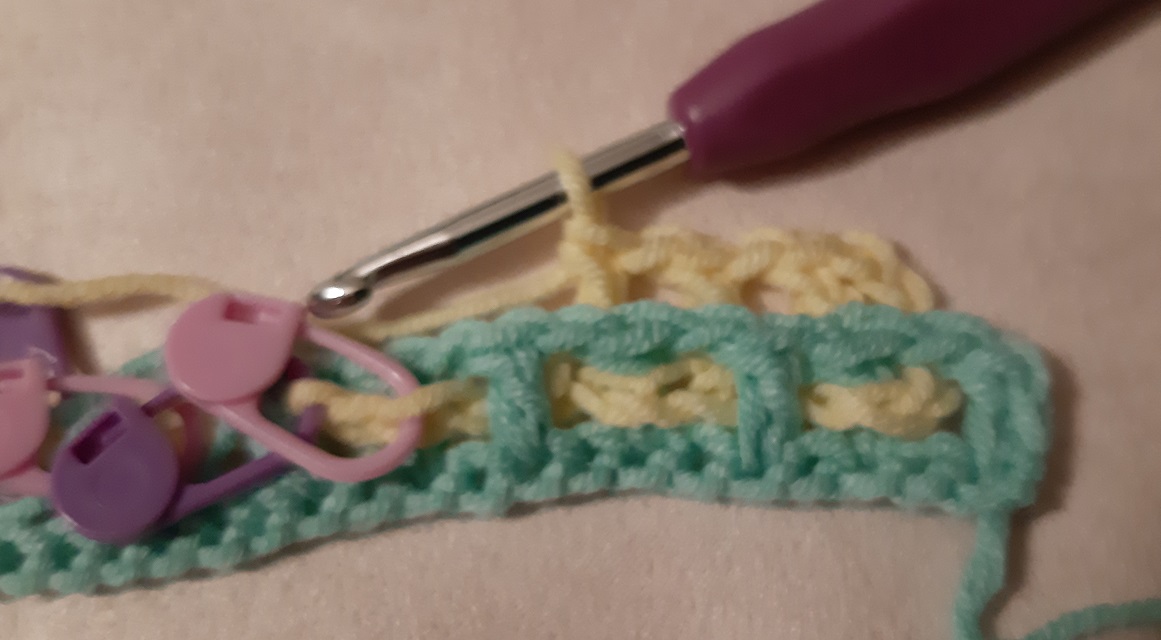
Now do again dc’s in front and back with color 1. Place the markers at the right spot, and have some left on the chain.
And continue crocheting with color 2. Don’t forget the in between chains 🙂
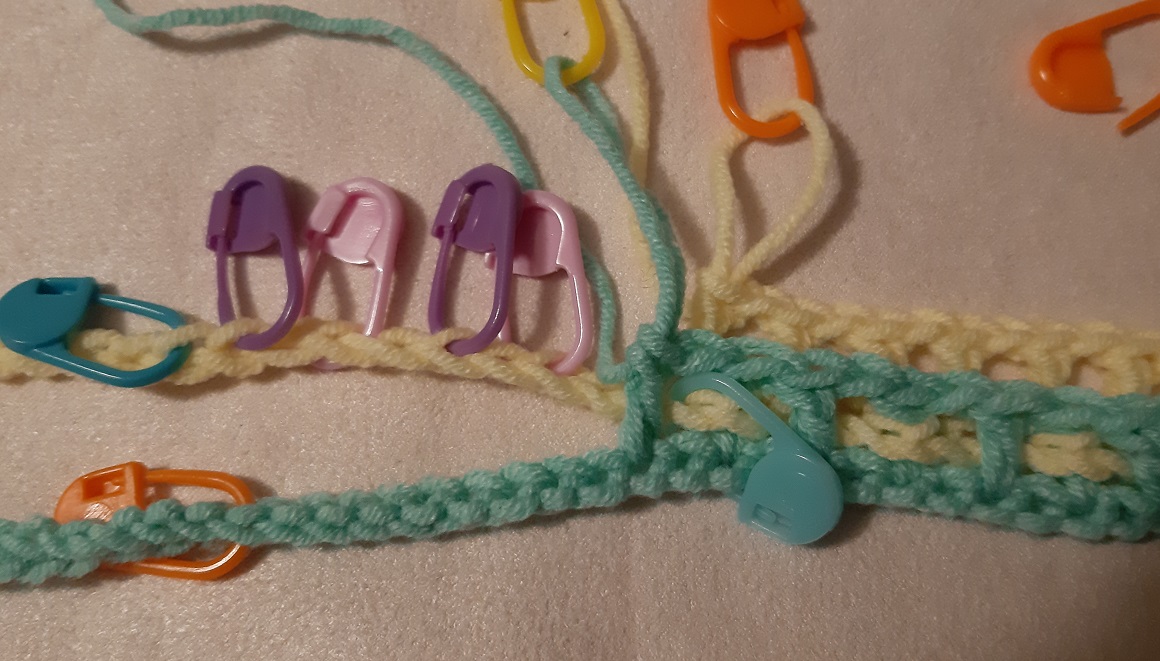
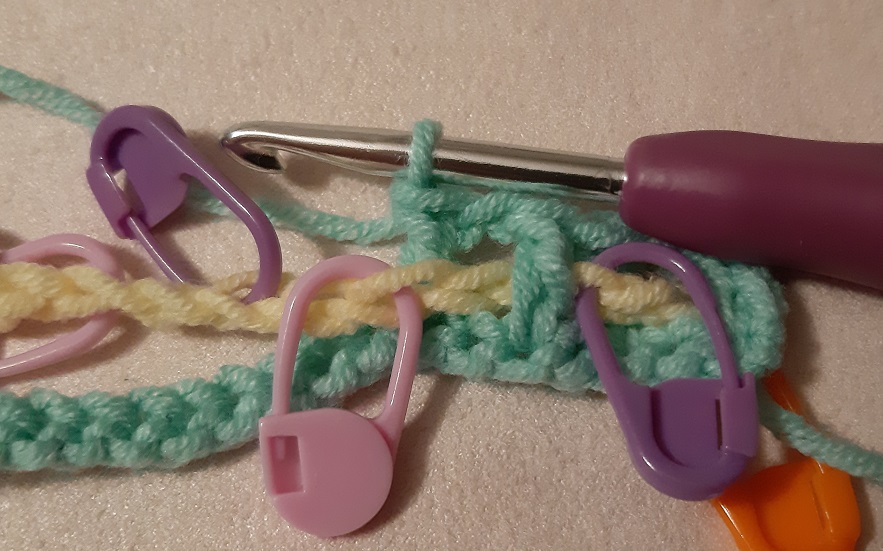
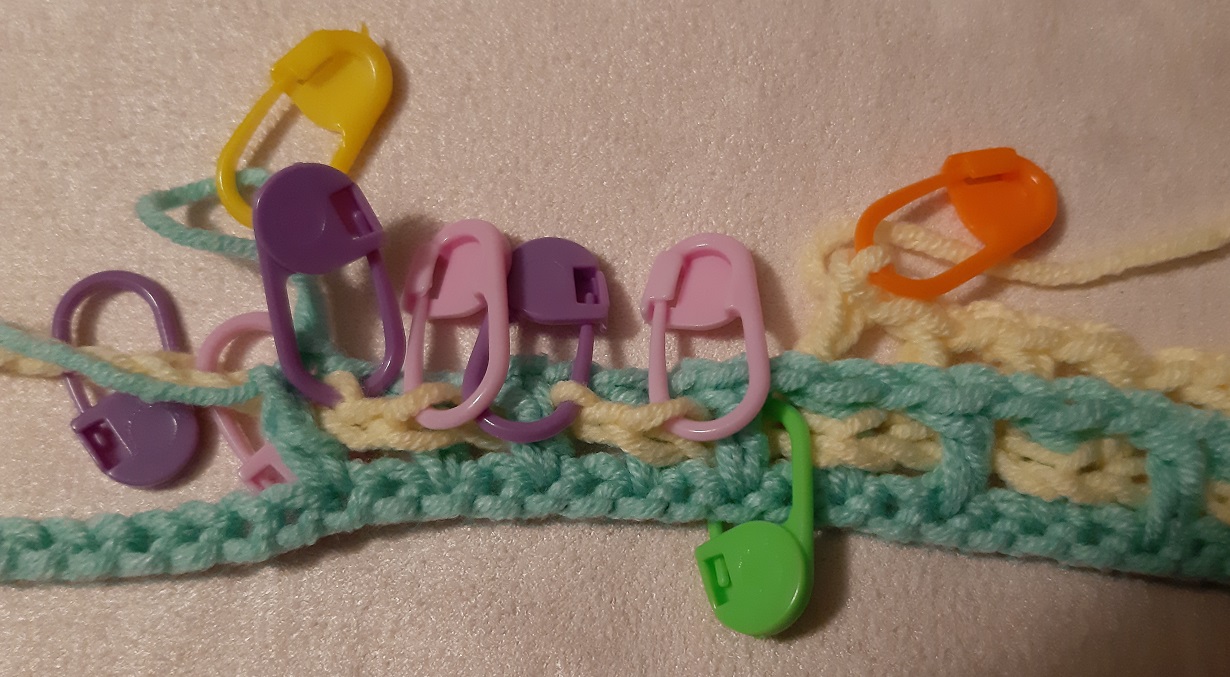
And here the next part is done. I put in an extra marker (the blue one) to keep everything in place, and the next set of markers is placed into the chain of color 2.
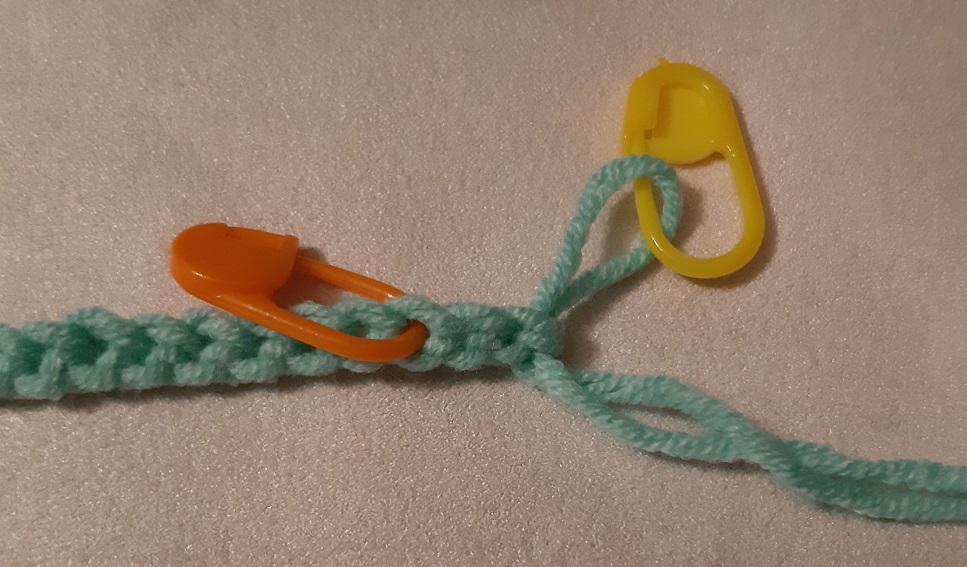
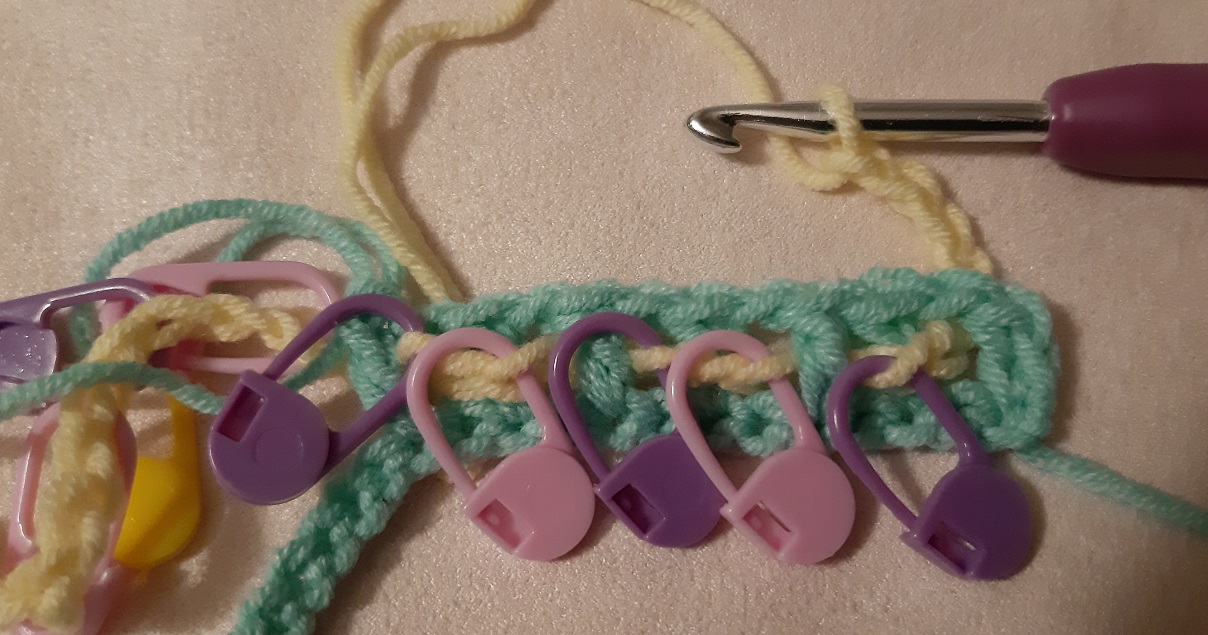
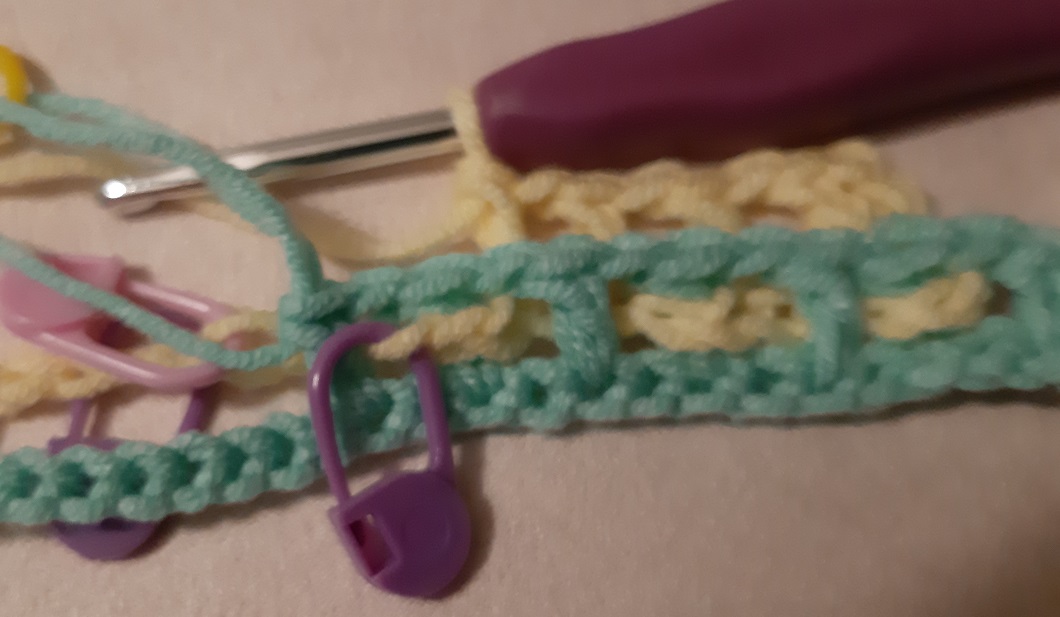
A checkpoint: you inserted markers at the setup for counting stitches. When you now put the markers into the chain of color 2, and you did this correctly, then at a certain moment you will end up 1 stitch before a marker used for counting. You see this in the picture at the blue marker in the yellow chain! Same for the dc’s you will be making in color 1. You will never have a dc into a place where a counting marker is, but always 1 stitch before it.
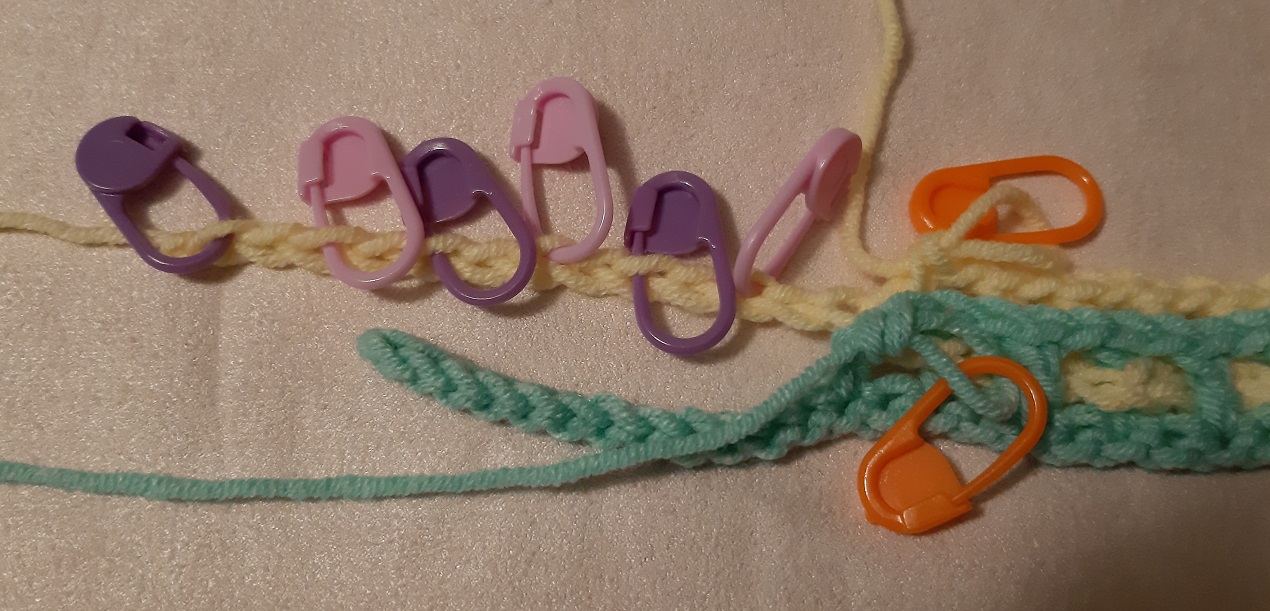
Almost finished. You see the last purple marker is in the last stitch of the chain, so you end up correctly!
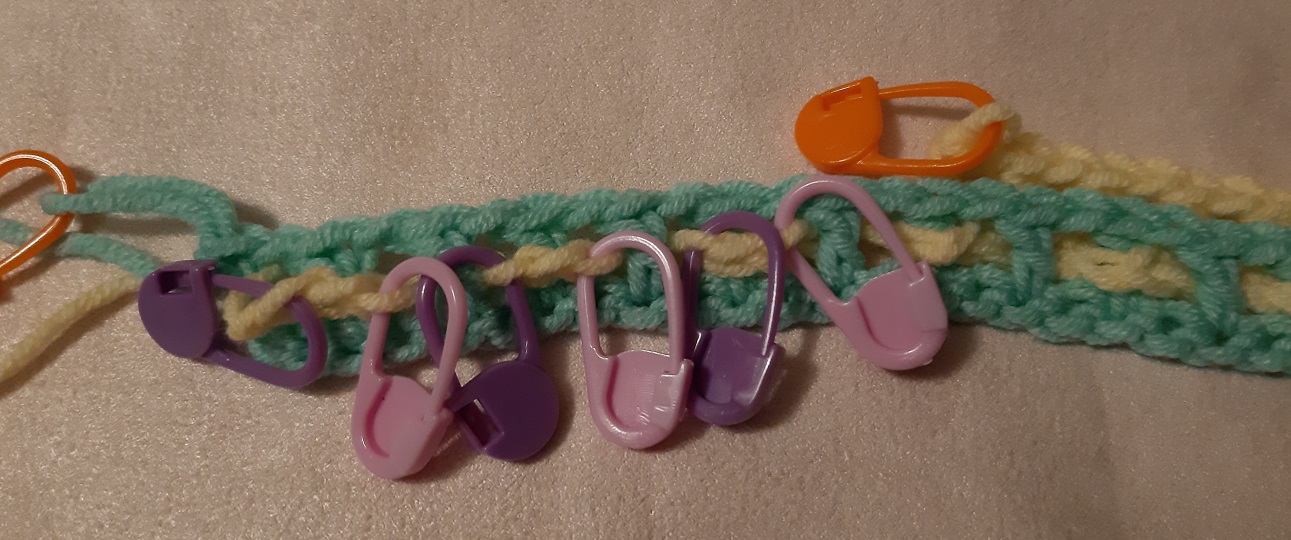
The last dc’s of color 1 are made now. Don’t get confused. The instructions for row 1a say you end with a dc at the back, but also followed by a side stitch. So that is what you’re seeing here!
The last dc’s for color 2. Rows 1a and 1b are now finished.
A lot of fun crocheting the rest of the blanket. From now on it will be much quicker and easier. Just keep counting correctly 🙂 .