
Overview of the tutorials
This tutorial of the first 5 blocks is split into a couple of pages, so that you can go quickly to the page you need. Here you find the overview with the links.
- Choosing colors and crochet symbols: click here to go the page
- The practice piece: click here to go the page
- Block 1, the middle part: click here to go the page
- The low border around block 1: that’s this page
- Block 2, the first 2 rows: click here to go the page
- Block 2, the interwoven rows and the end border: click here to go the page
- Block 3: click here to go the page
- Block 4, with stitches on the front in row 1a: click here to go the page
- Block 5: click here to go the page
- The border: click here to go the page
The video
You can watch the videos for this part here: https://youtu.be/_NQYib0zppM.
Low border tutorial for block 1
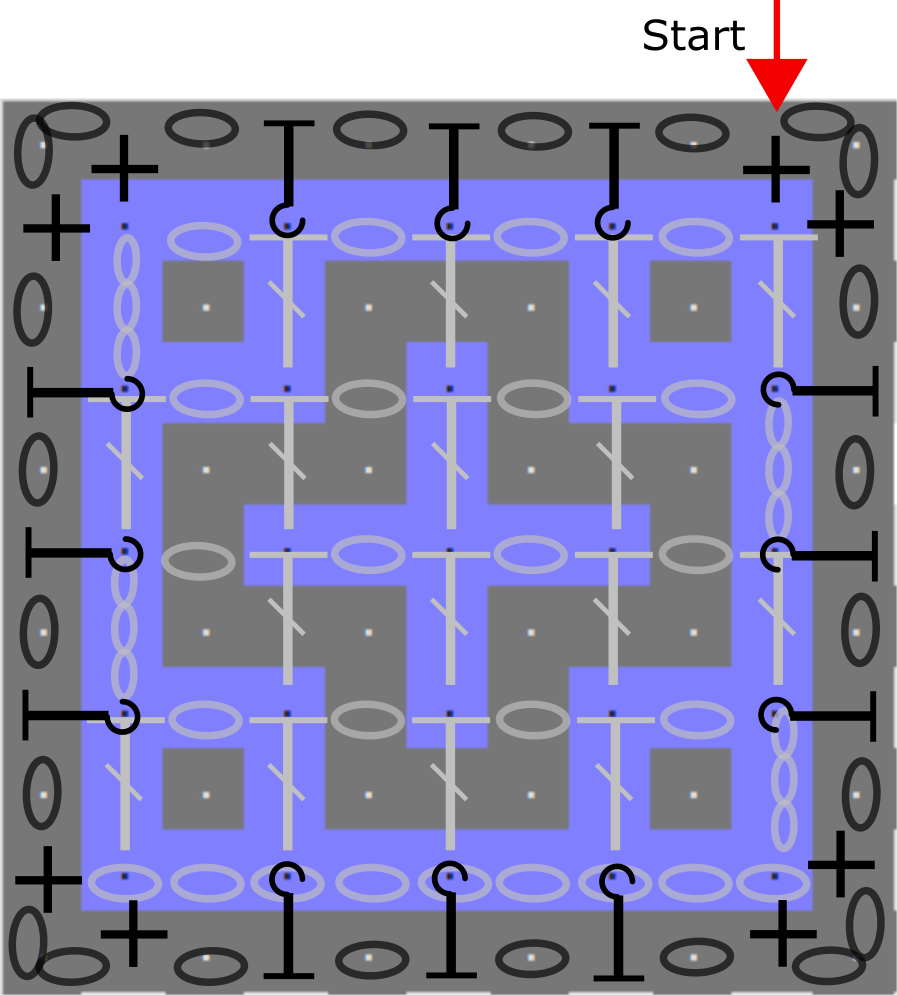
Click on the chart to see it fully. Look on the first page of the tutorial for the crochet symbols.
We will now make a border around the piece with color 2A. We will work into the back of the top, sides and bottom of the stitches in color 2A.
This border is to get a row of stitches that fall behind the border of color 1. So we need to make some ‘low’ stitches. This means making sc’s and BPhdc’s (Back Post half double crochets).
The use the BPhdc’s will help you get a nice look especially when working at the sides of the piece.
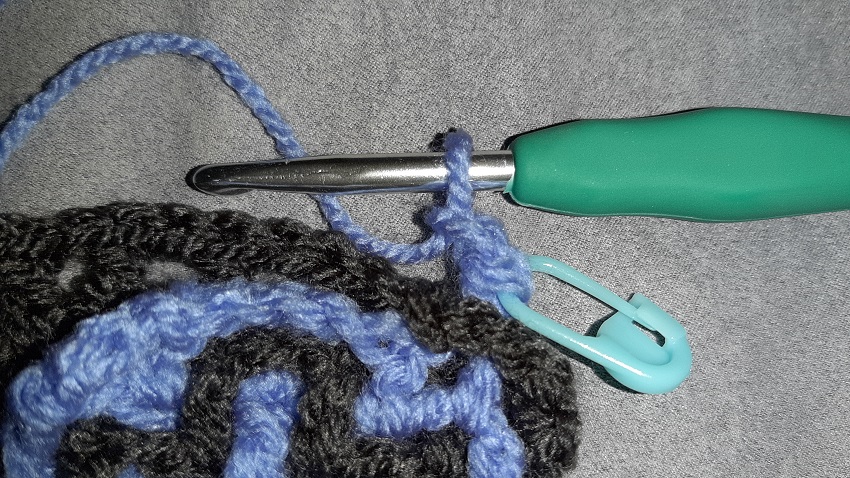
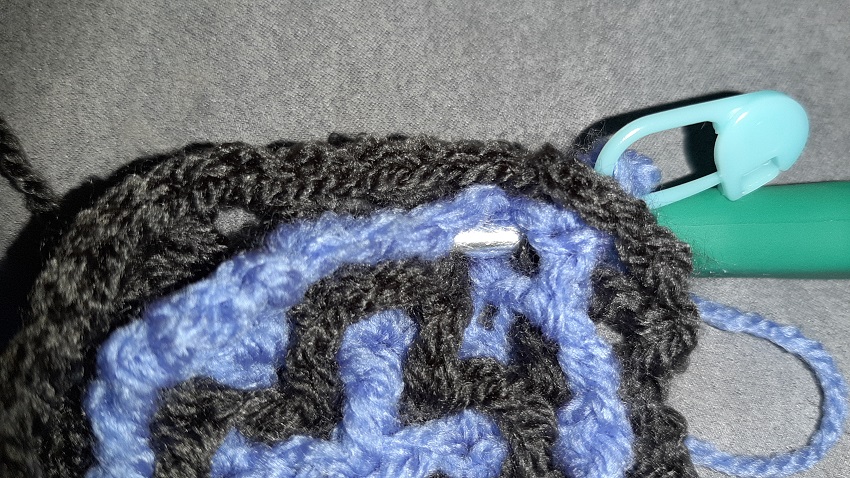
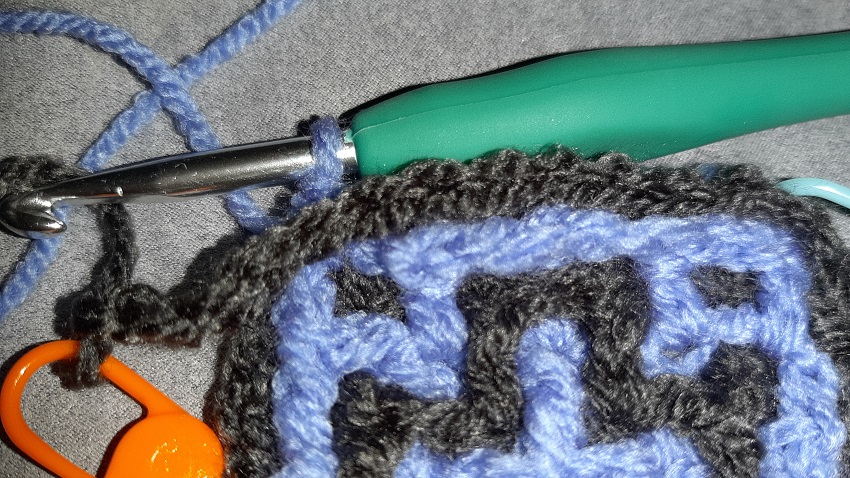
Place the front of the piece on top. The yarn of color 1 is at the top left. Don’t make a turning chain, but make a sc right away into the top of the first dc of color 2. Place a marker into the top of this stitch. Then do an in between chain.
!Remember: always put 1 chain in between the sc’s and the BPhdc’s, except for the corners. They will have 2 chains, but I will show that later.
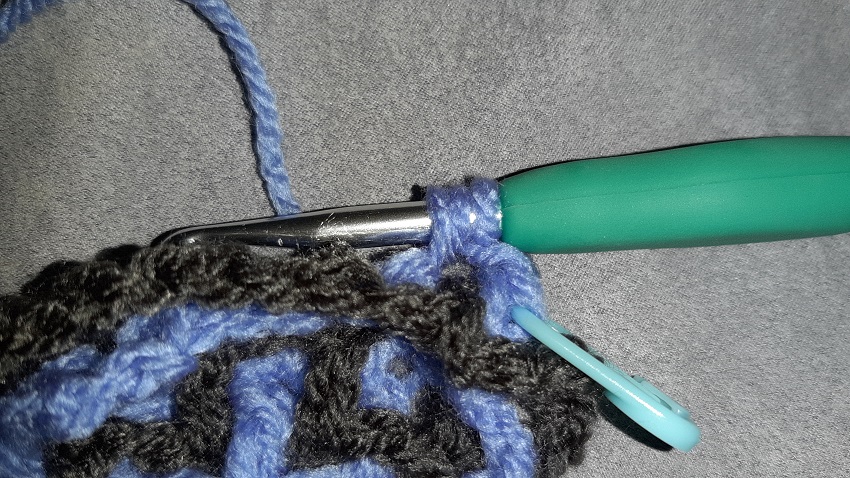
 Next we will do a BPhdc around the next dc in color 2A. Wrap the yarn around the hook.
 Put the needle to the front. Go through the hole of color 1 from behind. Think of it like this: as if you would make an interwoven dc on top of the dc of color 2, going behind color 1, a ‘back’ dc. Only this time we will not work into the top of the stitch, but do a back post stitch, and we will do a hdc instead if a dc.
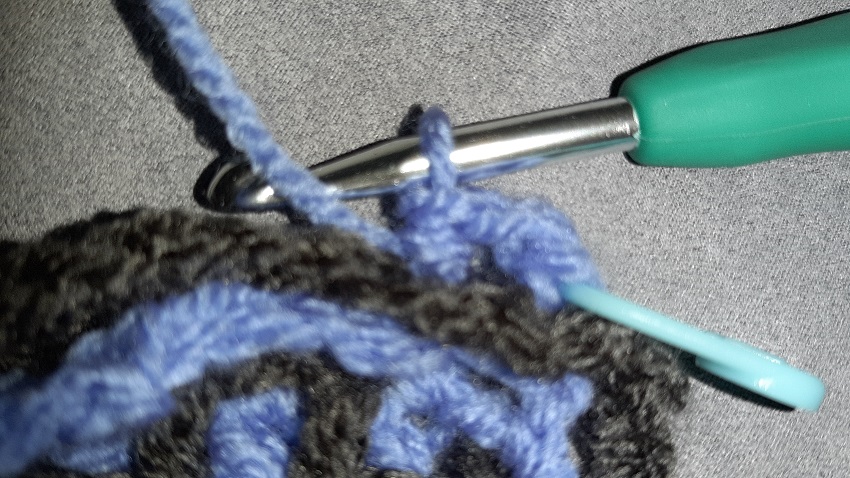
Back post stitches always start from the back, over the stitch (that is puhed backwards) and then pull up the yarn from the back.
 Here you see that the hook is brought to the back, ready to get the yarn from the backside.
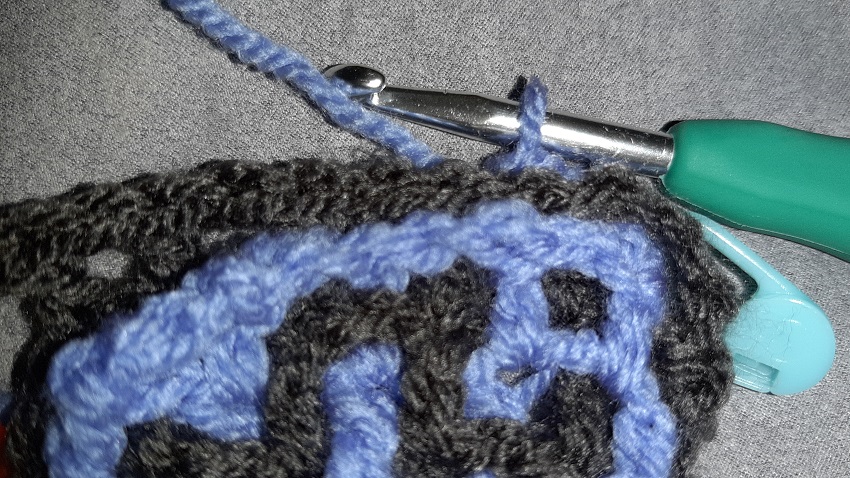
 The yarn is pulled up. Fold color 1 to the front to be able to work more easy.
 Wrap the yarn again and pull through all 3 loops to finish the hdc.
Remember to do the in-between-chain after this.
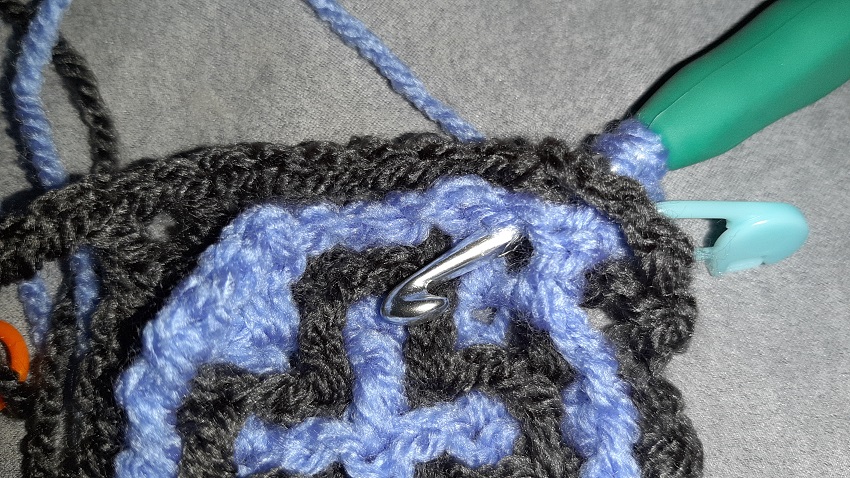
Here you see the result when the border in color 1 is folded to its natural position again. You see that the border in color 2A is quite hidden behind it.
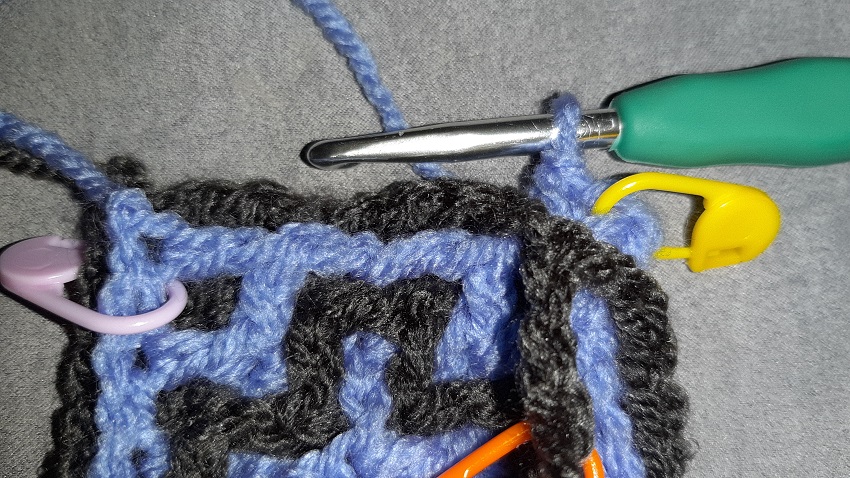
Make 2 more BPhdc’s around the next 2 dc’s. Remember to do an in-between-chain after each BPhdc.
 Make a sc into the chain space in the corner. The first side is done.
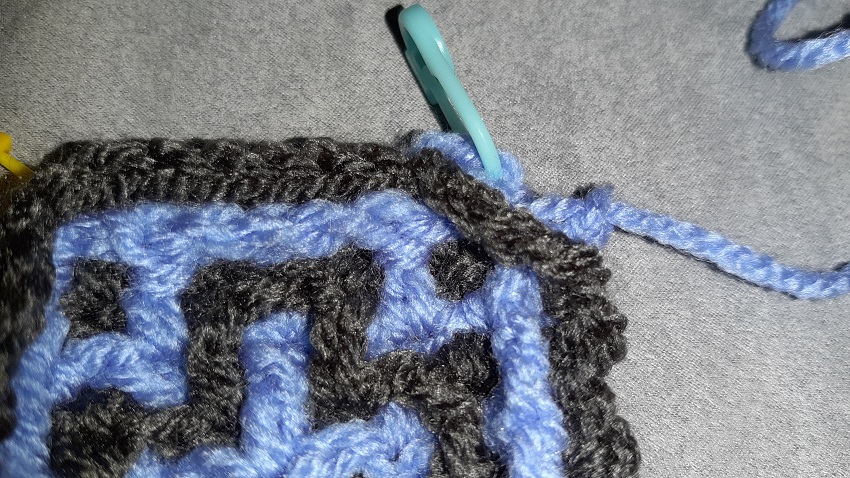
 Make 2 corner chains and then again a sc into the chain space. Place a marker into the newly created chain space.
Continue like the first side,
 When you have worked around the entire piece, all four sides, end with making 1 chain after the sc of the last side, cut the yarn and pull the yarn through. Thread the yarn through a needle, go through the top of the sc, under the V-shape, and go back into last made chain. This way you have created the second corner chain with the needle. Put the marker into the chain space and finish all loose ends.
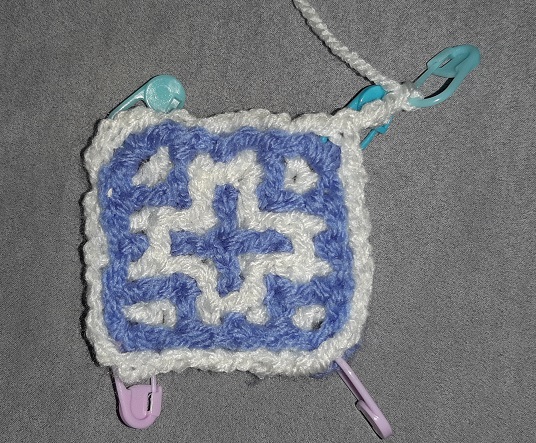
 Back view of the block when finished.
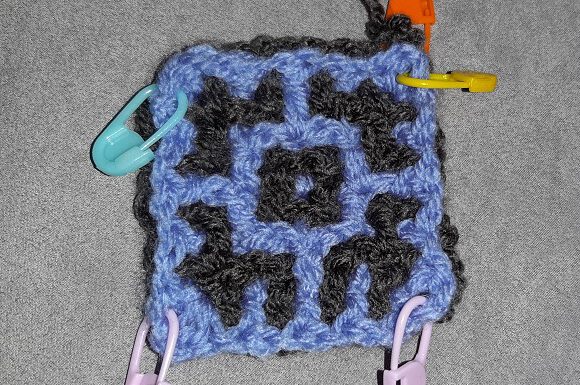
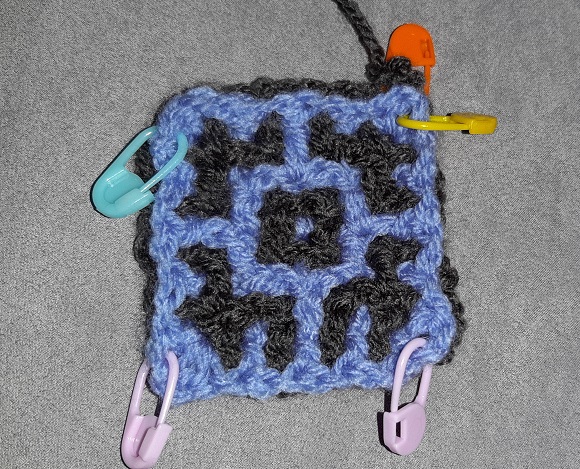
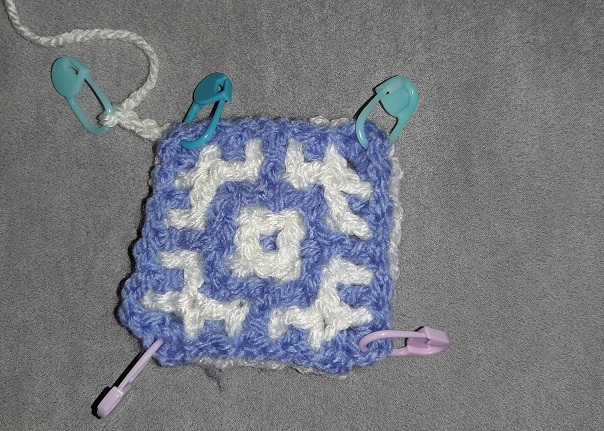
 Front view of the block with a light background color.
 Back view of the block with a light background color.