
Overview of the tutorials
This tutorial of the first 5 blocks is split into a couple of pages, so that you can go quickly to the page you need. Here you find the overview with the links.
- Choosing colors and crochet symbols: click here to go the page
- The practice piece: click here to go the page
- Block 1, the middle part: click here to go the page
- The low border around block 1: click here to go the page
- Block 2, the first 2 rows: that’s this page
- Block 2, the interwoven rows and the end border: click here to go the page
- Block 3: click here to go the page
- Block 4, with stitches on the front in row 1a: click here to go the page
- Block 5: click here to go the page
- The border: click here to go the page
The video
You can watch the videos for this part here: https://youtu.be/Eeu-gRqRSVk and https://youtu.be/jyTCIcfl4hg.
Block 2: the first row in color 2
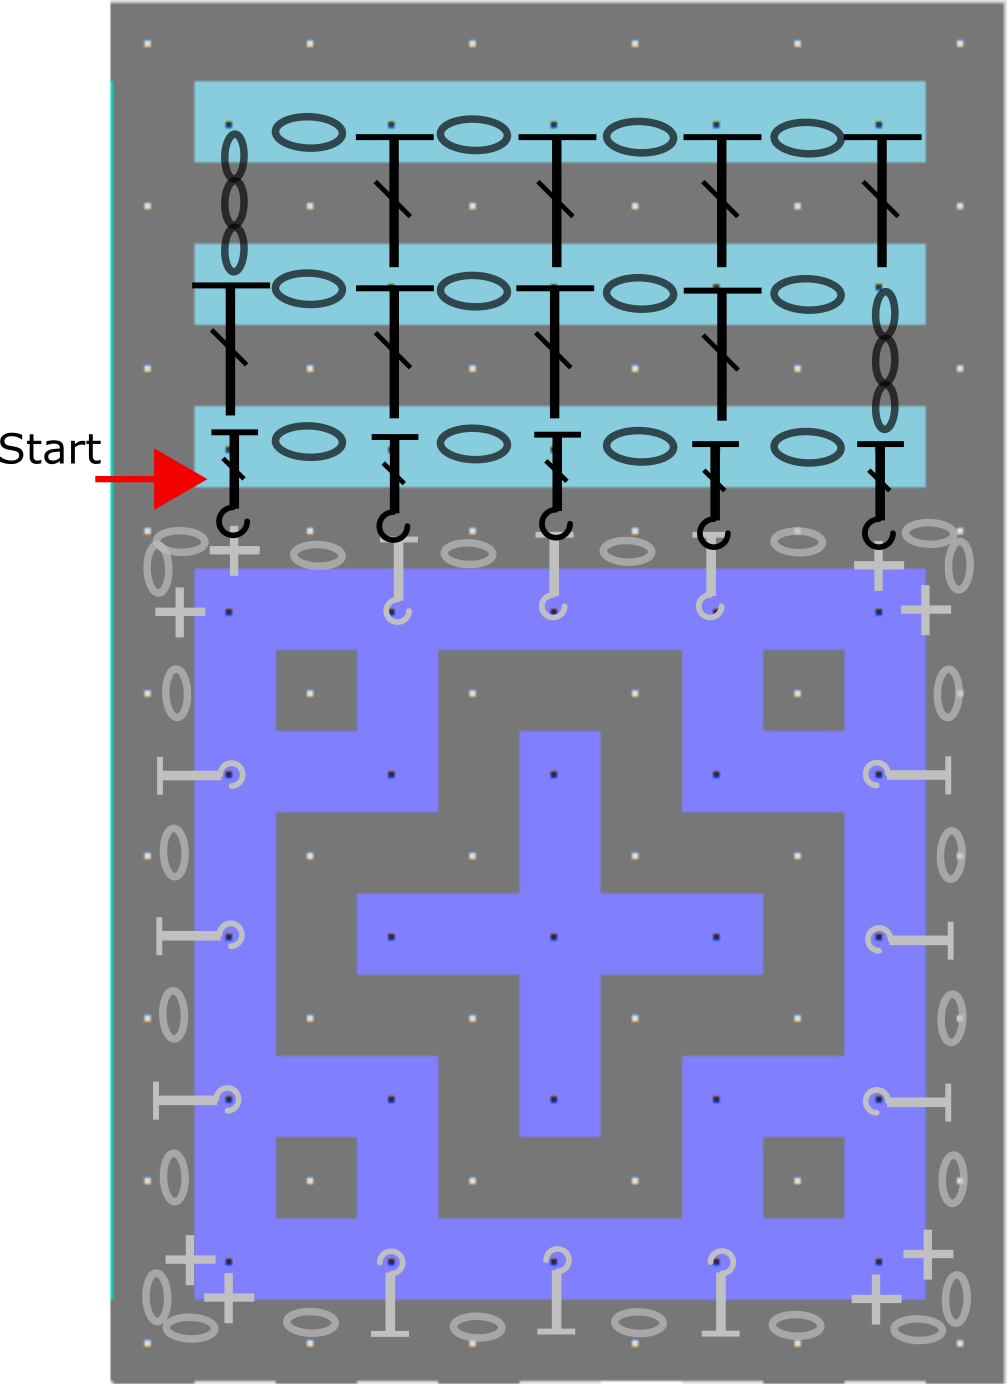 Click on the chart to see it fully. This is the chart with crochet symbols for color 2. This is not a chart for working ‘front’ or ‘back’, but it is more of an overview of the used stitches. We will first cover here the row that is pointed at with the red arrow, the start.
You see here that the first row is made with Back Post double crochets (BPdc). And you can also see these are made around the single crochets of the corners and the dc’s of the border of block 1 in color 2. You might want to take a look at the chart we used there to make the border around block 1. These stitches are shown here in grey.
You can also see we start at the left side of the chart. That means we will first have to turn the work, back side up, because we will of course work from right to left (if you’re right handed). FYI: in the crochet charts you see 3 chains plus 1 in-between-chain are drawn at the start of the rows, so 4 chains in total. Do 3 if you crochet loosely, as mentioned with the tips.
First a short explanation of why we use the dc’s as our back post stitches, while we already have done a bit of the border in color 2 (of block 1). You maybe expect we would do something like single crochets, or half double crochets. But because we want to get the right height, and we will not be working into the top of the stitches of the previous row of color 2 (of block 1), but around the posts of the stitches and therefore work lower, we do have to make slightly taller stitches. So dc’s, worked back post.
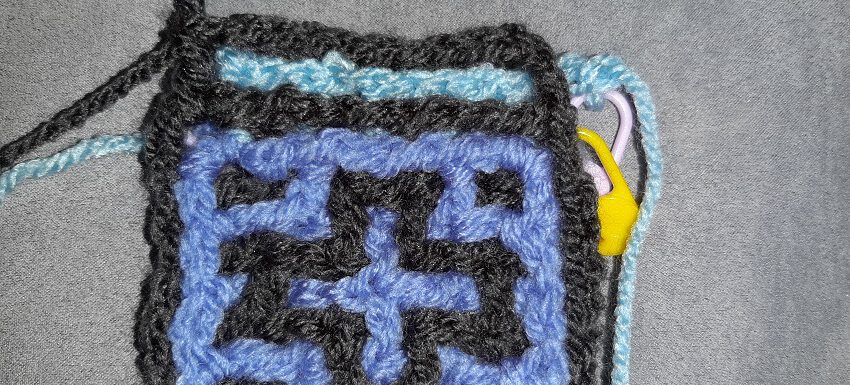
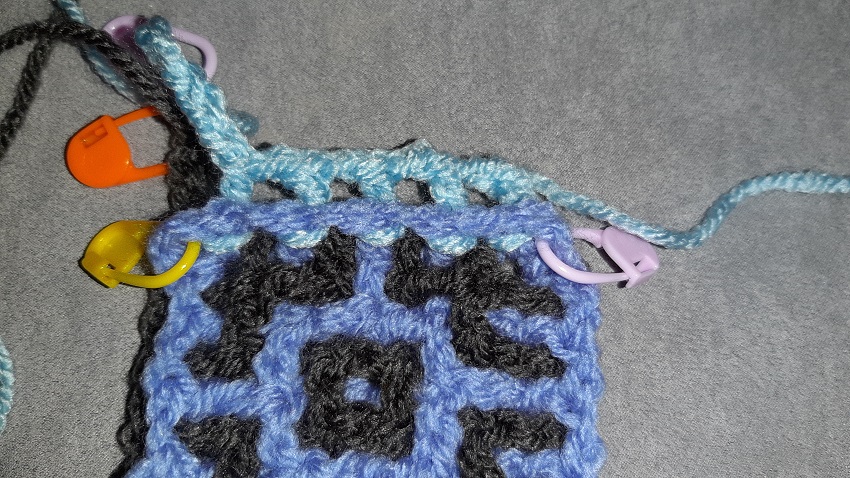
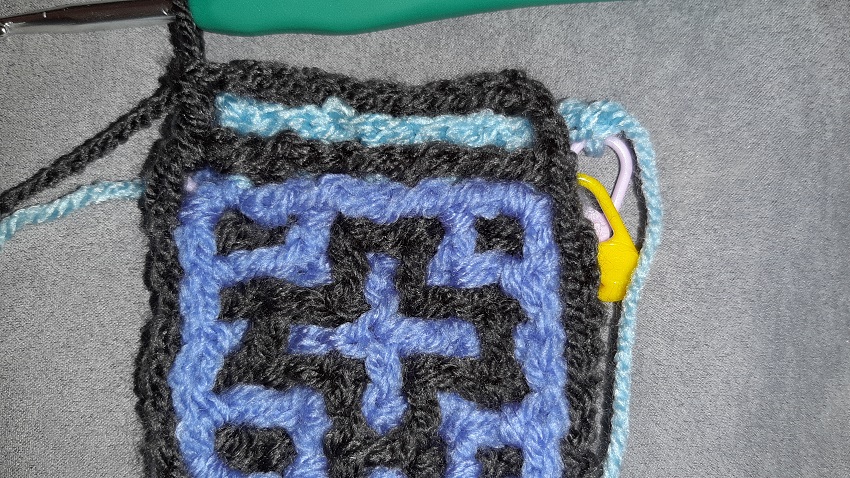
 This is your starting position when you’re finished with the border around block 1. The yarn of color 1 is at the top right. You see here that the first stitches of color 1 are already made, like most of us are used to do for the side stitch.
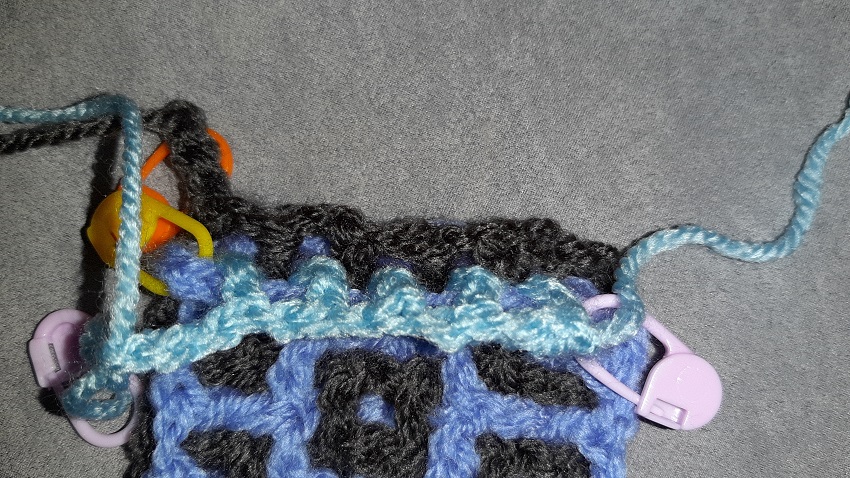
 Turn your work, so that the back side is up. The yarn of color 1 is now at the top left. To be able to continue with the next rows in interwoven, we first have to make a row in color 2 (in this case the blue), so that we end at the top left corner and have both colors at the same side, and have a ‘base’ in color 2.
 Now we will do the first Back Post double crochet (BPdc). This one will be made around the single crochet at the right. All stitches will be made in front of the border in color 1, so fold this border in color 1 to the back if you find that easier to work. This is also a standing dc, so make a slip knot, put this on your hook, and make a BPdc. See the video if you don’t exactly know how to do this.
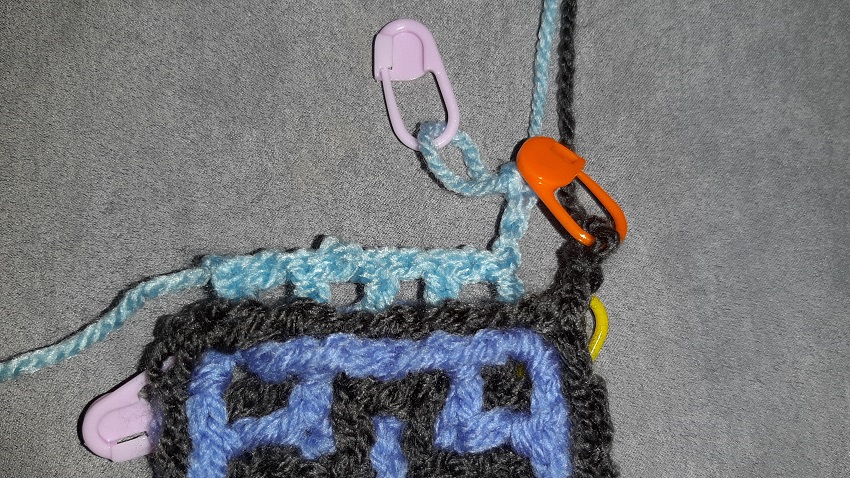
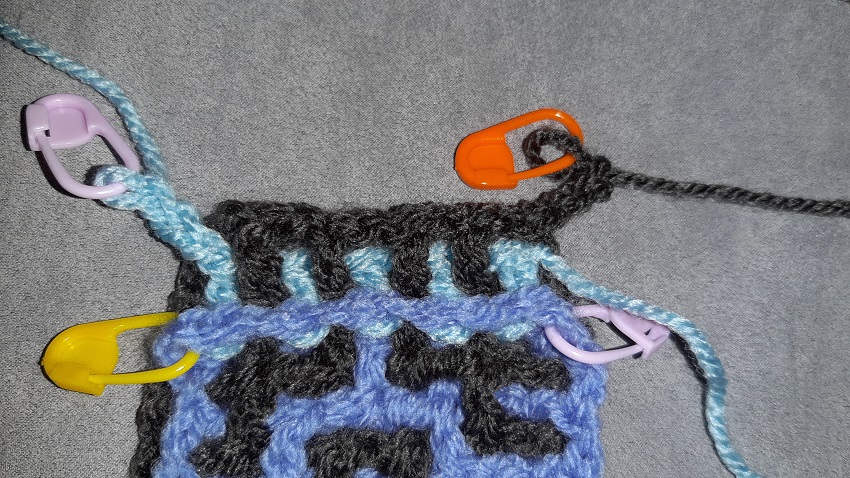
 After every BPdc you make an in-between-chain, as you can also see in the chart. Here the row is finished. The first 3 chains (or 4, if you work tight) for the next row in color 2 are already made.
In my instructions I give the numbers how many stitches you have to make, in this case 5. For this second block you will only be working along the side of block 1, but with the next blocks you will be crocheting along several blocks, and then these numbers are very important to be able to check if you do it right.
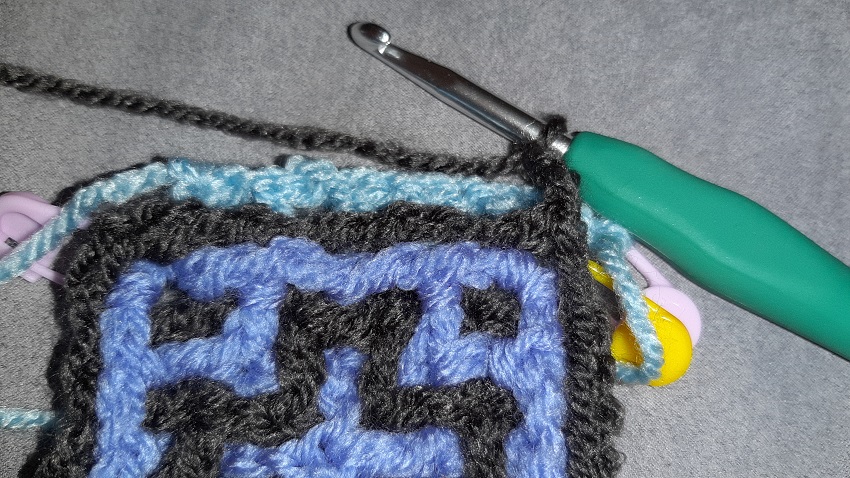
 Here I folded the row we just crocheted to the front, so that you can see the row of color 1 behind it.
 And here you see how the work looks if you have turned your work again with the front on top. You can now also see we have the right starting position for the rest of the block.
Block 2: the first row in color 1
The instructions for row 1a – front are: color 2 to the back, side st, b 4x, side st
 Here you see that color 2 is brought to the back, and the side stitch in color 1 is made (it already was of course, as you can see in the pictures before).
This is important: the rows A of all the blocks are made as extended dc’s, and they will also be made a back post stitches. Why extended dc’s? This is to give just a bit of extra height to the stitch. Usually we will use ‘regular’ dc’s here, but because we will work this as back post stitches, that are made a bit lower becuase you don’t work into the top of the dc’s below it, but around the post of the dc, we need to make a stitch that is just a little bit higher. A triple or treble crochet is too much (believe me, I’ve tried it when I figured this out and tested it), but an extended dc is just right. Pay attention: the side stitches, the chains at the start of a row, and the last stitch at the end of a row, a dc, just will be done as normal. So this is only for the stitches that are made in between the side stitches!
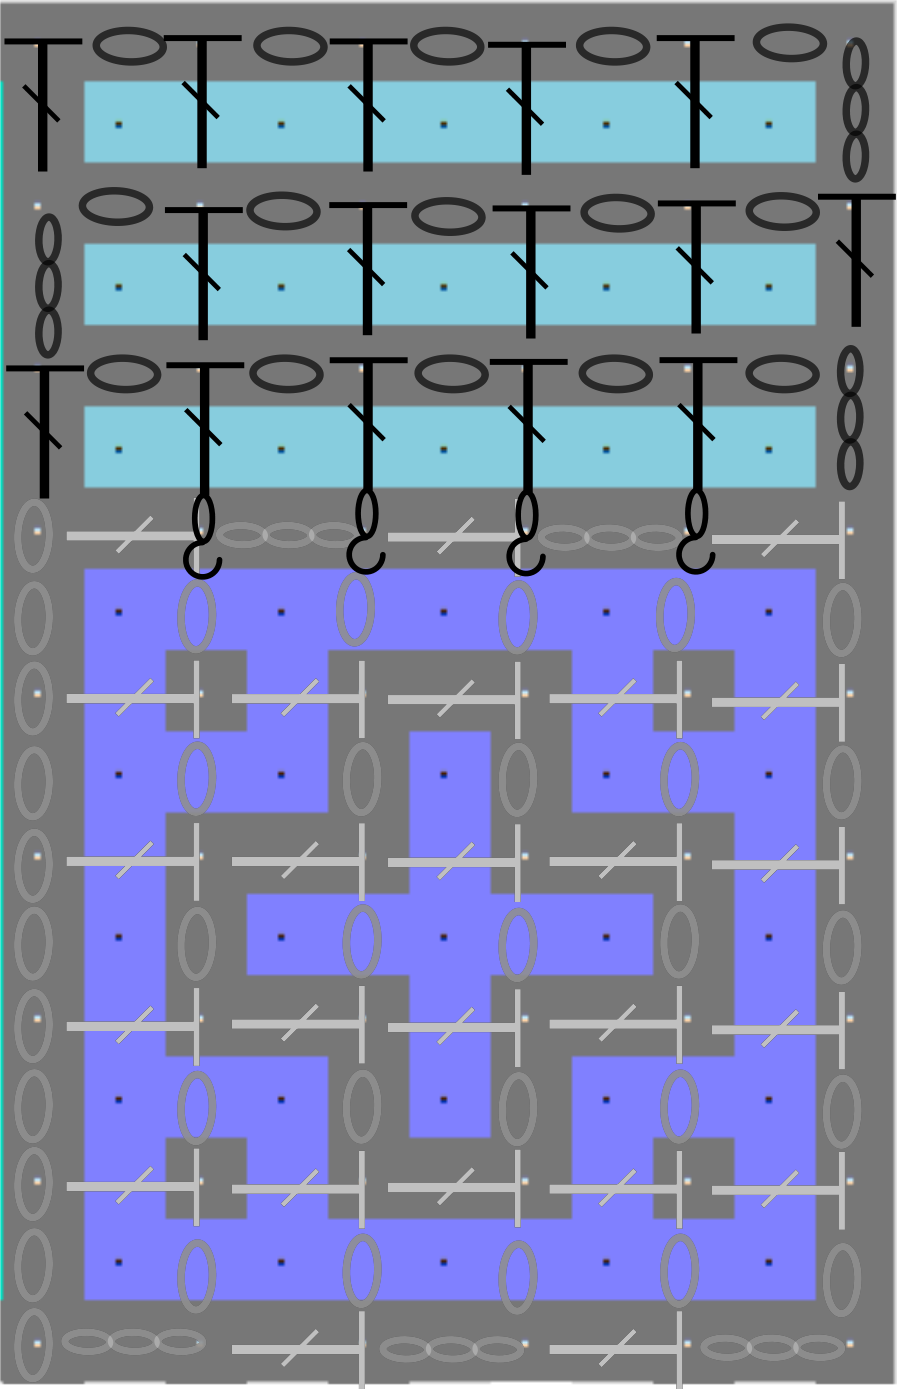 Also see the chart here with the crochet symbols for color 1 (click on the chart to see it fully). In this chart you can see the Back Post extended double crochets (BPedc) are used in the middle only. The start (of each row) is drawn here as 4 chains, but use 3 as mentioned at the tips if you crochet loosely. What you will also see here in this chart, is that you won’t work around the posts of dcs of a previous row, but you will be working around the side of block 1. Later, with the blocks further, you will partially work around the sides of previous block and partially around dc’s of a previous block.
Remember this as follows:
1. With the low border at the end of a block you will use single crochets and back post half double crochets: the low stitches
2. With the first row in color 2 of a new block back post double crochets are used: medium stitches
3. With the first row in color 1 of a new block back post extended double crochets are used: high stitches (in between the side stitches)
 Here you see the start of the first BPedc after the side stitch. The instructions say b 4x. Remember that we are actually going to do regular interwoven, but by using back post stitches. So the stitch has to be made behind color 2. This means that you go through the opening of the first hole of the first square in color 2 from behind to the front! We will not be working now into the top of the dc of color 1, but around the post. Well, actually, to be honest, these are not dc’s of course, because this is the side of block 1, but we can pretend they are, as you can see.
Pay attention: there are several blocks in the pattern where row 1A also contains stitches that have to be made ‘front’. I will show that later and also in the videos.
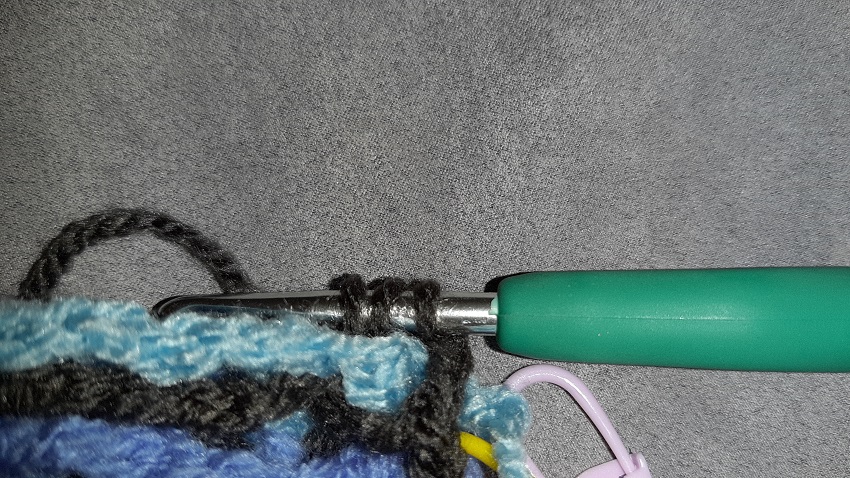 Here the loop is pulled up. You now have 3 loops on your hook, just like with a regular dc.
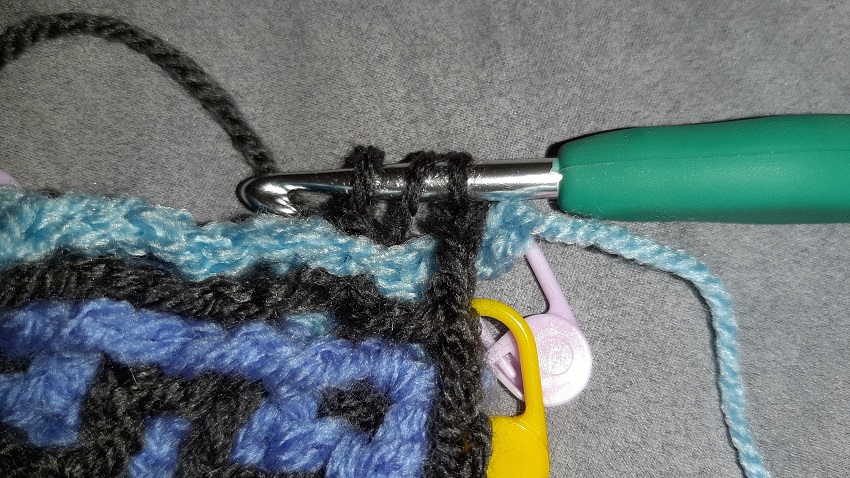 Now wrap the yarn around your hook and only pull this through the first loop! With a regular dc you would pull it through 2 loops, but not so with an extended dc! So you will still have 3 loops on your hook. If you look super closely to the picture, you can see a tiny bit of a stitch under the loop at the left.
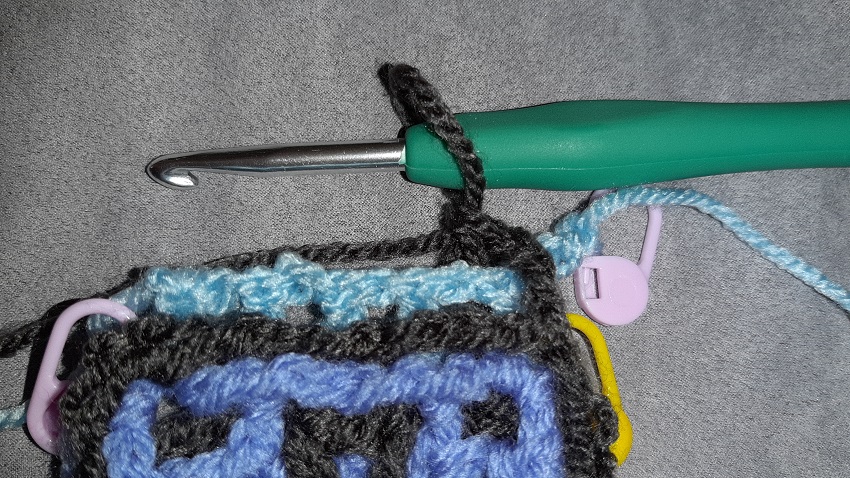 And now you can finish the stitch as a regular dc: wrap around your hook and pull through 2 loops, and then again wrap around your hook and pull through 2 loops. The stitch is finished.
 Continue to work like this the entire row. The last side stitch is just a regular dc. You don’t have to work into a dc for this, but you can just work through the chain opening.
 And this is how it looks at the back side.
Click here to go to the next page with the further explanation about block 2.