
Pages of this tutorial
I splitted the tutorial up in several pages.
- Introduction and row 0 and row 1: click here to go to that page
- Row 2: that’s this page
- Row 3: click here to go to that page
- Row 4: click here to go to that page
- Row 5: click here to go to that page
- Row 6 and 7: click here to go to that page
- Pattern description and pictures of the last rows: click here to go to that page
- Tips and tricks: click here to go to that page
- Joining the blocks: click here to go to that page
Important for the next rows
With regular interwoven crochet you turn the work each time you’ve done both color 1 and color 2 at the same side of the piece. This takes care that your work doesn’t slant. With this method you won’t do that. You will continue to crochet at the front side all of the time. For this you have to do something special to take care your work will not get slanted!
Tip: Place a marker or thread at the front of your work, so you will always know for sure you are working at the right side.
When crocheting into the top of the dc of the previous row of the same color, you will not work as usual only under the 2 strands (the v-shape) of the top of the dc, but you insert your hook into the top of the dc.
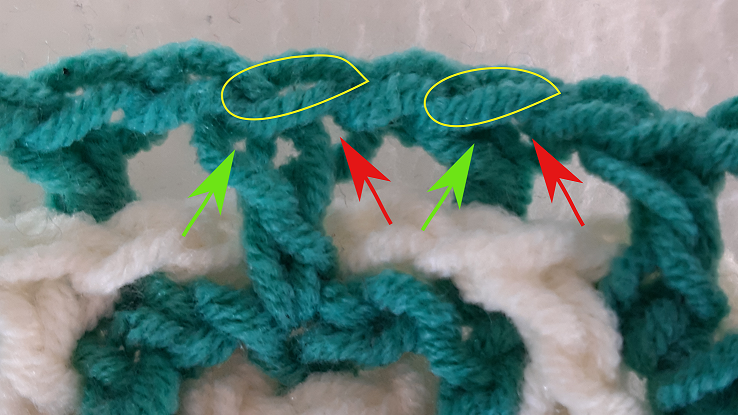
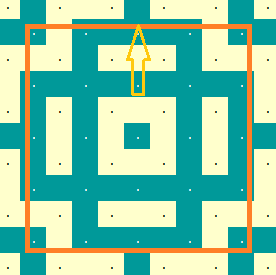
In this picture I have tried to make it clear what I mean. You see the 2 marked yellow ‘loops’. That’s the v-shape that belongs to the dc. Usually you will insert the hook at the spot where the red arrows are pointing to, so that the 2 loops of the v-shape get on your hook. You see that they lie a bit to the right of the post of the dc, and that’s also the reason why your piece will get slanted if you would work into this row after row after row.
I pulled the post of the left dc a bit apart at the top. Click on the picture to see it full size to see it clearly. If you now insert into the hole where the green arrow is pointing to, the dc’s will get nicely on top of each other.
It may feel a bit weird at the start, and in the beginning you really have to aim a bit, but you will get accustomed to that quite quickly.
Row 2 (color 2, yellow)
Pattern description extended:
- corner dc in the back (3 ch) + 1 in between ch
- color 1 to back
- dc in the back
- 4 corner ch
- repeat 3 times:
- dc in the back + 1 in between ch
- dc in the back
- 4 corner ch
- close row with slip stitch
Pattern description shortened: color 1 to back, *(b 2x, c)* 4x
See the tips and tricks page where I show how to use stitch markers in the corners, to help you through this first part. I also show in the video how this can help you!
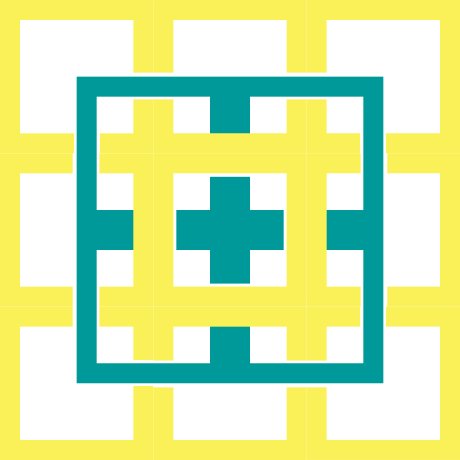
This is a graphical representation of how rows 0, 1 and 2 will look together. Click on the picture to see it full size. You can already see that all dc’s fall behind the green border, so all dc’s will be made in the back.
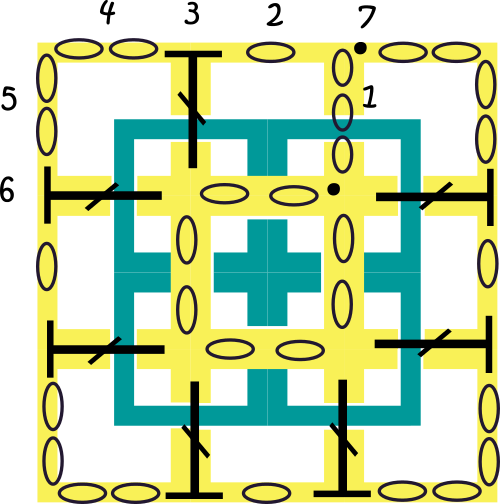
Here you see the next row with the use of crochet symbols.
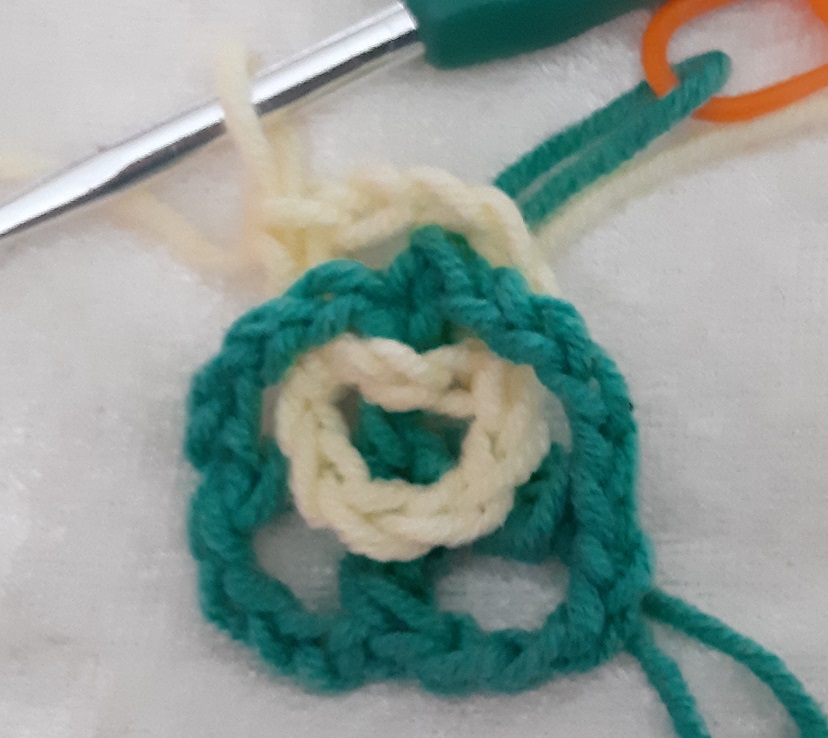
You start at 1 and 2. These 4 chains (steps 1 and 2) are already made, when we had to figure out where to put color 2. So these are the first 3 chains that make the first dc, plus the chain to make a square. Besides that, the dc is already in the back, because we took care that when closing row 1, the light thread was on the back of the piece.
This first dc is a corner dc of the top right corner, as you can see in the picture.
Something to remember: you will always start with color 2 at a dc just before the centre of a side.
Before you will now make the next dc you have to see where to put the thread of color 1 (the green). To do this you can already do the 4 chains of color 1, but I often just pull up the loop a bit.
Actually the rule is that each time you cross the start of the next row of the other color, you have to look where to put the yarn of that color, and for that you will already need the pattern chart for the next row, unless you just follow the instructions that tell you what to do.
So here you will cross the start of color 1 (the green) with color 2 (the yellow). In the picture here I have marked the next green row with orange. The first stitch that has to be made in green is where the arrow is. You see that the green will be behind the yellow that you have to do now. This means that we have to put the thread of the green to the back.
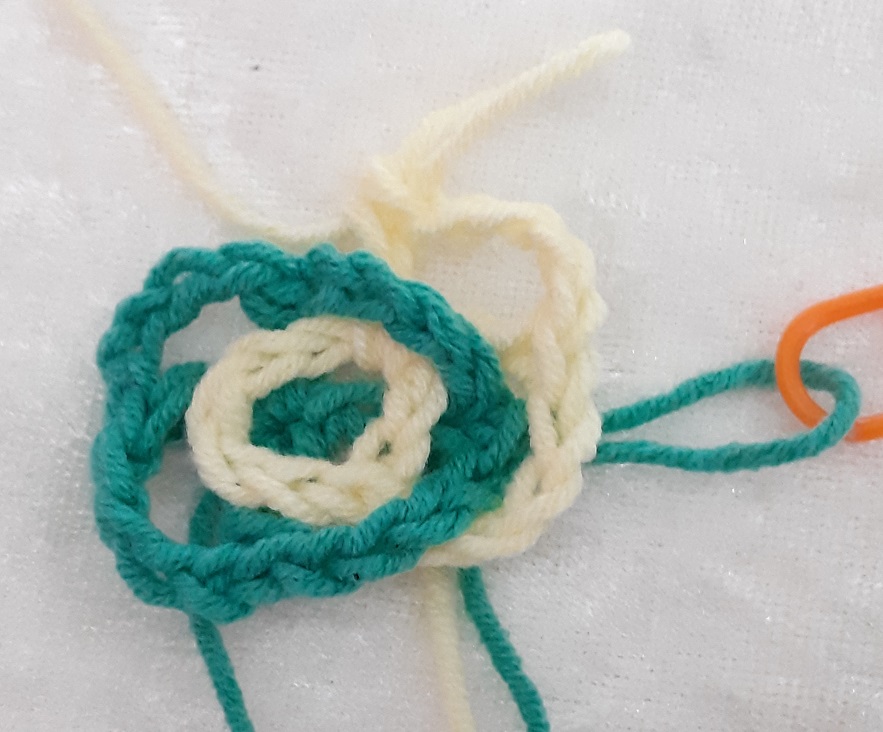
The next dc (step 3) that you will make will be the first corner dc of the left top corner. You crochet that into the space of the middle circle, but work it in the back through the opening of the top left square.
This is the way of crocheting interwoven crochet, so if you don’t know how to do this, please learn that first.
By the way, you have now made an ‘in-between-square’, the middle one of the 3 on the top border in the pattern chart. Do you also see how the green thread lies behind the top of this square?
Do 4 chains (step 4 and 5), turn your work to the right, and do another dc into the middle circle (step 6), through the same opening as where you did the previous dc. Do this again in the back.
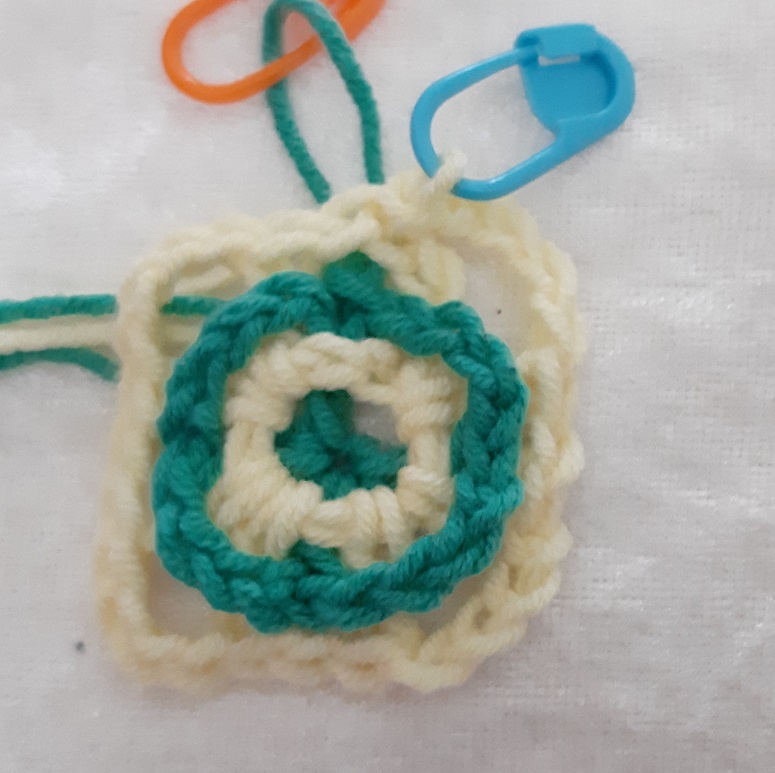
This corner is now ready.
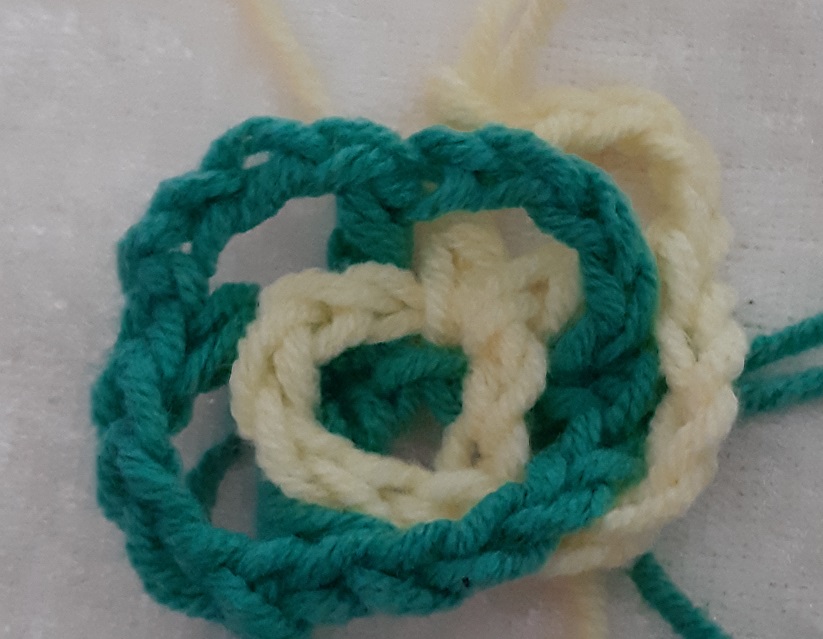
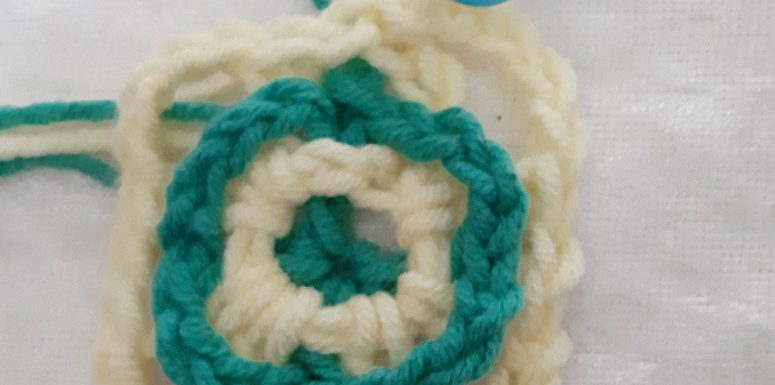
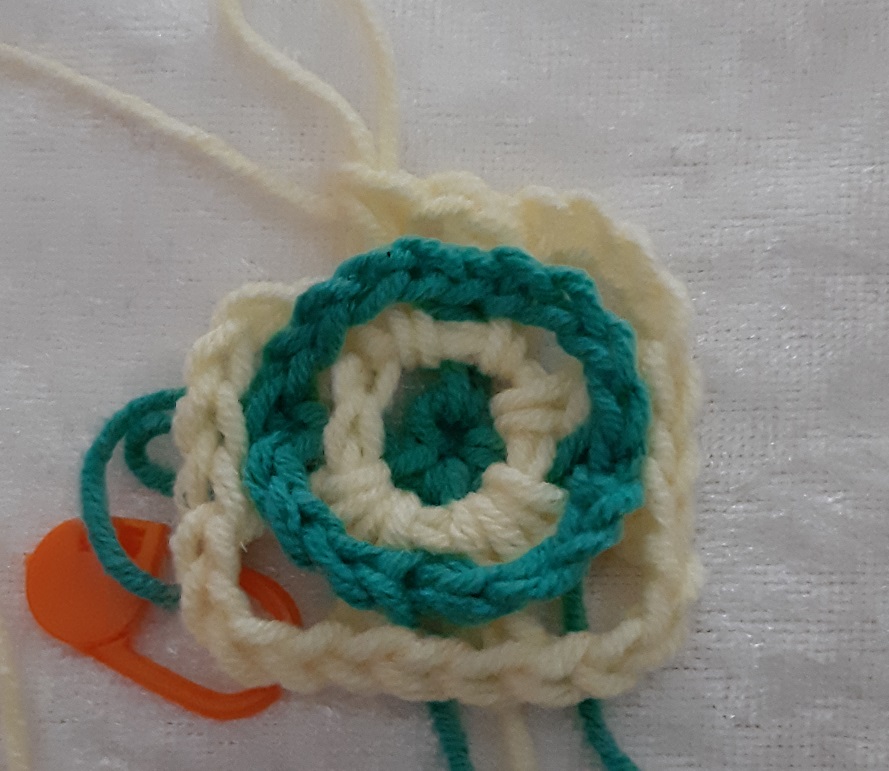
I zoomed in a bit more here, so that you can clearly see that the dc’s are made in the back through the same green filet square.
Now do 1 chain and the next dc into the next corner, to make the middle filet square of this side. Crochet this again in the back into the space of the middle square of color 2.
Repaat making the corners and the in between squares until you have come at the starting corner.

Next side.
In the last corner you do again 4 chains and you close the row with a slip stitch into the third chain of the starting dc .
You don’t cross the other color here, so you don’t have to worry about where to put color 1 (green). We already did that at the start of the row.