
Overview of the tutorials
This tutorial of the first 5 blocks is split into a couple of pages, so that you can go quickly to the page you need. Here you find the overview with the links.
- Choosing colors and crochet symbols: click here to go the page
- The practice piece: click here to go the page
- Block 1, the middle part: click here to go the page
- The low border around block 1: click here to go the page
- Block 2, the first 2 rows: click here to go the page
- Block 2, the interwoven rows and the end border: click here to go the page
- Block 3: that’s this page
- Block 4, with stitches on the front in row 1a: click here to go the page
- Block 5: click here to go the page
- The border: click here to go the page
The video
You can watch the video for this part here: https://youtu.be/5v1A_XFF7Gk.
Block 3: the inner part
In the following part of the tutorial I go a bit quicker through the steps. Take a look at the previous pages for details if you need that, or watch the videos.
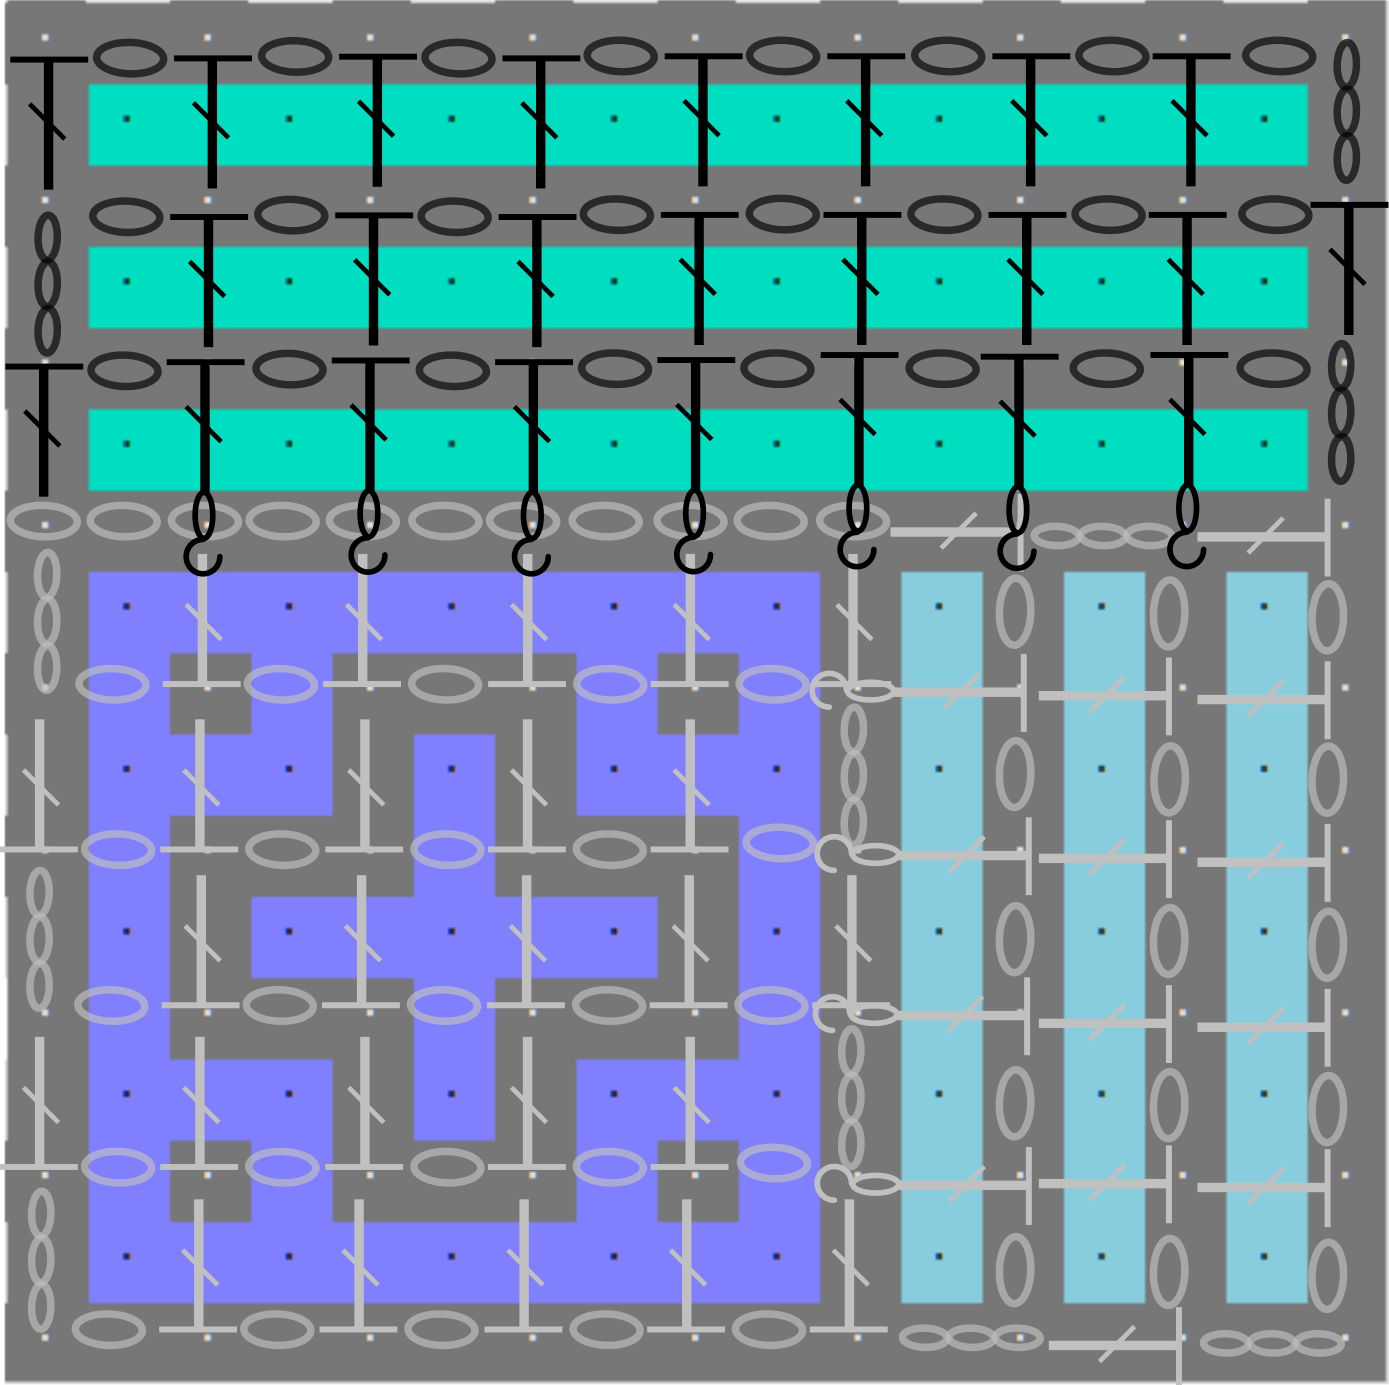
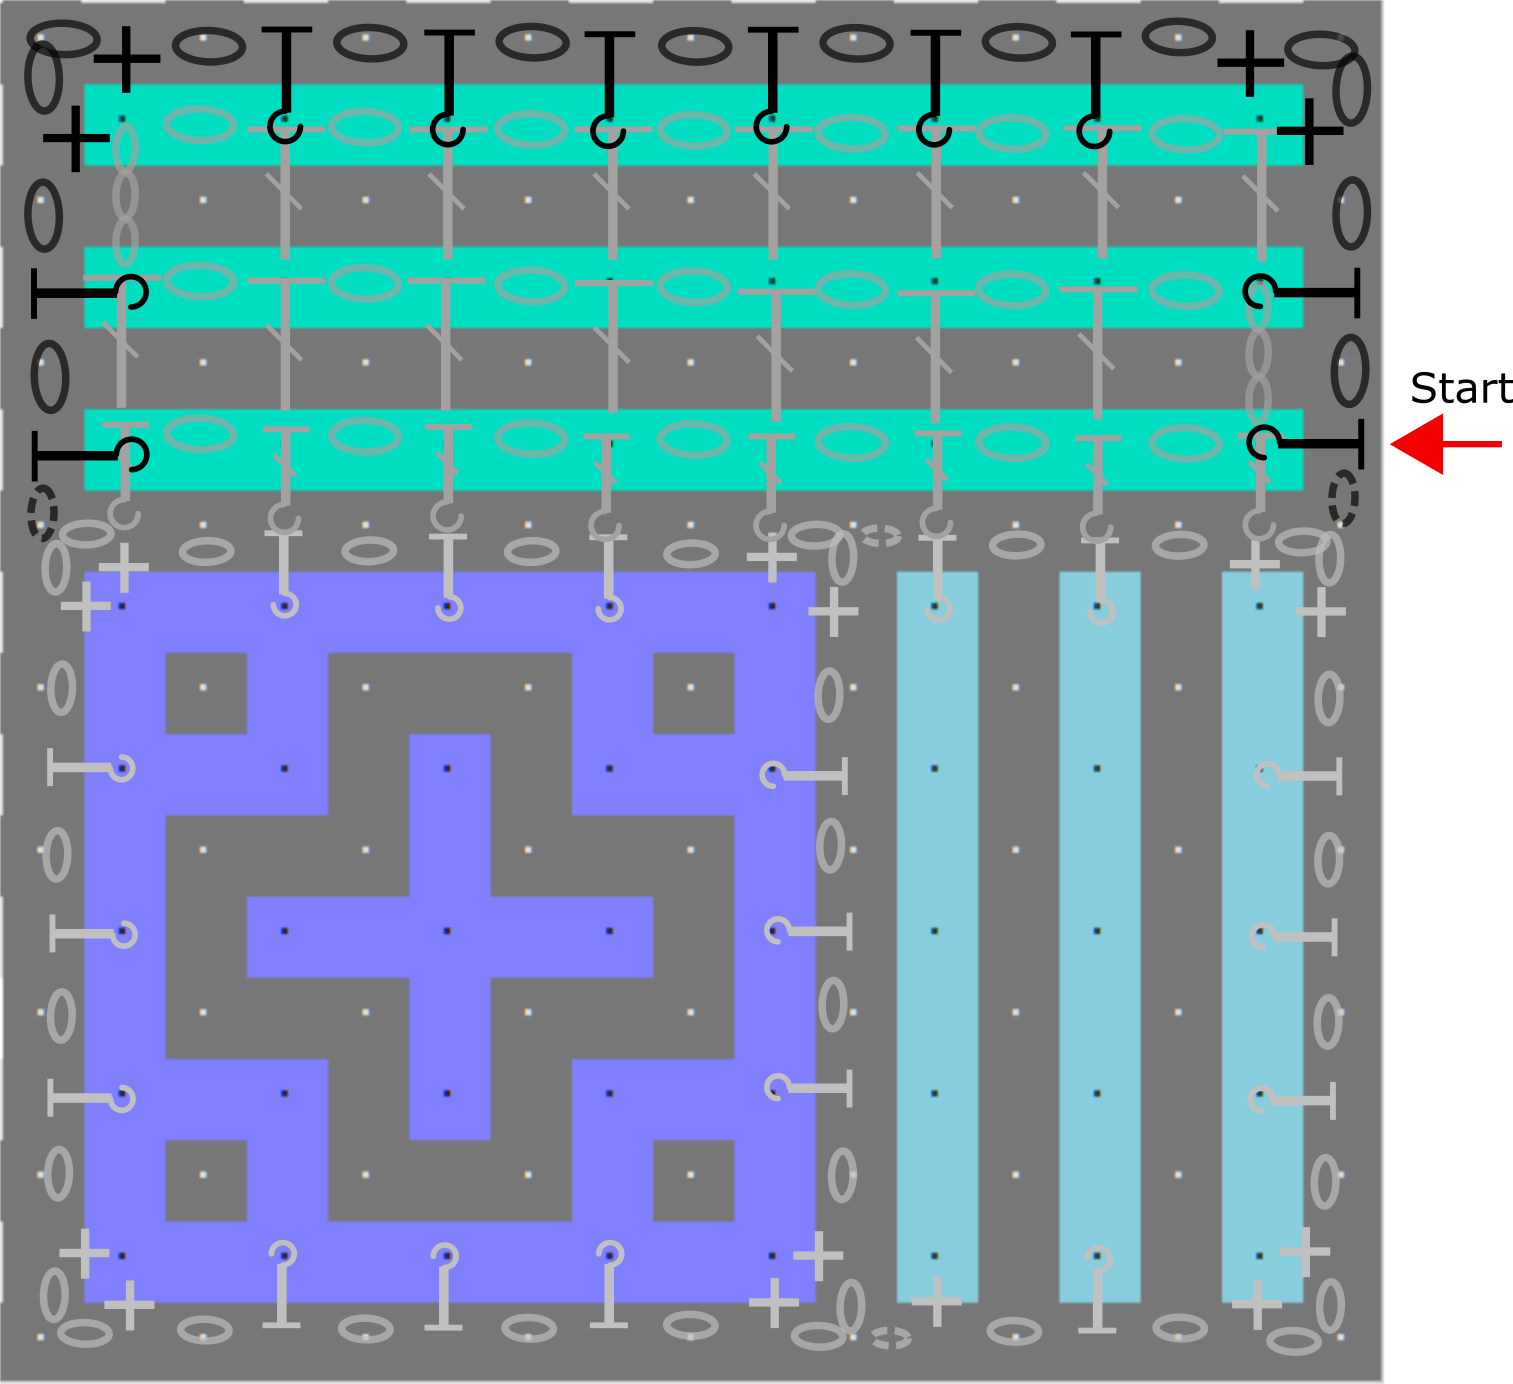
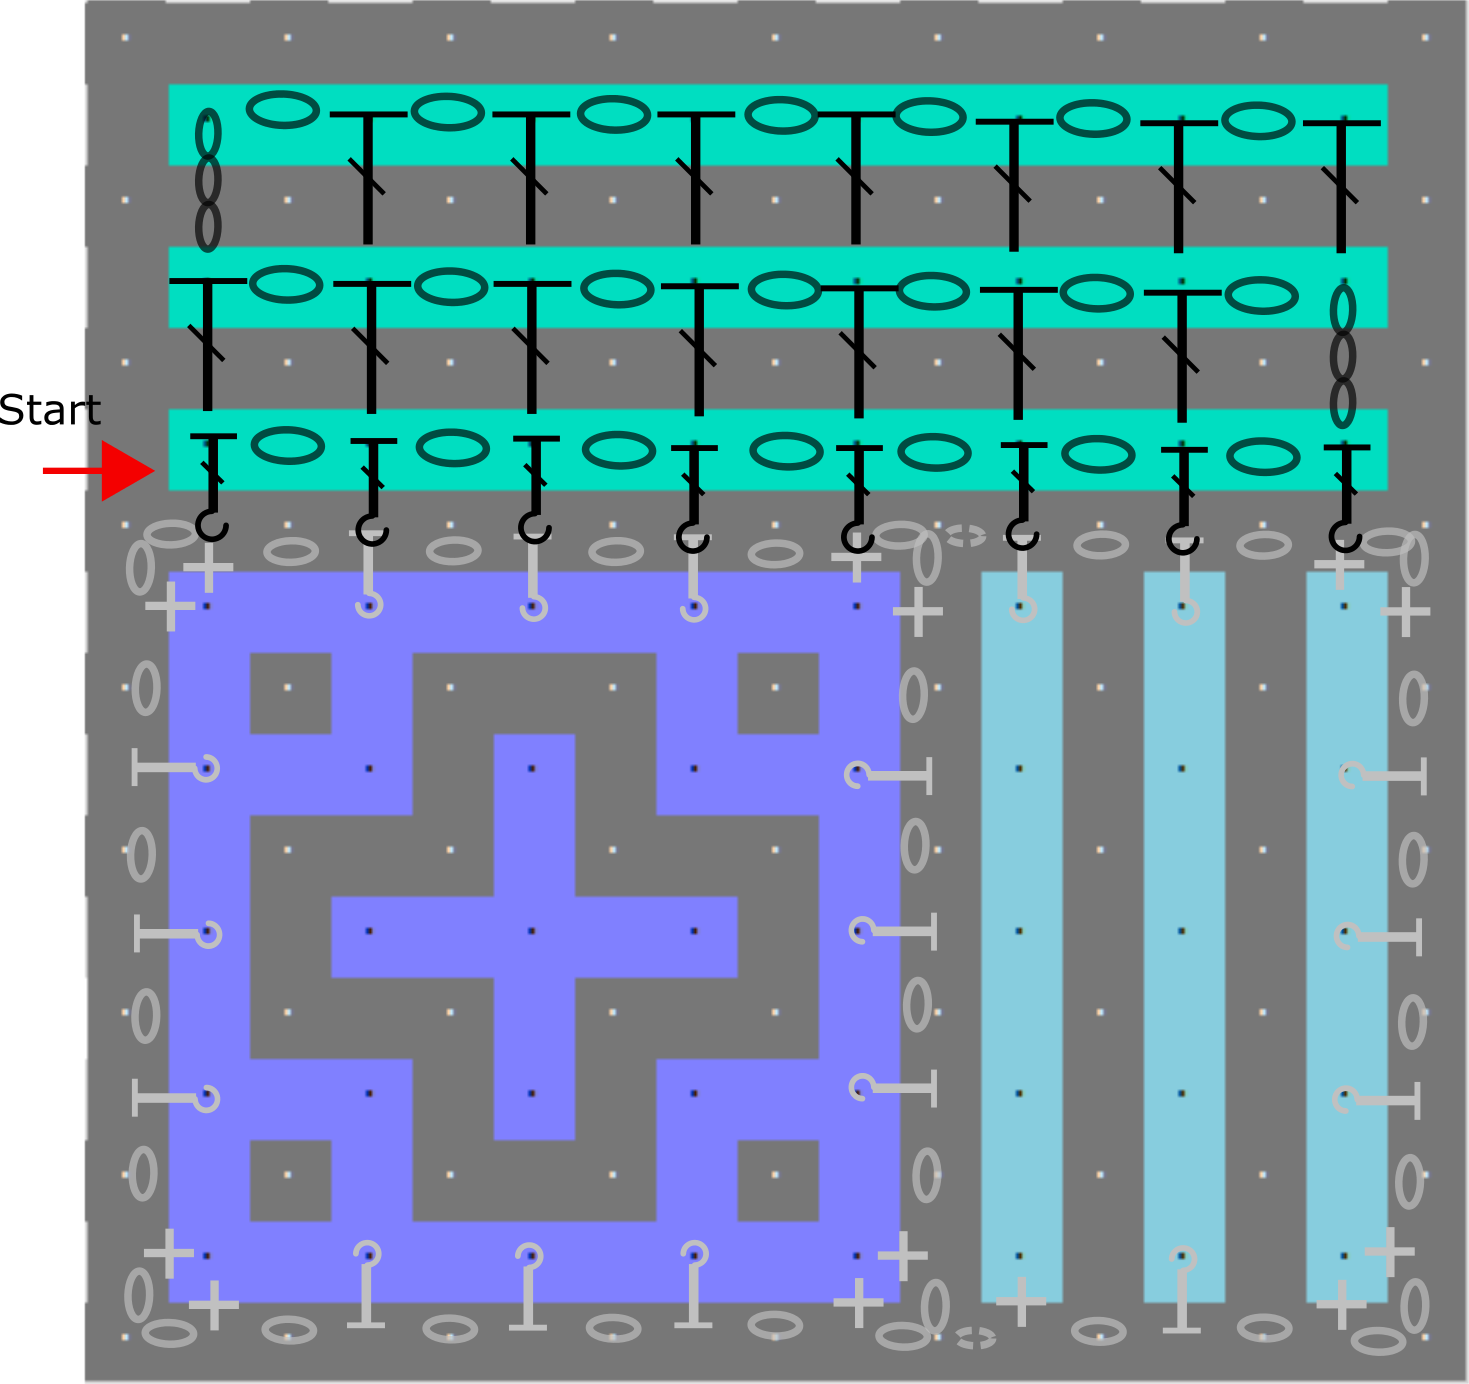 This is the pattern chart for color 2. Again you see you have to start at the left in the chart. And there are some other points that are quite important. First of all you start with a BPdc around the single crochet at the corner of block 1, and you end with a BPdc around a single crochet at the corner of block 2. But just as important is the place where block 1 is joined to block 2. You see that here also will be worked just around the single crochet of the corner of block 1 and around the BPhdc of block 2, and not(!) around the part that’s in between. With the pictures that follow you will see that this is a point that you really have to pay attention to, because it’s easy to go wrong here.
This chart doesn’t show if to crochet front or back, use the instructions for that. This is just a clarification for the stitches that will be used. This also is the case for the charts that follow.
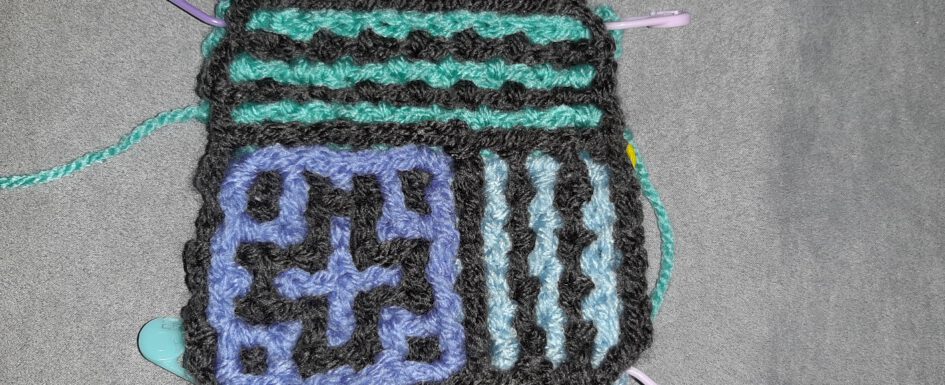
 This is the starting position. Put your work with the front side up, with the yarn of color 1 at the top right. We will work now along the top side of this, along block 1 and block 2. The instructions now say to make 8 BPdc’s in total, 5 along block 1, 3 along block 2, in this order!
 So we will first start again by turning the work. The yarn of color 1 is at the top left again.
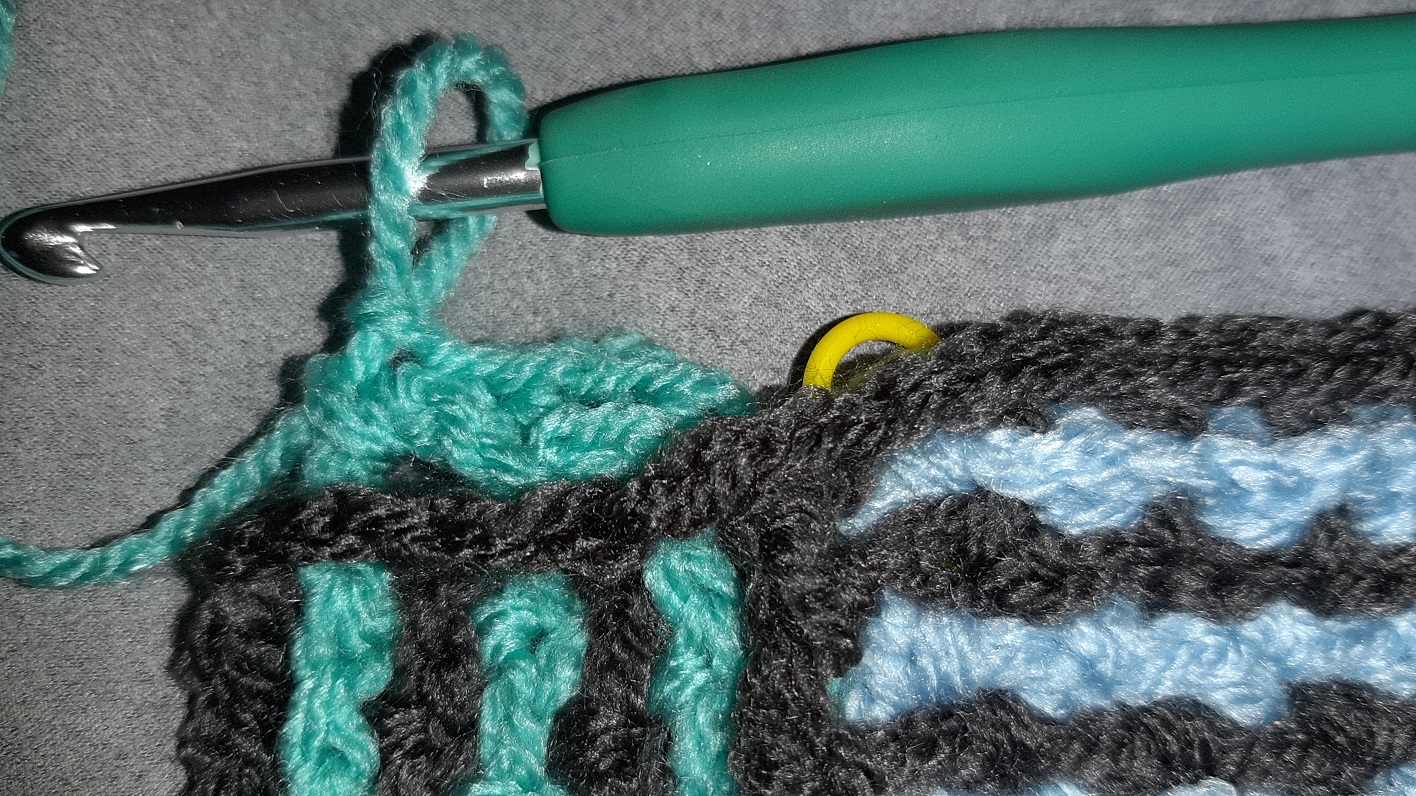
 We start with a BPdc along the first sc of block 1. All stitches are made in front of the border of color 1.
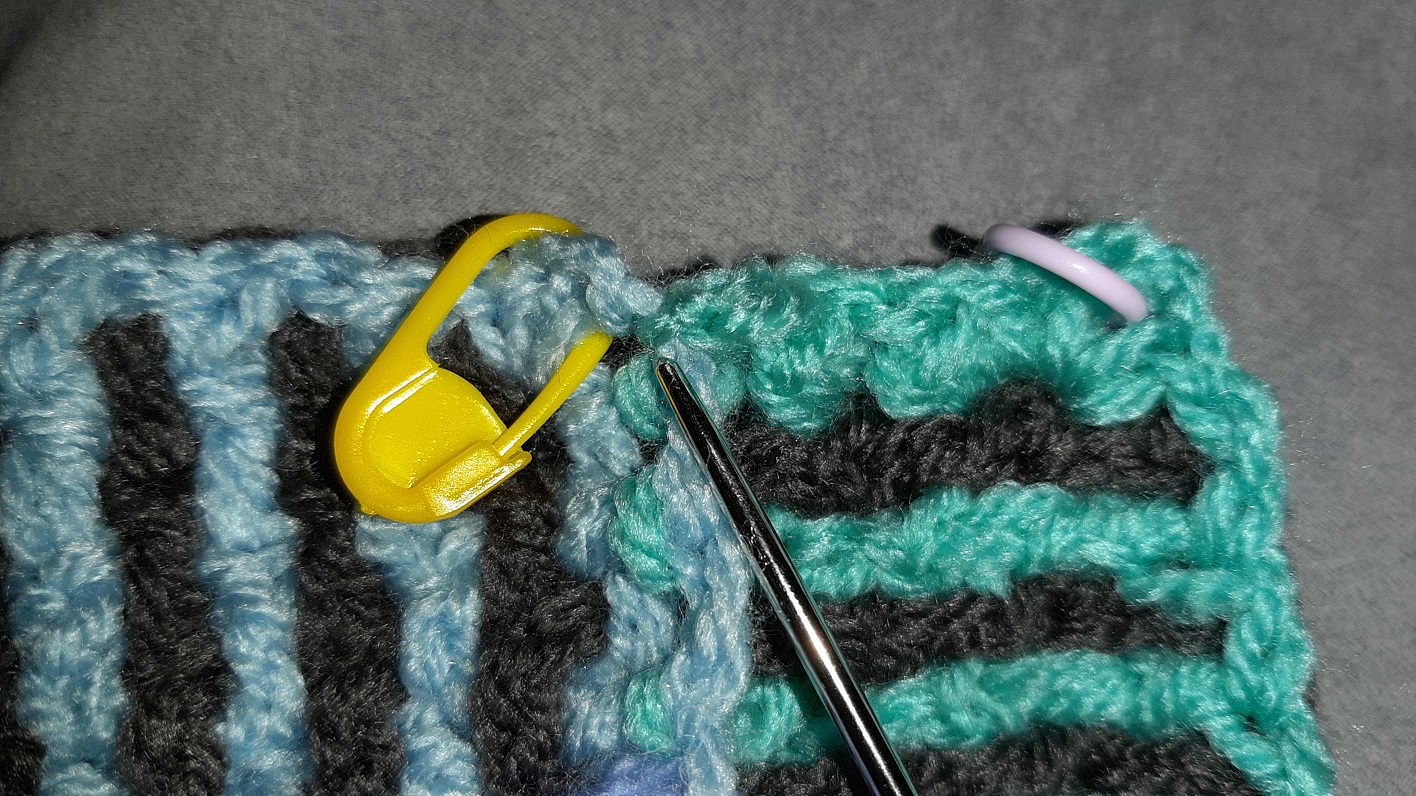
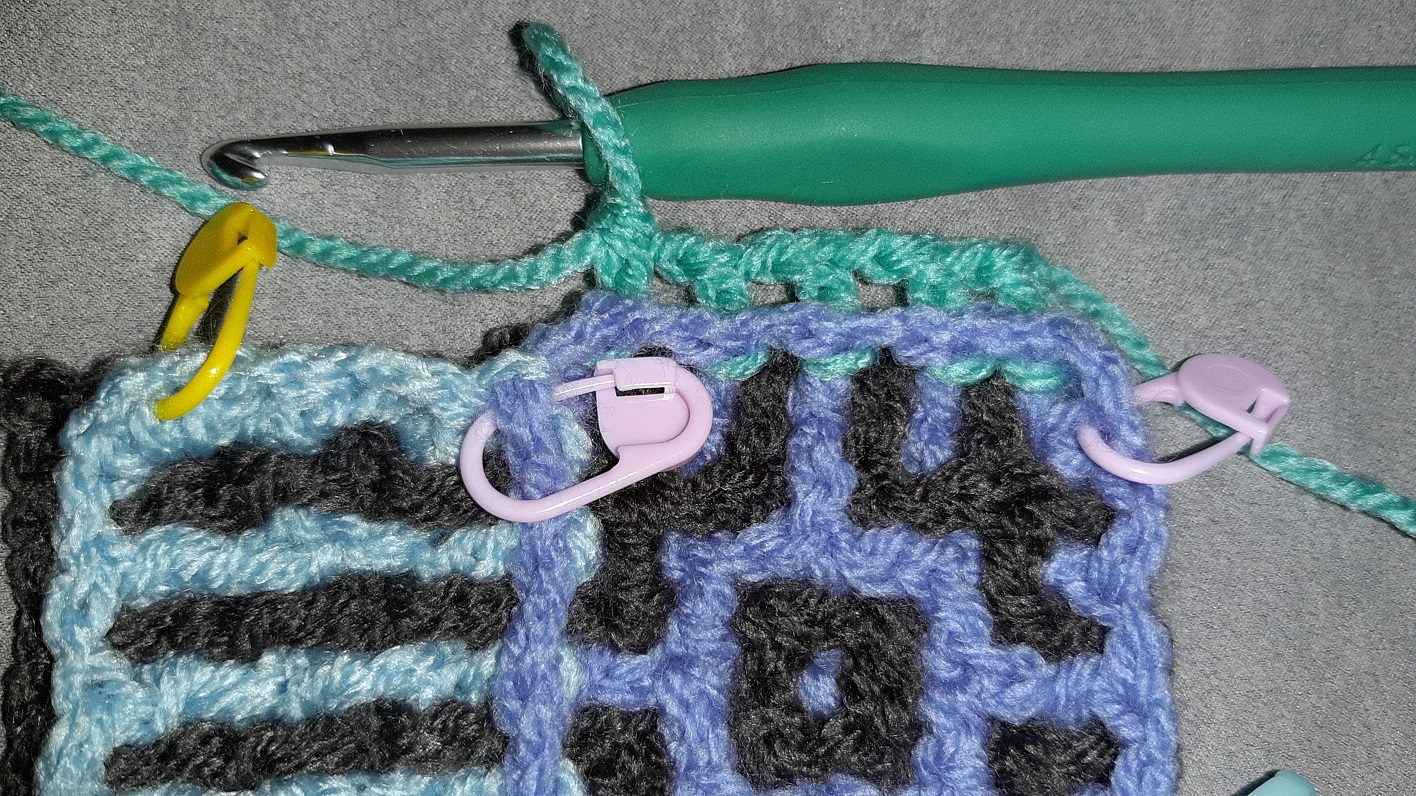 Here the first 5 BPdc’s are made along block 1 and we have reached the connection from block 1 to block 2. Check at this point the number of stitches you made with the numbers in the instructions.
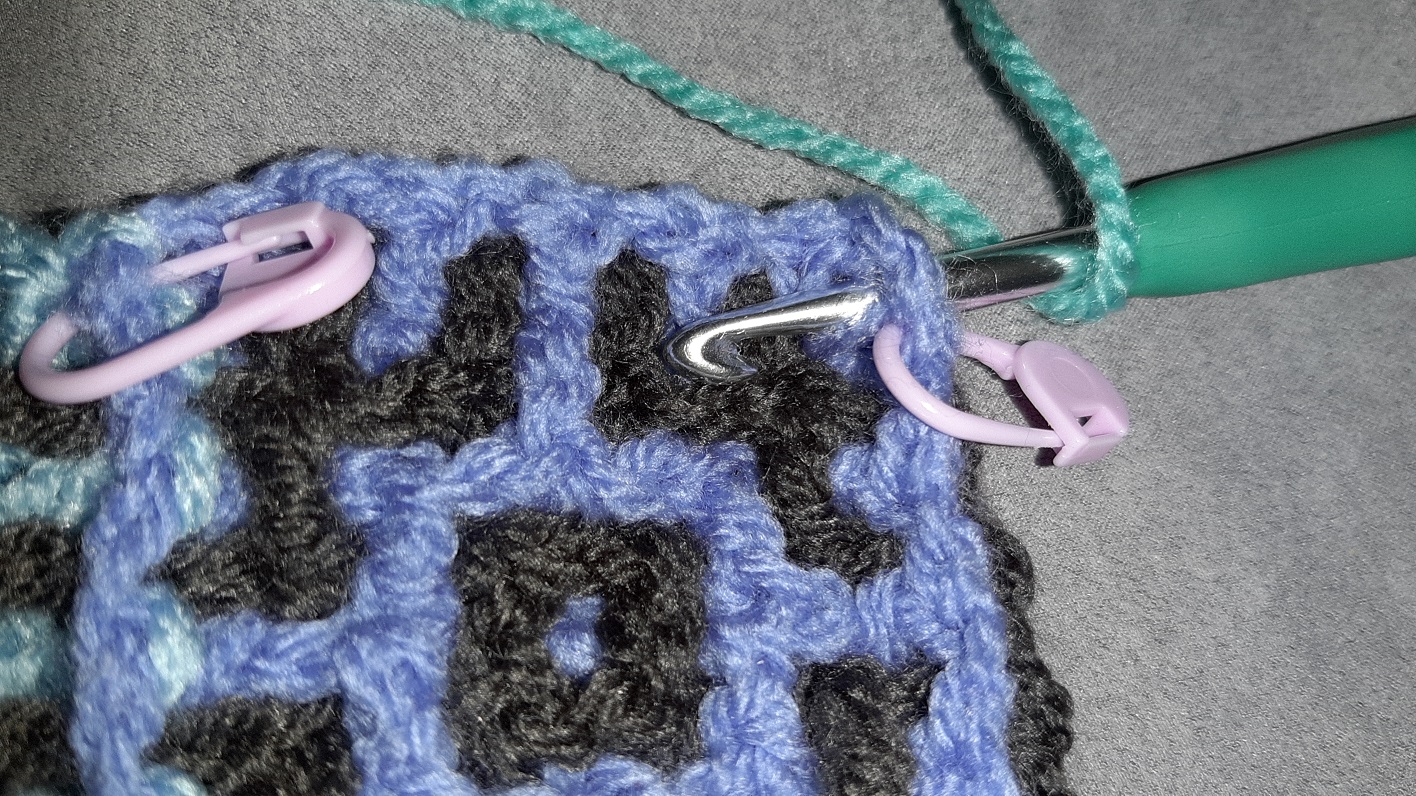
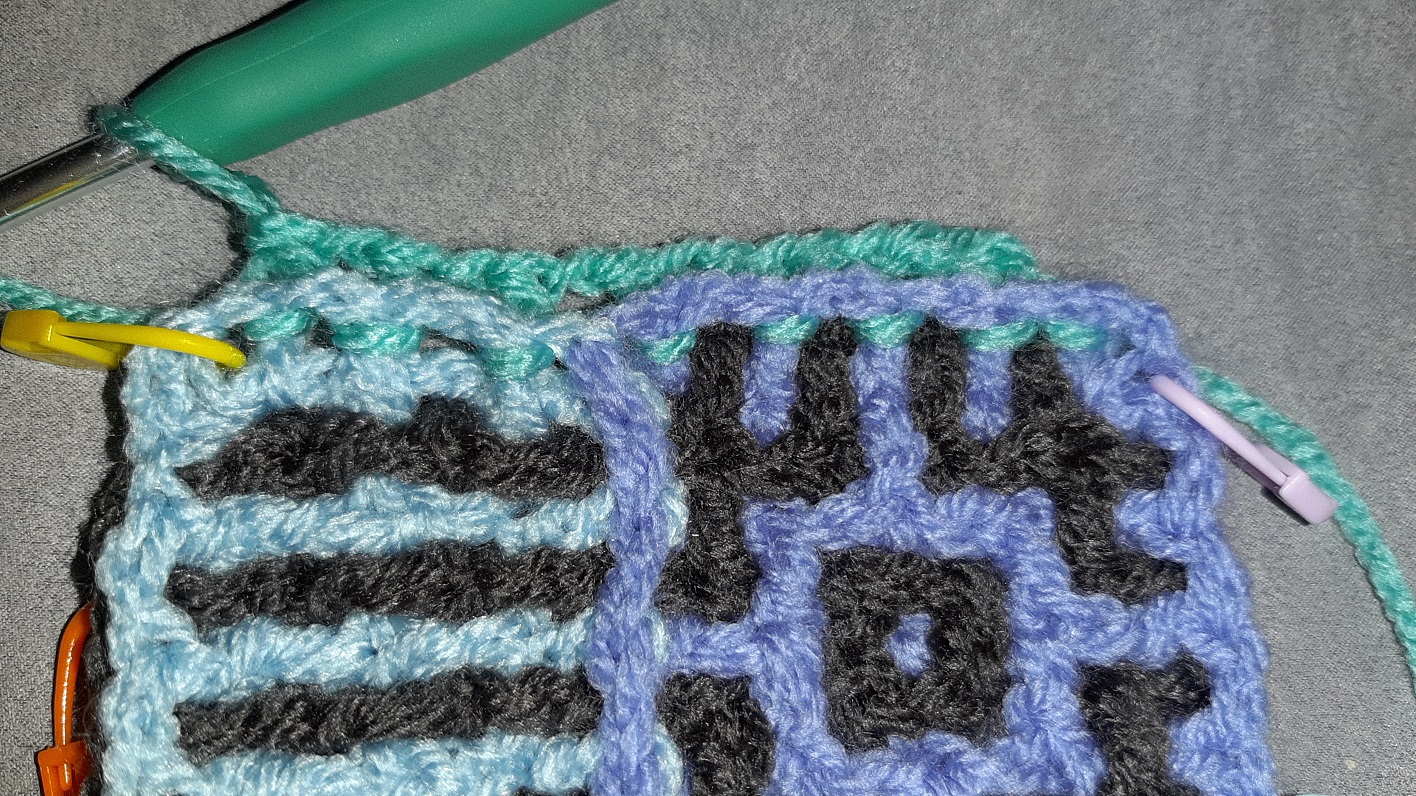
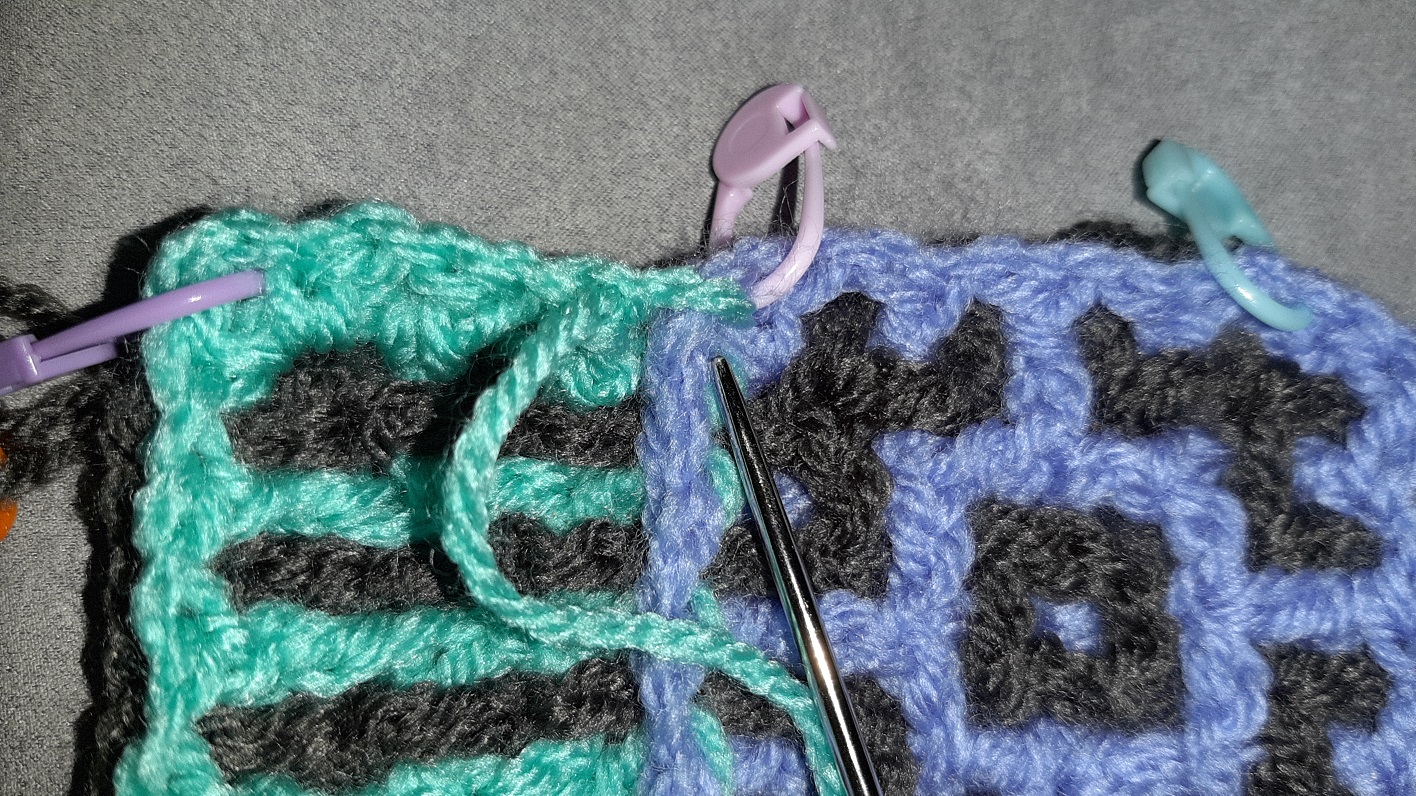
 Now we will cross over to block 2, and here you have to pay really close attention that you don’t(!!!) work around the ‘post’ that you see at the marker, but that you cross over and work around the first BPhdc of block 2. This is the reason that I advise to place a marker into the corners. It acts like a signal: pay attention, cross over here! When you have crossed over, you can remove the marker.
Something that you might notice often is that the two stitches on each side of the crossing are a bit further apart. That’s correct, because there is a bit more space to be crossed. But his will be okay when you work further. The work will correct itself in a natural way.
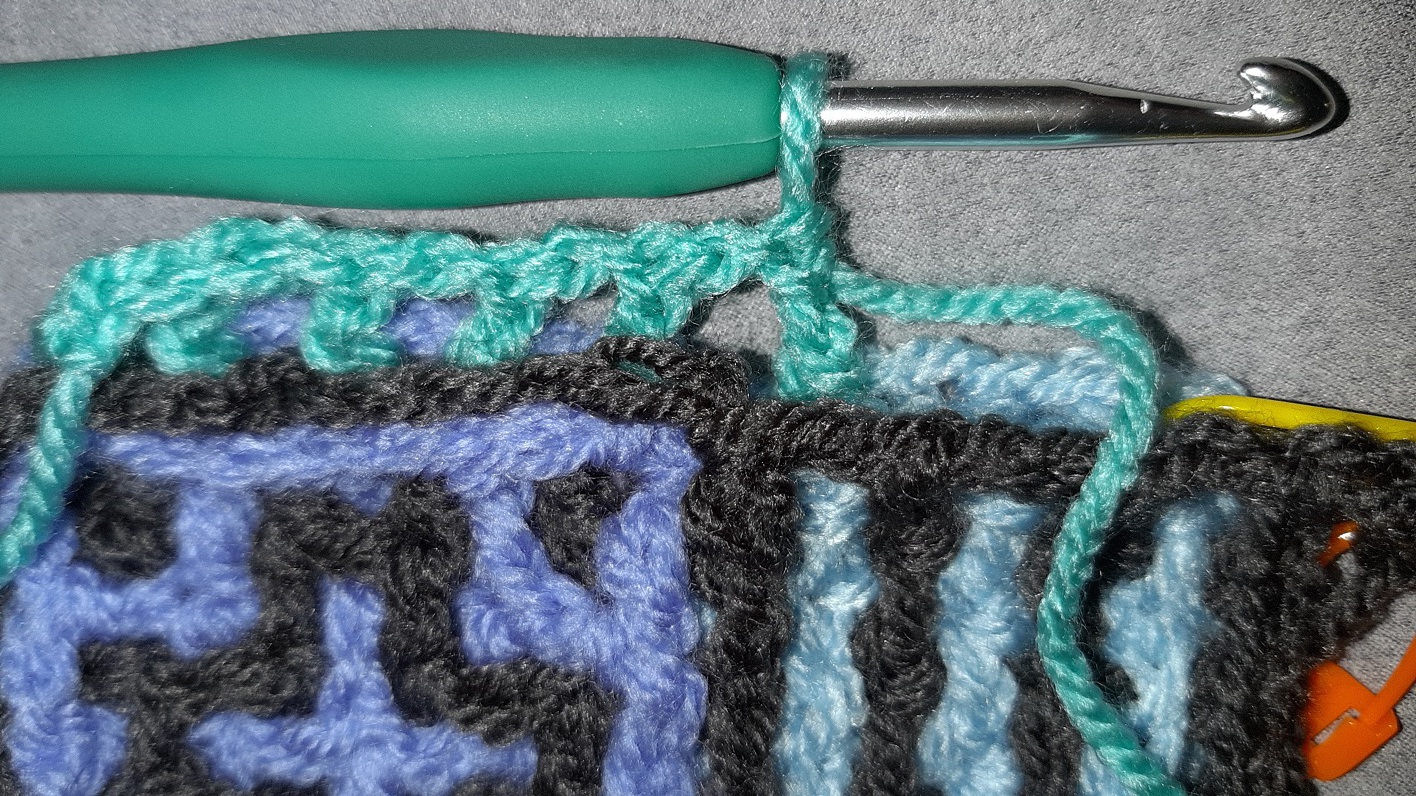 This is how it looks at the front side of the work. Sometimes it’s more handy to turn your work over for a moment to see if you’re doing the right thing. You see that the last sticth in aqua is a prolongation of the ‘line’ in blue, the second last stitch in aqua is a prolongation af the last border in purple of block 1. So it’s just a bit easier to see and check on this side of the work.
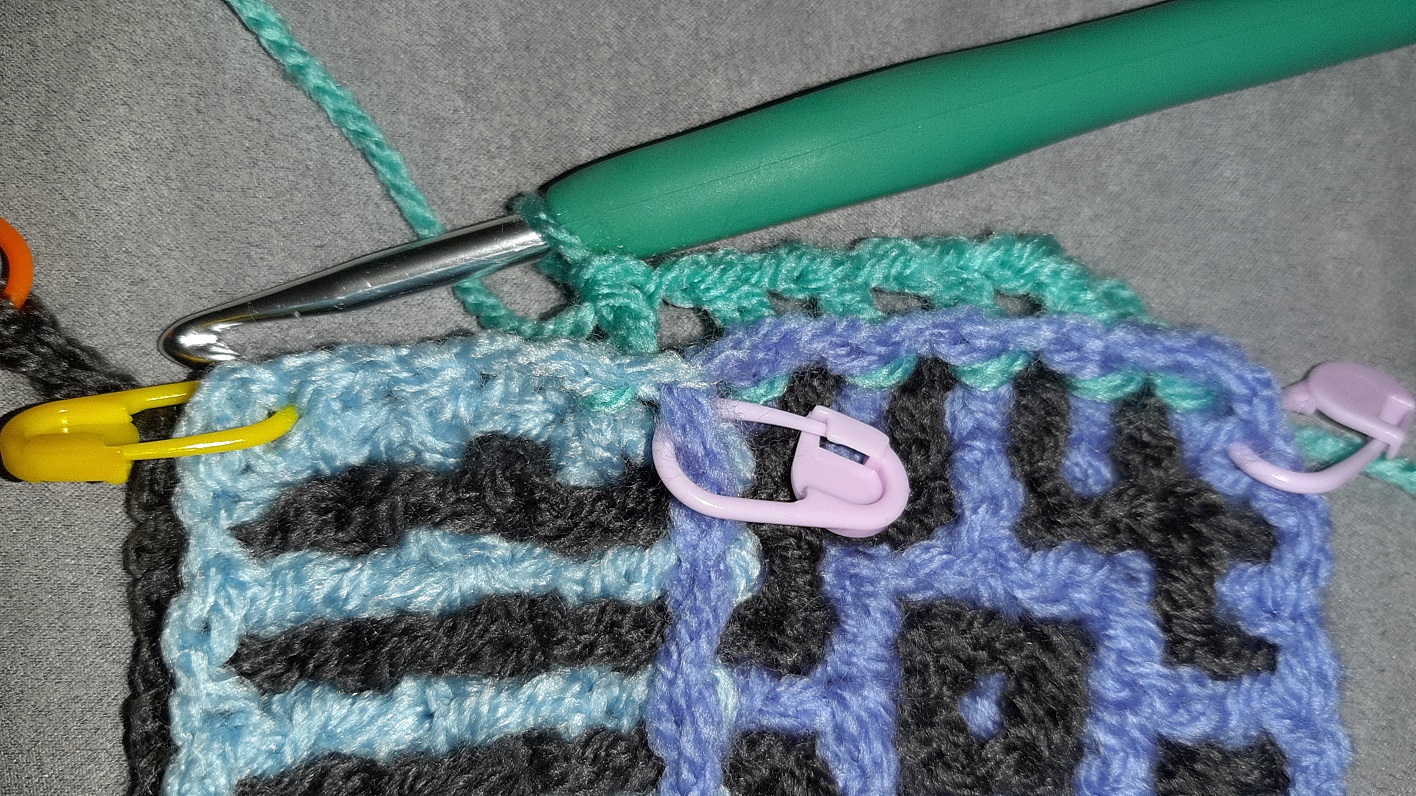
 The 3 BPdc’s along block 2 are now made also. Compare this again with the numbers in the instructions.
 This is how at looks now at the front side.
A tip to remember if your work is with the front side up: the plus-sign of the middle should be facing you. But you could also remember it like this if you’re a fan of Indiana Jones and the Last Crusade: the X marks the spot! You can take a look here at the fragment of the film: https://youtu.be/dvywOjh_hdY. When you rotate a plus-sign 45 degerees, you have a cross. I guess you won’t forget this now 🙂 .
 This is again the chart for color 1, for clarification of the stitches that have to be used. Pay attention again to the extended dc’s that are used in a backpost way for row 1a, and only between the side stitches.
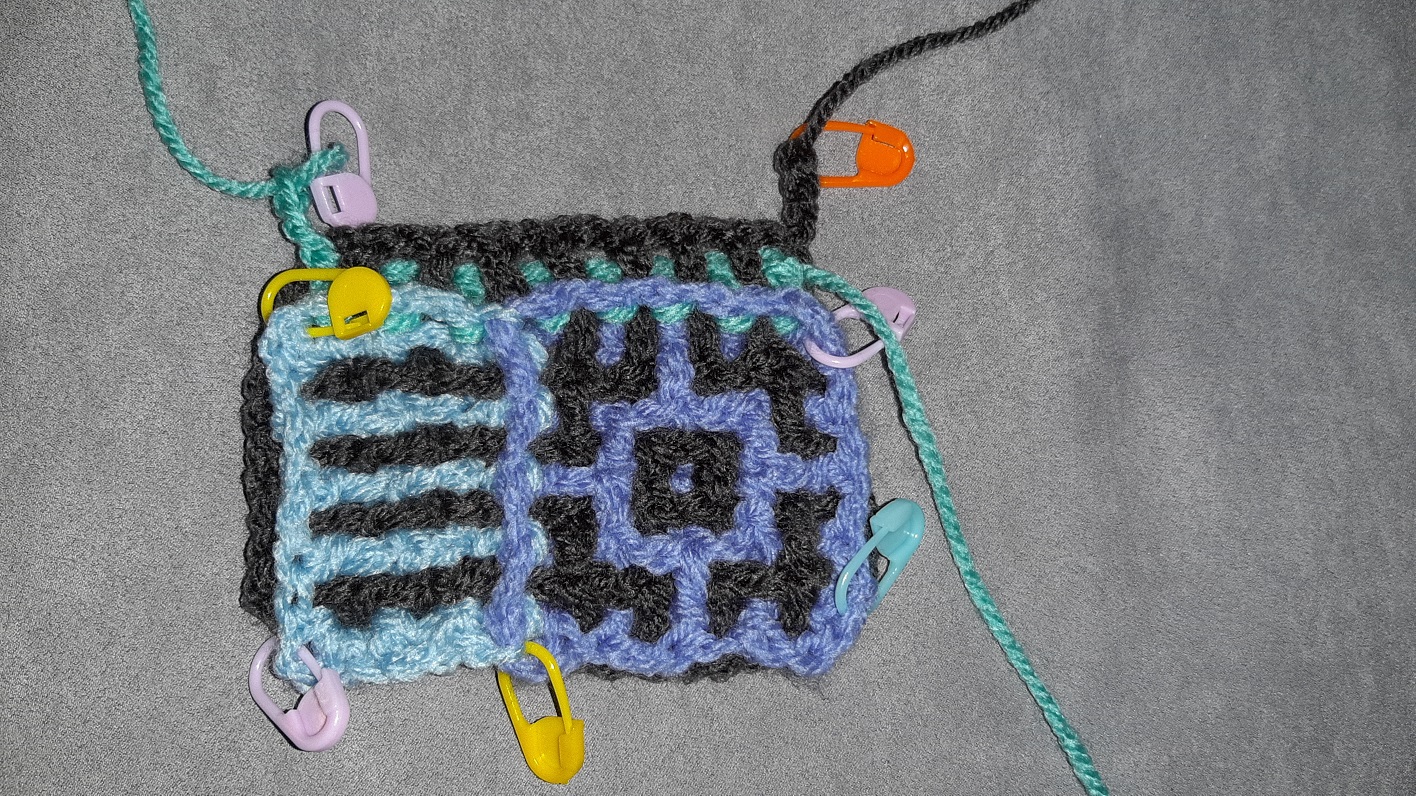
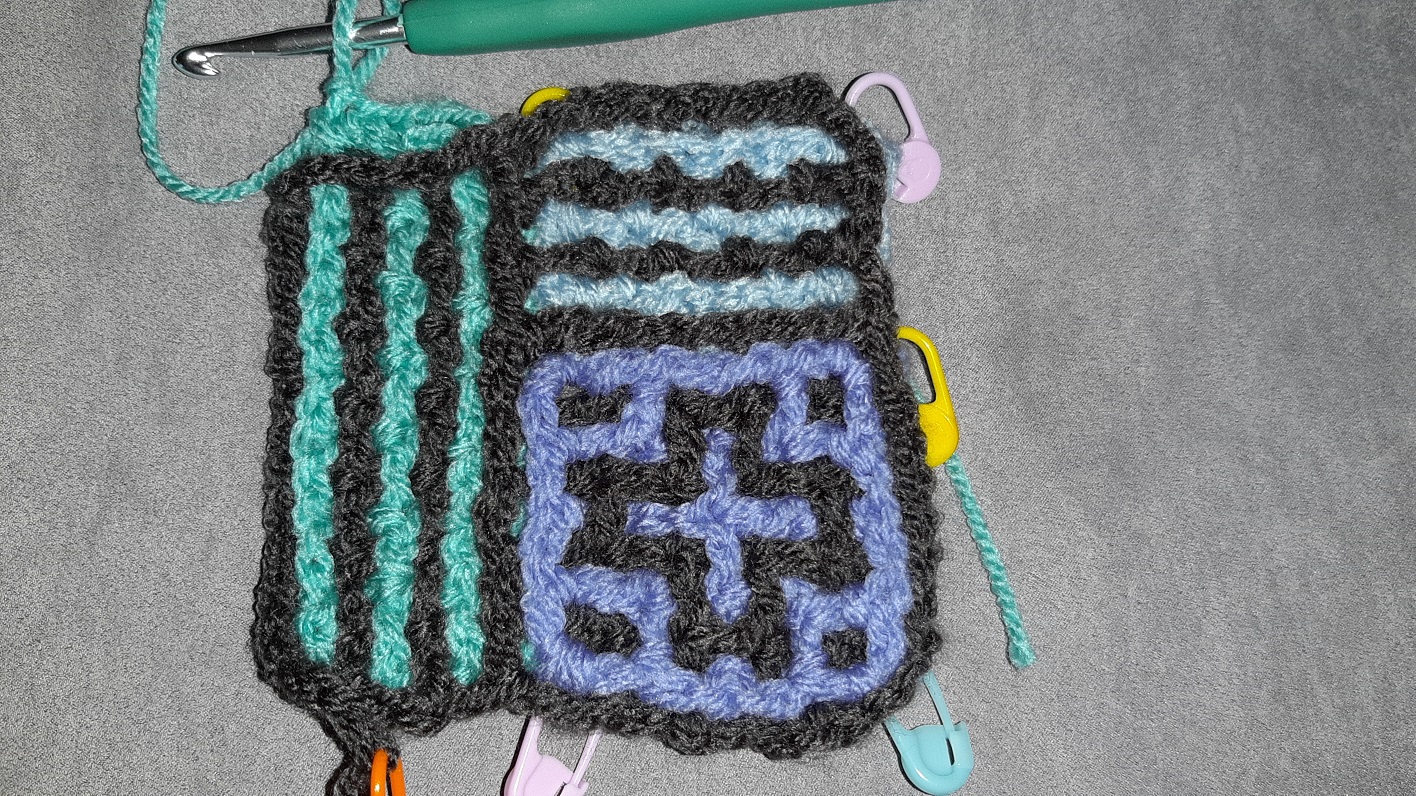
 This is after doing row 1a: color 2 to the back, side st, b 7x, side st.
 And the back after row 1a.
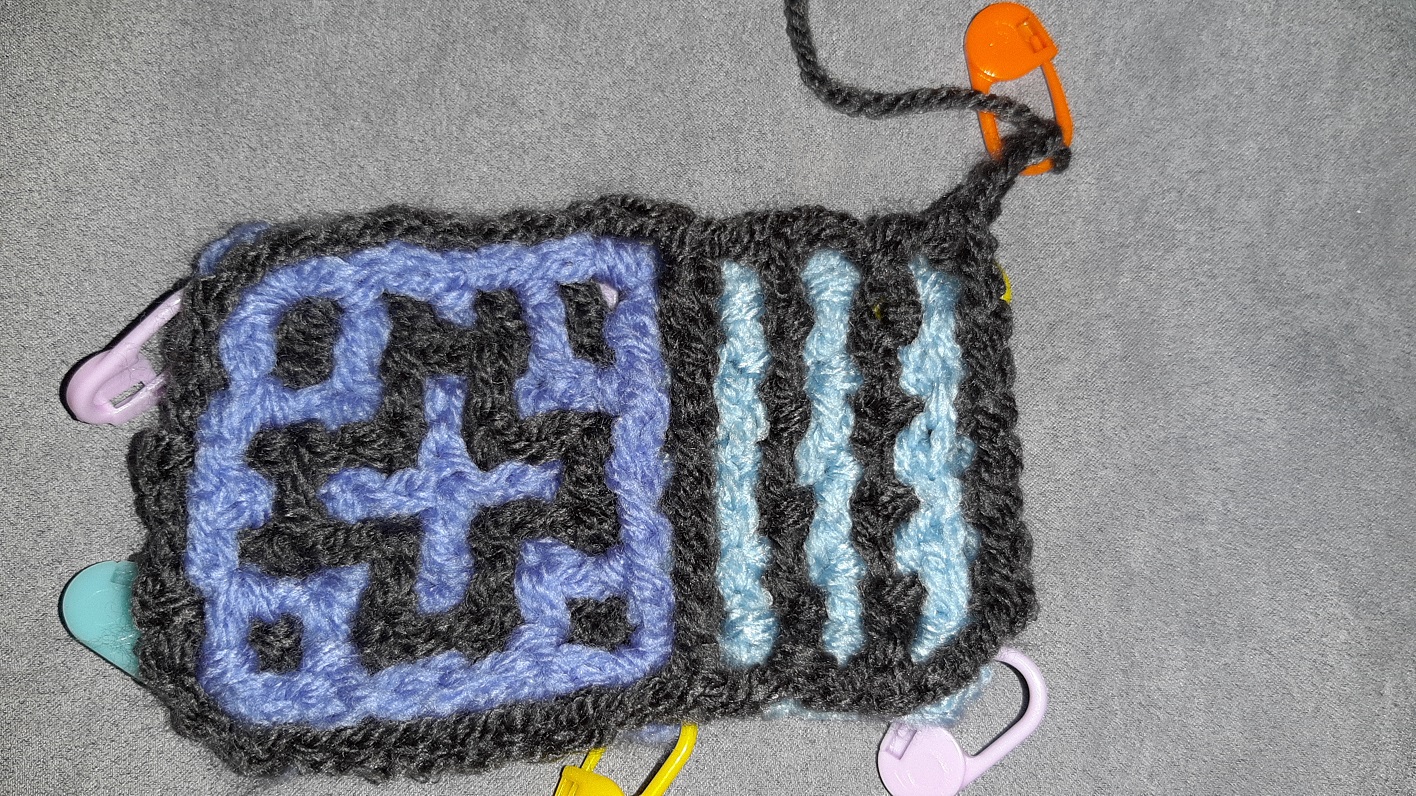
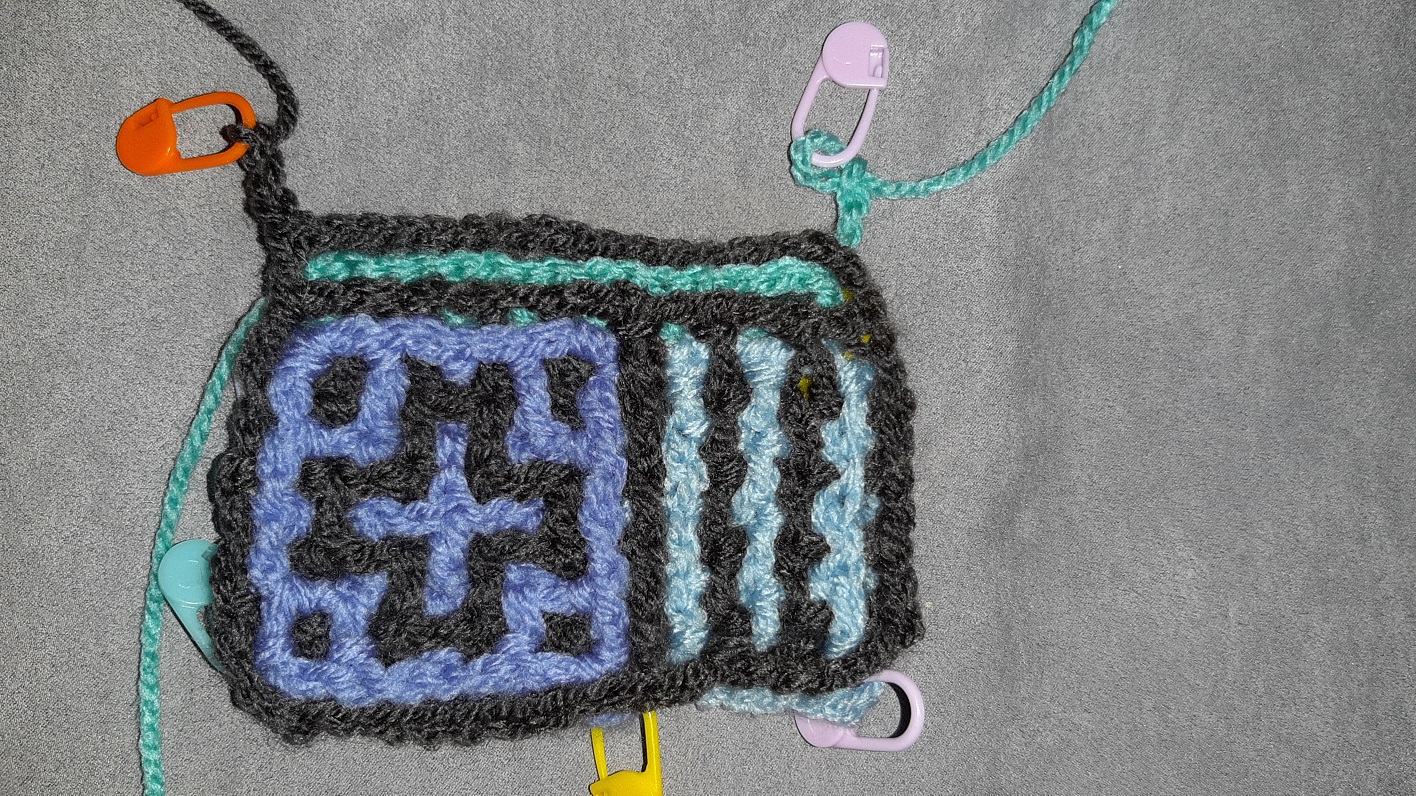
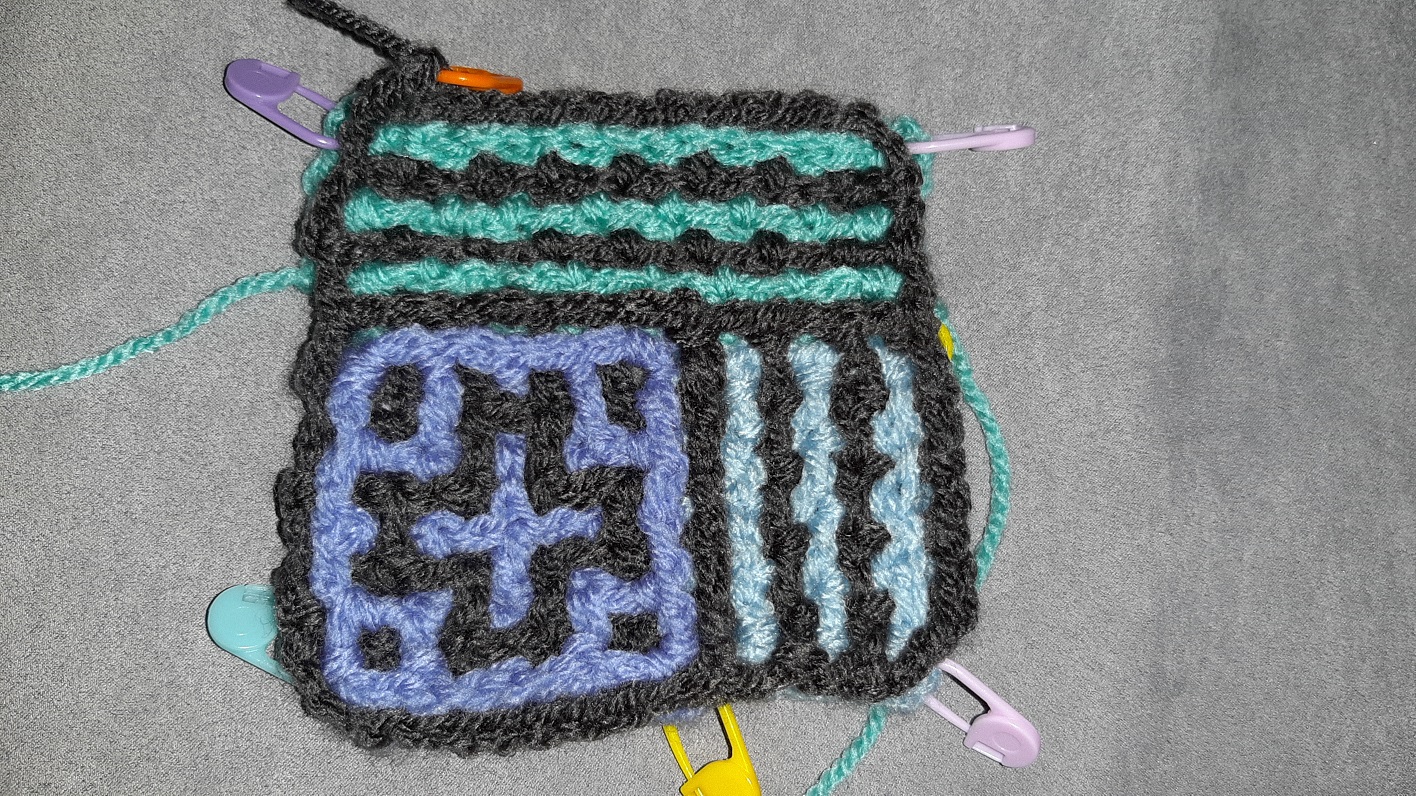
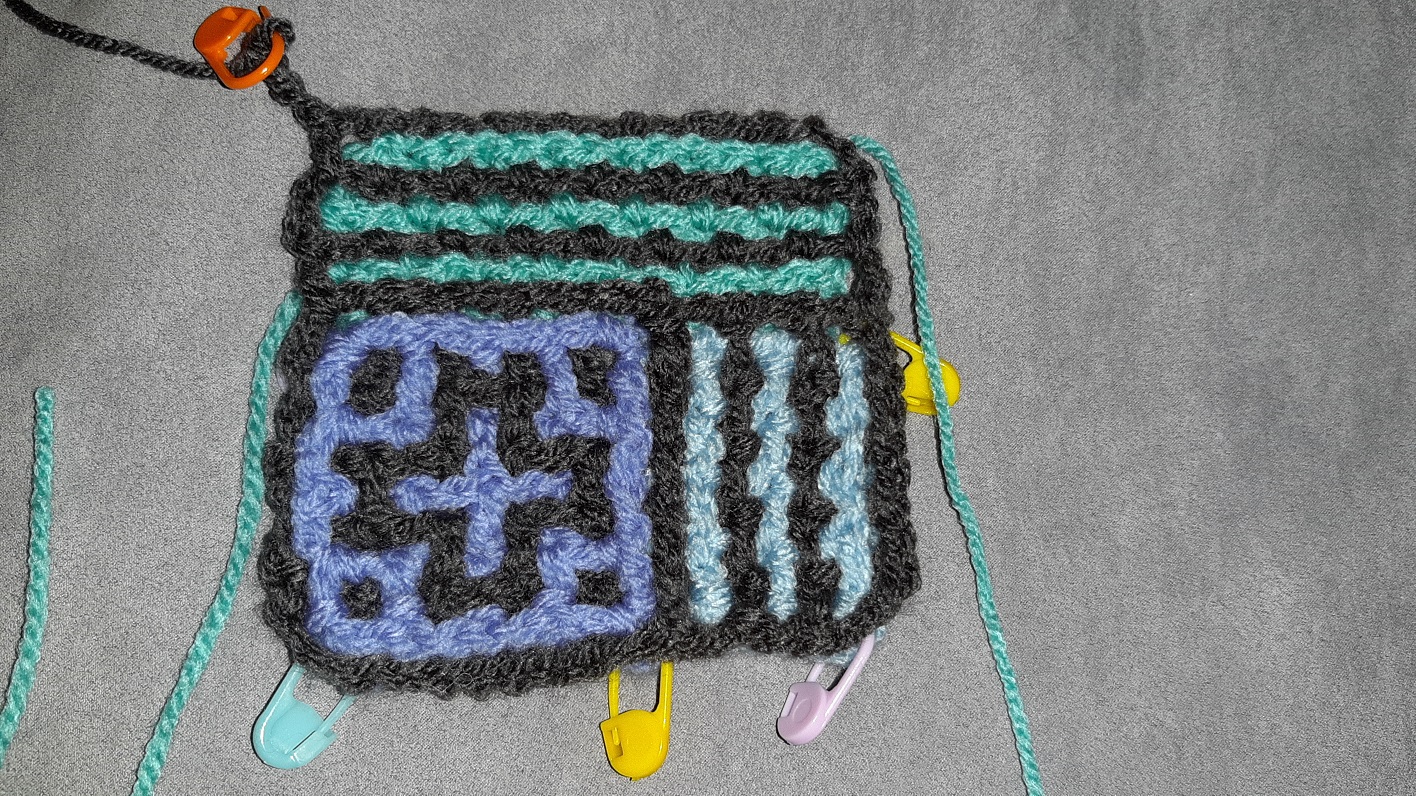 Here you see the entire block is crocheted. The yarn of color 2 is cut off and can now be finished.
The funny thing of this block is that it is actually the same pattern as block 2, but because the work is turned 90 degrees, the stripes run perpendicular to the stripes of block 2.
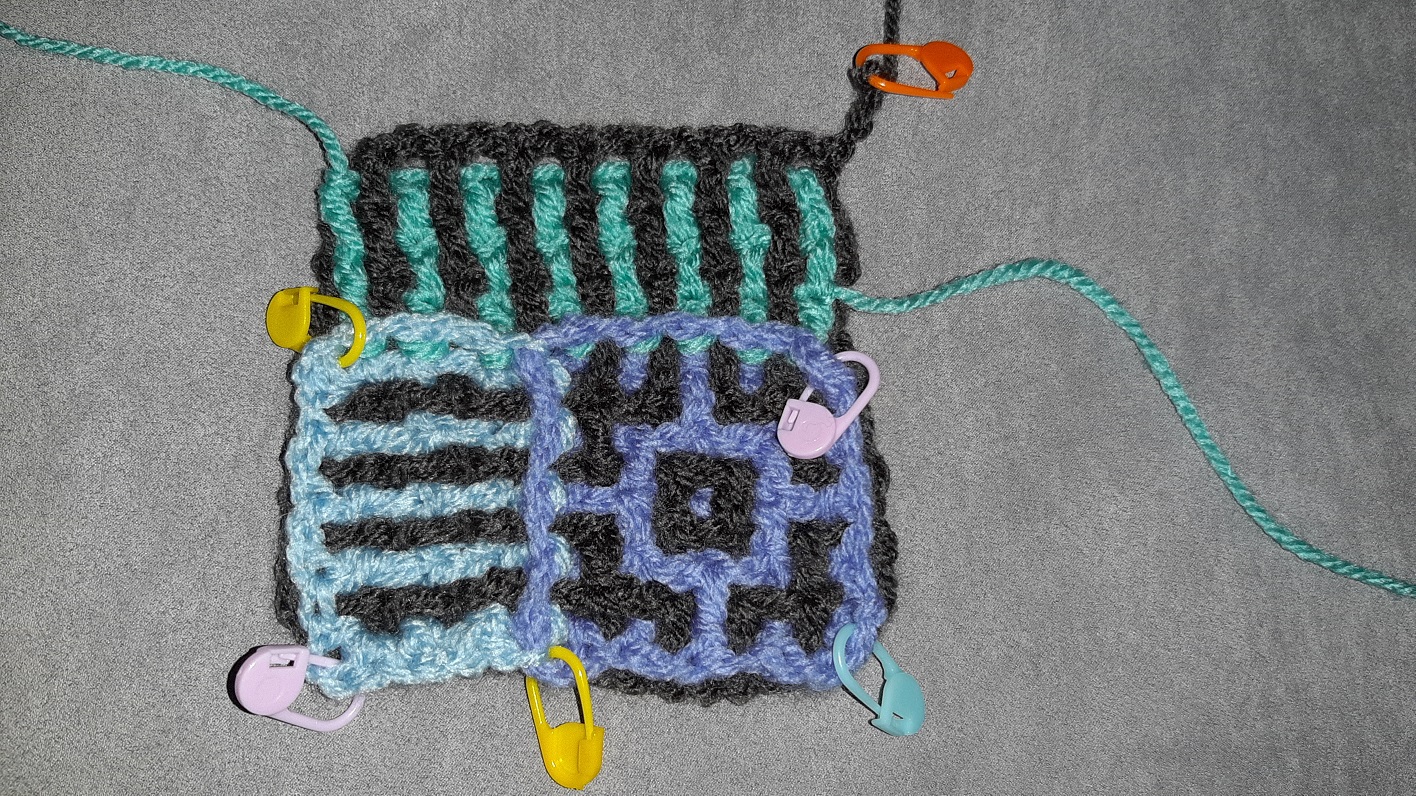 And this is how the block looks at the back.
Block 3: the low border
 This is the crochet chart for the low border around block 3.
 Place your work with the front side up. Turn the work so that the right side of block 3 is at the top like in the picture. Now make 2 BPhdc’s at the side of block 3 with the in-between-chains of course, like you can see in the crochet chart.
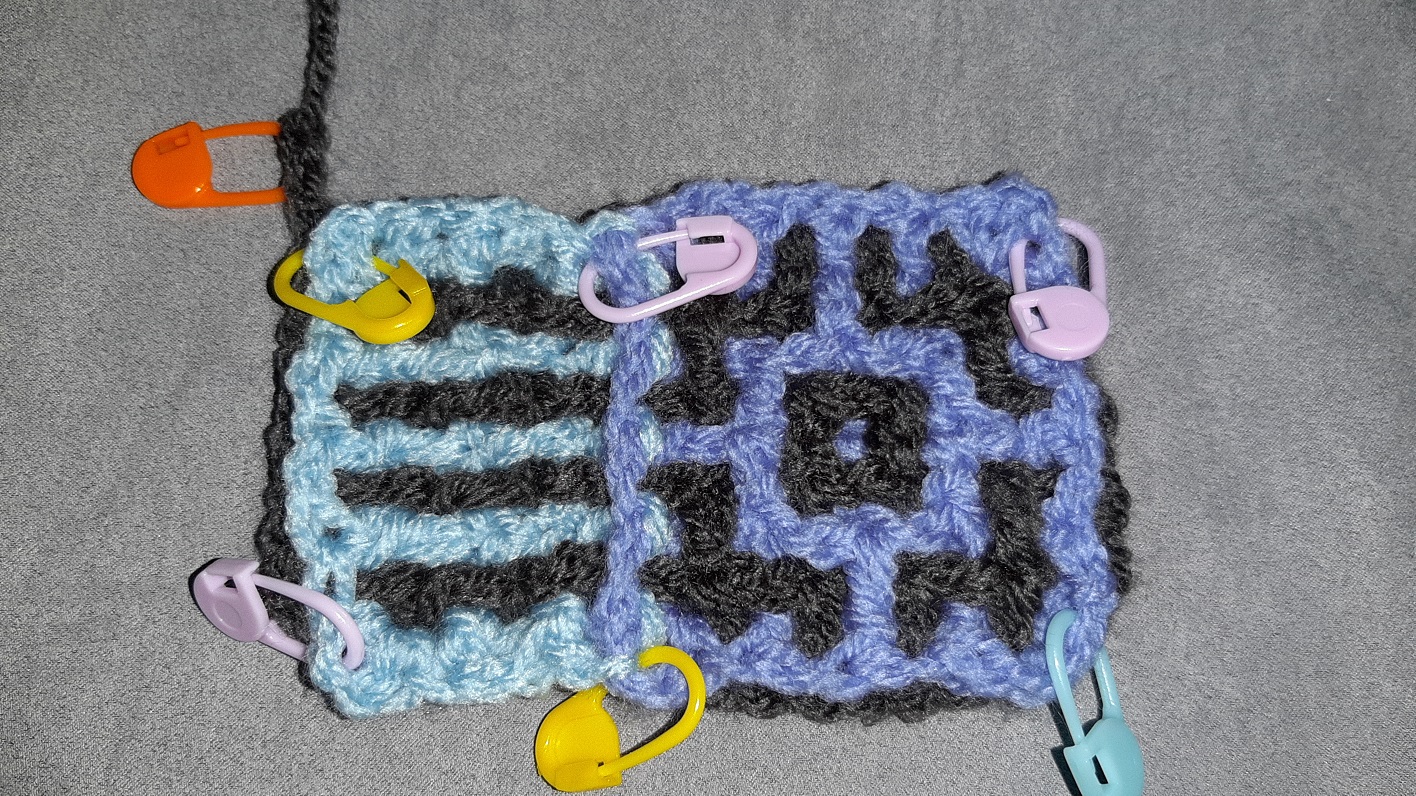
 Here a bit more detail. At the corner you make single crochets again with 2 chains between them. Place markers into the corners.
And don’t forget of course to count your stitches and compare this with the numbers in the pattern description. I give these numbers without the corner single crochets, so pay attention to that. For this block it is 2 BPhdc’s at the sides and 6 BPhdc’s at the top, and at both corners a single crochet, 2 chains and a single crochet.
 The border is done again and nicely hidden behind the border in color 1 🙂 .
 At the back side the low border is clearly visible.
 The yarn at the start of this row is connected again to the corner of block 1. I mention this each time in the pattern description, so that you don’t forget.
 And the yarn at the end is connected to the corner of block 2. Block 3 is finished!
I guess you now will have a good picture of how this works. But take a further look, because there are blocks where you have to do stitches at the front in row 1a, and I will show you how to do that, so click here to go to the next page.