
Overview of the tutorials
This tutorial of the first 5 blocks is split into a couple of pages, so that you can go quickly to the page you need. Here you find the overview with the links.
- Choosing colors and crochet symbols: click here to go the page
- The practice piece: click here to go the page
- Block 1, the middle part: click here to go the page
- The low border around block 1: click here to go the page
- Block 2, the first 2 rows: click here to go the page
- Block 2, the interwoven rows and the end border: that’s this page
- Block 3: click here to go the page
- Block 4, with stitches on the front in row 1a: click here to go the page
- Block 5: click here to go the page
- The border: click here to go the page
The video
You can watch the videos for this part here: https://youtu.be/y-zhmvXxyeY and https://youtu.be/jyTCIcfl4hg.
Block 2: the regular interwoven rows
After row 1a we will continue with the rows as normal: so no back post stitches, but just working into the top of the dc’s.
Here I show you some pictures of the rows, and then the tutorial for the low end border starts.
 The instructions for row 1b: b 5x. This is the result from the front.
 This is the result after row 1b at the back side.
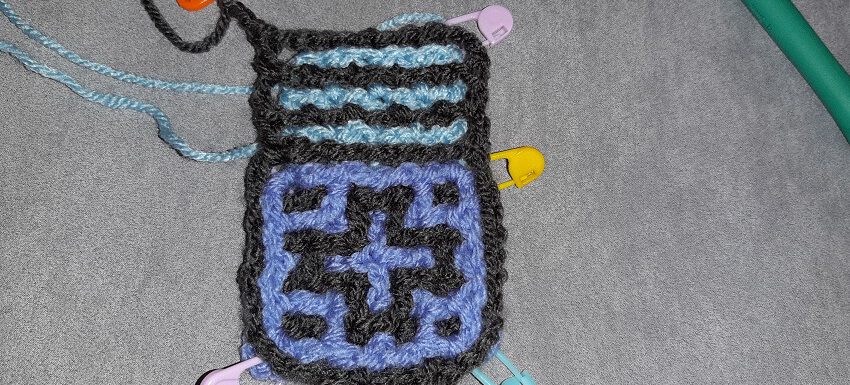
 This is the result when block 2 is finished, after row 3a, at the front. The yarn of color 2 can be cut off now.
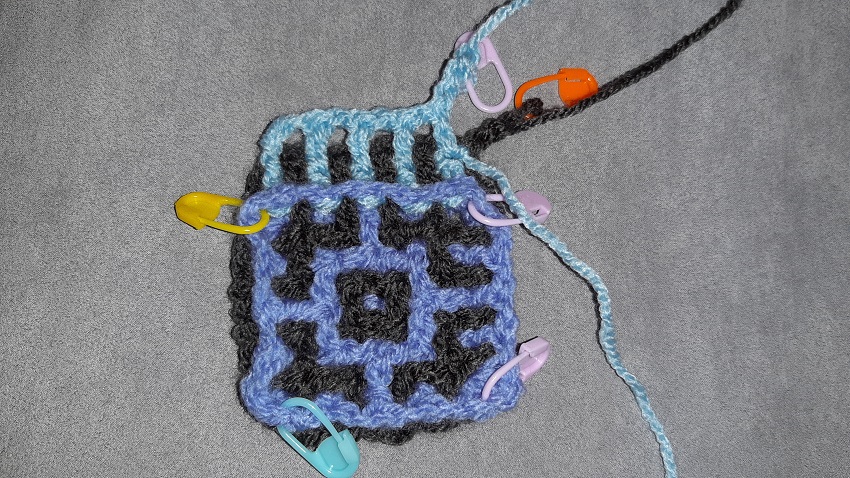
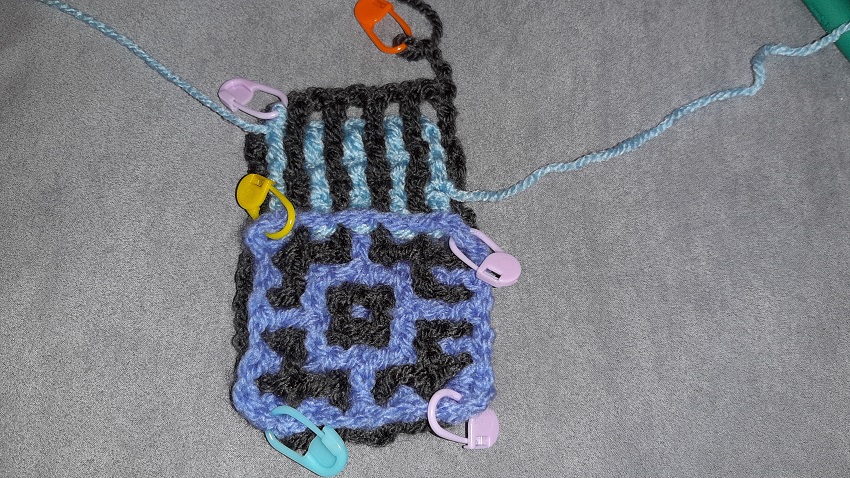 This is the result when block 2 is finished, after row 3a, at the back.
 This is not a joke: finish the ends of color 2 right away. Don’t wait until the end! Especially for the next row this is very important, just to prevent you will make mistakes later. And especially with the first blocks of the blanket the threads will really get in the way! Believe me, you will be happy if you do this now right away. So take a deep breath, grab that needle and work in these ends 🙂 .
Block 2: the low end border
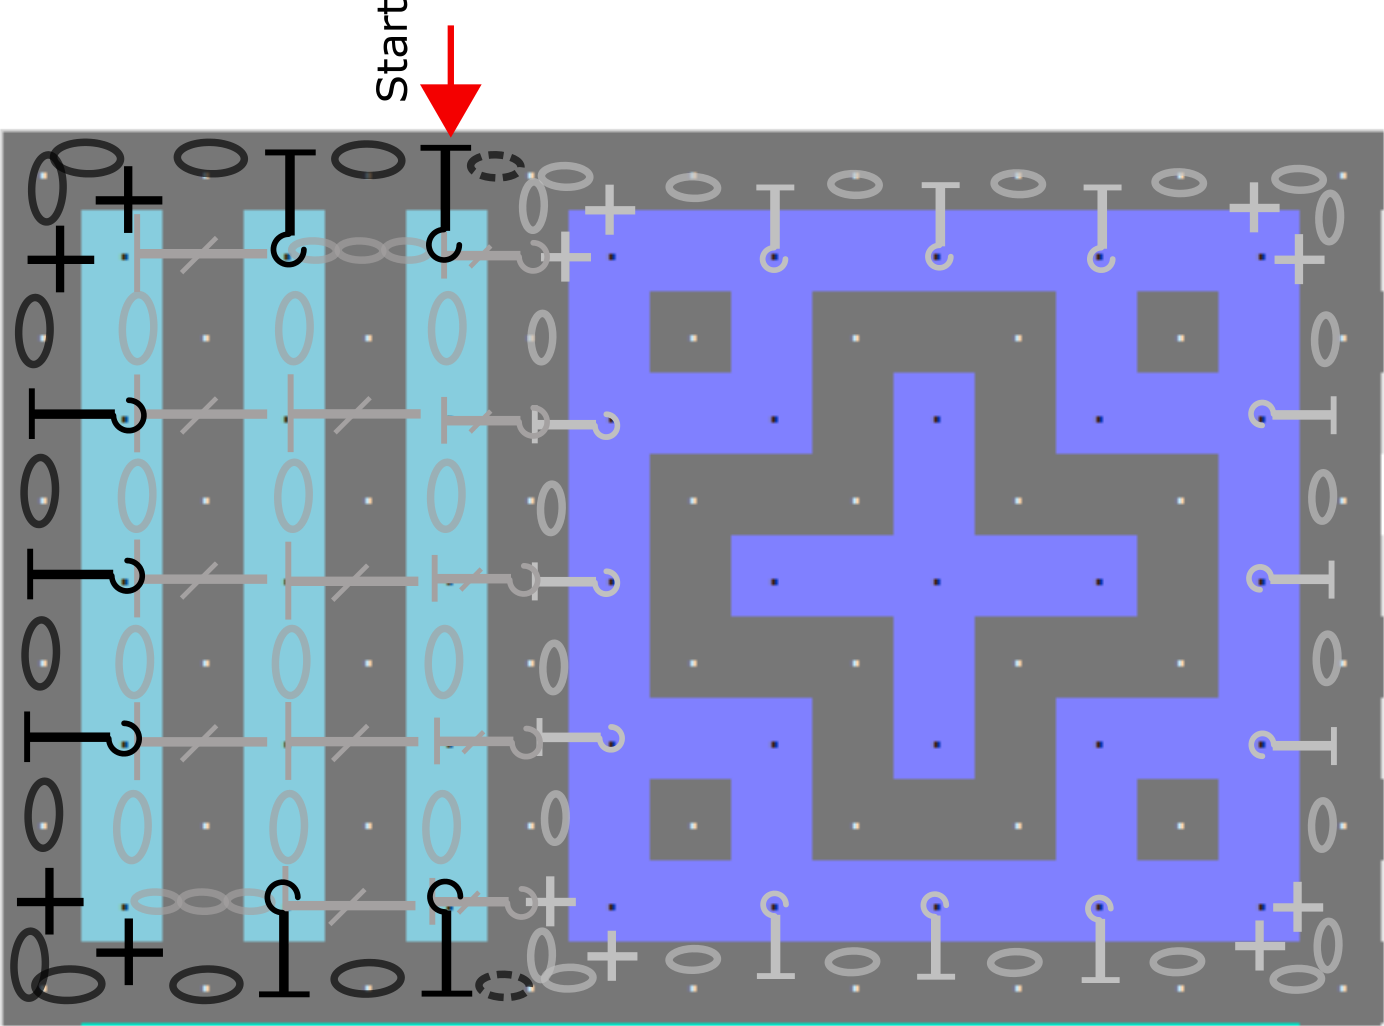 This is the crochet chart for the end row of block 2. Actually we will be doing the same as with the low border of block 1, but this time we will work around just 3 sides, and we start at a different spot as where we’ve ended.
 Place your work with the front side facing up and the right side of the last block to the top. We will first work along the side. Remember the rule? With the low border at the end of a block we will use the low stitches: sc’s and BPhdc’s. You will start with a standing BPhdc, which means that you first put a slip knot on your hook, and then will do the BPhdc. In the chart you see the dotted oval shape right of the first stitch, we will make that later by needle.
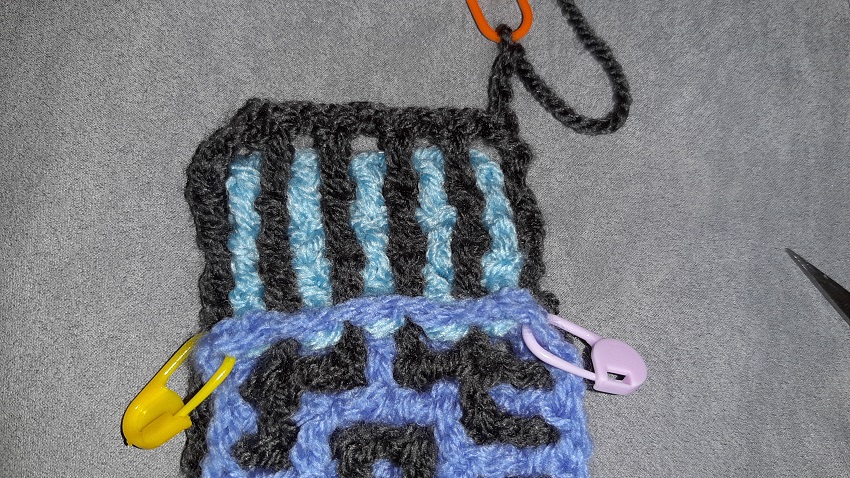
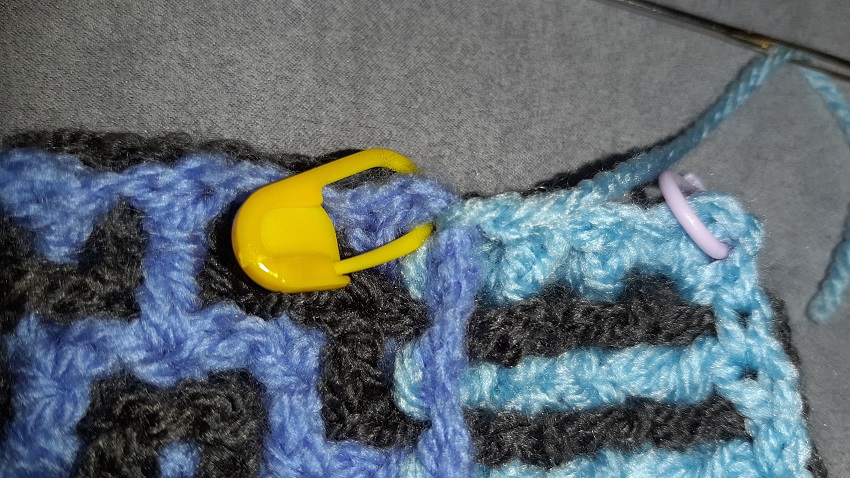
In this picture here it might look like I’ve done the third stitch wrong, but take a close look at the next close up picture.
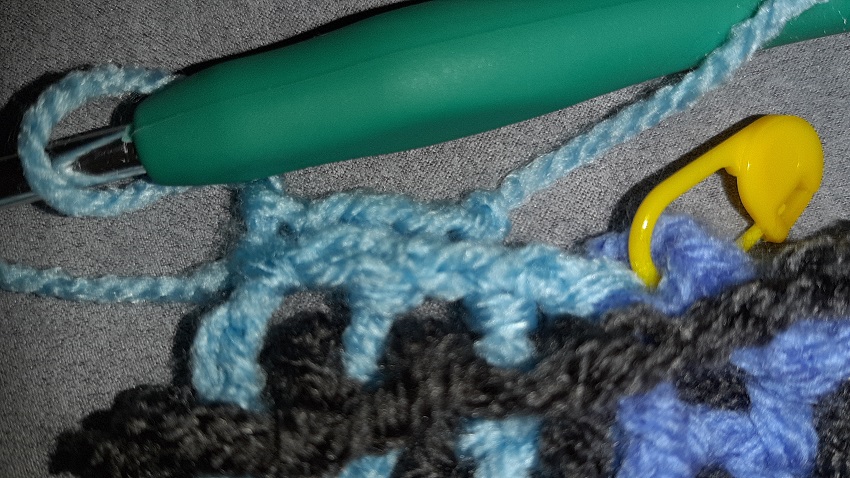 This is the close-up. Click the picture. You see a bit of a border just above the blue posts: that’s the low border. Here 2 BPhdc’s are made and 1 sc at the corner, as you can also see in the crochet chart.
Make 2 chains and another sc in the corner, and make BPhdc’s along the top side of block 2. Don’t forget the in-between-chains! At the next corner do again a sc, 2 chains and a sc, and then the final 2 BPhdc’s. Stop after the last BPhdc and cut off the yarn.
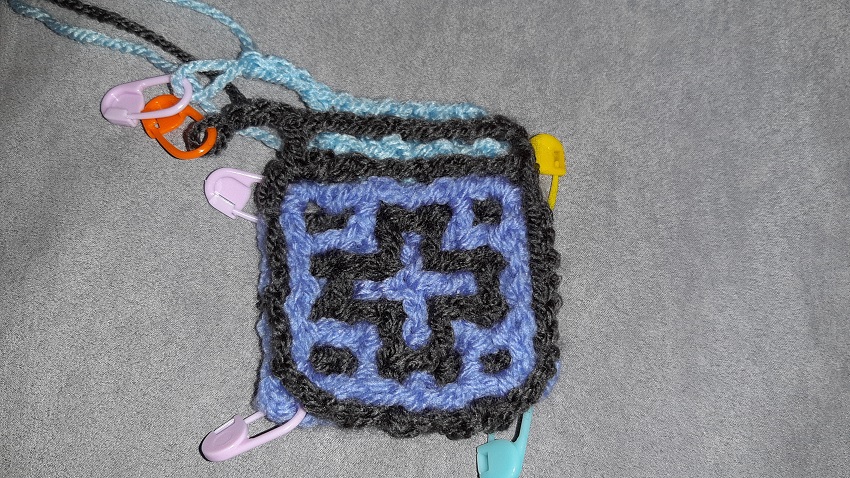
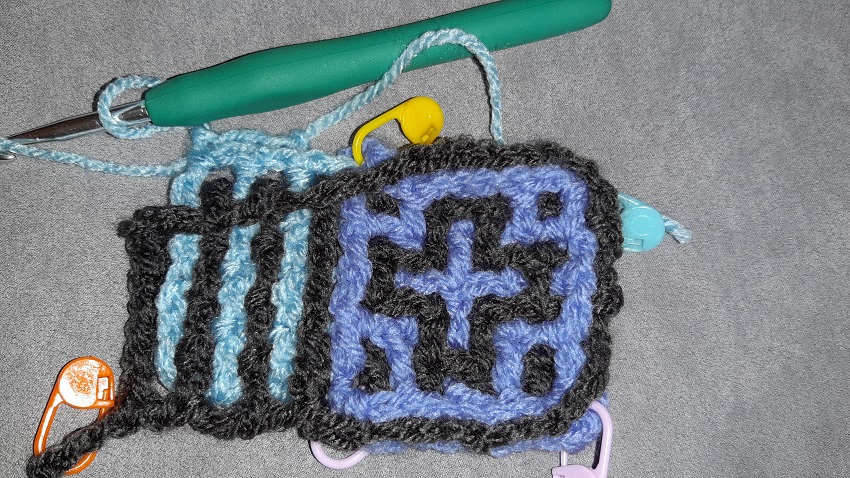
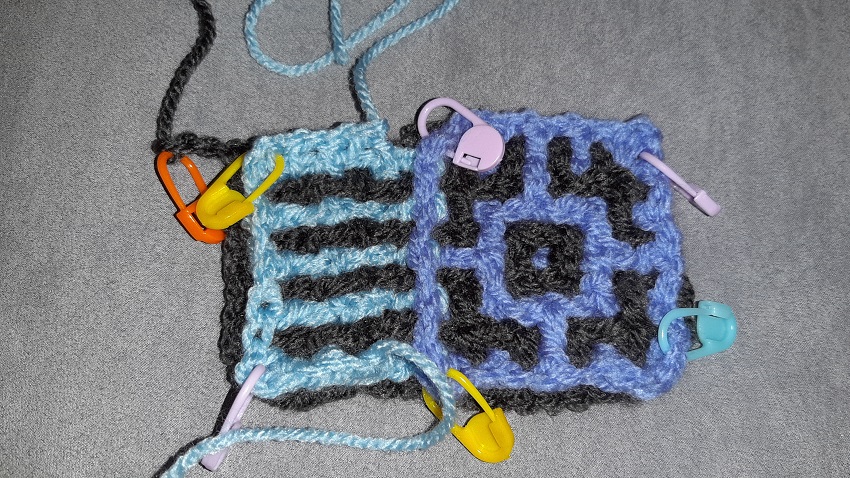
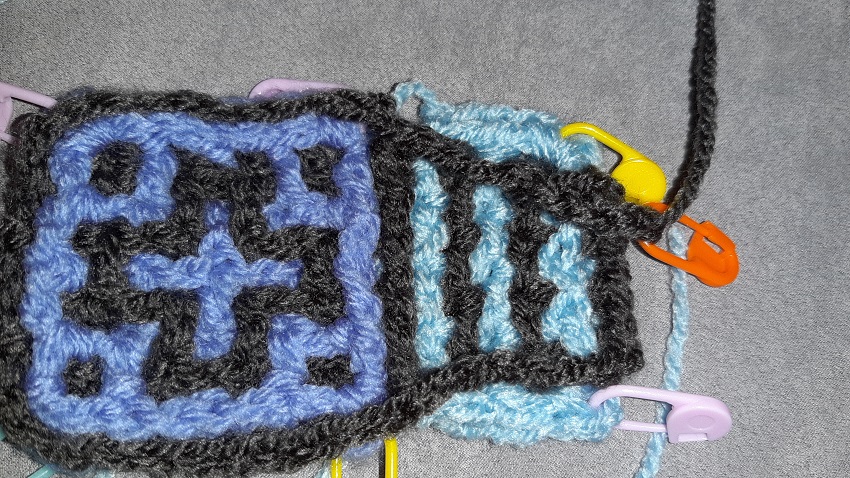 The border is finished. Into the corners with the 2 chains I’ve put markers (please do this, because this will really help you!). I’ve folded the border in color 1 a bit aside, so that you can see the result a bit better.
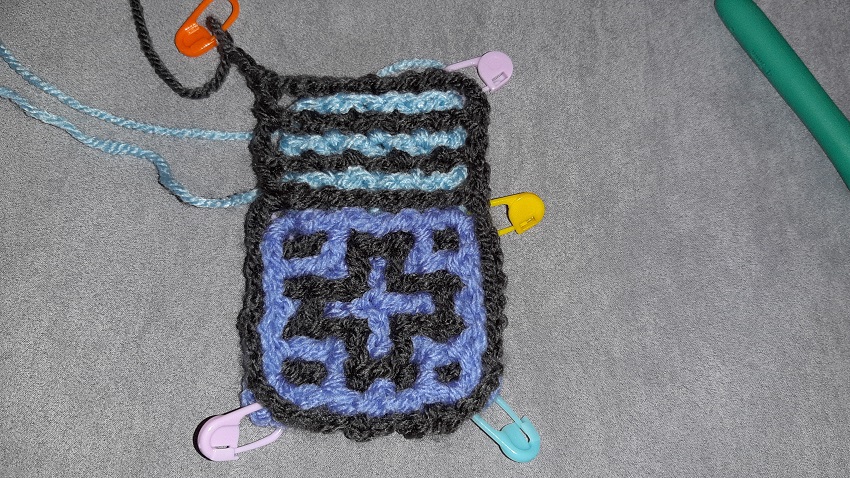
 And this is how it looks at the back side. The low border is about at the same height as the border in color 1.
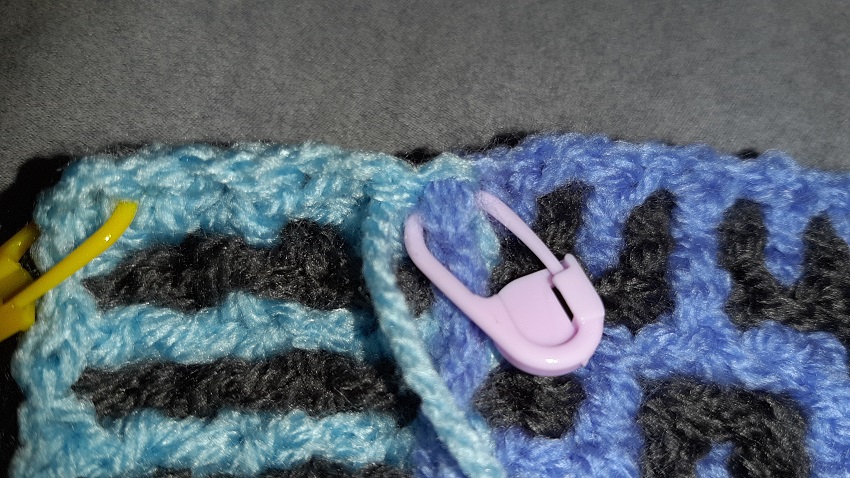 In the crochet chart you see both at the start and the end of the border a dotted oval shape. This is what we will do now, and it is quite important. Take a needle and thread it with the yarn end at the start of the row. Bring the yarn through the corner opening in color 2 of block 1, where the marker is. Bring back the yarn again to the top of the first BPhdc, so that you’ve actually created a chain stitch by needle. It is important to do this step for the next rows when you will be crocheting blocks to this border! Do this, really! Don’t pull so hard on the thread that the corner of block 1 will be drawn to the left, but also don’t make it too loose. Finish the yarn end invisibly into the rest of your work.
 Do the same with the yarn at the end of the border. Connect this also to the corner of block 1 by going through the chain opening and bringing back the yarn into the top of your last BPhdc. Again, not too tight, just take care the border of block 1 continues in a straight line.
The steps we have now done for block 2 will be repeated for each following block. In the rest of the tutorial I will repeat it shortly a couple of times, so you will know how to do this. I have added this also to the pattern descriptions.
!!!Super important!!! I have added the numbers for counting at every start and end of a block. Check your work with these!!! Please do so, because it is really annoying when you will be attaching a new block, and you will find out you made a mistake 4 blocks ago. At the start it is not a big issue to frog, but with the later rows lots of work is involved, a really lot! It is not so much work to do the counting, so please please please, check it!