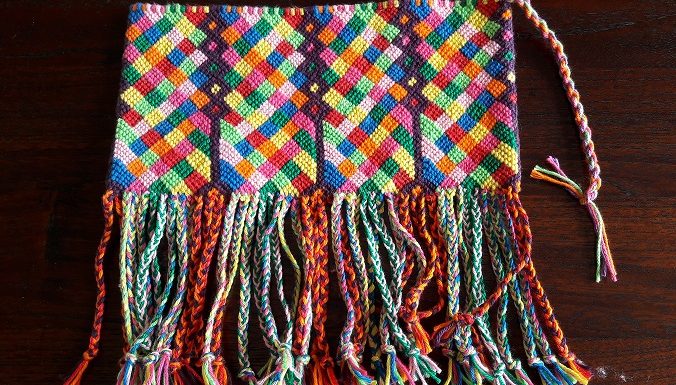
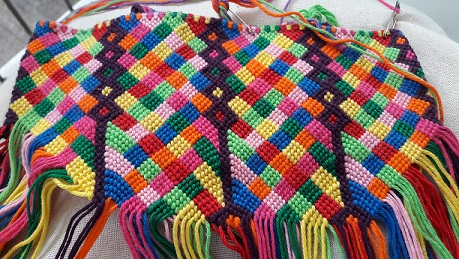
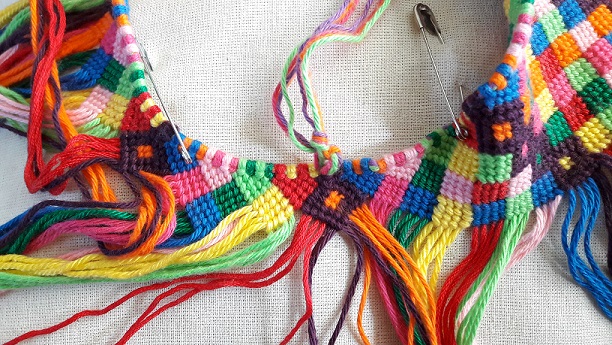
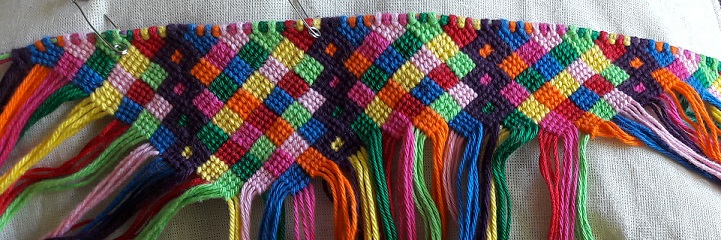
During a vacation with lots of rainy days, when I was making friendship bracelets with my two daughters, I thought by myself that it would be nice if I could make some patterns myself. I learned the technique years before from a book that was given to me by a friend. With the patterns of that book we could make several bracelets and it was fun to play with all kinds of color-combinations, but the need of having more patterns started to grow. I started thinking that it shouldn’t be that hard to figure out a method myself. I searched on the internet then (we’reRead More →

This is a design for a little bag, to put pencils or make-up in, or for whatever you would like to use it for. It doesn’t have a zipper yet on this photo, but you can add that for a closure or make a closure with small buttons for example. I did some blogging on this website about the entire design process (see here for the start), and about the steps making this (see here for the start). I also have some video’s on my YouTube channel, in which I show you every step, from start to end, how to make this little bag.  HereRead More →

Hi everyone! As promised: the digital version of the pattern is made. It’s in the menu with my knotting patterns, together with a description which I already did for a big part in my previous blogs. Or click here to go to the pattern rigth away. The video’s are in progress being edited by the creative persons here in my home 🙂 Of course they had to have a nice tune, some pictures, the sound has to be excellent. All kinds of stuff I hardly have knowledge about how to do that the right way (okay, maybe a little), but I have my helpers hereRead More →

The lower border Almost finished! I want to share some last things with you. You can see in this picture that I ended at a certain length.  I had enough yarn left to continue for a couple of rows, but I thought it as ok actually. The bag had a nice depth for what I want to use it for, so time to end it. To get a straight lower border, you must first get all knots in a straight line.  With the colored block this is done by knotting half blocks. At the yellow parts you can see I did a row of 4Read More →

Oh dear…. Well, not really 🙂 . I ran into a ‘problem’, like I already mentioned in a previous post. As you can see in the picture here, I used a lot more of the purple yarns than I used for the other colors. At this point I had approximately 50 cm (20 inch) left of the purple threads, and about 70 cm (28 inch) of the other colors. Well, this is not exactly my very first design, so I could have foreseen this. I know that making a knot uses more length of your thread, than when you make a knot around this threadRead More →

And now closing the circle! When you have knotted quite some part of the motifs next to eachother, you can go closing the circle, so you will get a, closed on the edges, whole. And this is really super simple! To close the circle, you take the left and the right side of your work and bring them together. Make a knot in the upper border threads, so you will get these two sides as closely together as possible. In the first rows the work has a tendency to move apart from eachother,  so it is necessary to really pull the first knots tight. NextRead More →

The design: a short review As you can read and see in my previous blogs, I made a design for a knotted bag. And now the sequel: the actual knotting of it! The ones that follow my facebook page already saw a preview in a vlog of the start, and how to knot the threads around the upper border threads. If you don’t follow my facebook page yet, you can see a direct link to my page in the menu! I can tell you secretly that I am a lot further already, and it turns out so nice!!!  A special twist on the design happened,Read More →

Playing with the upper border I went to draw again, working on what I had previously thought of for the upper border. I took the upper 2 rows of the big design (see my previous post) and put that on my design paper (see for downloads here), and started to try out some things. At the left part, with the blue, orange, licht and dark pink, you can see I added 2 extra rows on top of the original top rows. On the right I did only do 1 extra row.  I decided that 2 extra rows would be too much, so I started lookingRead More →

The chosen turn As you can read in my previous blog, I figured out that if I could have the blocks move over, I would get a more random look of colored blocks. For this I needed to make a turn to let the yarns change direction. I also thought that if I wanted to keep this random look all over the design, I would have to make several turns. So I already drew it on both sides, mirrored, as you can see in this partial design. I wanted to have all the colors I chose to be part of it, next or under each other,Read More →

Continuing with my design Okay, as you can read in my previous blogs in this series, I ran into some things while designing. It doesn’t matter, I gained understanding and as a bonus I got an idea for a twist on the design I have in mind. But now I will continue with the next step in working this out. If I wante to avoid having three blocks in a row, than the only thing I can do is make certain colors go from left to right, or from right to left, Ok, fine, but it means I have to introduce an extra color, or dropRead More →