
The chosen turn
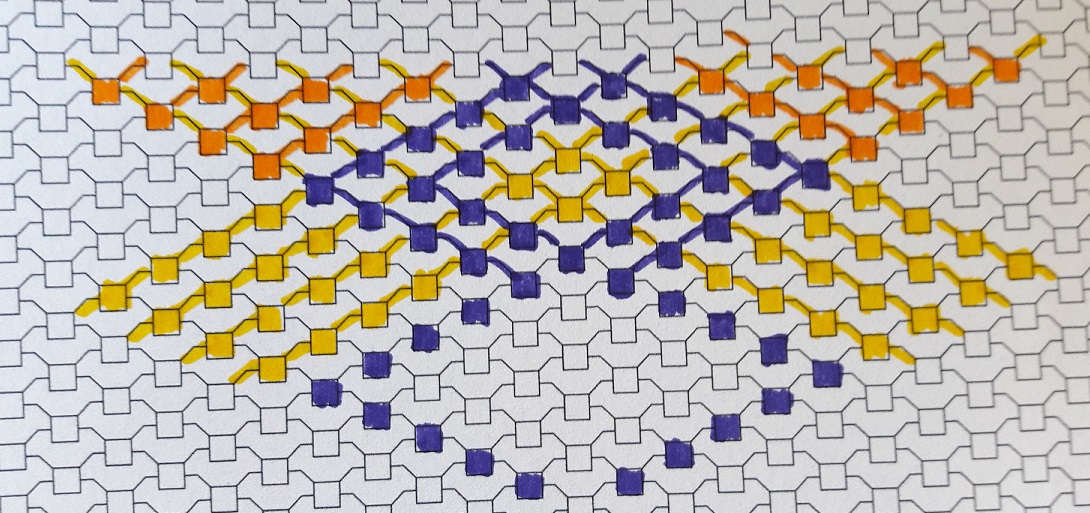
As you can read in my previous blog, I figured out that if I could have the blocks move over, I would get a more random look of colored blocks. For this I needed to make a turn to let the yarns change direction. I also thought that if I wanted to keep this random look all over the design, I would have to make several turns. So I already drew it on both sides, mirrored, as you can see in this partial design. I wanted to have all the colors I chose to be part of it, next or under each other, so this was my next starting point and I started drawing again.
Further elaboration of the turn: frustration???
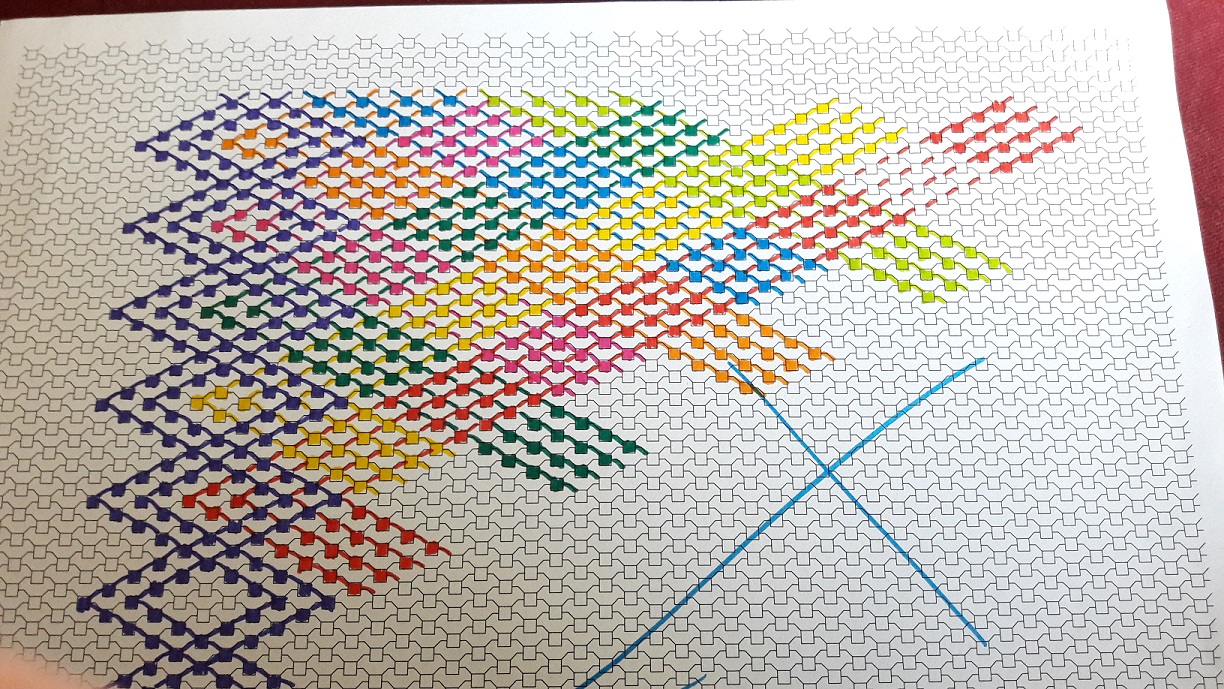
Okay, fair is fair, and I’m not perfect, and yes, I like designing, but very very very occasionally I get a bit frustrated :-). A little bit. What did happen? I continued with the zigzagborder I figured out to make, added the first 4 colors, no problem, added the 5th color (red), still no problem. I added blue and green to the top border, and then it was like ‘ding ding ding, you’re going to get the blocks of a same color in a row again!’ If you look at it, when you draw blue from the diamond shape on the lower left side to the upper right side, you will be crossing the blue block that comes from the top left, and then you will have, again, a blue block right next to another blue block. Okay, I could have figured that out in advance, but I wanted to look where the next turn of the knotting direction would be.
Well, drawing this costed me some time, and I don’t really mind because it’s quite relaxing to do, just coloring sitting on my couch :-), but this time I really wanted to tackle this. So I took another drawing block to make a quick sketch.
Tackling double turns
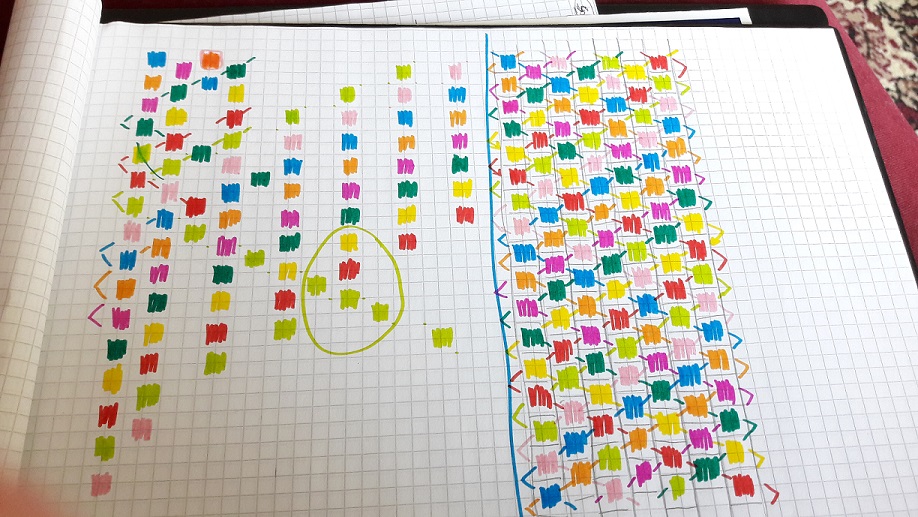
Here you see on the left where the ‘issue’ is (see the circle in the photo), or, to put it in a better way, what I didn’t want for this desing. On the right side you see the solution. Then I knew I had it, this was what I wanted it to be. As you can already see from the sketch on the right side, it looks like the colored blocks spread randomly over the design. This was the look I was looking for. Now to make a neat drawing just 1 more time!
And here it is!
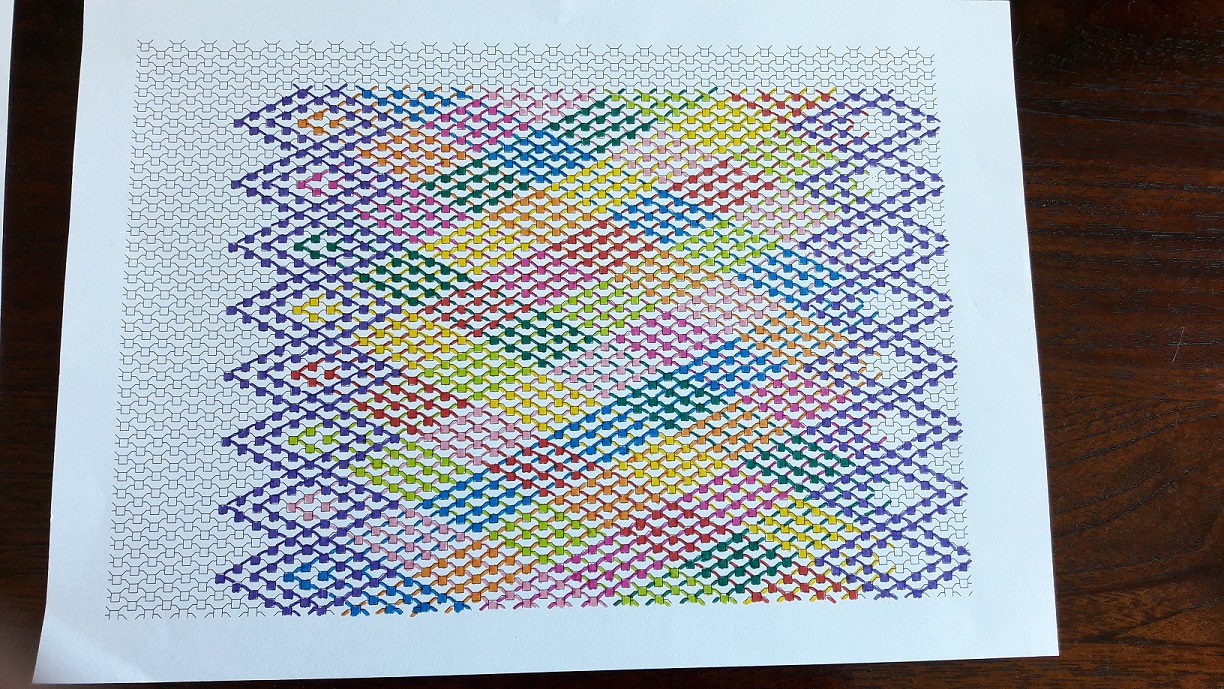
When you click on the picture, you will see it in its full glory. There still will be added a little piece for the upper border, and I will show you in detail what extra possibilities this design offers you. Because it’s not going to end with just this part. That would make a very small bag/purse/case :-). So, first a little edit of the upper corner, that, of course, is going to look very similar to the border I designed previously. But that I will show you in my next post!