
Continuing with my design

Okay, as you can read in my previous blogs in this series, I ran into some things while designing. It doesn’t matter, I gained understanding and as a bonus I got an idea for a twist on the design I have in mind. But now I will continue with the next step in working this out. If I wante to avoid having three blocks in a row, than the only thing I can do is make certain colors go from left to right, or from right to left, Ok, fine, but it means I have to introduce an extra color, or drop one, because I have to have an even number of colors. I chose for the last option, with pain in my heart ;-). So it became, red, green, orange and a dark pink on the diagonals from left to right, and yellow, light green, purple and blue on the diagonals form right to left. And that worked fine.
Designing the upper border
Now I had to figure out a way to make the upper border, so that , when I would knot a thread around te upper border threads, I would have the threads in the right order to be able to knot the rest of the actual design. I will explain this using some photo’s, because I can imagine that you wonder what I mean.
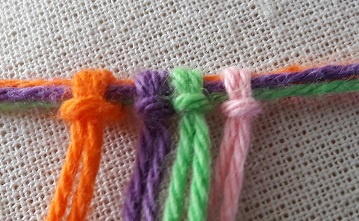
When you look at the picture, where I knotted a couple of threads around the upper border threads, you see that each thread results in two threads with which I can knot, that are in the same color alongside eachother. However, when you look at the upper border of the design step 5, you will see that with each knot you have 2 threads in different colors.

If you look at the detail of the design of the upper border, it would mean for this part you see here, you would have to take a green, a yellow, a green, a yellow, a green, a light green, an orange, a light green, and so on, next to eachother. So, next step, how do I come from ‘alternating colors’ to ‘same colors’?
So, new design sheet, taking over the upper part of my big design, and figuring out how I could et things together. Okay, I did this before, so I know that with this kind of repeats of threads that are close to eachother, and when you have an even number of threads of the same color, it usually is not a big issue. So it took not very much effort to make a design for the upper border (click on the picture for more detail):

As you can see an extra row is added on top of the design. Yes, it looks a bit different than the rest. But to be honest, I think it’s okay. Sometimes it is just a matter of letting good be good enough. And now you see that with every knot, you have two threads of the same color entering into it. Yay! Ready!
Ehm, not quite yet???
Well, that’s good, isn’t it? You would think so…… Didn’t I just say something about letting good be good enough? You know, I’m sometimes not easily happy about something. Yes, I know, it looks really nice, maybe I could have made some changes in the order of the colors, but I just wanted to have a little more exciting design. I don’t know if it’s the correct phrase in English, but in Dutch we say it continues to scrub or sand in my head. And if it keeps scrubbing, well, I just try to do a little extra to get it right. This was a design where the repeat was just a bit too visible to my likings, so I started brooding on it (man, it’s hard to translate Dutch phrases into English, I just hope that you understand what I mean 🙂 ). Maybe, if I would make the blocks jump over a bit, but then I had to do something with a turn to make the threads change from direction. Well, worth the try!
Making a turn
So, how to shape this turn? And do I need to mirror the design? Okay, getting my felted pens again, took my design paper (see here), and trying things out. Attempt 1:
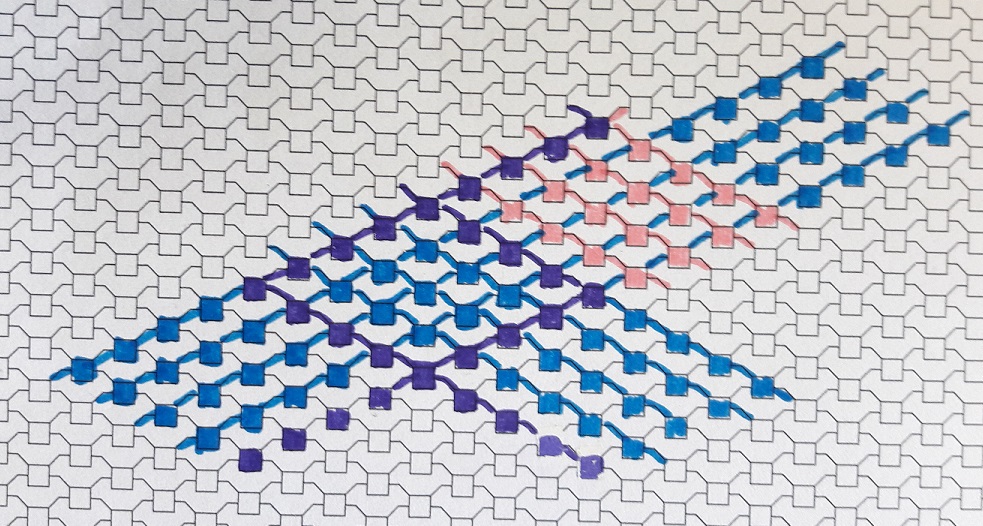
I let the blue block make a turn from upper right to lower rigth. Okay, this is a journal of a couple of days ago, so I discovered in the meantime that the block on the lower left side was not necessary, but I will show that to you later. I thought I needed to mirror the design. So forget that part for now. To let the block go round a corner, I added a purple border. But I found it to be a bit too delicate. I wanted it to pop out much more, because I found it an interesting effect on my design. Next attempt with a wider border:
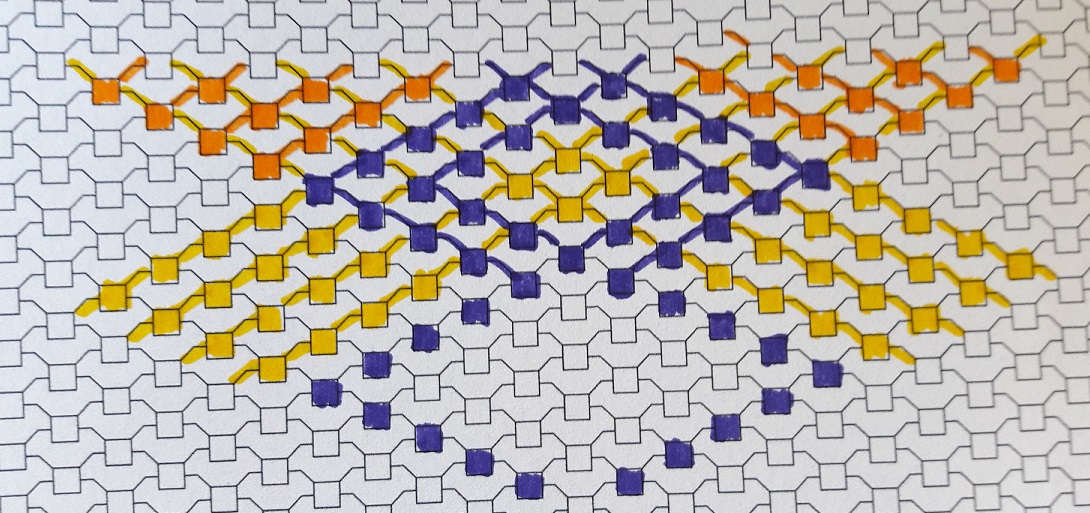
Yes, this was really it! So that’s what was it was going to be!
Next time: last steps
Now I really had the feeling that I was on my way to what it was going to be, what fitted to what was in my head. In my next post I will show you how the final design turned out to be. And which ‘bonus’ came bubbling up, what gave it an extra interesting twist to it. Because, while drawing, a possibility showed up that I had not foreseen at all! So watch my next post! See you!