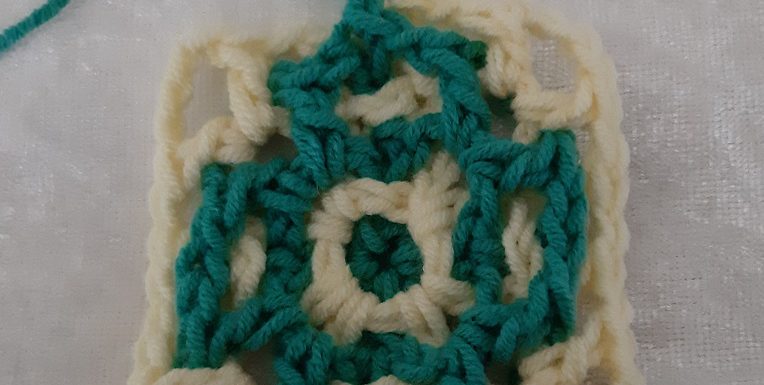
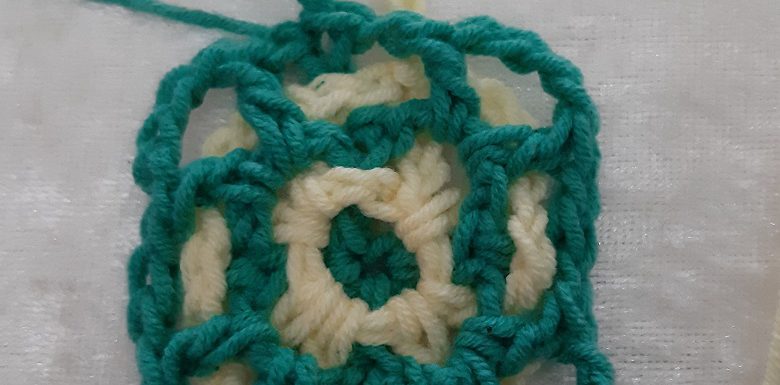
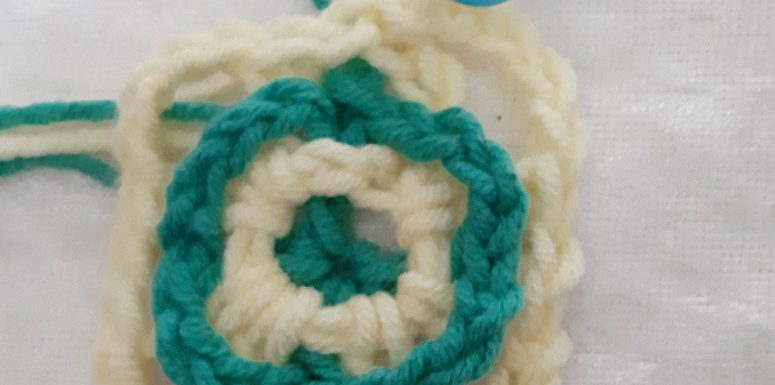
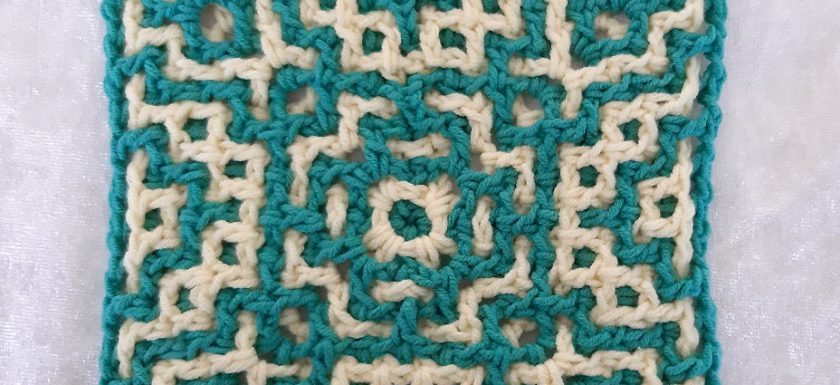
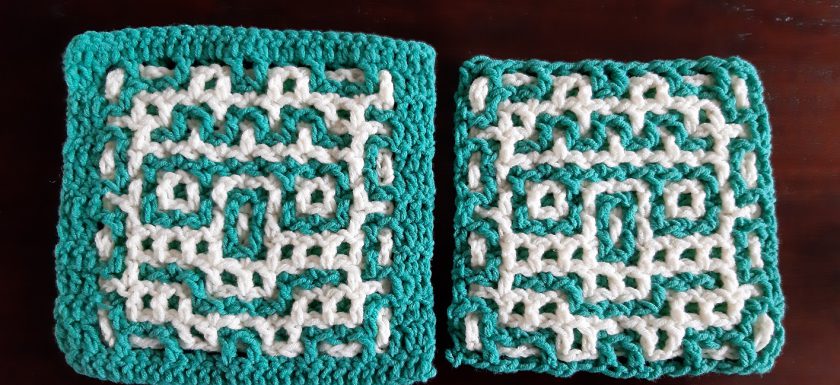
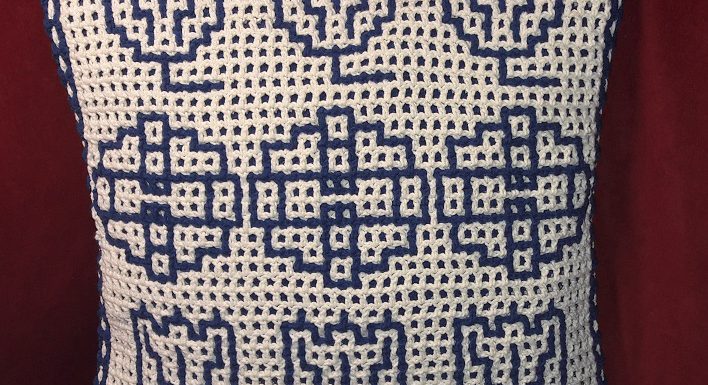
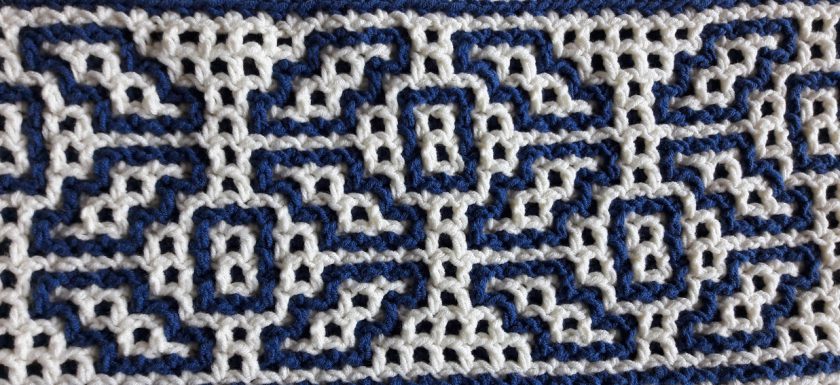
Pages of this tutorial I splitted the tutorial up in several pages. Introduction and row 0 and row 1: click here to go to that page Row 2: click here to go to that page Row 3: click here to go to that page Row 4: click here to go to that page Row 5: that’s this page Row 6 and 7: click here to go to that page Pattern description and pictures of the last rows: click here to go to that page Tips and tricks: click here to go to that page Joining the blocks: click here to go to that page RowRead More →

Pages of this tutorial I splitted the tutorial up in several pages. Introduction and row 0 and row 1: click here to go to that page Row 2: click here to go to that page Row 3: click here to go to that page Row 4: that’s this page Row 5: click here to go to that page Row 6 and 7: click here to go to that page Pattern description and pictures of the last rows: click here to go to that page Tips and tricks: click here to go to that page Joining the blocks: click here to go to that page RowRead More →

Pages of this tutorial I splitted the tutorial up in several pages. Introduction and row 0 and row 1: click here to go to that page Row 2: click here to go to that page Row 3: that’s this page Row 4: click here to go to that page Row 5: click here to go to that page Row 6 and 7: click here to go to that page Pattern description and pictures of the last rows: click here to go to that page Tips and tricks: click here to go to that page Joining the blocks: click here to go to that page RowRead More →

Pages of this tutorial I splitted the tutorial up in several pages. Introduction and row 0 and row 1: click here to go to that page Row 2: that’s this page Row 3: click here to go to that page Row 4: click here to go to that page Row 5: click here to go to that page Row 6 and 7: click here to go to that page Pattern description and pictures of the last rows: click here to go to that page Tips and tricks: click here to go to that page Joining the blocks: click here to go to that page ImportantRead More →

In this tutorial I will teach you how to do interwoven crochet (or also called locking filet crochet) in squares, and with that I mean working in the round, so not from bottom to top. It is necessary that you already know how to do interwoven crochet. You can learn all about it on the pages on the HAL CAL menu or here for the very first start (click here). You will find the phototutorials there and the links to the accompanying videos. I will use the American crochet terminology in these pages. A new extensive tutorial! Hereafter follows the tutorial I made in 2019Read More →

Hi! Neglected the website for a while, because I share a lot on my facebook pages, and then I simply forget that I also have something like a website  😛  😛  😛  . I am already busy though with a new tutorial with a lot of pictures and charts again, so keep an eye on this! It is something new that also has to do with interwoven crochet and it’s so fun to do. Something which gives more possibilities to create really beautiful projects! But first something new today! I made a new tutorial for interwoven or locking crochet. I saw on my facebook pagesRead More →

There will be worked on this page, but you will find already enough information. Follow the links on this page, so you will find all the information you need. If you have never done interwoven or locking crochet, you can best start with the video tutorials in this playlist: Interwoven or locking crochet. With these videos you can get acquainted with this technique in a simple way. You can first focus on crocheting the 2 filet crochet layers. In these videos I use extra double crochets (that you do not normally do!) for the lower border, the sides and the top border in color 1, andRead More →

Last week the last pattern of the blanket Is was so much fun again to see several members finished their blanket and showed their picture of it. Or of their table runner or shawl they made of it. So great! So please continue to share your pictures on facebook. Like mij husband said yesterday when I was scrolling through the group: ‘do you not find it a strange idea that your blanket is now in others people homes on the couch or on the bed?’. Yes, that still feels a little bit strange to me, but I also like it very much. Also an honorRead More →

What an adventure! Oh my, what an adventure this has been! I really did not expect this to become such a huge success. I am still happy with that every single day! Really! Of course I hoped it would be picked up when I was thinking about doing a CAL about the interwoven or locking crochet technique, but that it would become such a success, and that I would get so much positive response, I absolutely didn’t expect that to happen. Message of this post: ‘Wow! This makes me blush! I’ts 14:35 pm and I already have 56 members. I really didn’t expect that. ThankRead More →

A nice and simple surrounding border When you’ve finished crocheting row 160a, do not cut off the yarn of color 1. The thread of color 2 can be cut off and you can darn in the end. We will now make a border of single crochets around the entire blanket with color 1, and we will only work into the outer border. This will make that the blanket gets a nice straigth edge. DThe border stitches of color 2 do not need finishing. They look good already because of the weaving through because of how the pattern was designed. Important! Take a smaller hook thanRead More →