
Happy colors, I really needed that!
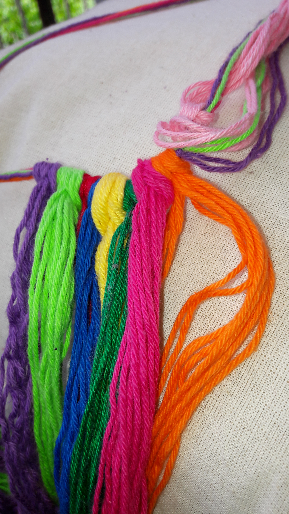
Happy colors, that was what I wanted! A bag, purse, pouch, whatever, it should have happy colors. So I grabbed my bag of yarn that I keep for knotting projects and turned it upside down, and quite randomly took balls of yarns in happy colors. I ended up with 9 colors that went together very well, to my humble opinion. My idea was to do ‘something with blocks’. Okay, quite vague, not really thought through, but that’s what was in my head and I really was in a kind of mood like ‘just grab something, don’t think it over too much’. Next I cut 8 strands of 2 metres (about 2 yards) long of each color, and 4 strands around which I will knot my other strands of yarn to make the upper border. These ones I cut about 75 cm (30 inch) long, but that doesn’t really matter that much. As long as it’s long enough to make the knots for the border and to be able to work comfortably.
You know, this is how simple it can be. An idea, colors in a bag of yarn that grab your attention, in a picture, a ball of variegated yarn, a bunch of flowers, and then just let your mind go over it. Enjoying yourself about just being busy with it.
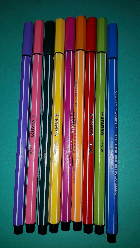
Okay, I started right away to think of a nice order in which I would knot the colors around the upper border strands, when I thought that I probably was going a little bit too fast. I said to myself: just a little step backwards, madam, because, before you know it, you will be attaching 9×8 strands of yarn, and you will come to the conclusion that you have to undo it all again. You can always have a good laugh with me, when I’m enthusiastic about something I tend to go a little too fast :-). So, to the drawing table. That’s something I really like to do also. Just nice with my felted pens, my design paper, and go coloring. On the page about designing bracelets yourself (click here) I have downloads for you of the design paper I use, so if you feel like it, download and print them.
Drawing: step 1
Like I said: I wanted to do ‘something with blocks’ . So I started drawing 4 blocks in 4 different colors. But that quite quickly turned out not to be working. I wanted the yarns to simply go from left to right or from right to left. You can see the problem that occurred at the spot where I drew the arrow. If you have a purple strand that comes from the left, and a green one from the right, there’s no way you can make an orange knot of it. So this was not a possible design.
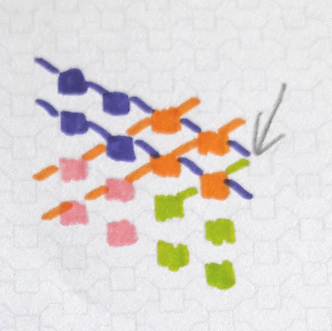
Drawing: step 2, next attempt
I decided next to make the blocks in a diamond shape and look how that would work out. This time it went well with the first 4 colors. Yay! Next step was to add another 2 colors. Alas, that’s where it went wrong also. Look at where the arrow points to: purple from the left, red from the right, no way that’s gonna make a dark pink knot. At that moment I got my aha-moment: this design needed a repeat of colored blocks on the diagonals, from left to right and from right to left.
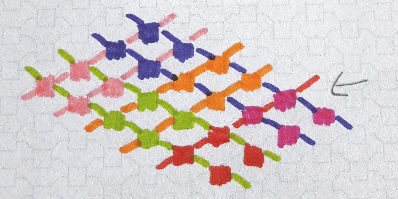
Drawing: step 3, blocks on the diagonals

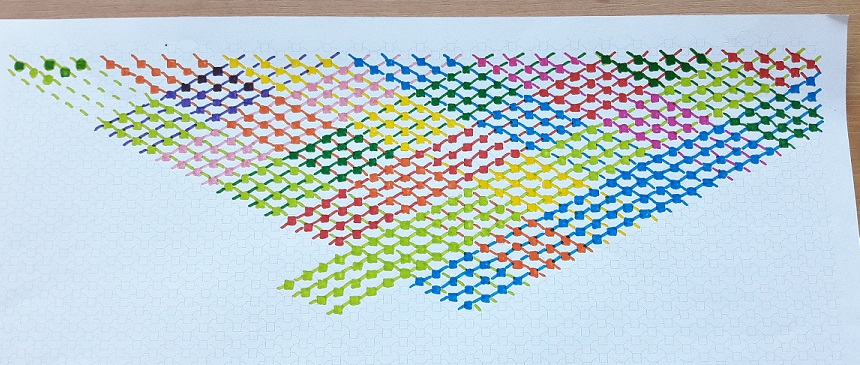
So next step was to draw the repeating blocks on the diagonal lines, both from left to right and right to left. Color 1, in green, of course went fine. And then I happily added the next color, orange. But then I saw another ‘issue’ rise. On the spot where the orange and green blocks cross, you have to make a decision: will there be an orange or green block there. One way or the other, you will get a sort of line of three block in the same color. I let my mind wander over it. Do I mind? Well, no, I don’t mind, it actually could have a fun or exciting effect if you just let it become part of your design. I definitely gonna treasure this idea, but I wanted to look further to what I actually had in mind. Next thing I was busy with some other things in life, and a couple of days later I started drawing again. Well, I have the tendency to make the same mistake more than once :-), so see the picture of step 4. Here you see the effect of 3 blocks of the same color in a row on the right in blue. Well, doesn’t matter, it is nice to show you in this blog, isn’t it? 🙂
Stay tuned
Okay, not finished yet. In my next post in will show you my next steps in this design-process. Keep in mind: don’t let anything discourage you when you try things out yourself. Every step on the way will give you something: insight, more ideas, or just a fun and relaxing experience!