
This tutorial is split up in several parts.
- page 1: introduction and explanation, click here to go to that page
- page 2: photo tutorial rows 1 and 2, that’s this page
- page 3: photo tutorial row 3, click here to go to that page
- page 4: photo tutorial row 4, click here to go to that page
- page 5: photo tutorial rows 5 and 6, click here to go to that page
The pattern
Click here to download the pattern
The photo tutorial
After this I will show you what to do per row. Keep the pattern next to it, so you can follow it. Click on each photo or chart to see it fully and full size. I have only added ‘ thumbnails’ here to make this page load faster. Don’t forget this tutorial has several pages 🙂 .
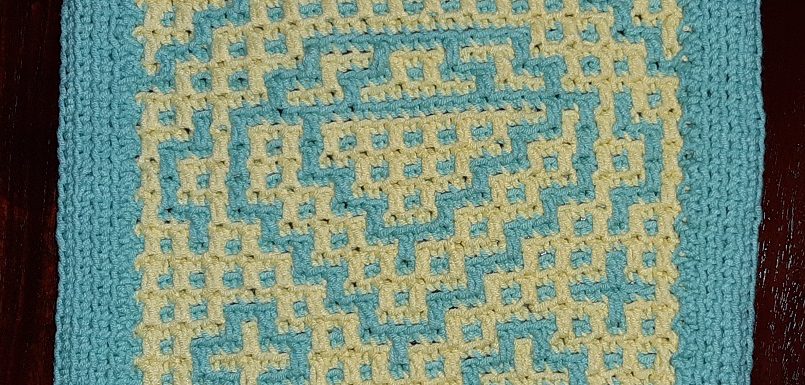
Look for a picture of the complete piece with the border at the last page of this tutorial!
Row 1, color 1: the setup
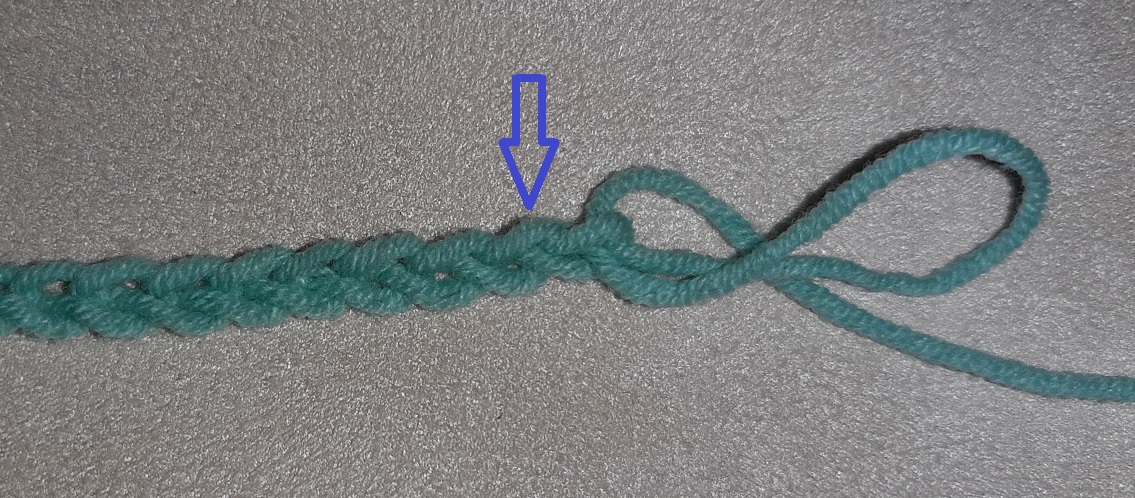
Make a setup with 33 chains. If you don’t want to make a border around your project, but use the yarn ends for a fringe, take into account what length you want for the fringe when you make the slipknot at the start of the setup.
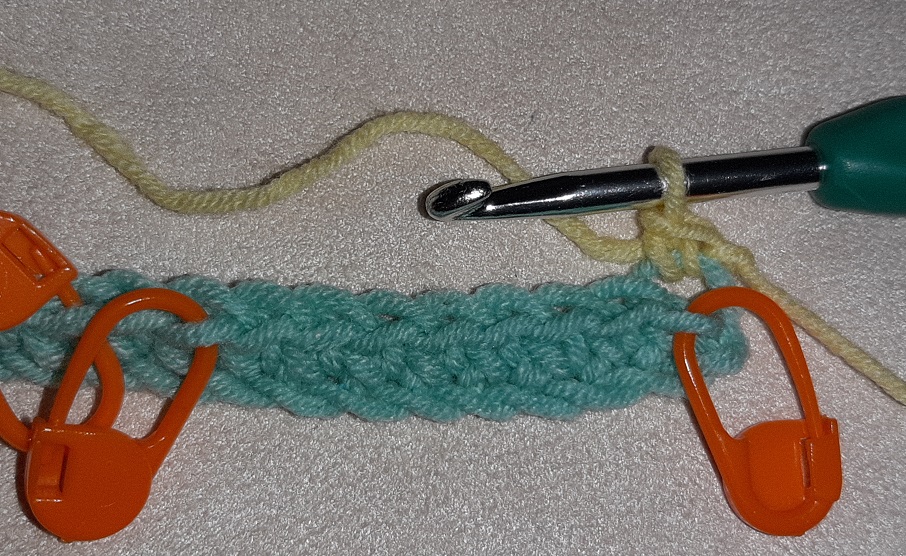
Crochet loosely, so that your work will not bent. Make another chain, which is the turning chain, because you will be making a row of 33 sc’s in the setup. The first sc will be made into the second loop from the hook (see the arrow in the picture).
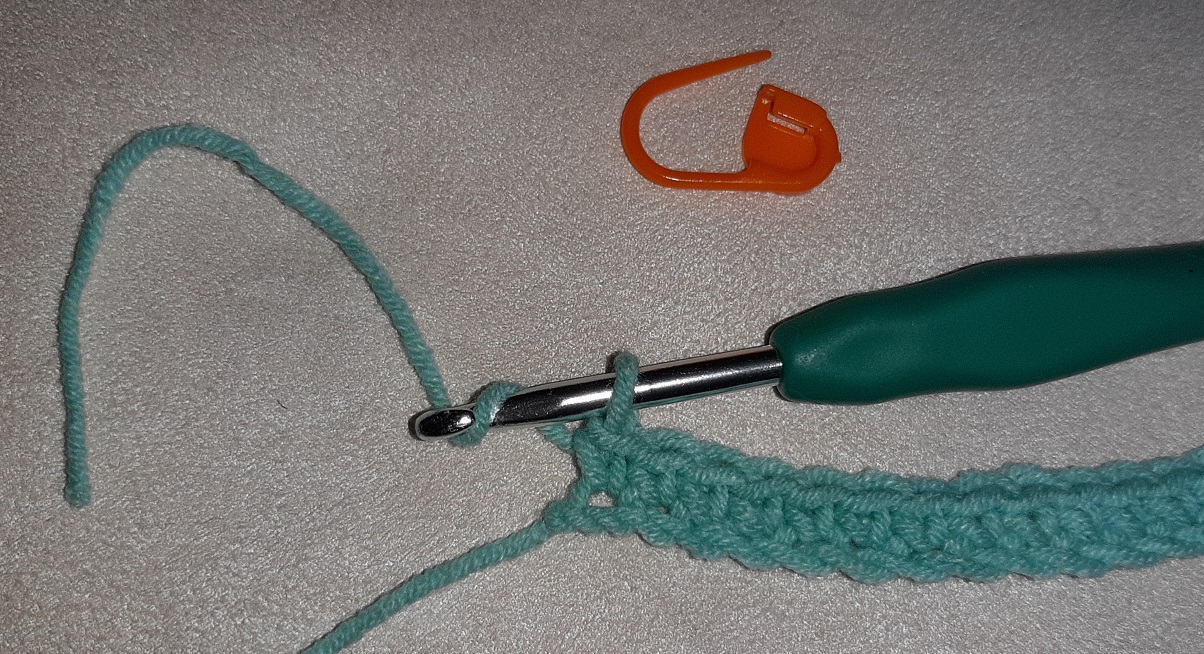
This is done both with color 1 and counts as row 1. I crochet the sc’s simply into the top loop of a chain, but if you prefer to work into the back chain, that’s okay as well. And you can use other ways of setting up if you like, where you will do the setup and the sc’s the same time.

When you have done the first sc, mark this stitch with a stitchmarker. Hang the marker at the bottom/front loop only!
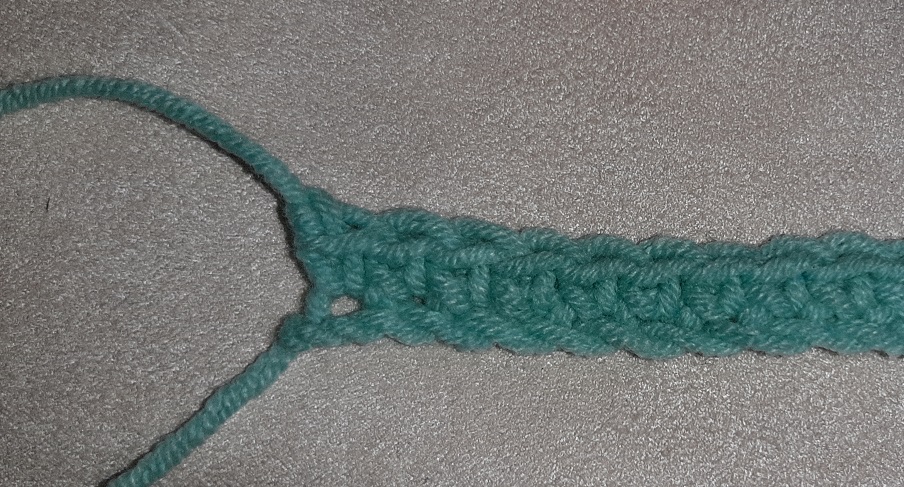
Make another 32 sc’s, so you will end up with 33 in total.
Now cut the yarn. If you don’t want to make a border around your project, but use the yarn ends for a fringe, take into account what length you want for the fringe.
Normally I pull the cut end of the yarn through right away, but to be able to make a tight knot I make another wrap and pull the yarn through. Pull it tight. This also makes that you won’t see it accidentally as an extra stitch in the next row.
Row 1 is finished now, but we will start thinking ahead to prevent making mistakes when we will work with color 1 again at row 3. It is not really necessary to make this extra step, but especially with long rows, like with the HAL CAL 2020, it can help you prevent making mistakes.
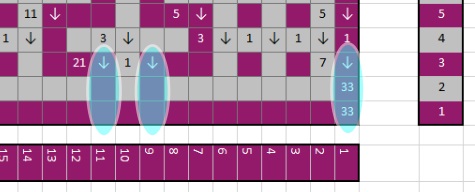
Look at this little chart here to see where the dc’s of row 3 will have to be made. There will also be one at the end of the row, but I left that out for now.
You see there will be made a dc into the first stitch, after that there will be made 7 sc’s, then there will be another dc, then again 1 sc and a dc. I have marked this with the light blue ovals.
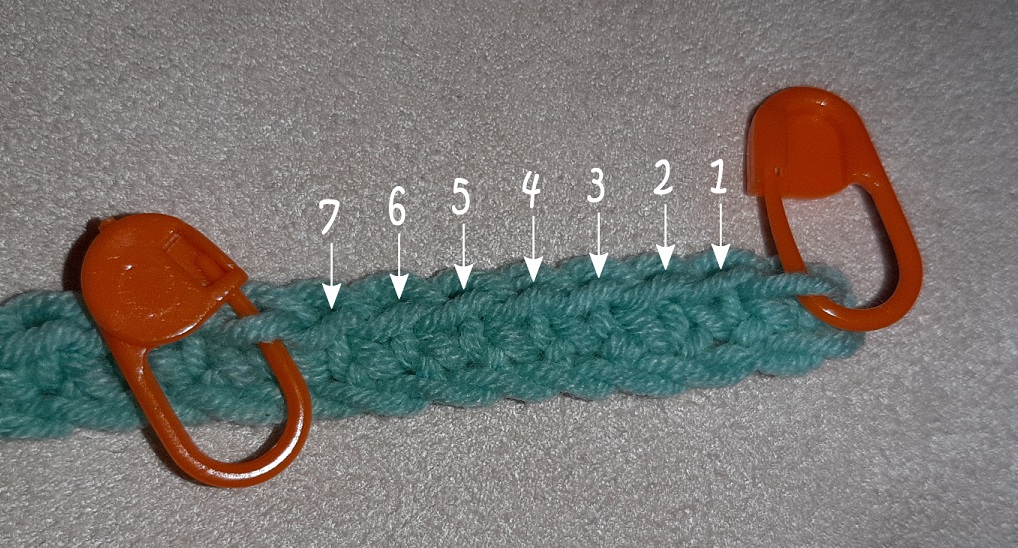
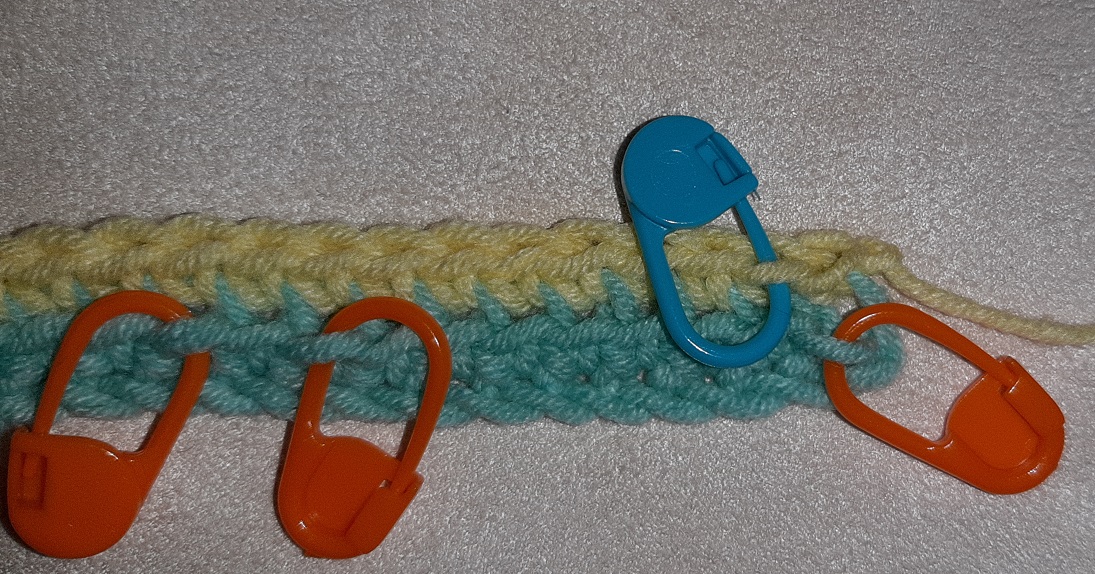
We will now place markers into row 1 at the places where the dc’s will be made into. We already put in the first marker. We will now skip 7 loops and place a marker into the stitch after that. Hang the marker on the bottom/front loop!
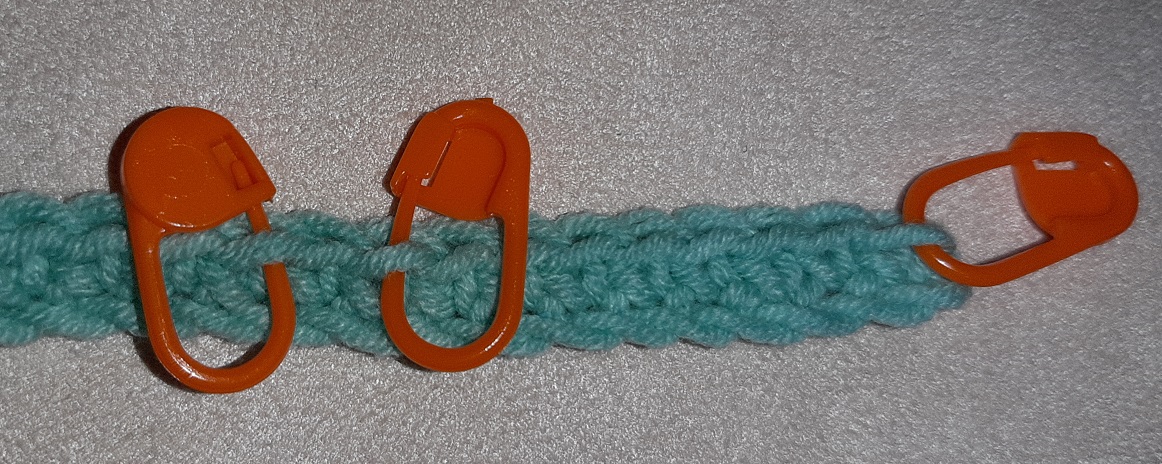
Now skip a loop, because in row 3 we will be making 1 sc after the dc. Hang the next marker on the next loop. Click on the picture to see this clearly.
If you want to, you can also put a marker on the last stitch, but that one is hard to miss, so I didn’t do that one 🙂 .
Row 2, color 2
We will now work with color 2. We will work again at the front side of the piece! The written instructions tell we have to make 33 stitches. In the pattern chart at row 2 you see the number 33 at the right. Even if you see the blocks in color 1 in row 2: simply ignore them for now. That will be fixed in row 3, because we will work over row 2 with dc’s. But you will see that when we come to row 3 🙂 .
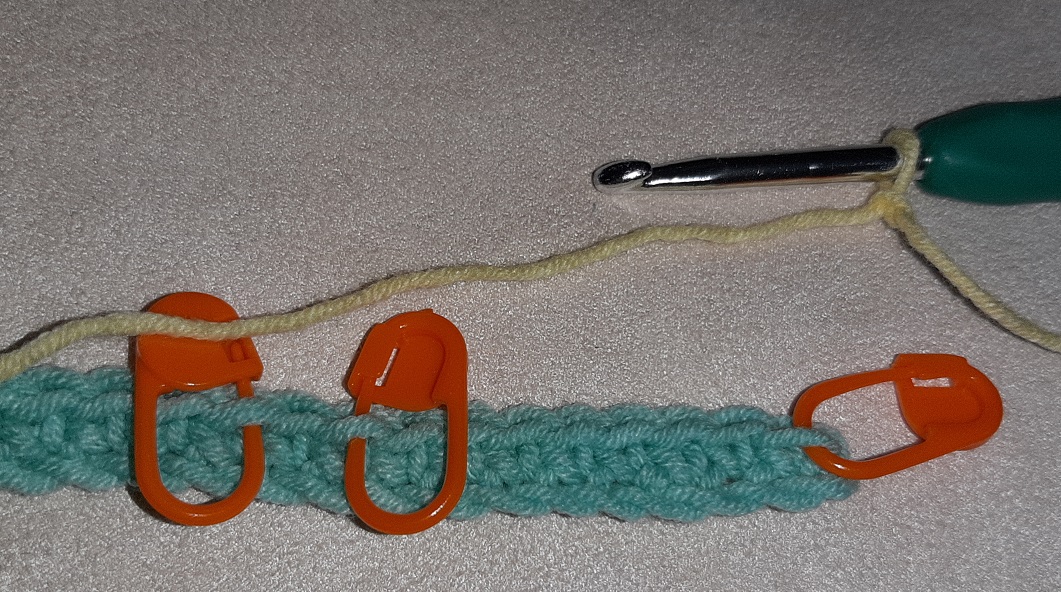
We will start with a sc into the first stitch. Make a slipknot and put that on your hook.

Insert your hook, but only pick up the top loop! This is essential for 2 reasons. First this is to prevent your piece getting slanted. Secondly, the bottom or front loops will be used to work into with the dc’s in a next row.
Here the first sc is made.
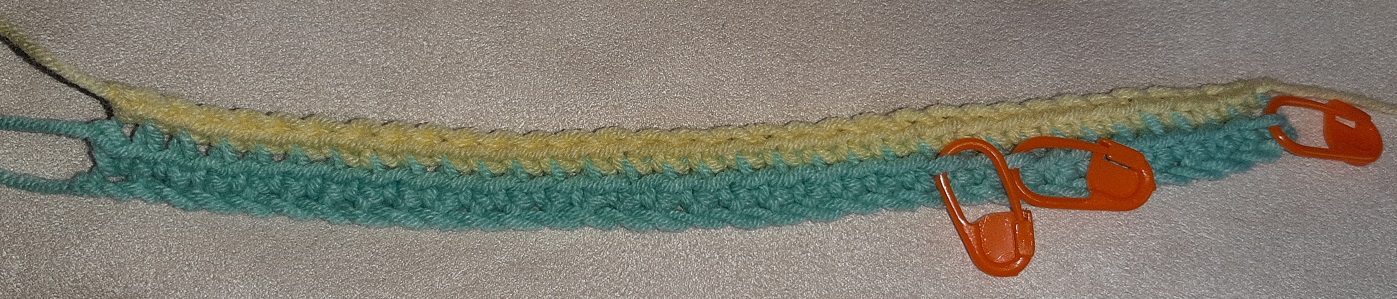
Make another 32 sc’s, so you will have 33 sc’s in total. Cut the yarn again at the end and make that extra pull through to make a tight knot.
When you look at the pattern chart you will see at row 4 you will be making a dc at the secons stitch. Again, it is easy to go wrong at the start, so just for the ease of it, place a marker.