
The first row to anchor the warp threads
As you have been reading in the introduction, you will work with weft and warp threads. In this tutorial I show you the ‘standard’ way of anchoring the warp threads. We will work with weft threads in 2 colors . I will also show how to vary with the threads, and how to use 3 threads.
I have splitted the first tutorial into 2 parts. First I show the principle, so you get a clear idea on how this works, and after that I show you how to keep this into your hands, so you have control over the weaving and to keep your work neat.
Index
I’ve spread the tutorials about casting on over several pages. Click on the links for each subject.
- The cast on basics: on this page
- Variations with 2 colors: click here to go to that page
- Casting on with 3 colors: click here to go to that page
Besides these, there will be more tutorials about casting on, because there are more possibilities. They will follow later!
Videos
I made some videos for the cast on and the variations on it:
- The basic setup: https://youtu.be/doBaIl5E1o4
- Color variations: https://youtu.be/pnMgQmYWz9Q
- Cast on with 3 colors: https://youtu.be/RrSOw8xAtI8
What do you need?
To master this technique first start with thick yarns that don’t stretch when you pull on it. I used a 100% recycled cotton for macrame here. Later you could always work with thinner yarns, to create bracelets for example. Just start with a simple short project. The warp threads (the ecru in the following pictures) have to be twice the length of the heigth of your finished project, because they will be folded in half. The weft threads (the blue and green threads) have to be at least 4 time the width of your project. I add some extra for the fringe.
The steps
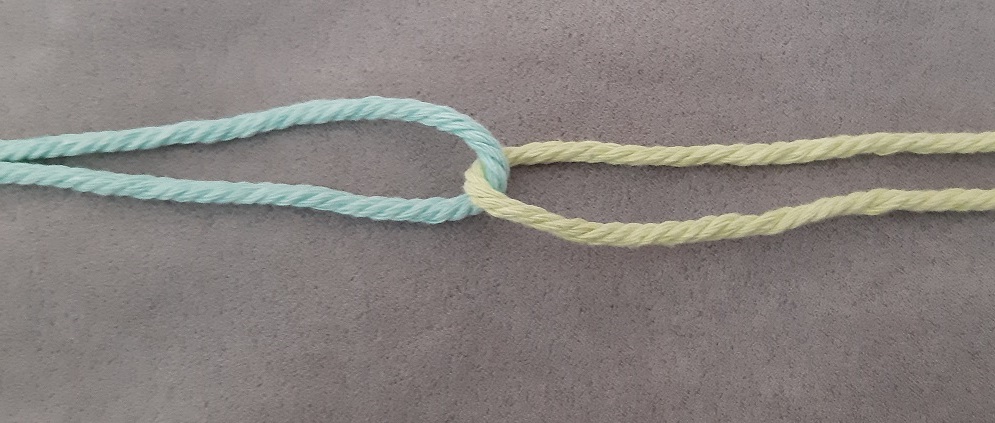
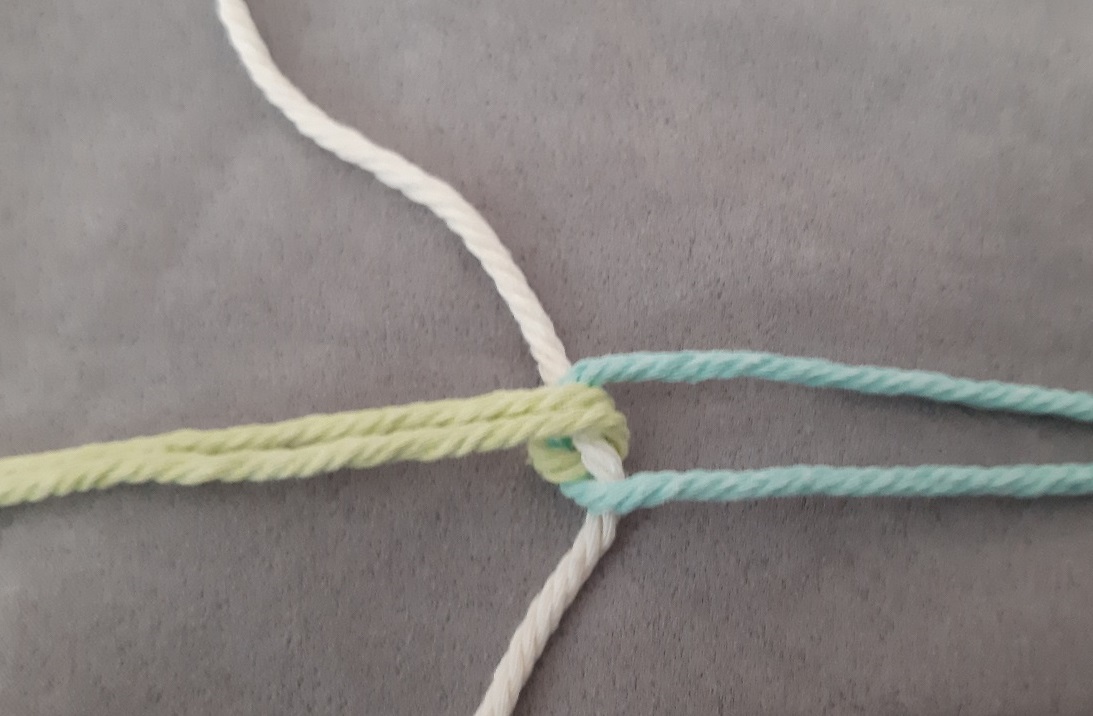
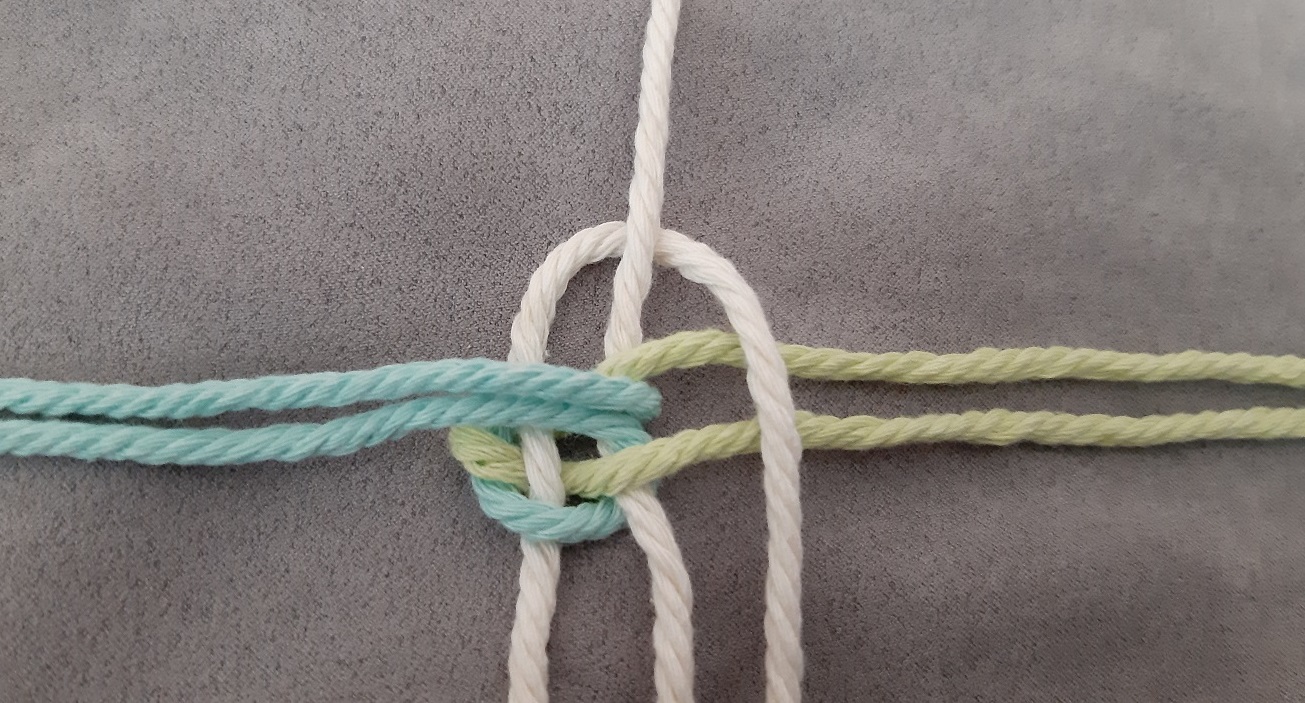
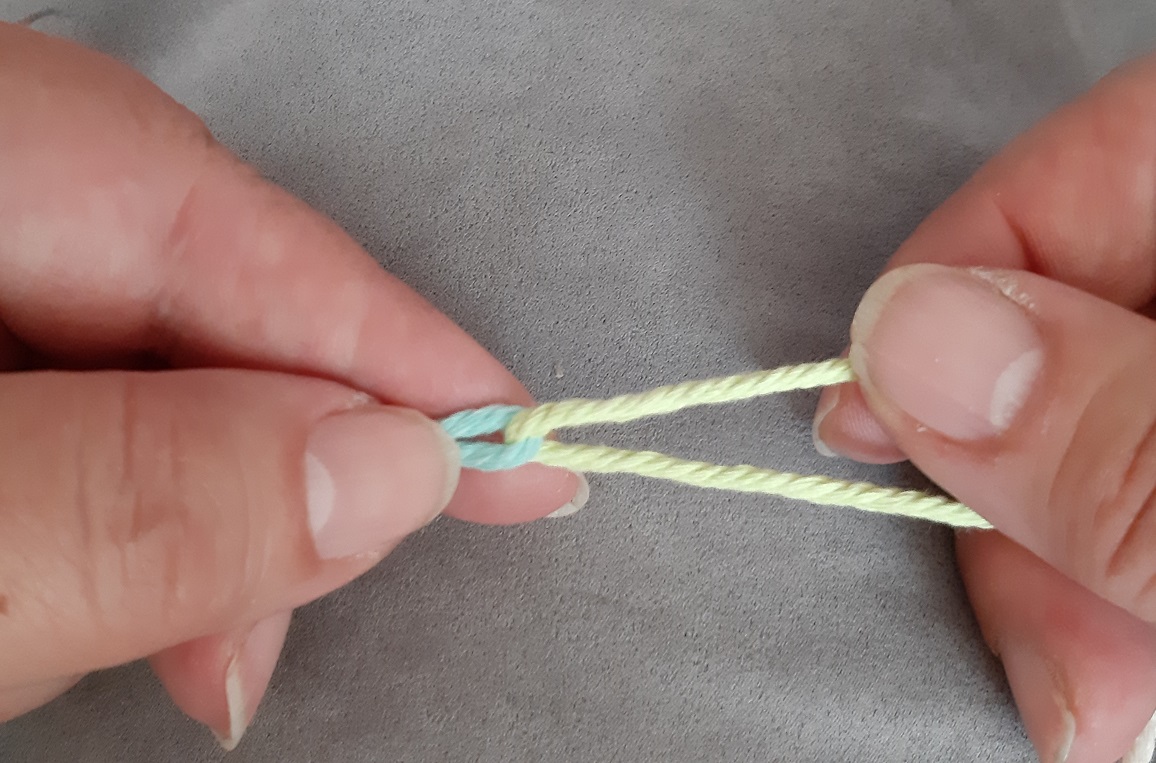
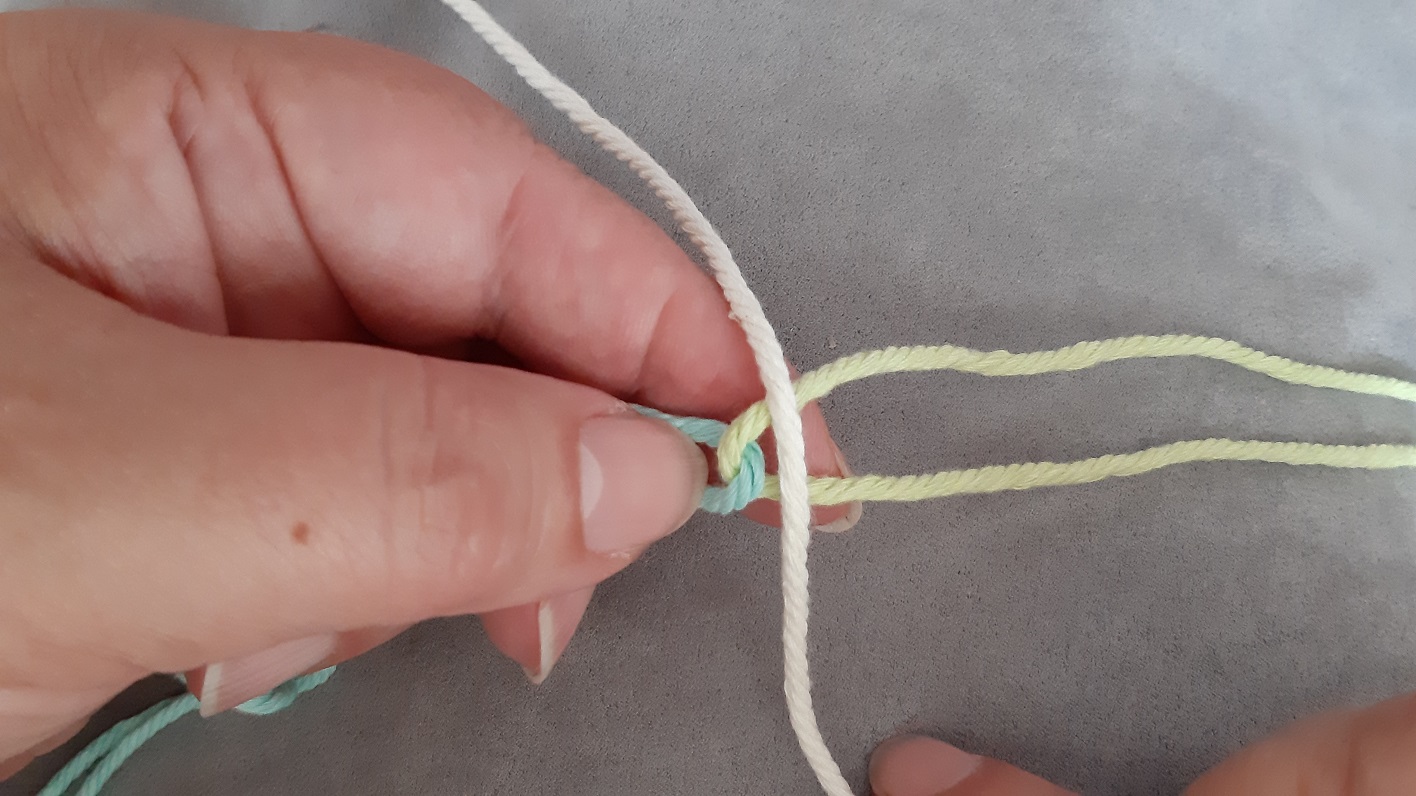
Fold the weft threads in half and interlock them in the middle as shown in the picture. The color that is now on the left, will be the color that will get on top of the first warp thread. This is important if you will follow a colored pattern.
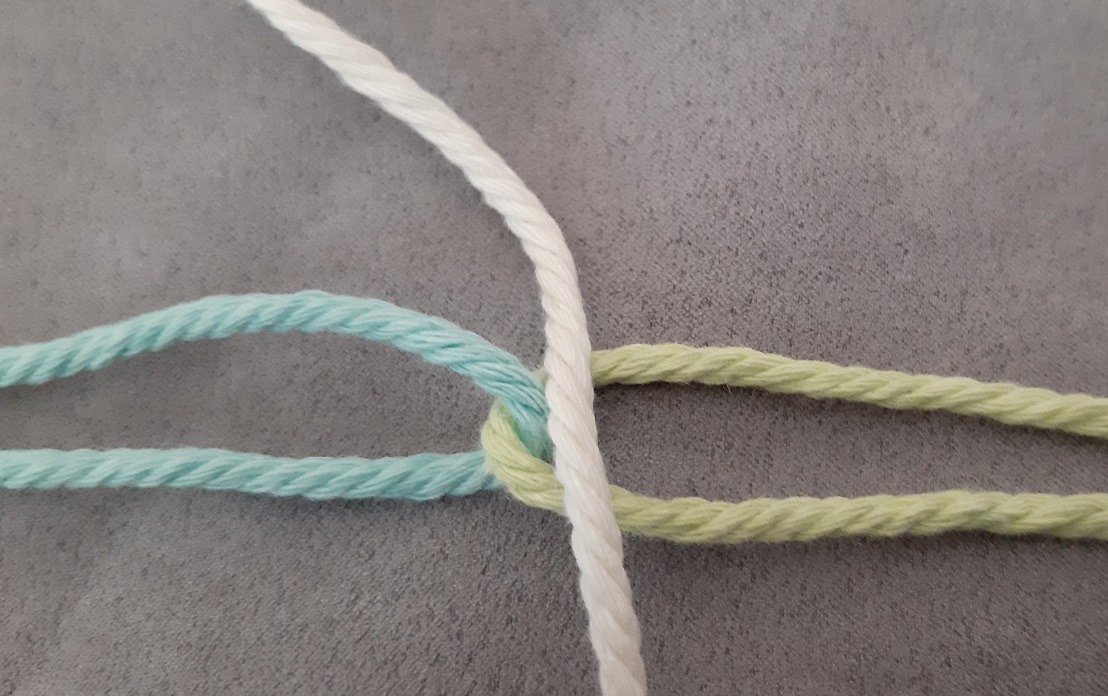
Now put the middle of your first warp thread on the weft threads. Take care of putting it on the right threads (green), so not on top in the intersection of the weft threads.
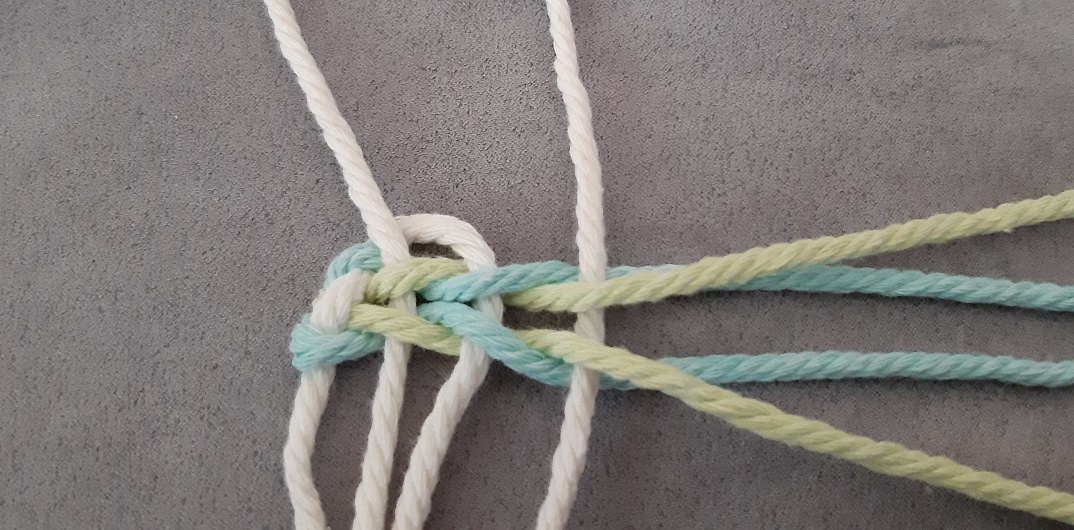
Next fold the left threads (blue) over the warp thread, and spread them, so that the green threads get to the middle. You see in the picture that the blue threads cover the warp thread, and the green threads are under the warp thread.
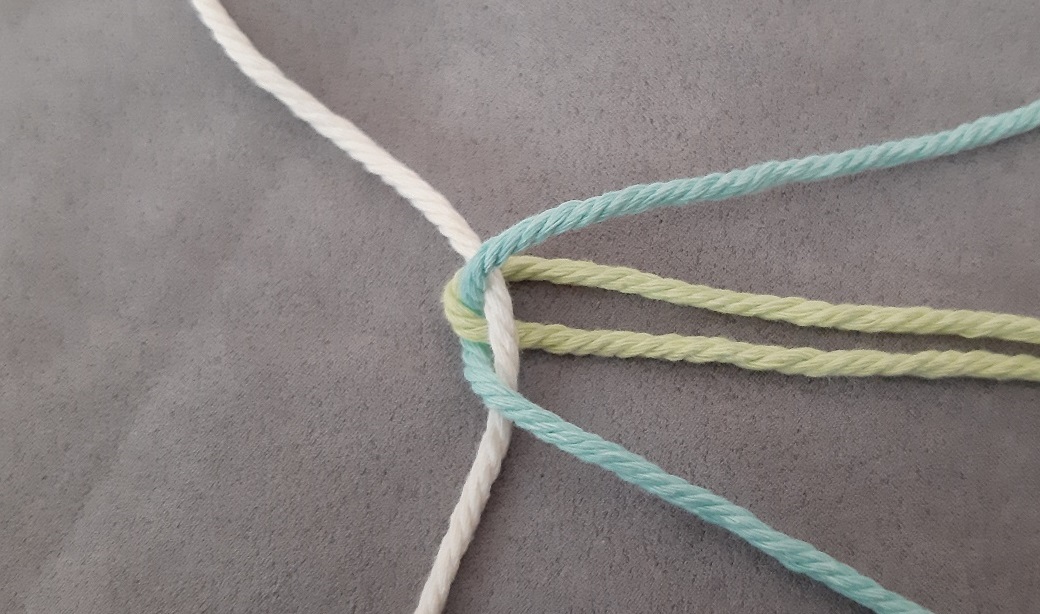
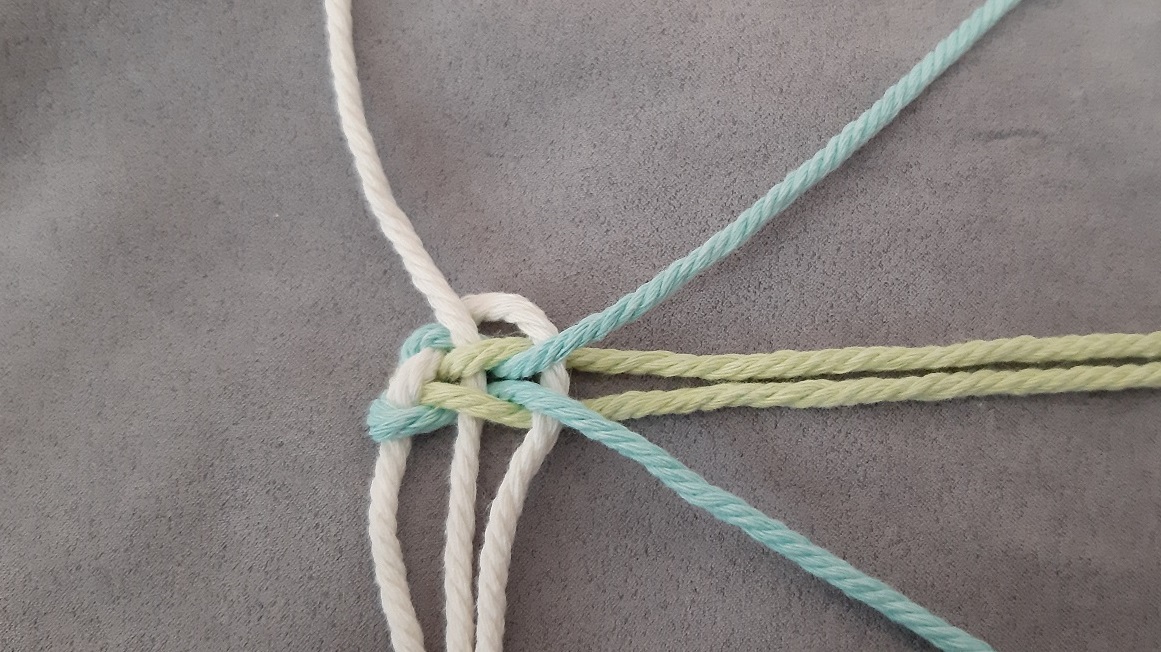
Take the middle 2 threads (green) and fold them to the left.
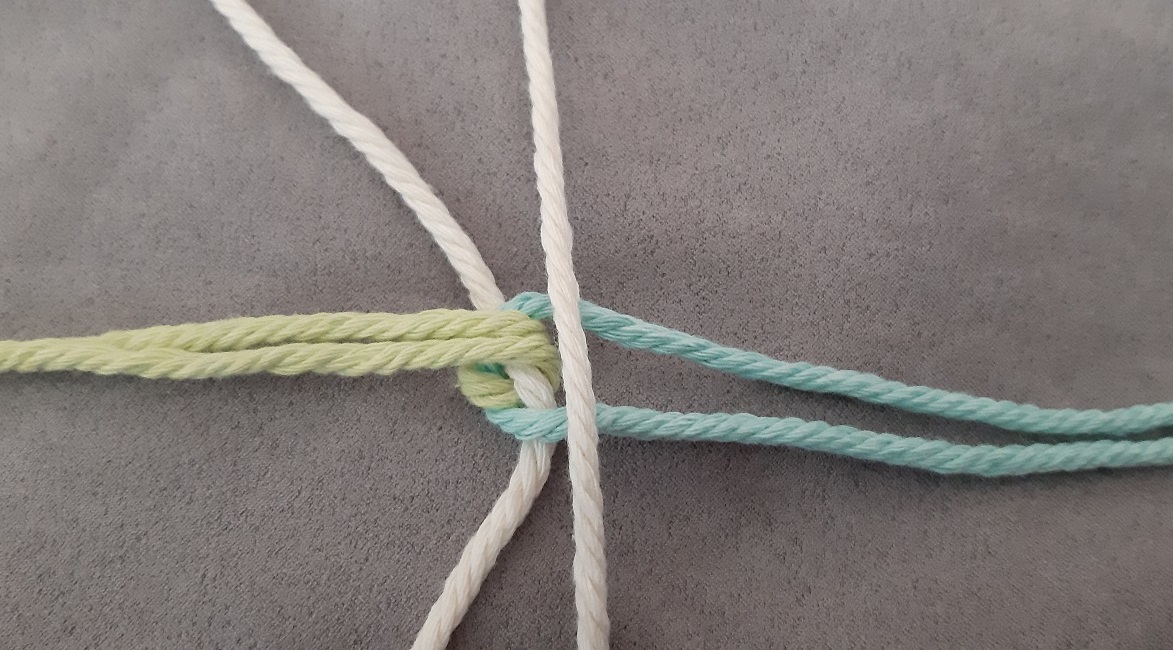
Add the next warp thread. Fold it in half and lay it on top of the right threads.
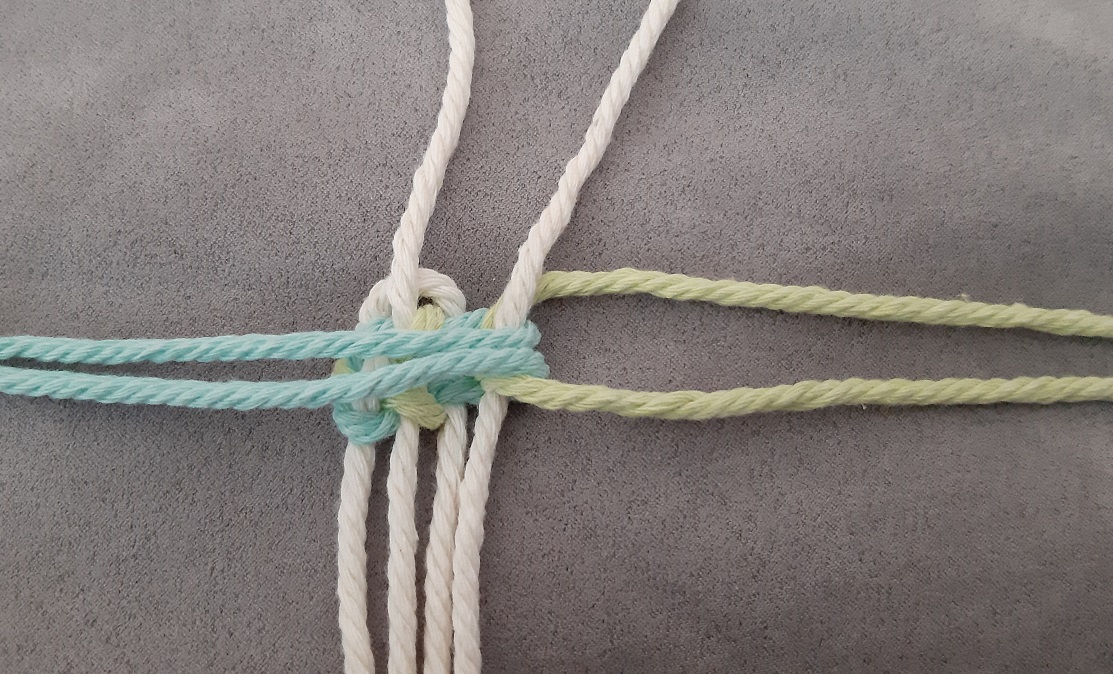
Now fold the left threads (green) over the warp thread, and spread them, so that the blue threads get to the middle. You see in the picture that the green threads cover the second warp thread, and the blue threads are under the warp thread this time.
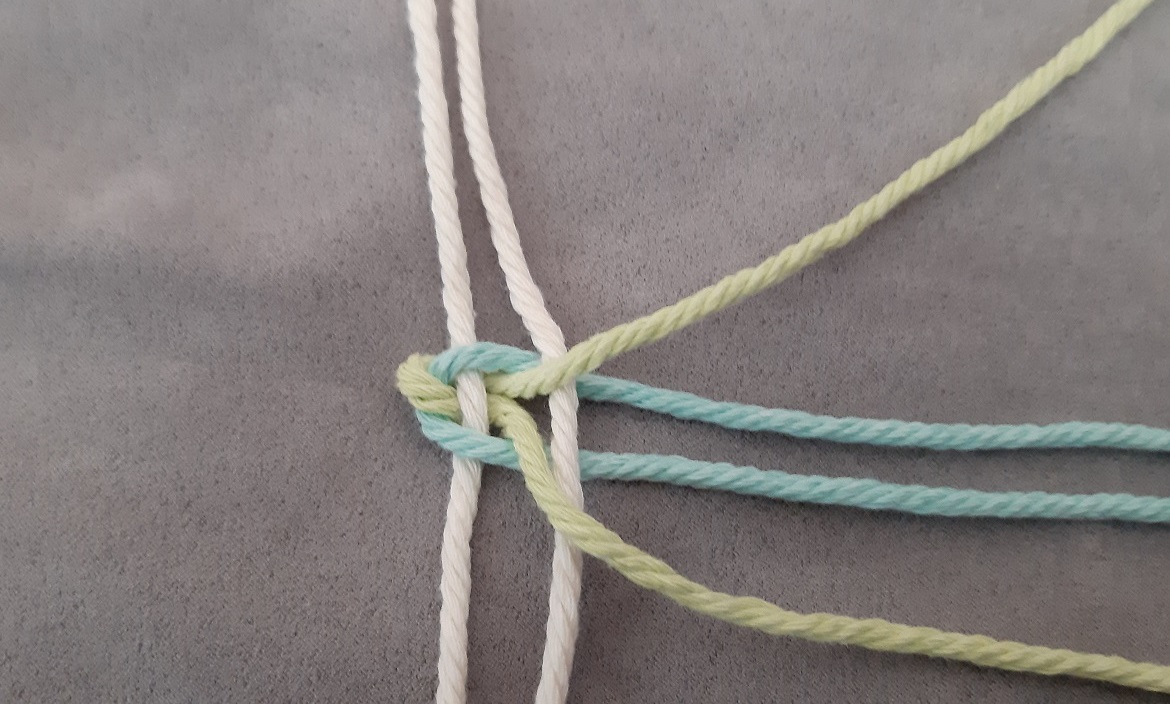
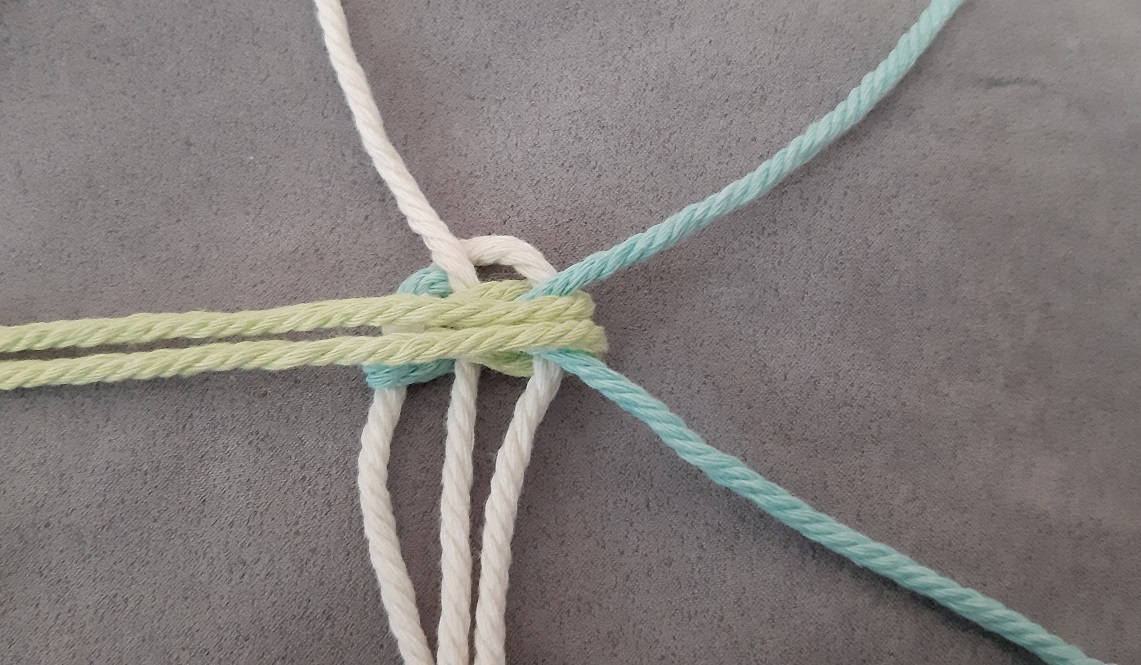
Now take the middle 2 threads (blue) and fold them to the left.
Important! Do not twist the threads. What I mean with this, is that the top blue thread has to stay on top, and the bottom blue thread has to stay at the bottom. The same goes for the green threads. While weaving this top row, it sometimes happens that the threads kind of twist around each other a bit. If you want to be sure that this hasn’t happened, fold the threads back to the right again, and check they are laying straight in a line. If you still can’t see it clearly, take one of the threads and give it a very very gentle tug, to see where it came from. I show this in the video if you don’t get what I mean (I won’t blame you 🙂 🙂 🙂 )
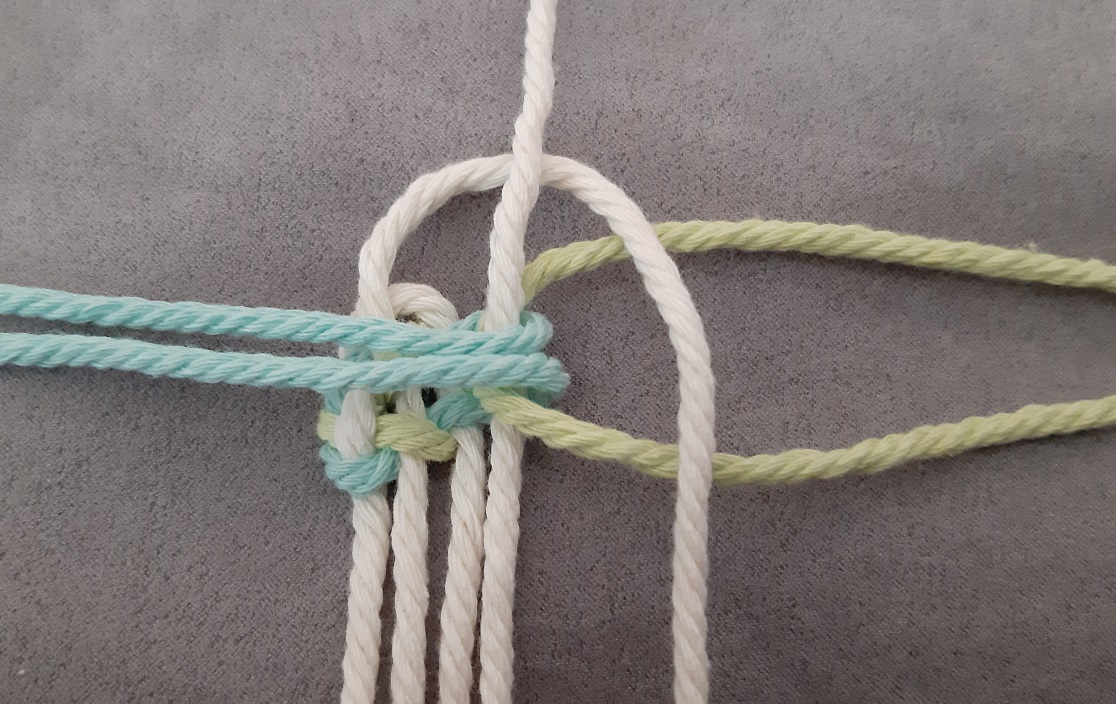
You now have 2 warp threads at the top of your work. Fold over the first one (the left one), go behind the second one (right one), and put them over the green weft threads. Do not pull too hard on the folded thread, just lay it over nice and loose. Later we will ‘fix’ this if the loop is too large.
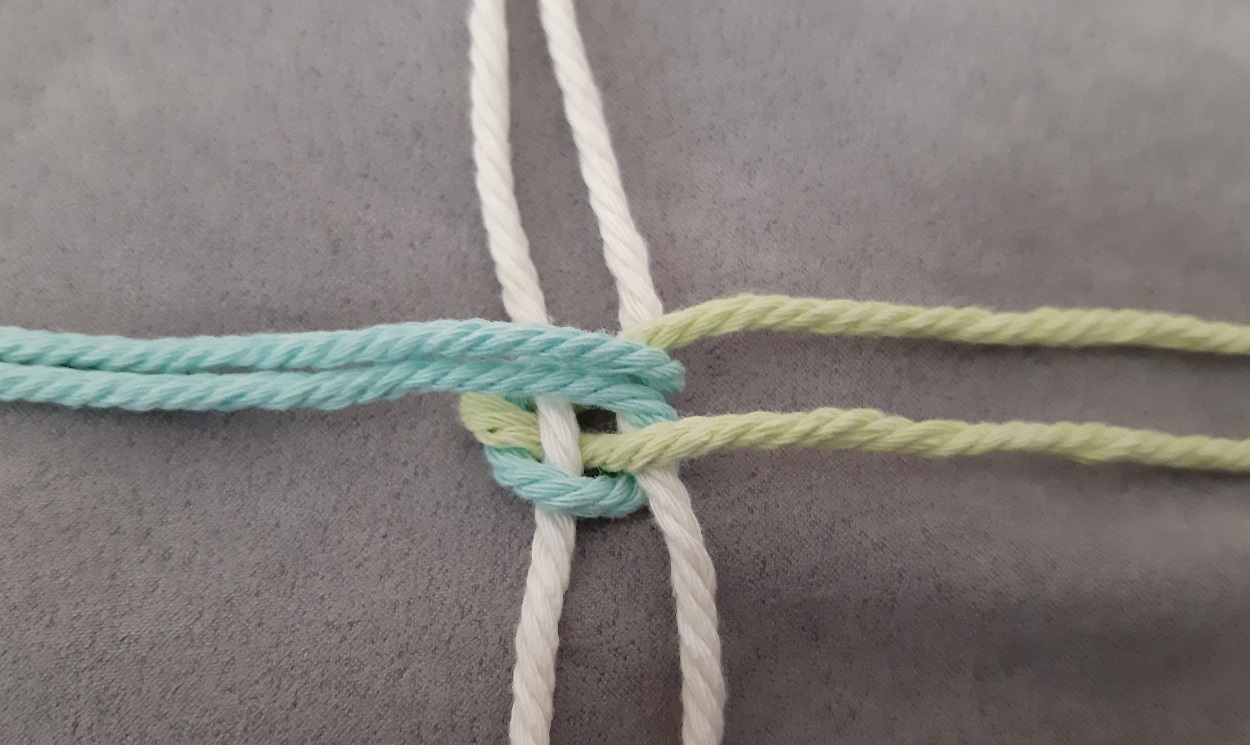
Bring the blue ones over the folded warp thread and spread them.
Again take the middle 2 threads (green) and fold them to the left.
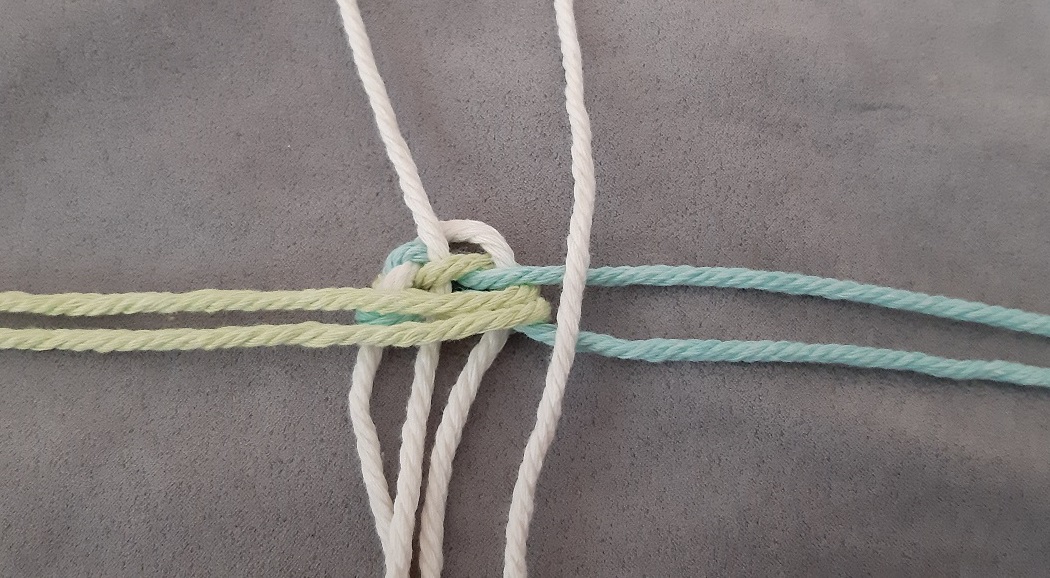
It’s now time to add a new warp thread. When working with 2 colors, you can try to remember when to add a new warp thread (in this case when the blue threads are on the right side), so folding over a warp thread is done when the green threads are on the right. Just a simple extra check to see if you’re not forgetting to fold over a warp thread 🙂
Fold the green threads over the new warp thread and spread them.
Bring the blue threads to the left.
Since you have 2 warp threads on top again, you fold the left one over, go behind the right one, and put it over the green weft threads.
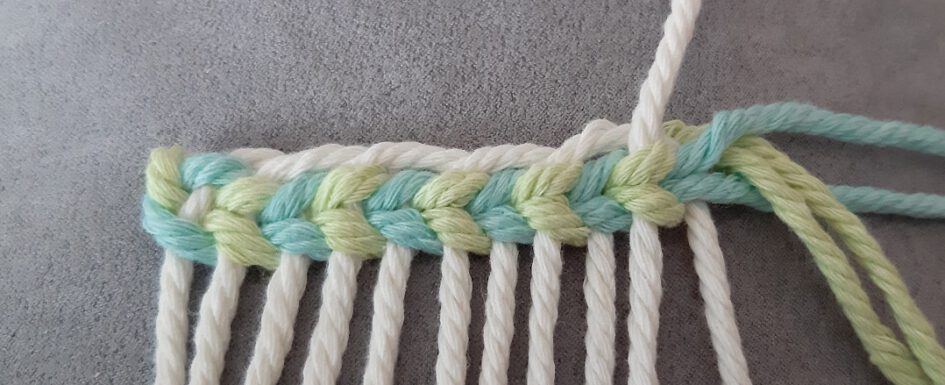
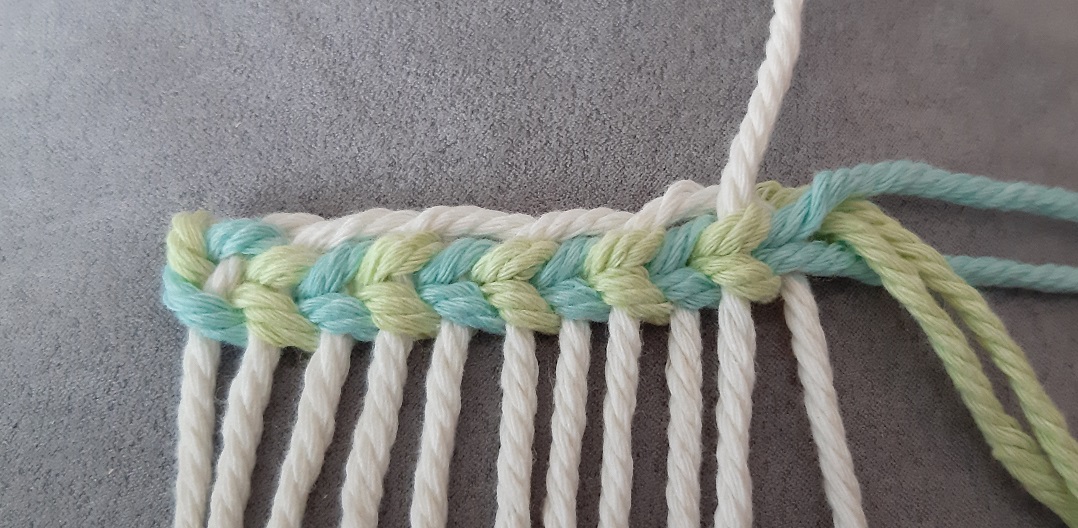
Finishing the row
Continue like this until you are finished. When you have only 1 warp thread left at the end, just fold it over and cover it with the weft threads. Make a knot in the threads at the end.
Now gently push these woven rows to the top to straighten your work and give it a nice even look. Take a couple of warp threads in your hand, and push the weft threads up. Do not pull on individual warp threads. Only do this when you need to, but please do it carefully and see which thread you have to pull on. You may find it is necessary to do this when loops on top of the work need straightening a bit more, but it is sometimes a little bit hard to see which end of a loop goes down where.
An alternative start
In this tutorial I interlocked the weft threads at the start. This way you get a ‘fringe’ at the right side of your work only at the end of the row. If you want to have fringes on the left side also, you could take 4 individual threads, each twice the width of your piece, plus extra length for your fringes. Tie them together with a knot and work just like above.
How to hold and control this
I will repeat the steps again, but this with showing you how to hold this in your hands. You have seen the concept of the technique, so now let’s do this! Click on the pictures if you cannot see it clearly. A larger picture will be shown.
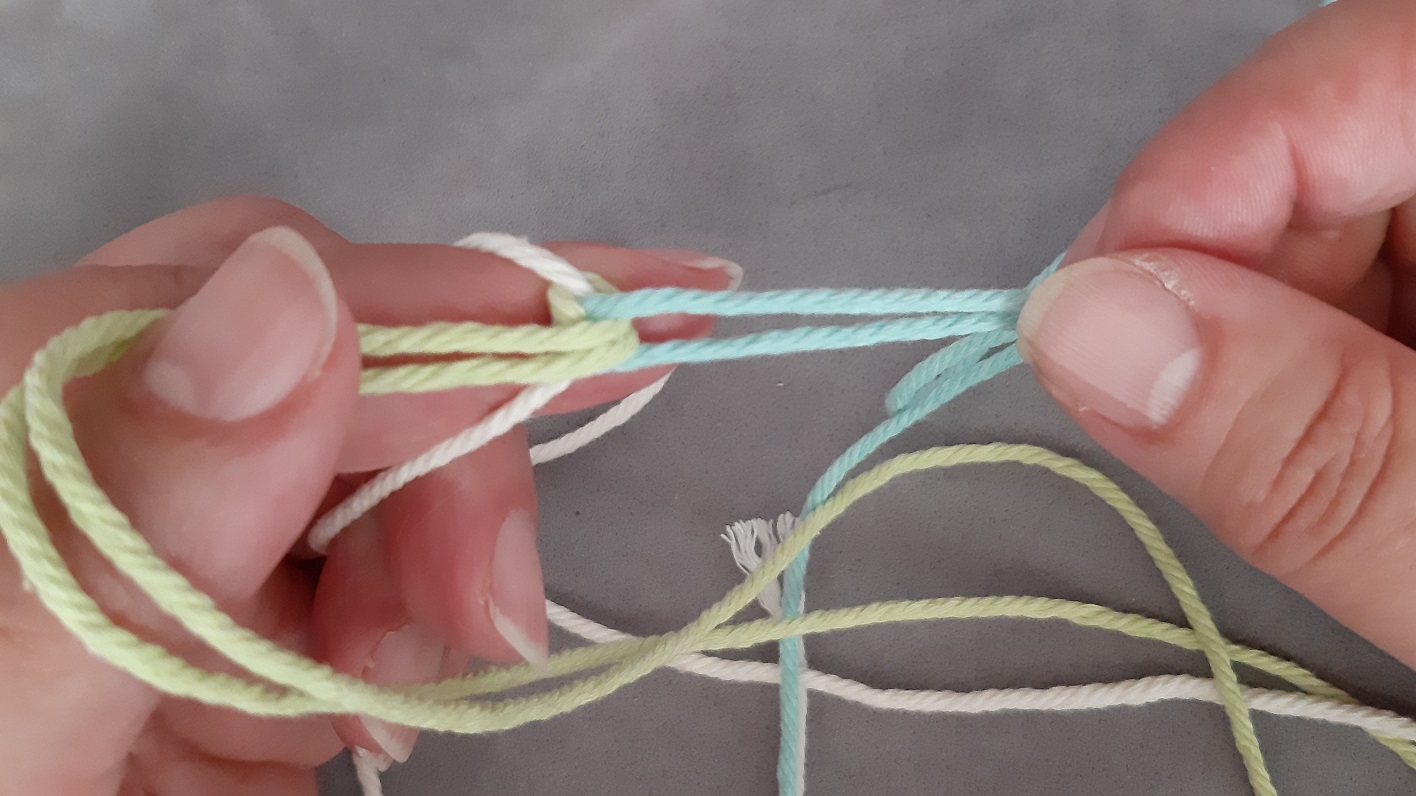
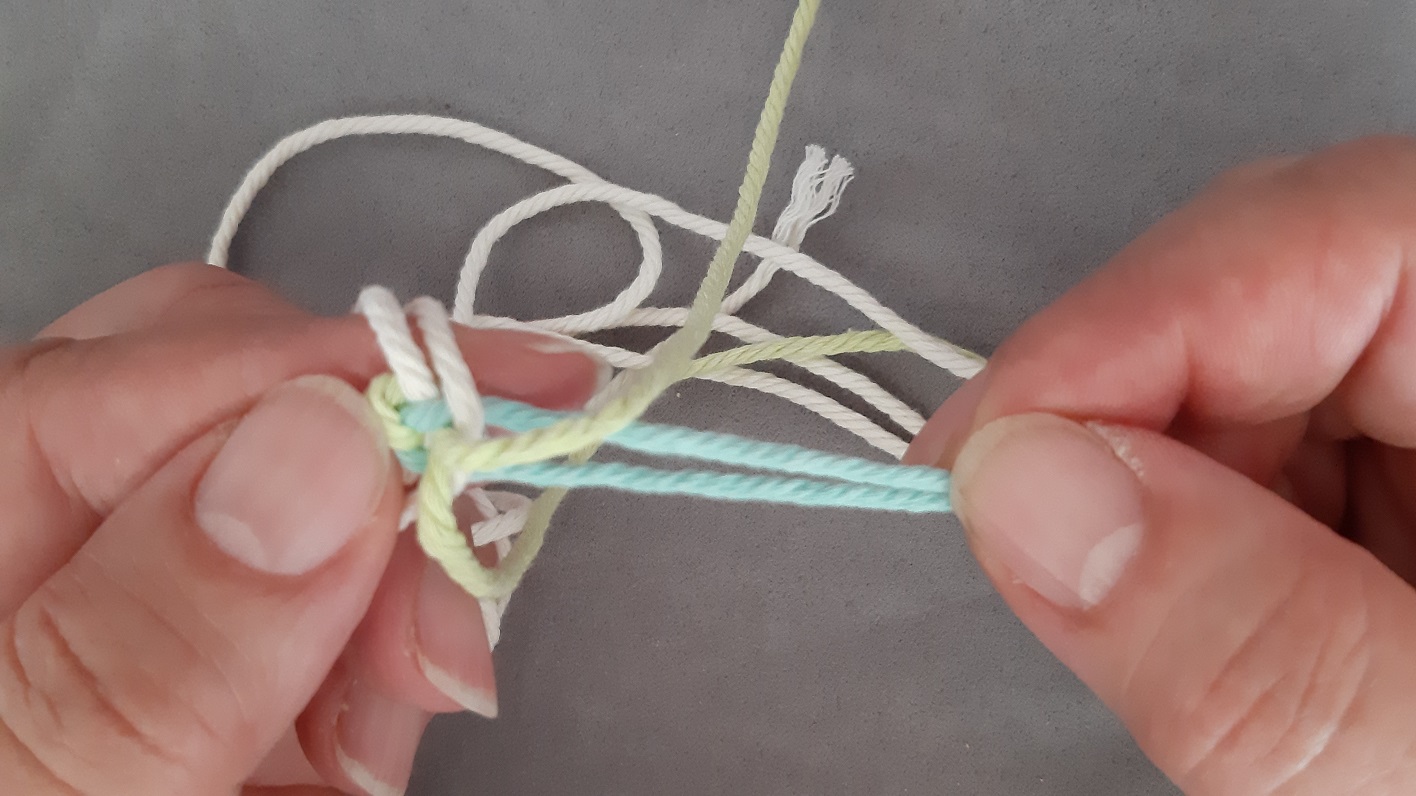
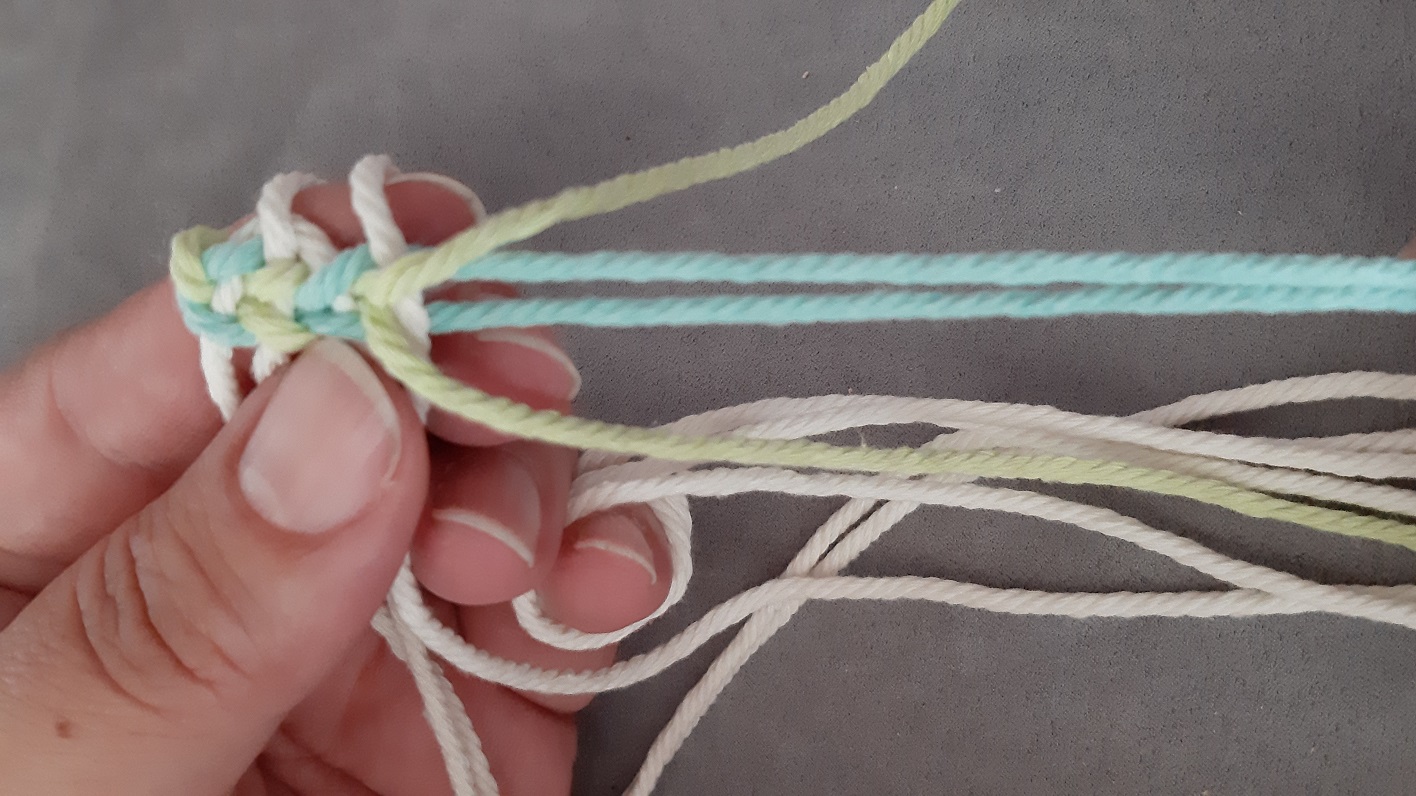
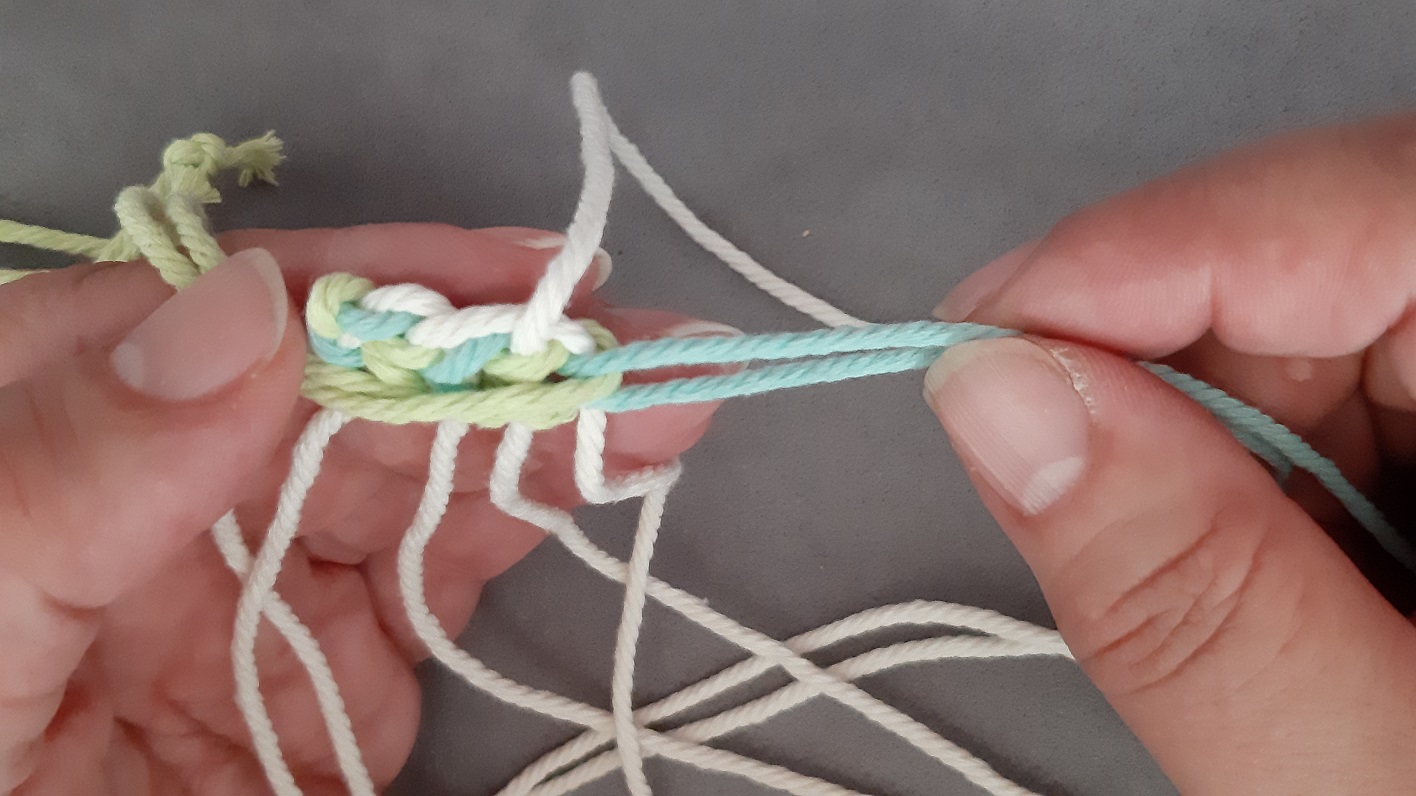
Hold the folded and interlocked threads in your hand.
Here you see the first warp thread is put on top of the right weft threads.
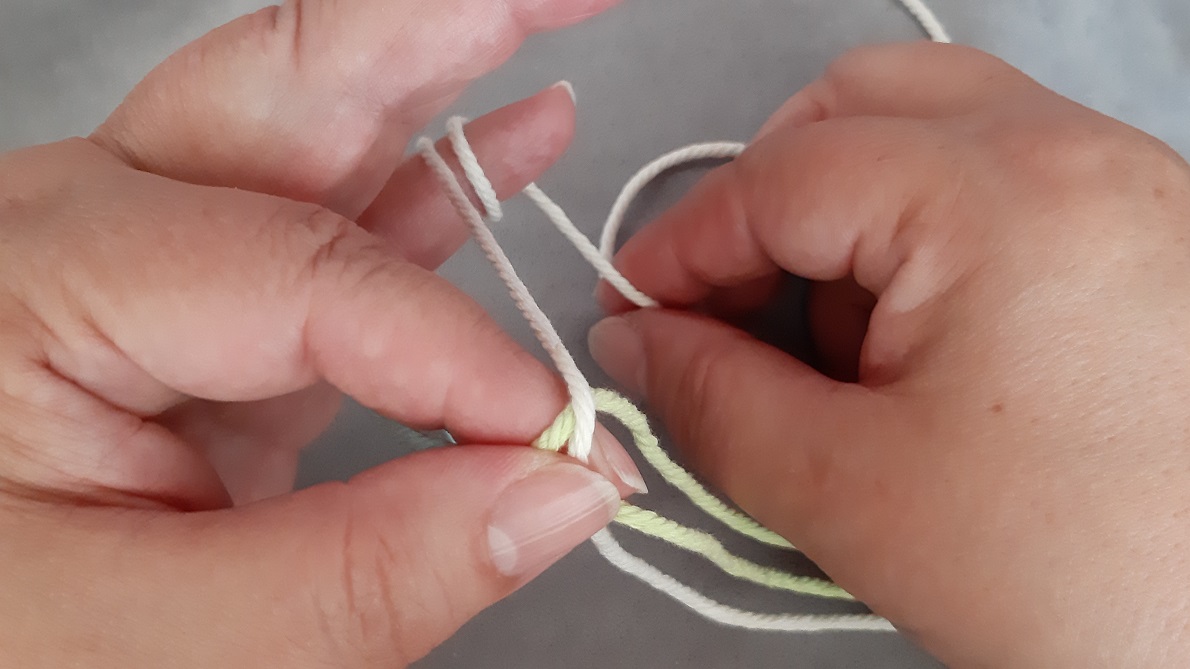
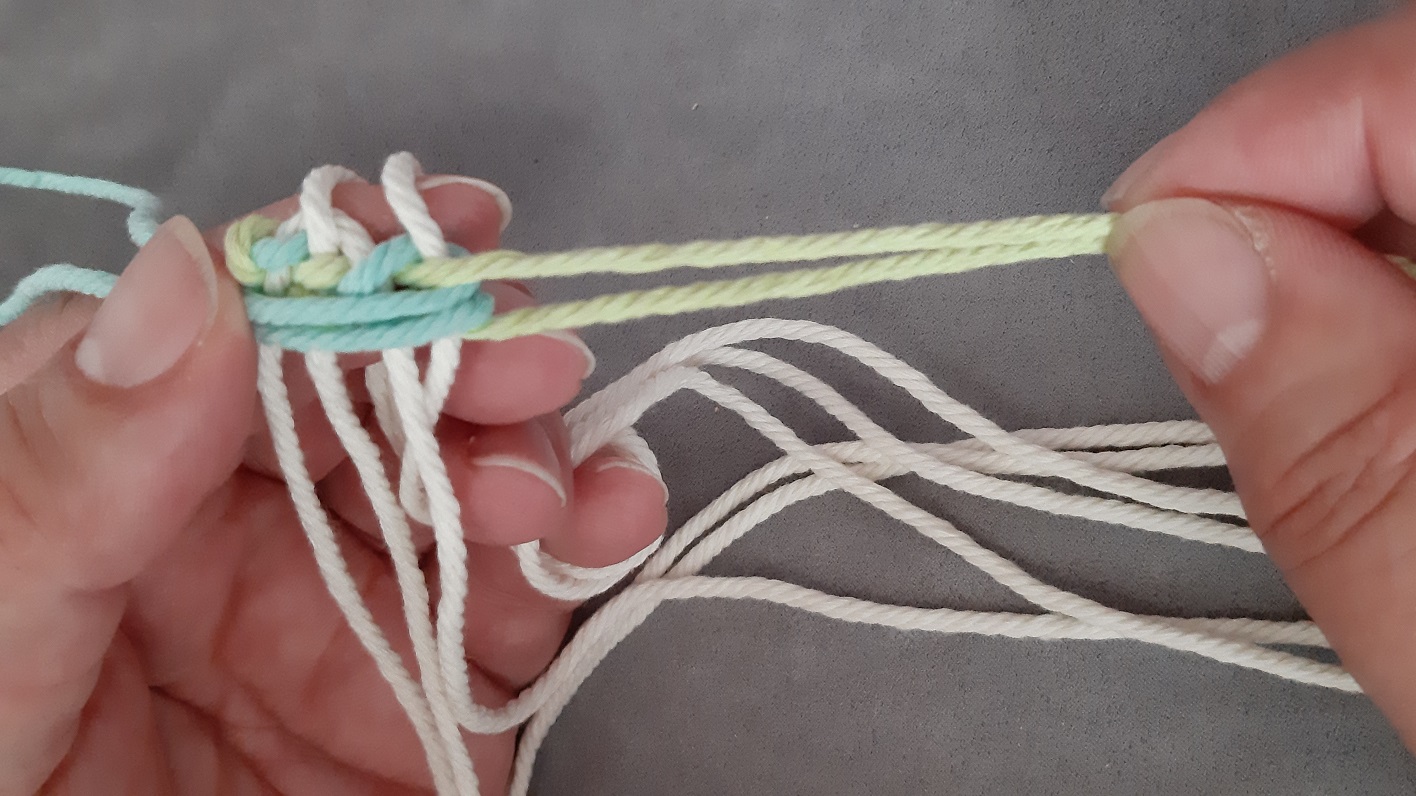
To have control over your work, which is important to get a nice even result, it is important to add some tension. What I like to do is wrap the top of the warp thread around my pinky.
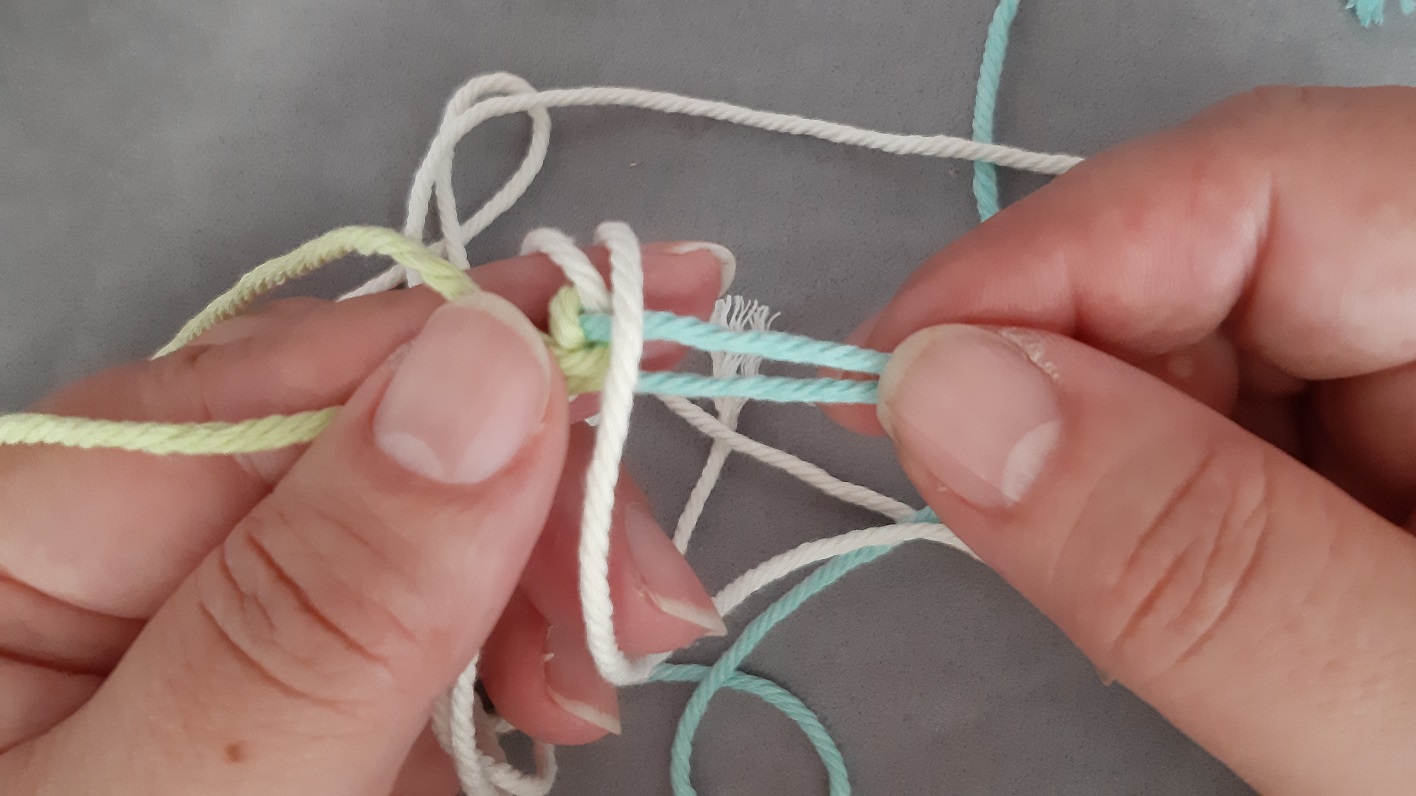
And I also wrap the bottom half around my pinky. This way the warp thread has some tension on it.
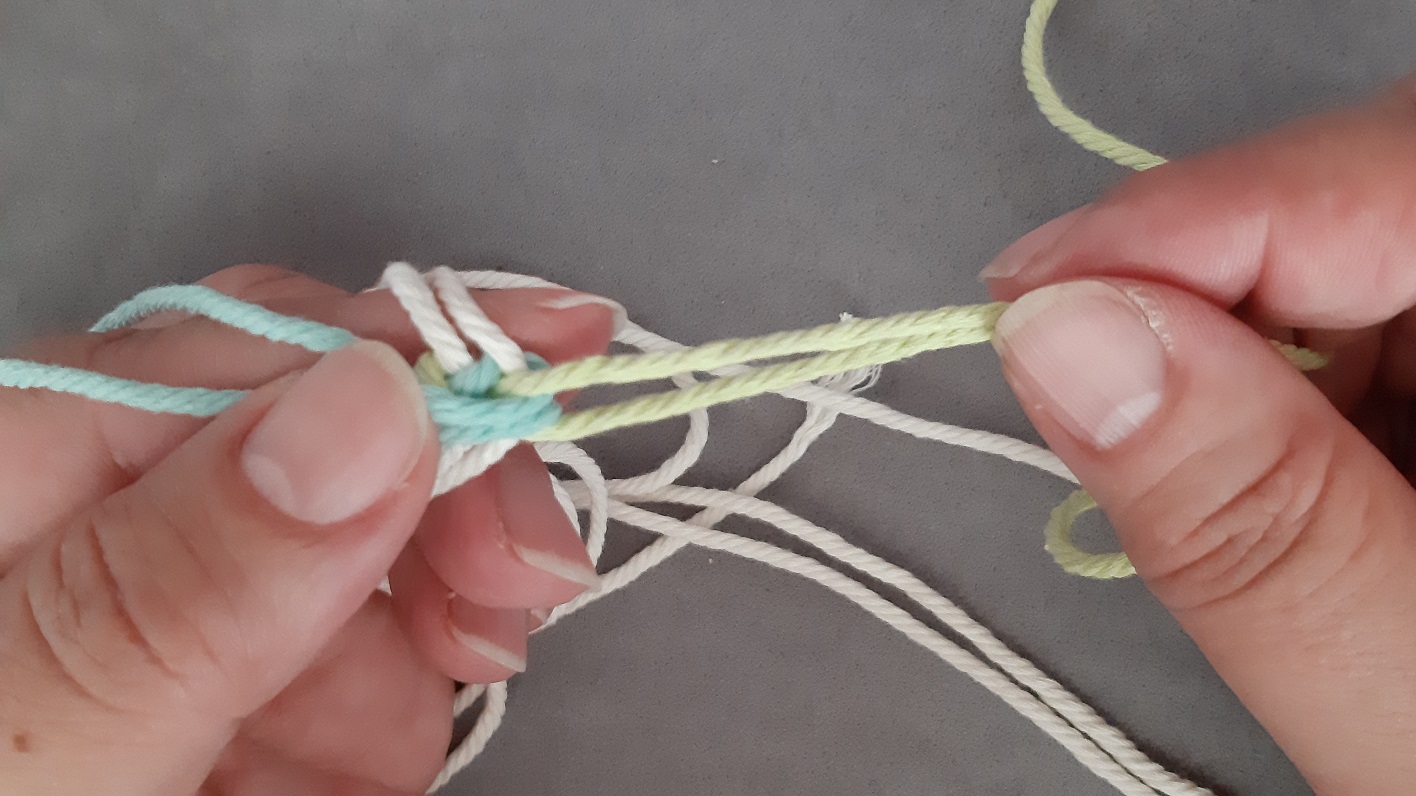
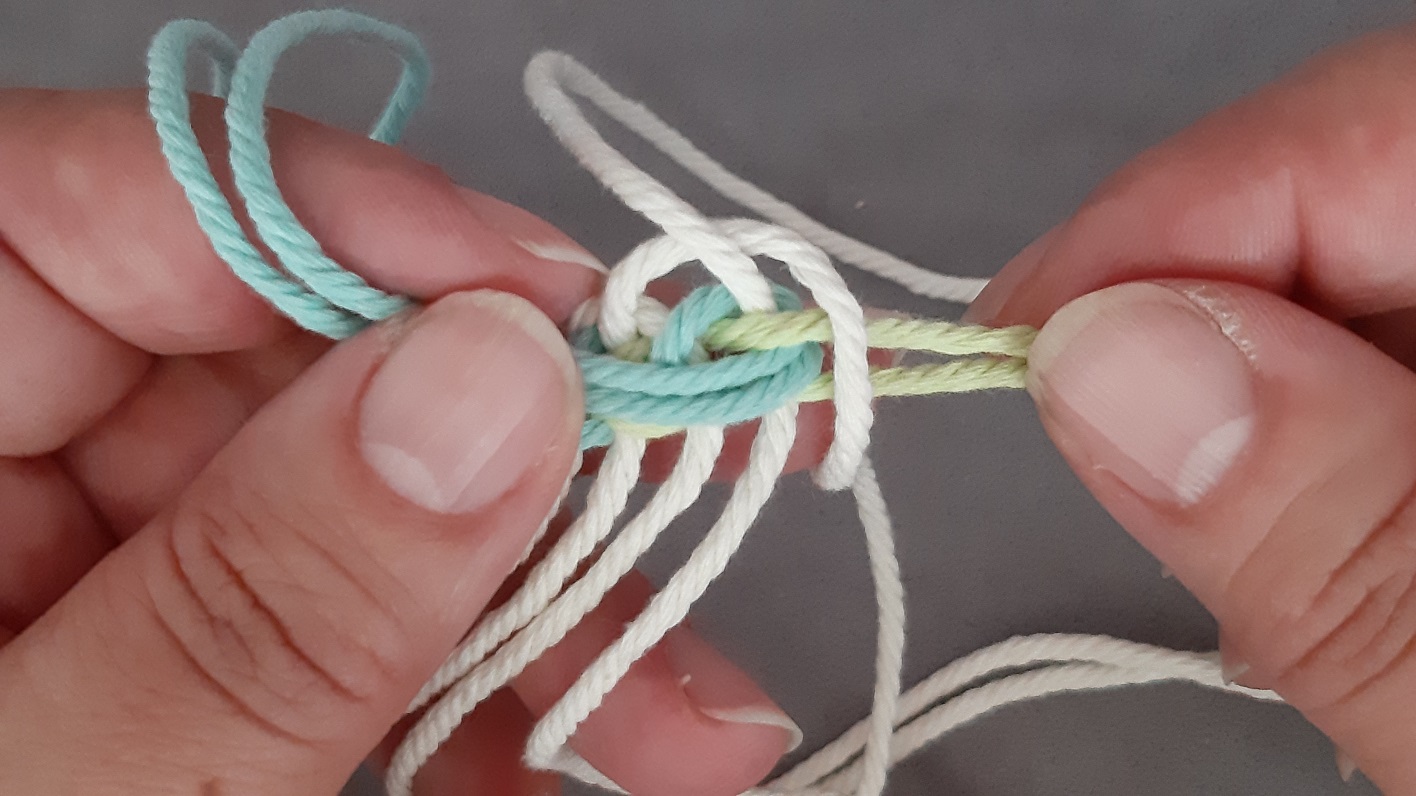
You can feel you have more control over the warp thread when you fold the blue warp threads over the warp thread. Spread the blue threads so the green ones get into the middle.
Fold the green threads to the left. You can release the warp thread from your pinky now if you want.
Add the new warp thread.
Again, add some tension. First by wrapping the top of the thread around your pinky.
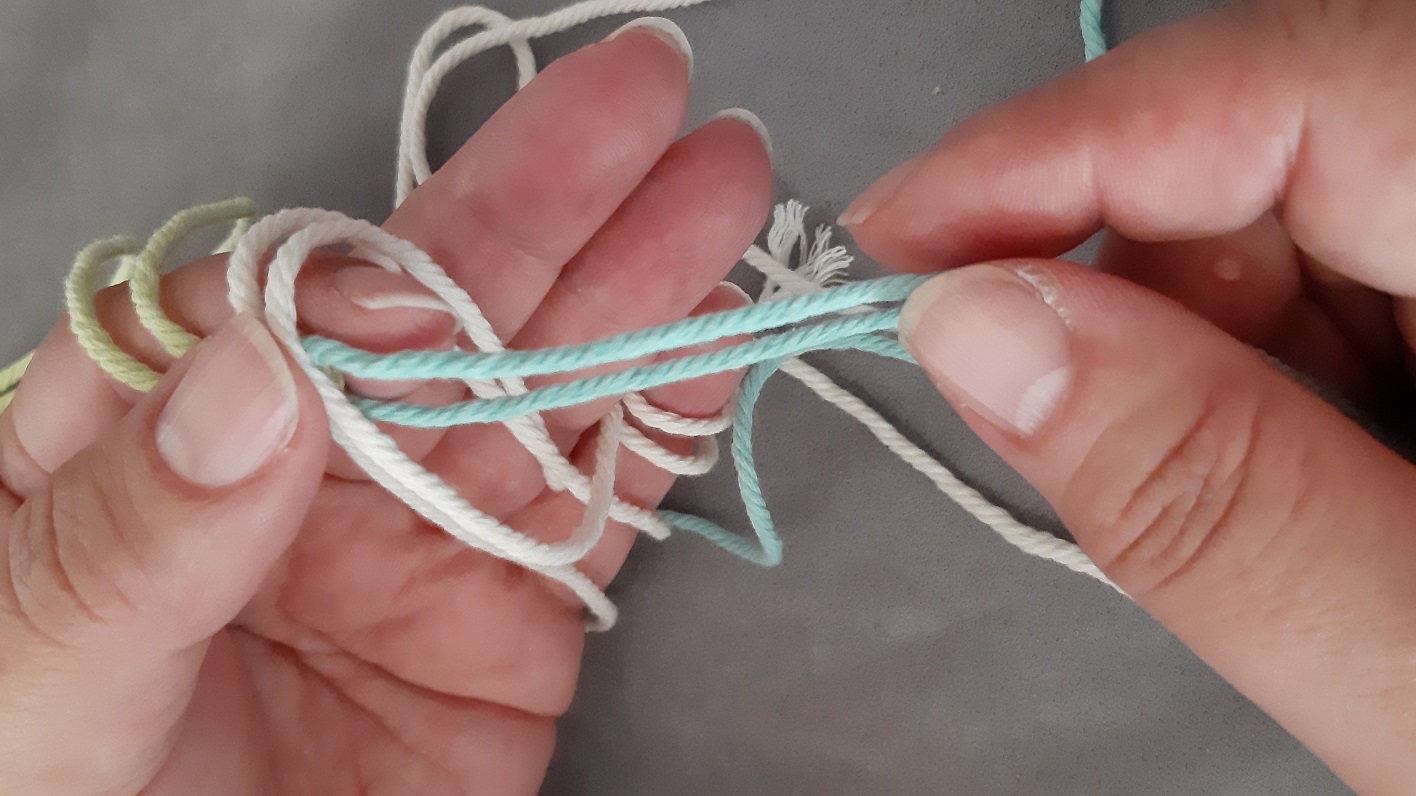
And then the bottom part of the thread. You can also take the bottom threads and put them between your pinky and ring finger. Remember what is the goal: to get some tension to handle it, so try what works for you the best.
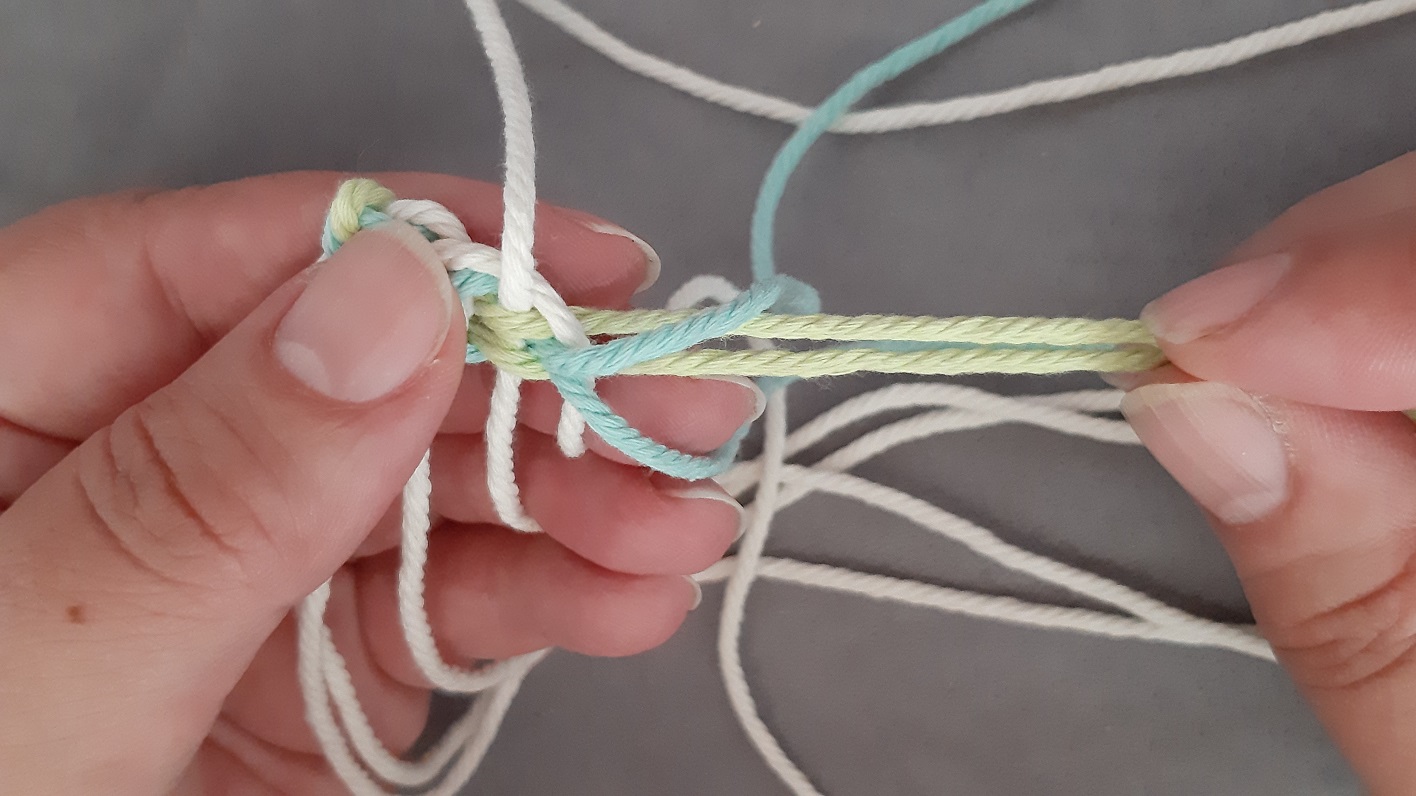
Fold the green threads over and spread them.
Fold the blue threads to the left. You see now that because of the tensioning, you can straighten the green threads to form a neat horizontal line.
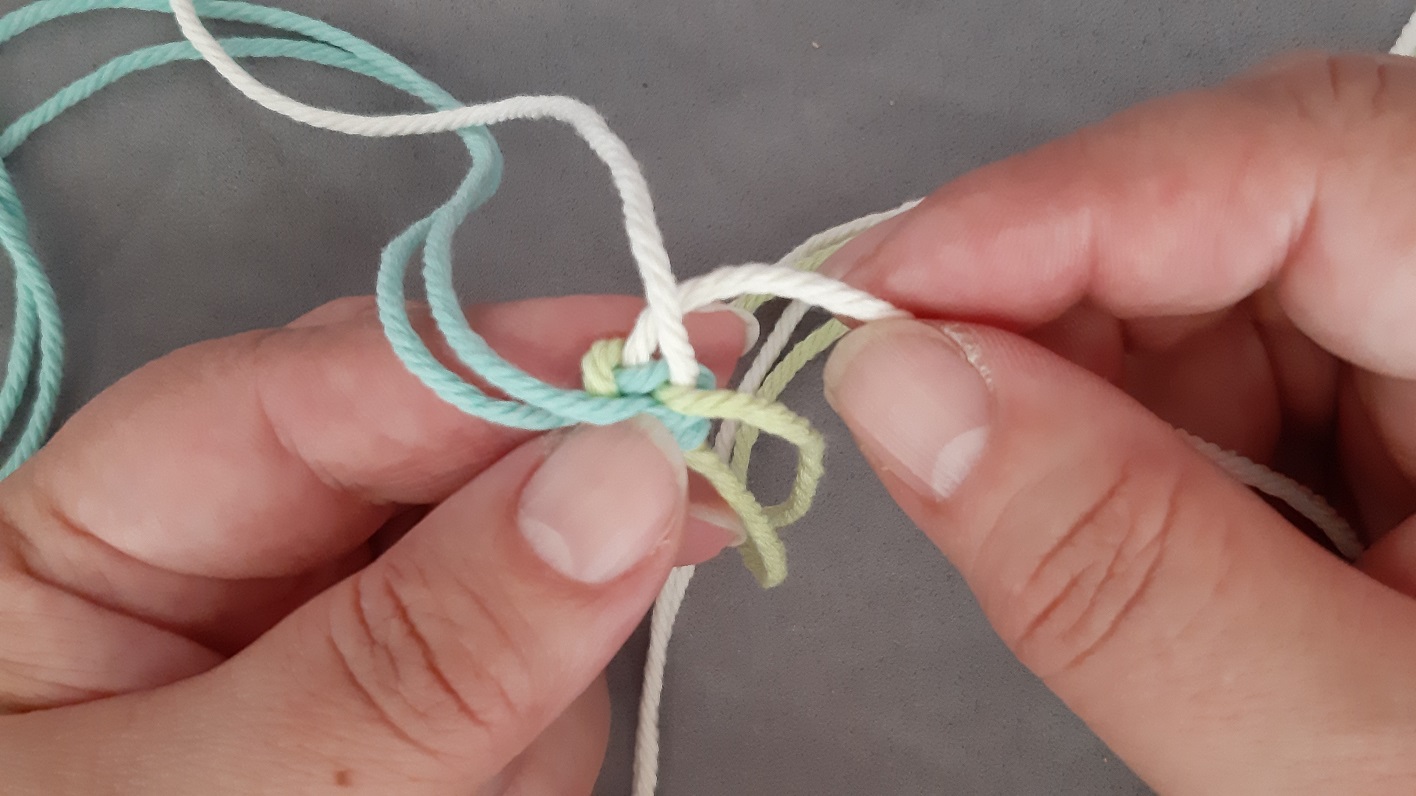
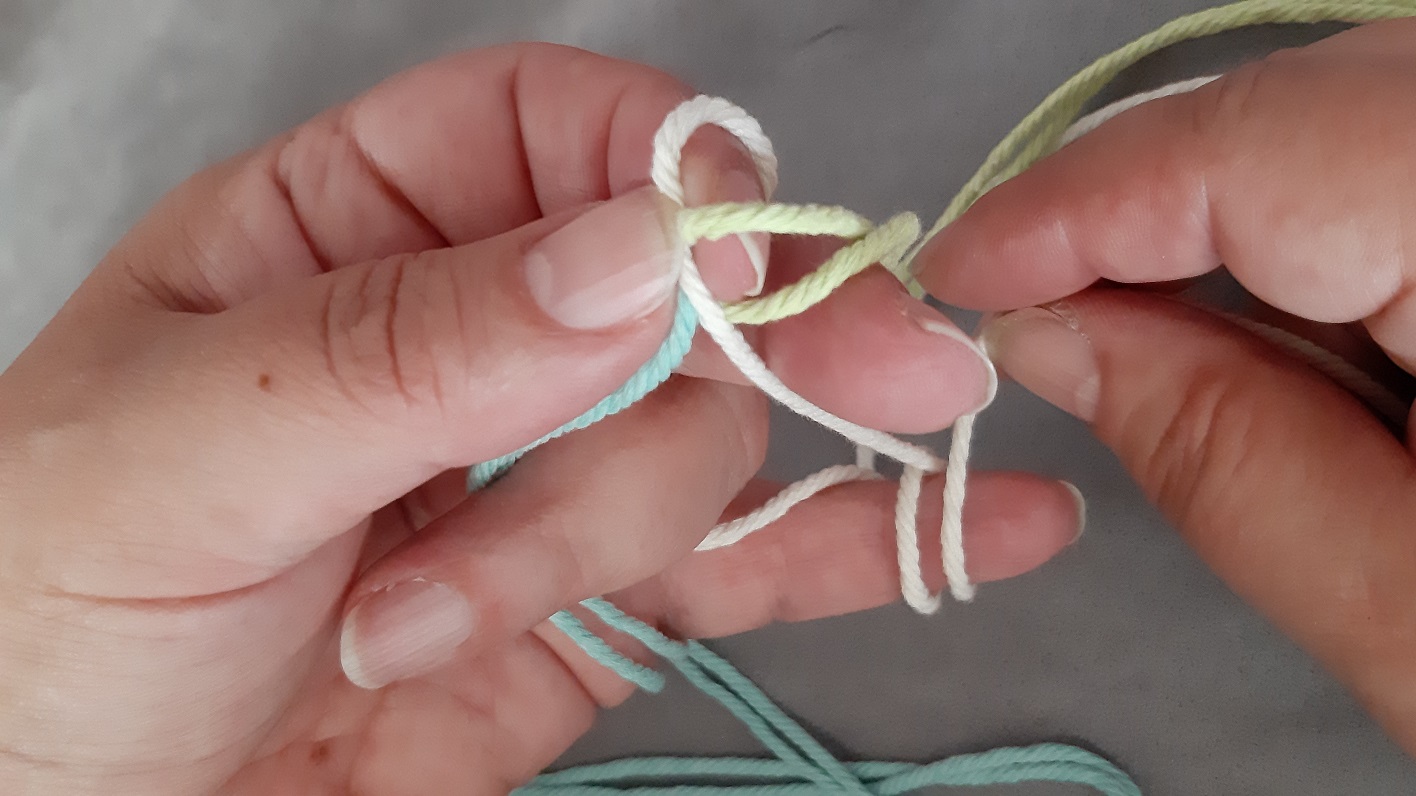
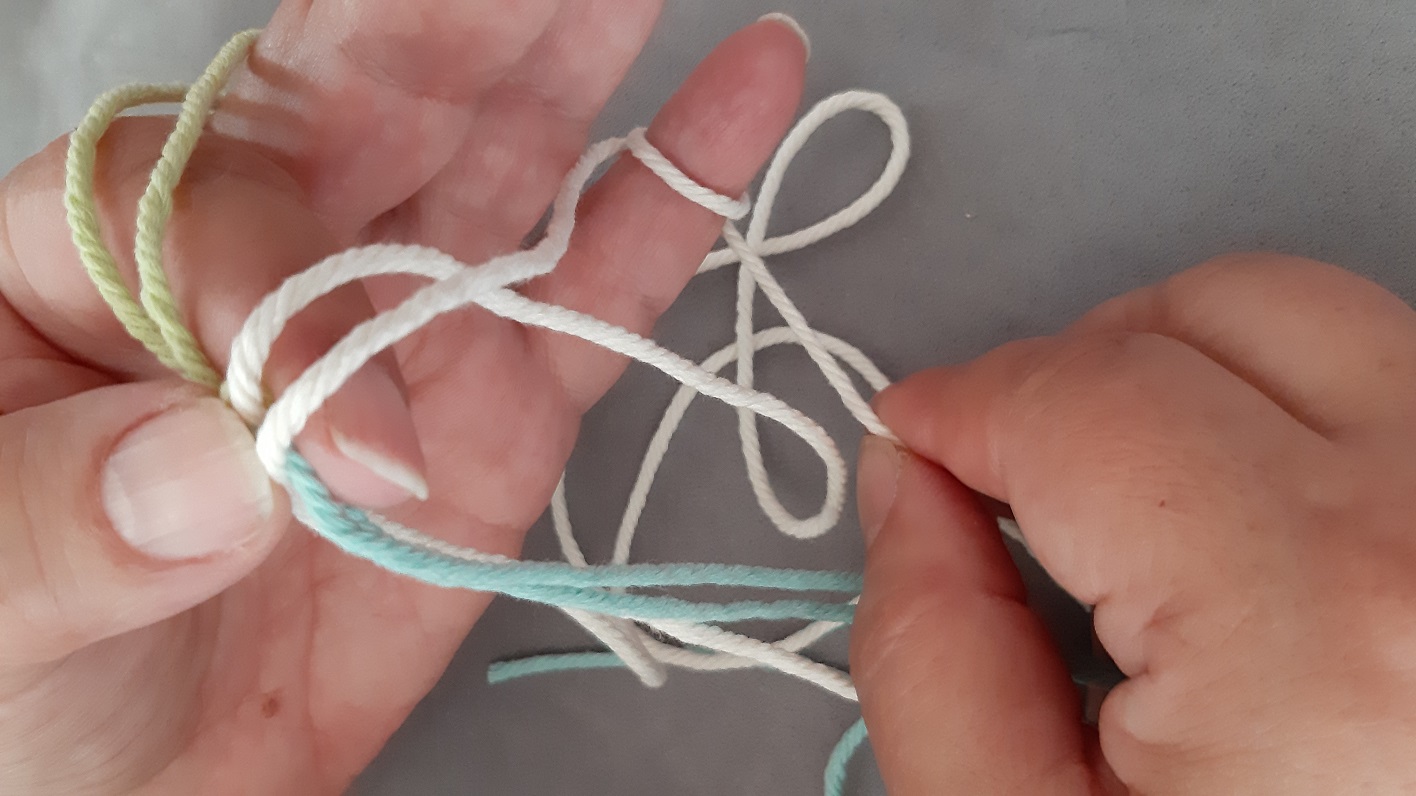
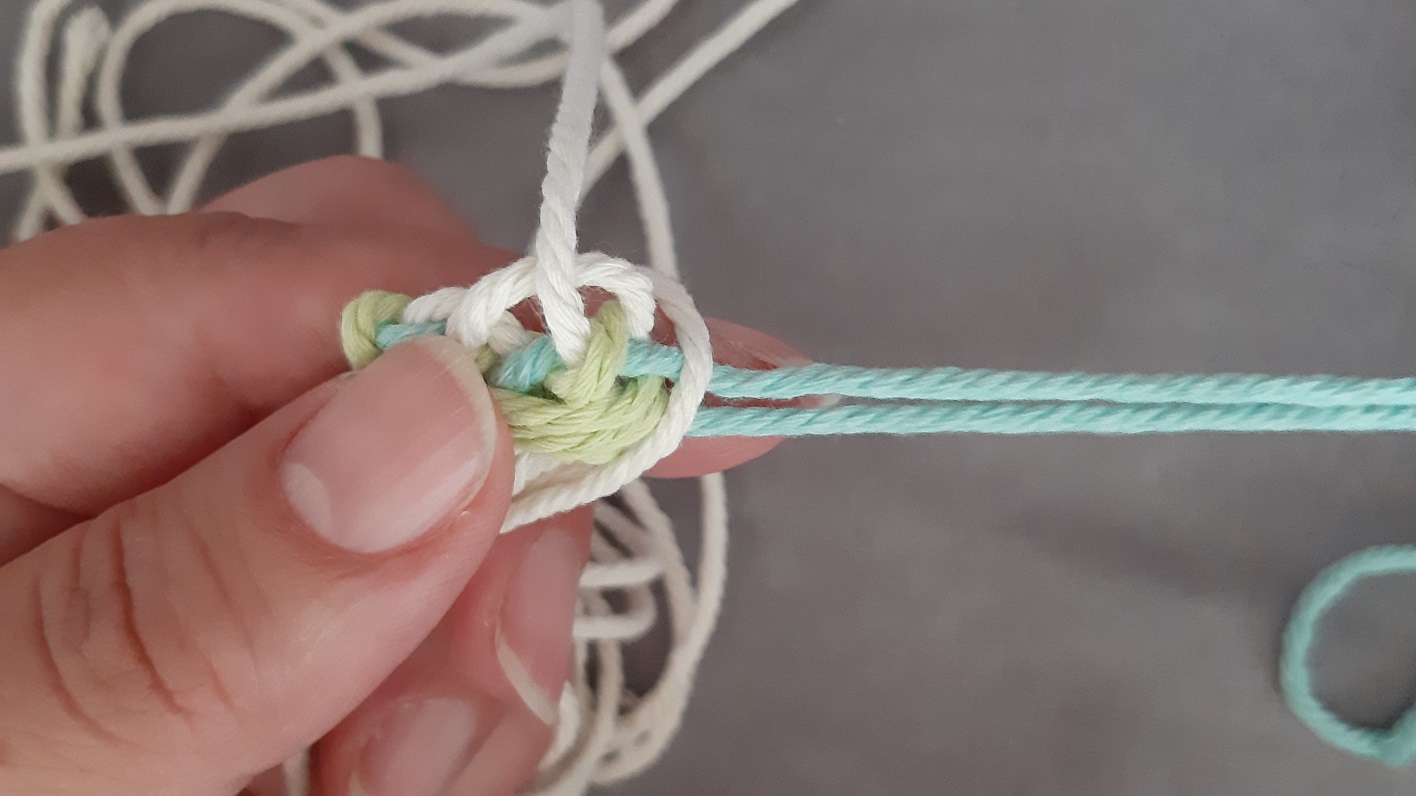
You can release the tension now and fold over the left top warp thread, behind the right warp thread, over the green weft threads.

Pinch the new warp thread. I also have it locked between my fingers if you look closely at the picture.

Fold over the blue threads.
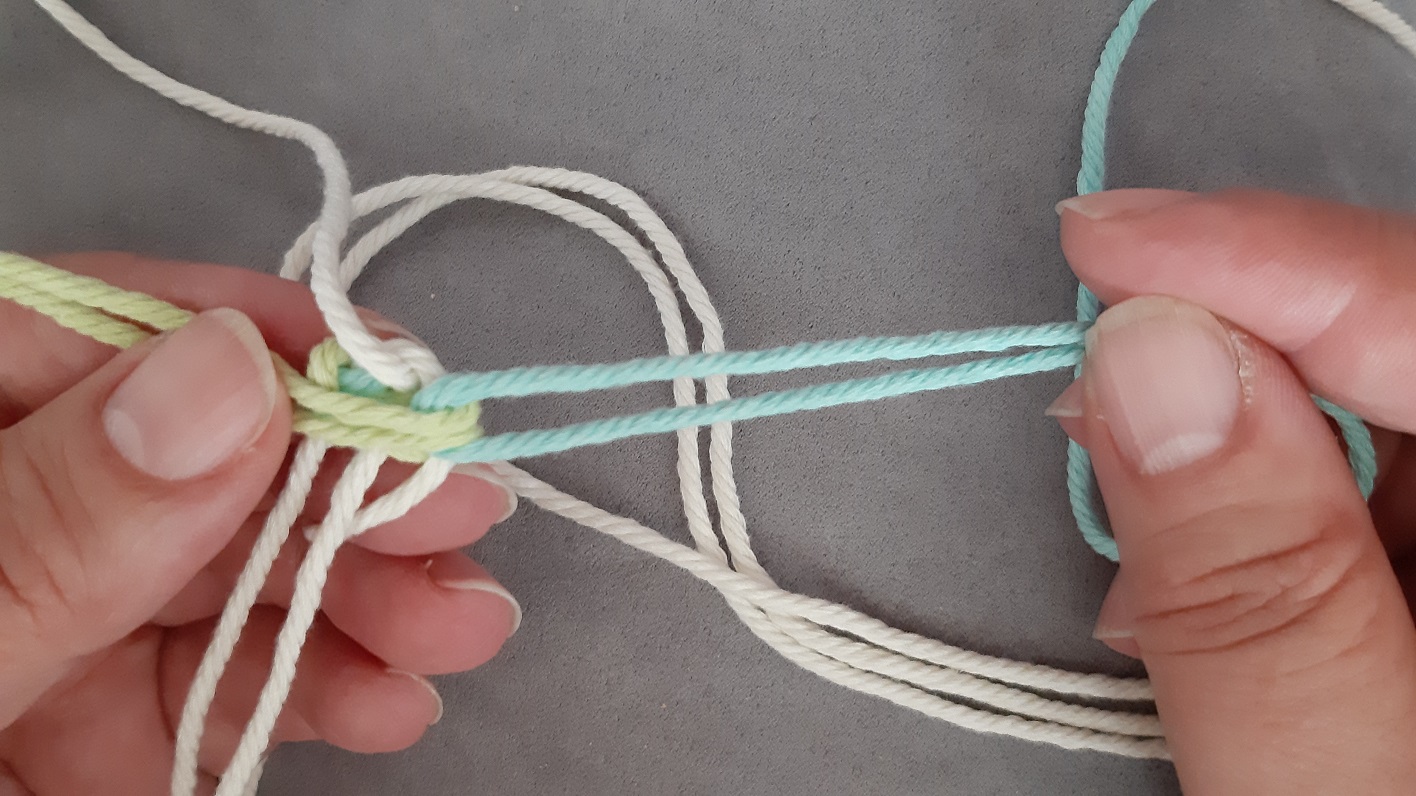
You see here that when folding the green threads to the left, I have the warp thread secured also between my fingers. You see me straightening the blue threads. When you straighten the threads, also keep an eye on what you have woven. You can always give a nice gentle tug on the top or bottom weft thread if you notice that the weaving is not even. Pay attention to this! When I first started doing this, the top leg of the side ways V-shapes that we’re creating tended to be slightly looser than the bottom leg. This will result in ending up with unequal lengths of your weft threads.

Continue doing this. Here I added a new warp thread and tensioned it.
Fold over the green threads. Do you see how the weaving already looks? In this picture you can see that this is a moment to look at your weaving if it’s nice and even.
Fold the blues back, straighten the greens.
And again bring the left top warp thread down over the green wefts.
I secured the last warp thread here and folded the blue ones over.
Greens folded back.
And again a new warp thread.
And this is how it looks.
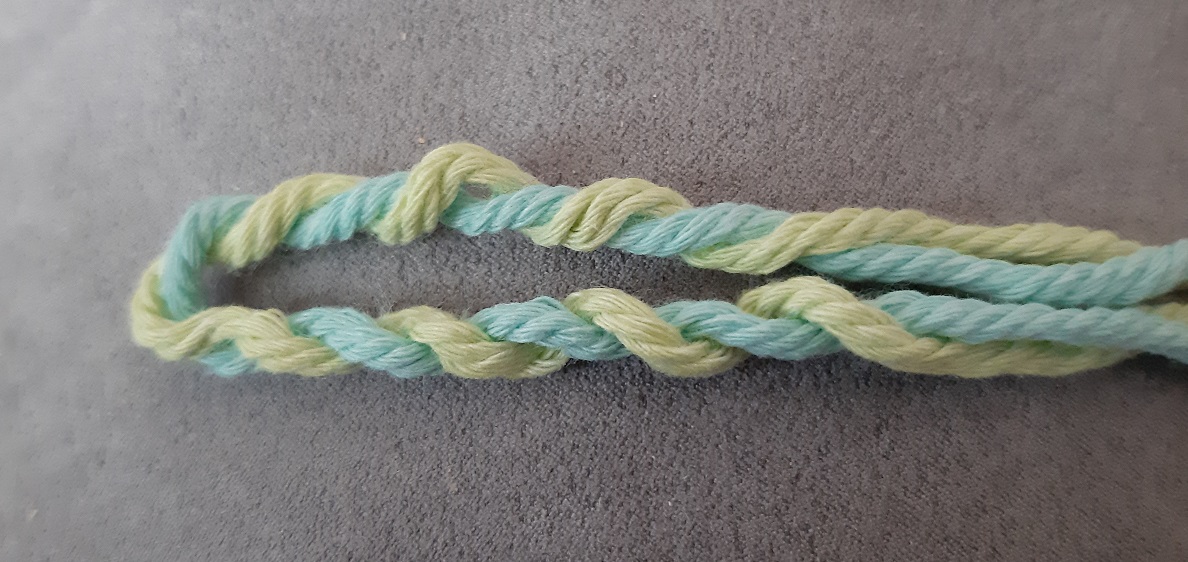
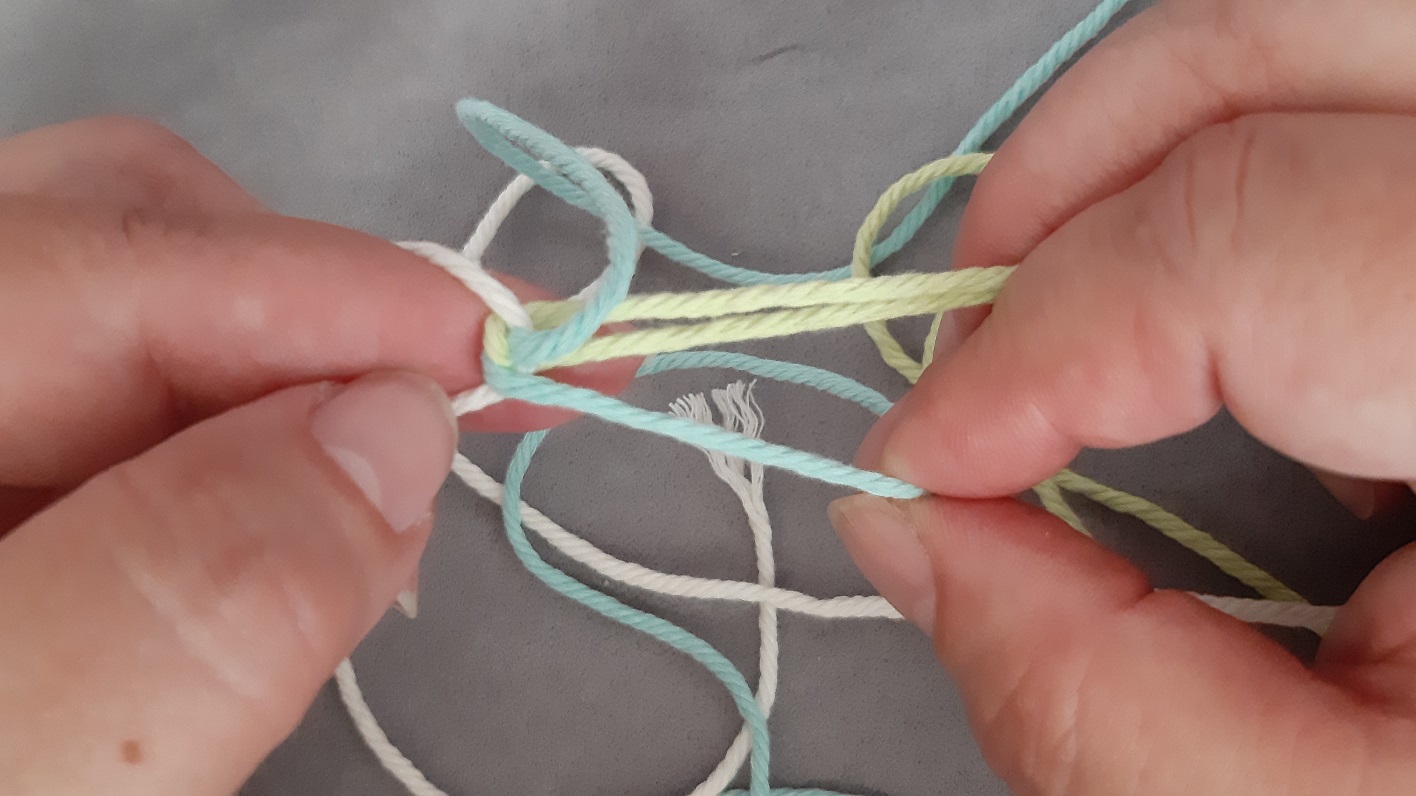
If you would remove the warp threads, without distorting the weaving, you see that the top and bottom threads are twisted around each other. This is actually what you have been doing. You see that the top threads are twisted to the top, and the bottom threads are twisted to the bottom. Keep this in the back of your head, because this is actually also the fundamentals for the weaving.
Variations
At the following page you can see how to play with color variations. In this tutorials we have sideways V-shapes, and each V-shape has a bottom and top leg that has the same color. But maybe you would like to have a different look 🙂