
3 Colors for casting on, how to do that?
That’s what I was wondering about, after I learned how to do the versions with 2 colors. I started trying out things, and this is what I figured out. It is not that hard, but you really have to pay attention to the order of the colors that you fold over and keep in the middle.
Remember to click on the pictures if you want to see them full size.
Index
I’ve spread the tutorials about casting on over several pages. Click on the links for each subject.
- The cast on basics: click here to go to that page
- Variations with 2 colors: click here to go to that page
- Casting on with 3 colors: on this page
The steps
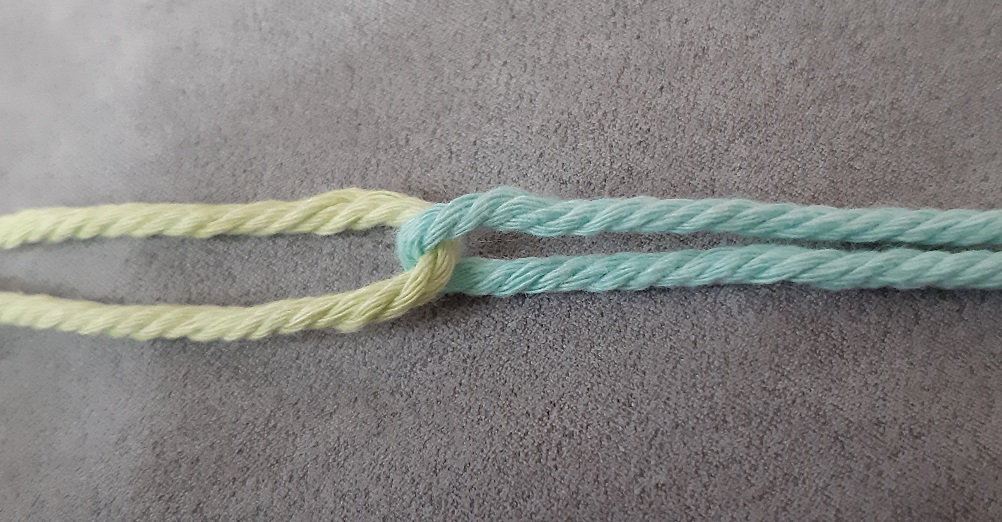 Decide in which order you want to have the colors showing up on top of your warp threads. I will do green, pink and blue. Interlock the threads halfways. Green, color 1, goes to the left.
 Then add the third color, also halfways.
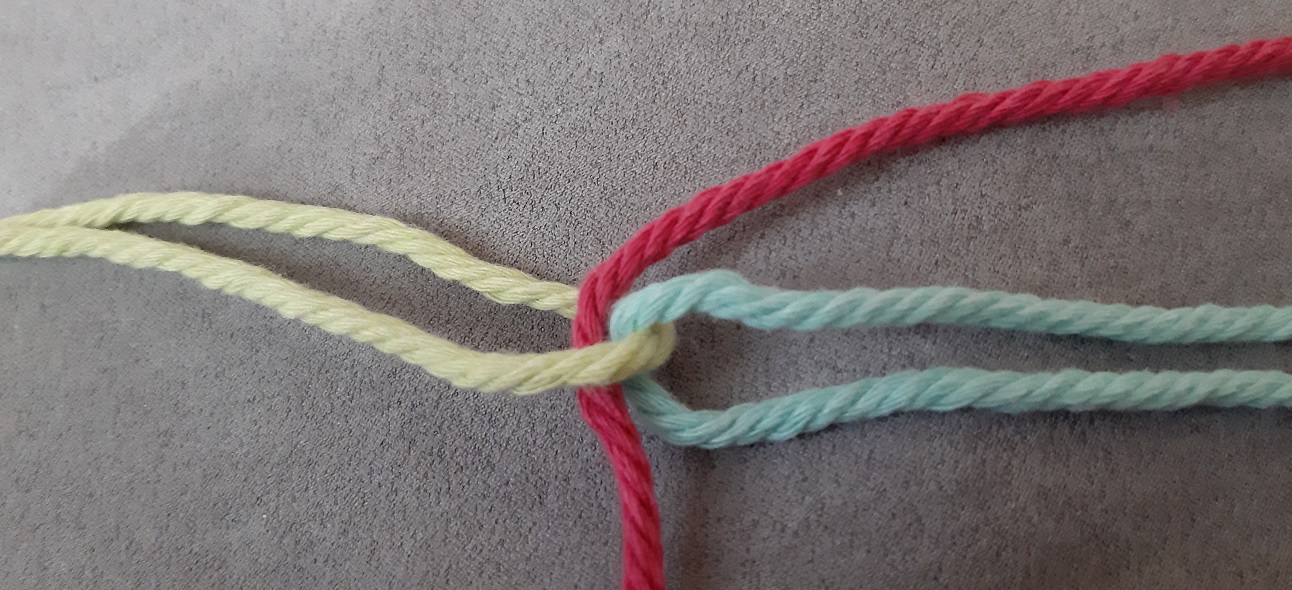
 Since I want the pink to be color 2 and blue to be color 3, I spread the blue ones, so that the pink threads get to the middle.
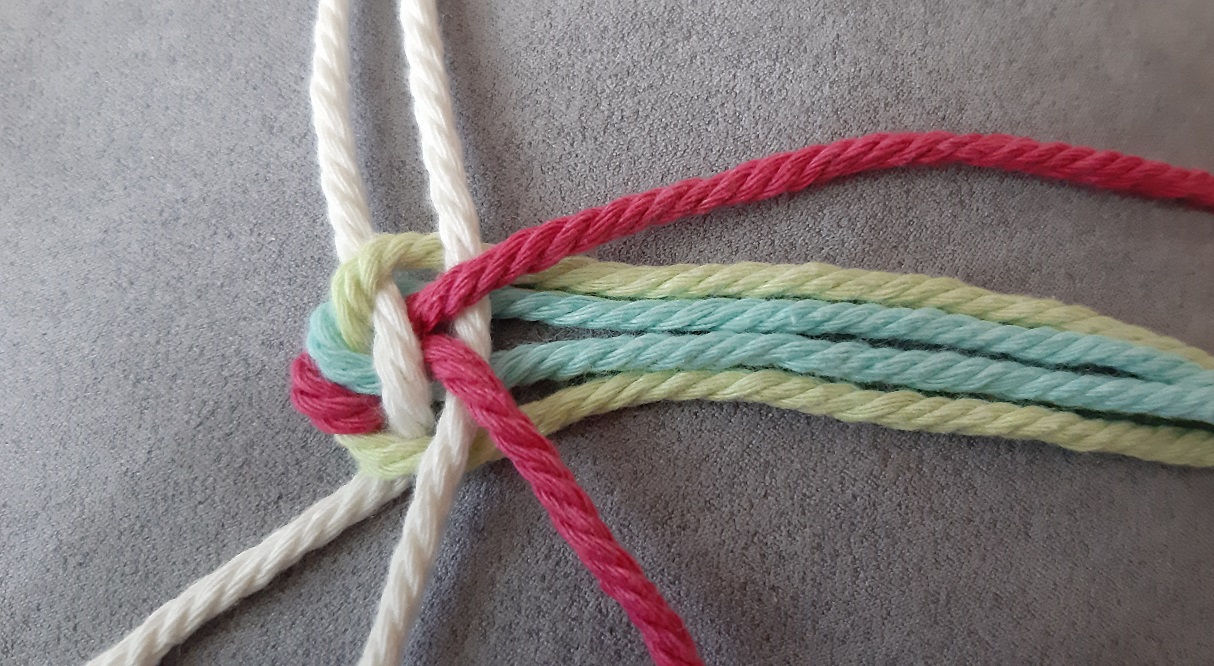
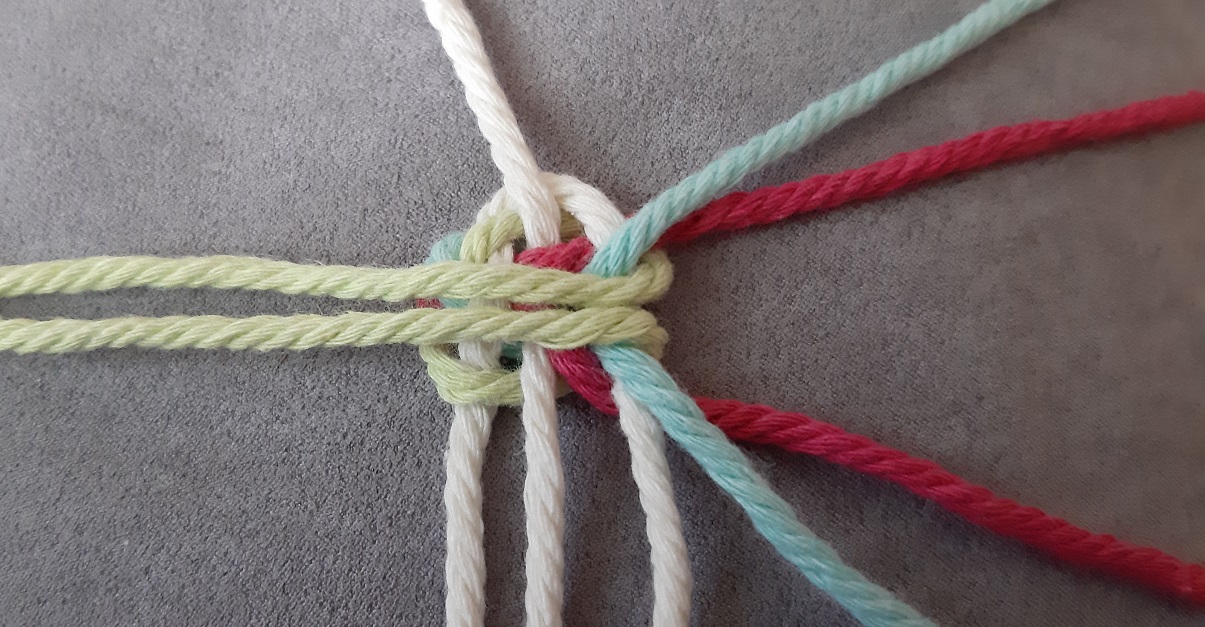
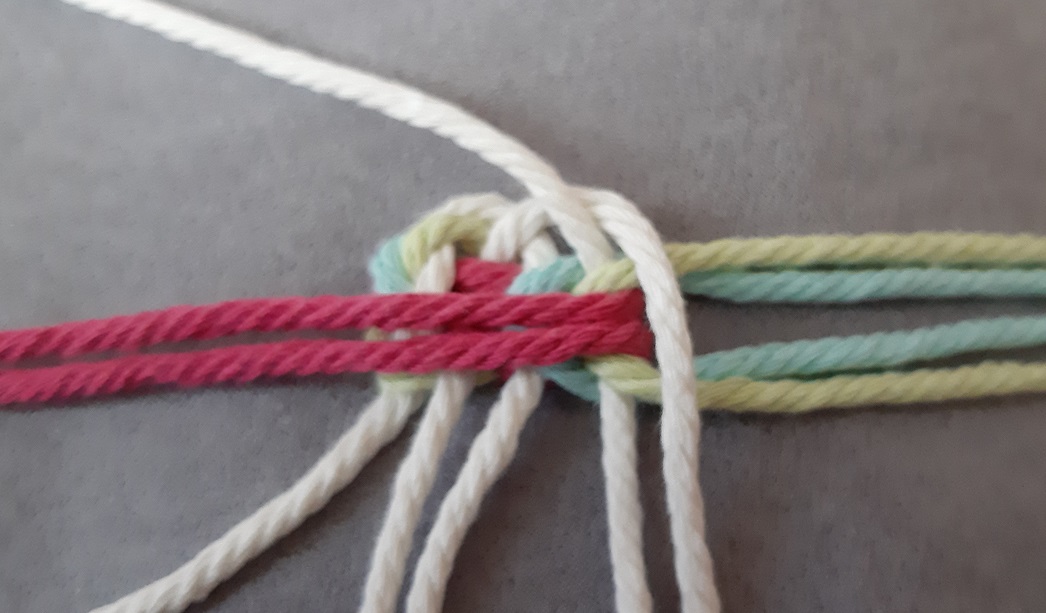
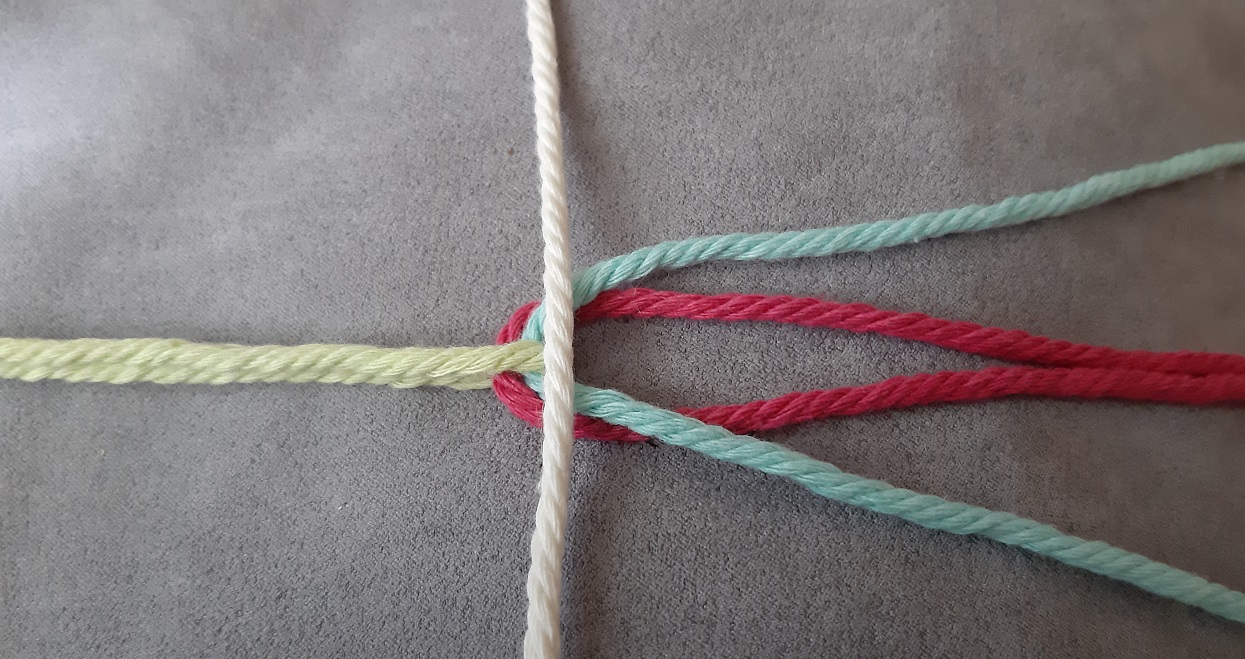 Add the first warp thread. It goes over all 4 weft threads at the rigth side.
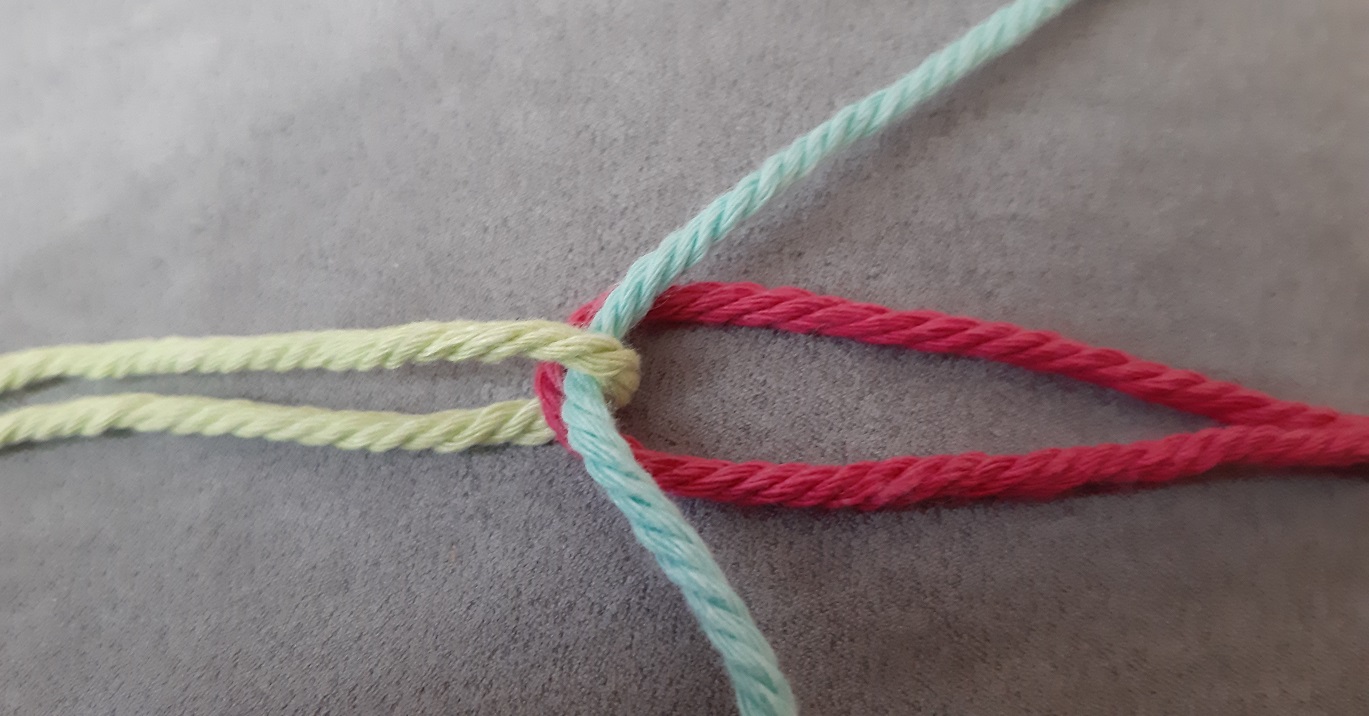
 Spread the green threads and fold them to the right.
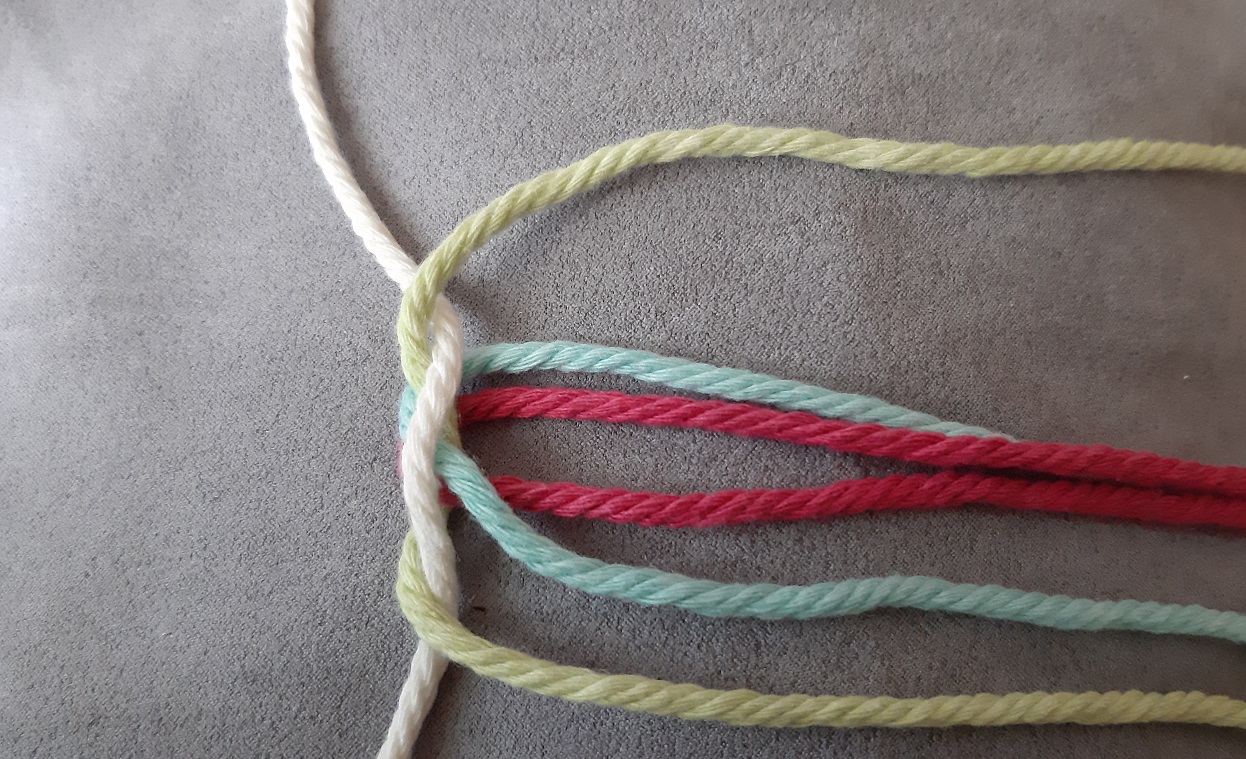
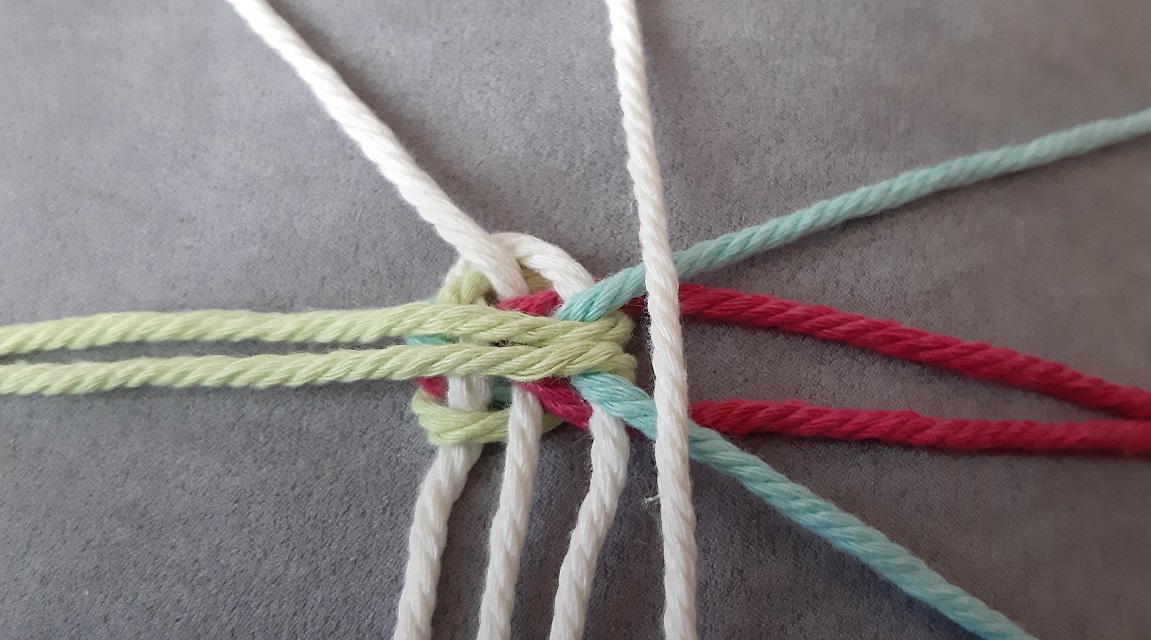
 Remember that the middle 2 threads have to go to the left, so it’s a brain exercise and to keep focused, because these threads try to twist and twist around each other 🙂 . Now remember that the blue ones have become the middle threads.
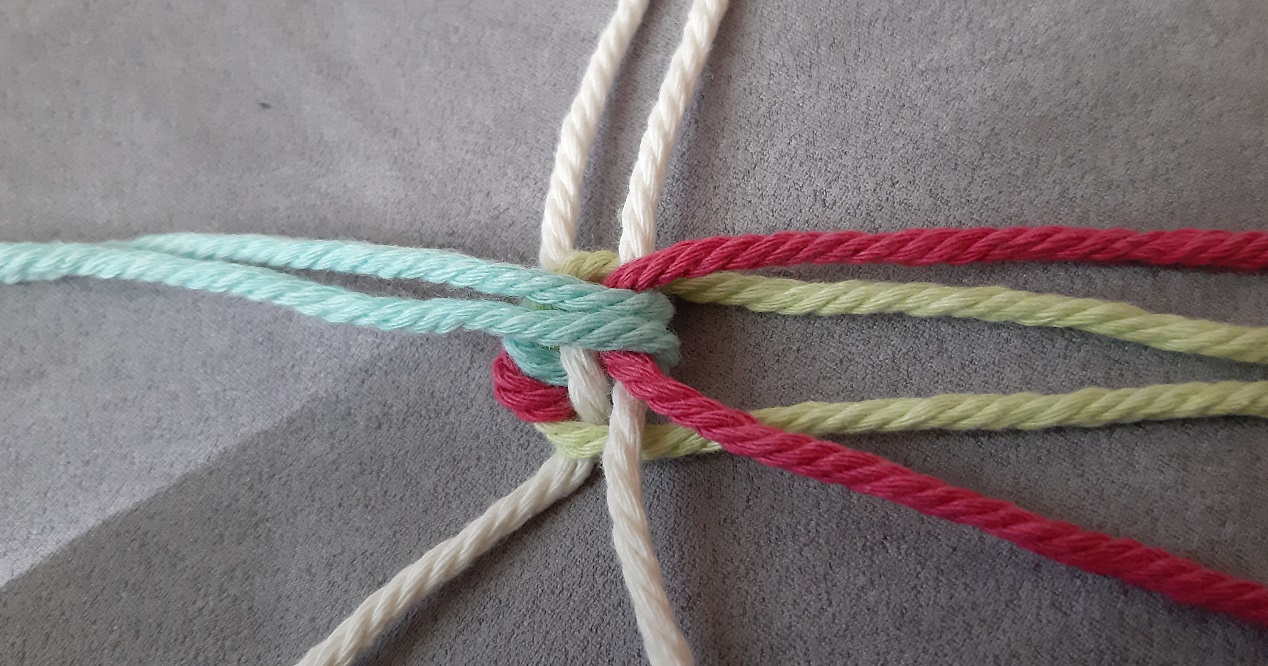
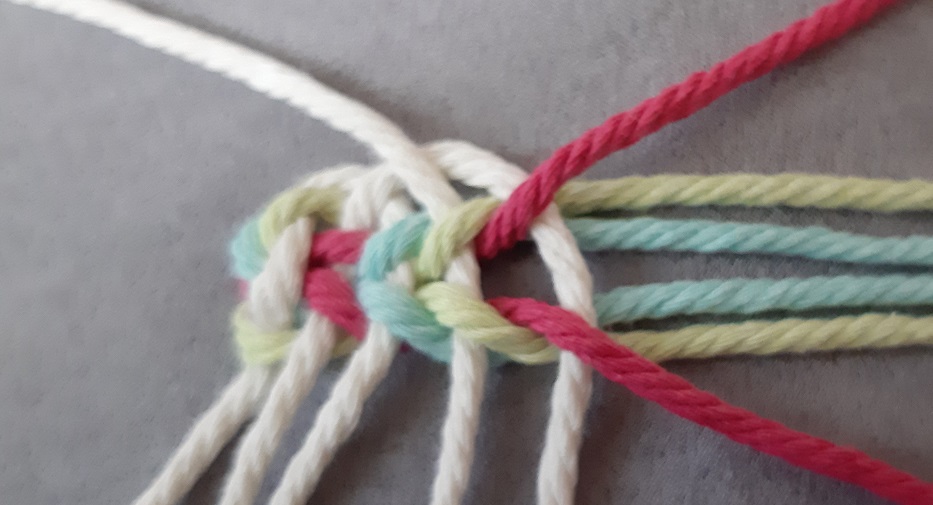
 Time to add the second warp thread. It goes over all 4 threads on the right.
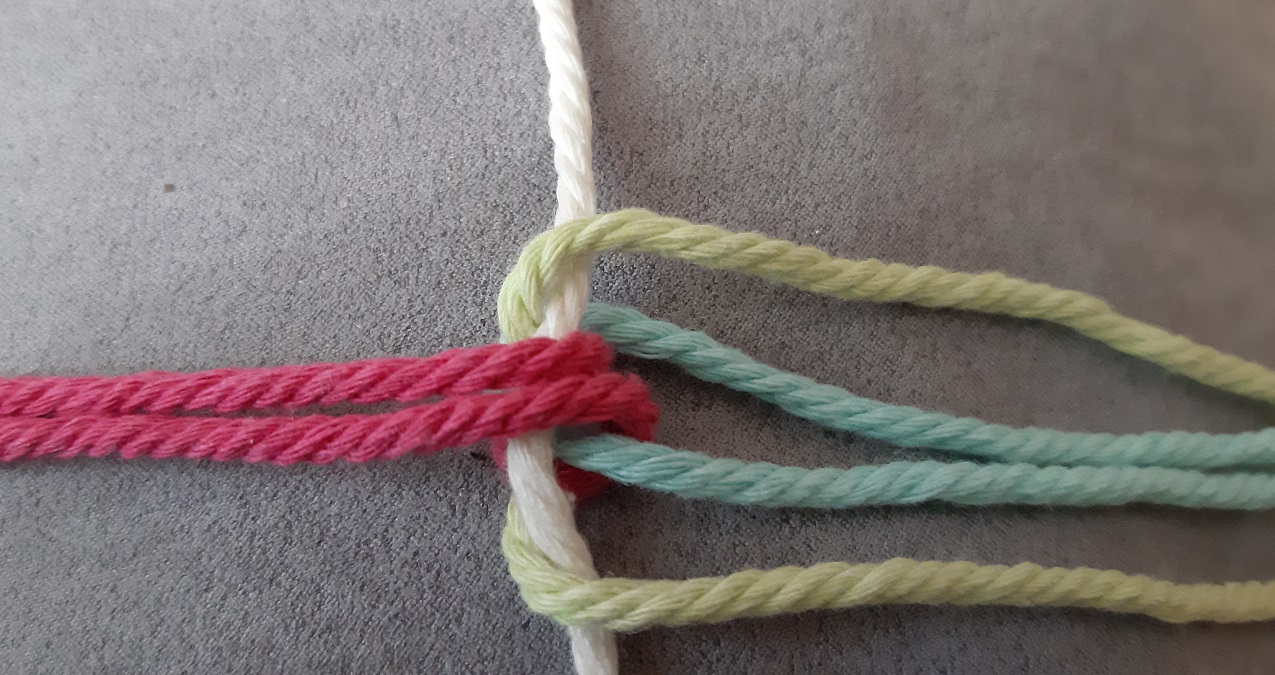
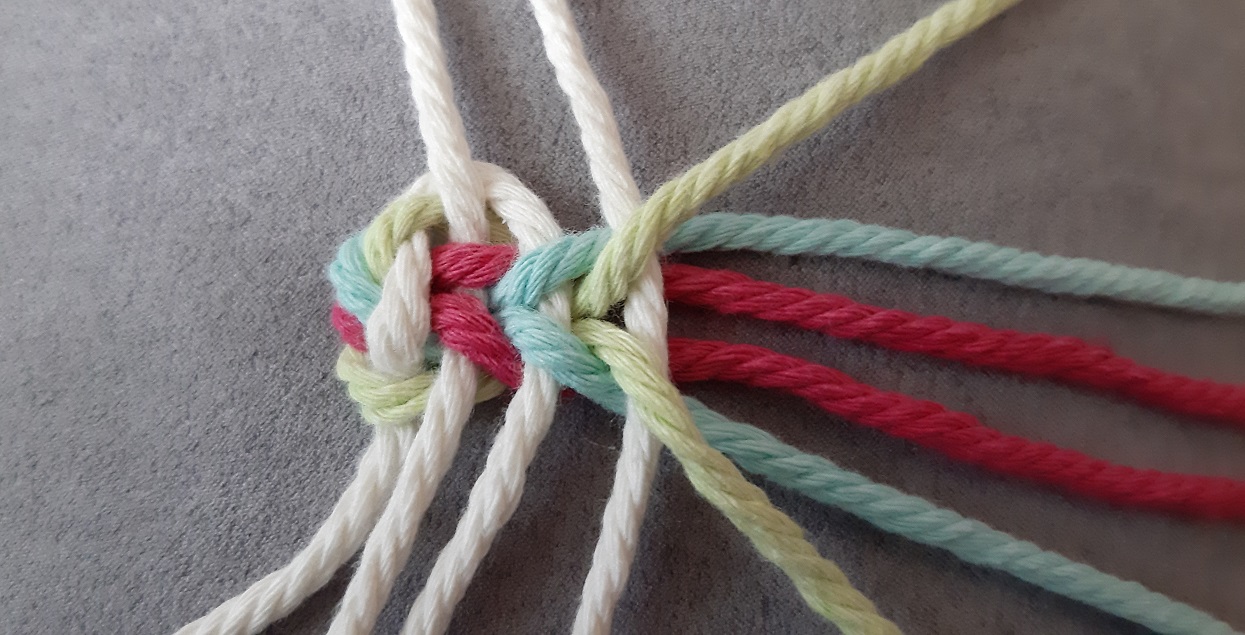
 Spread the pink threads and fold them to the right. Remember which color was in the middle? Yep, the blue ones.
 So the blue ones go the left now, and green goes to the middle. Green in the middle, green in the middle, green in the middle…… Just telling how my mind goes when doing this 🙂
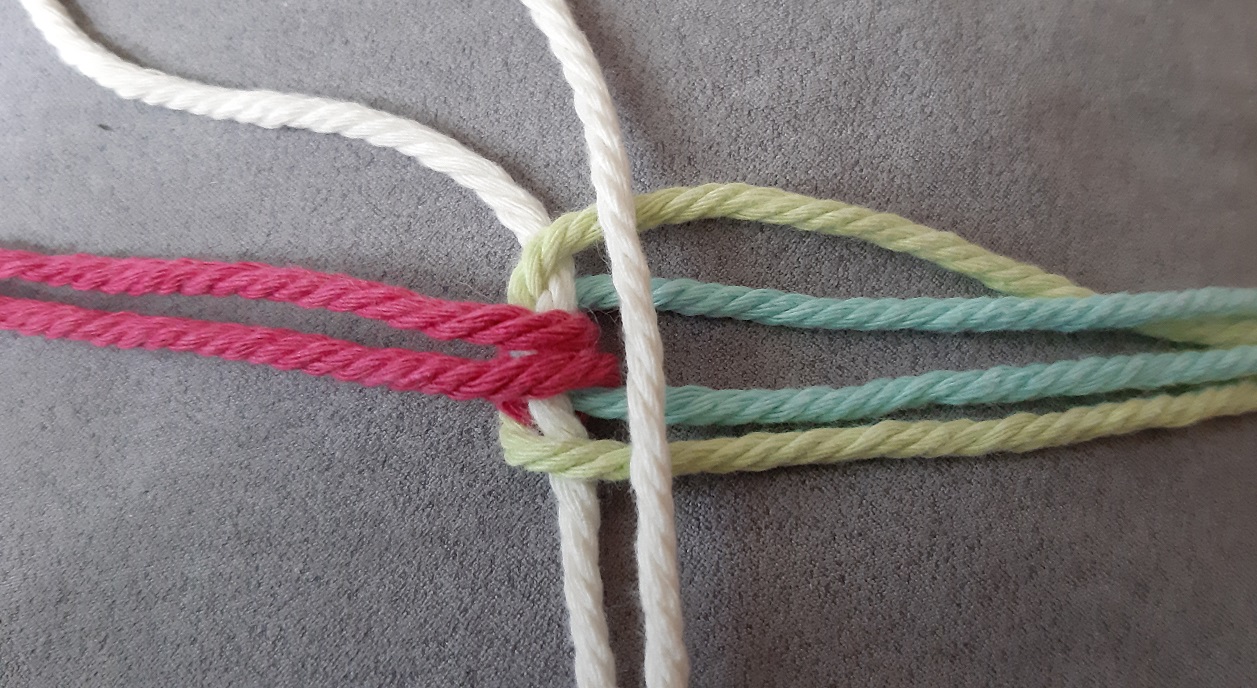
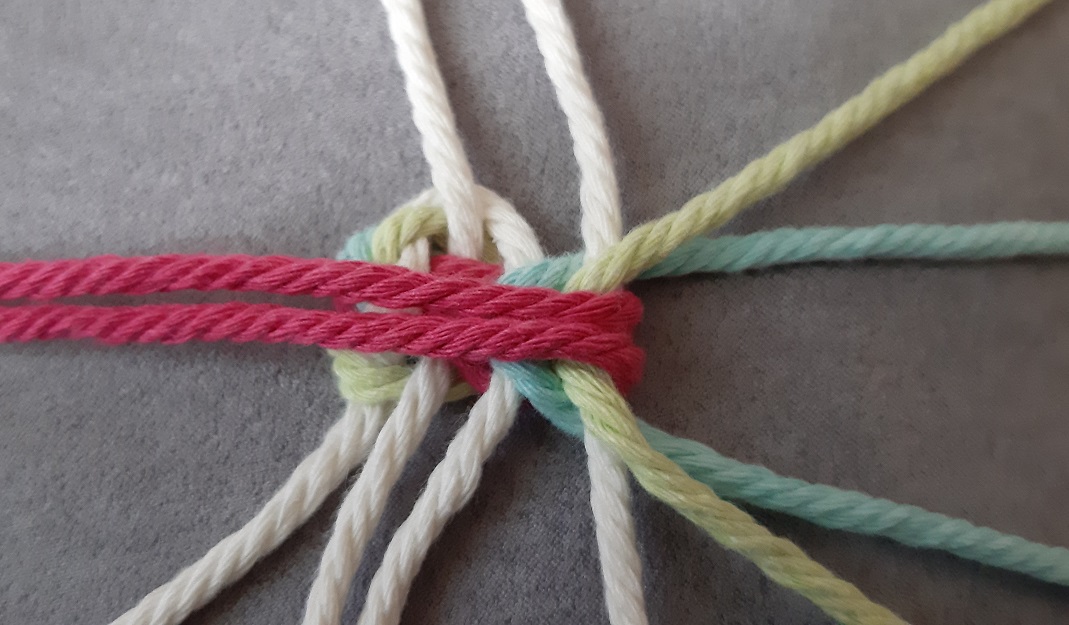
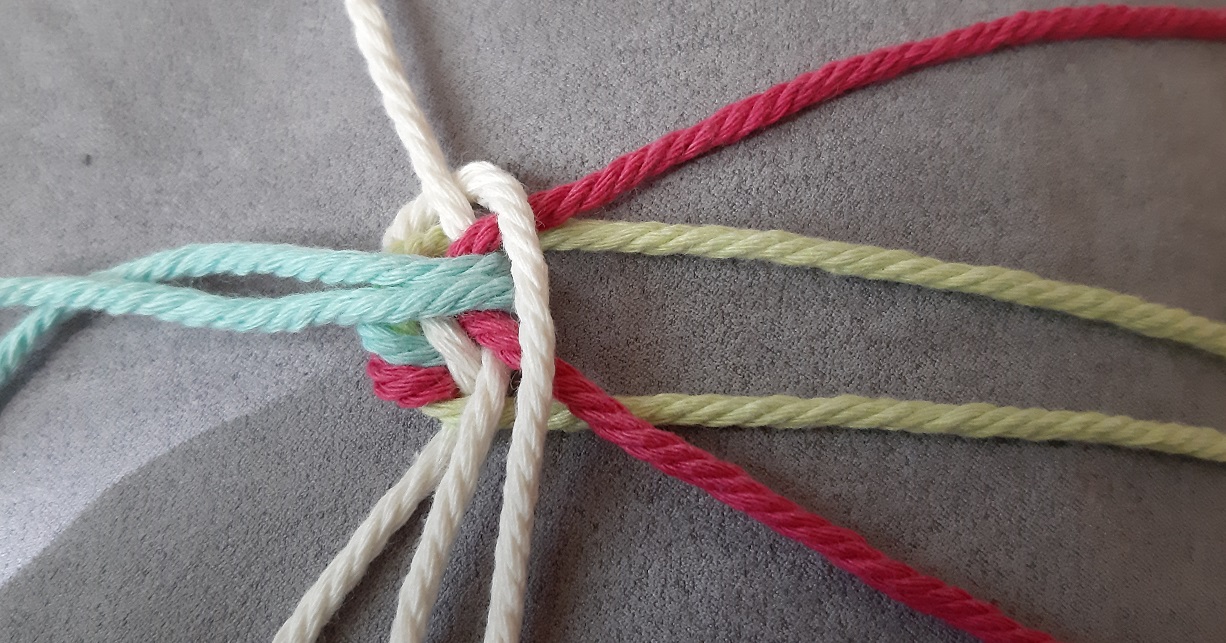 Like normal, now fold the first warp thread over, and bring it over the 4 threads at the right.
 Folding blue over to the right. Green in the middle, green in the middle, green in the middle……
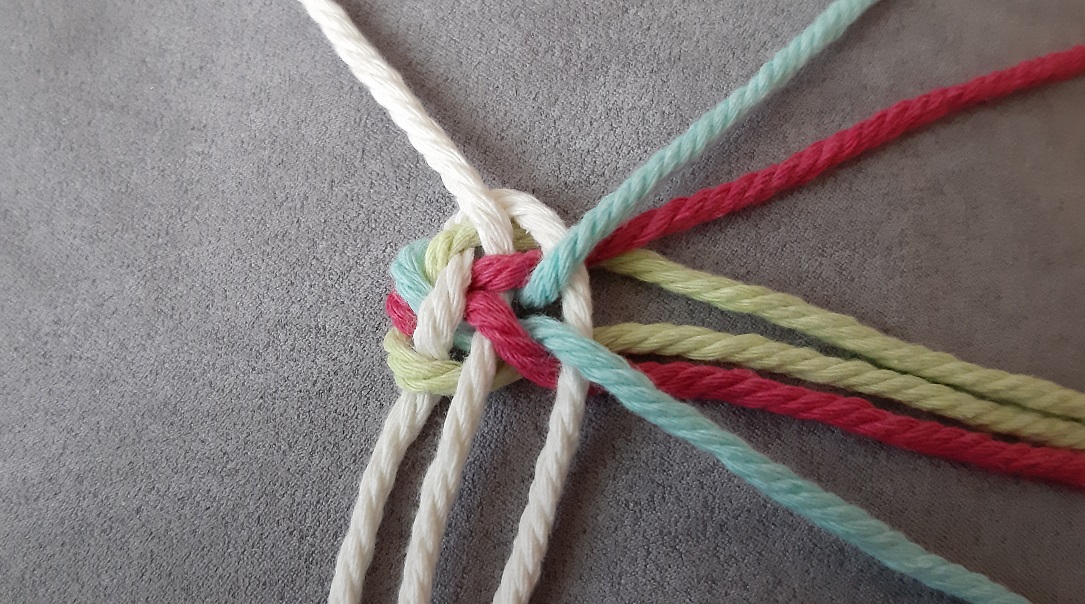
 Now green can go to the left. Pink in the middle, pink in the middle, pink in the middle……
 Add the next warp thread. Pink in the middle, pink in the middle, pink in the middle……
 Folding green over to the right. Pink in the middle, pink in the middle, pink in the middle……
Well, actually, if you are at this point, and you get confused about the order of the yarns, you could look at the order in which the colors lay in your weaving that you already did. Is the last warp thread covered with green? Then you know that the next V-shape has to be pink, so the pink threads should be in the middle. They are the ones that will be brought to the left, so that they will cover the next warp thread.
 Pink to the left.
 Fold the left warp thread over.
 Pink to the right. Remember the trick? Pink is folded over, next one should become a blue V-shape, so blue should be in the middle.
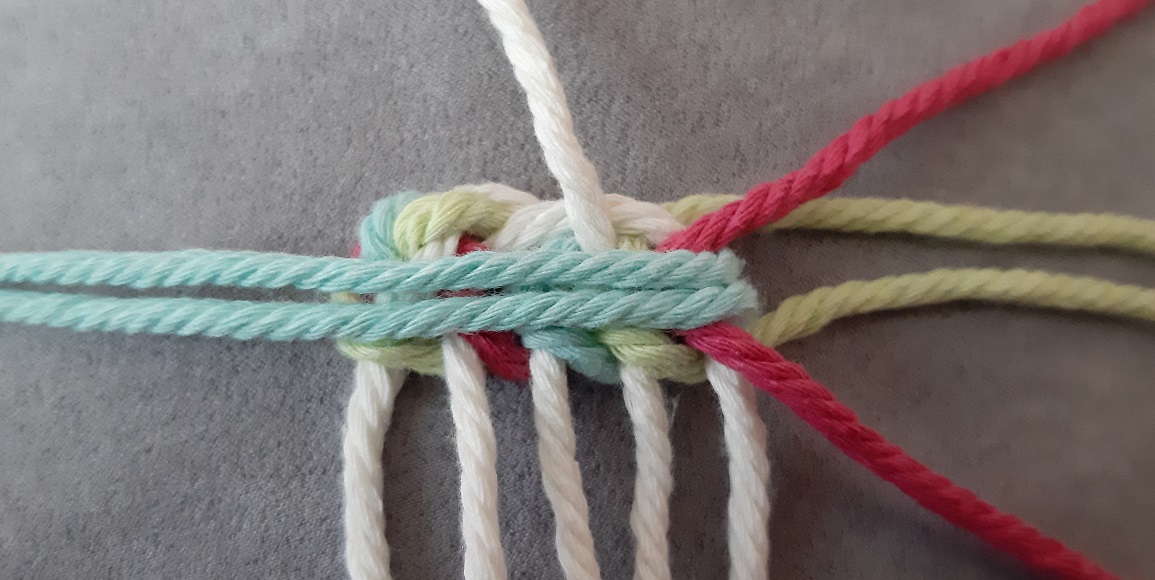 Blue to the left.
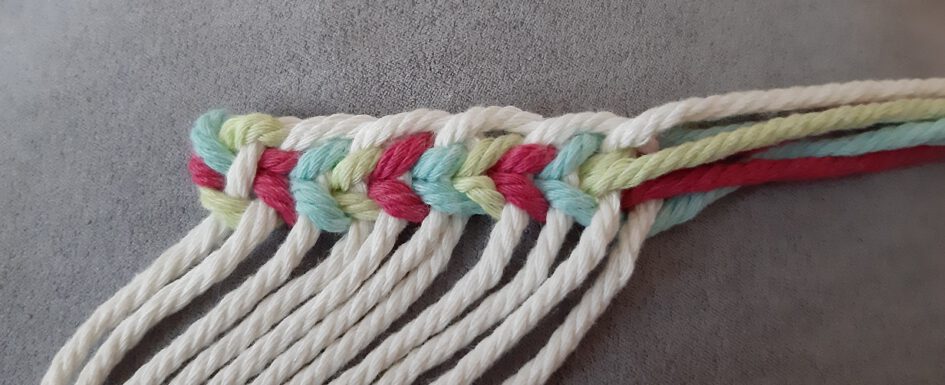
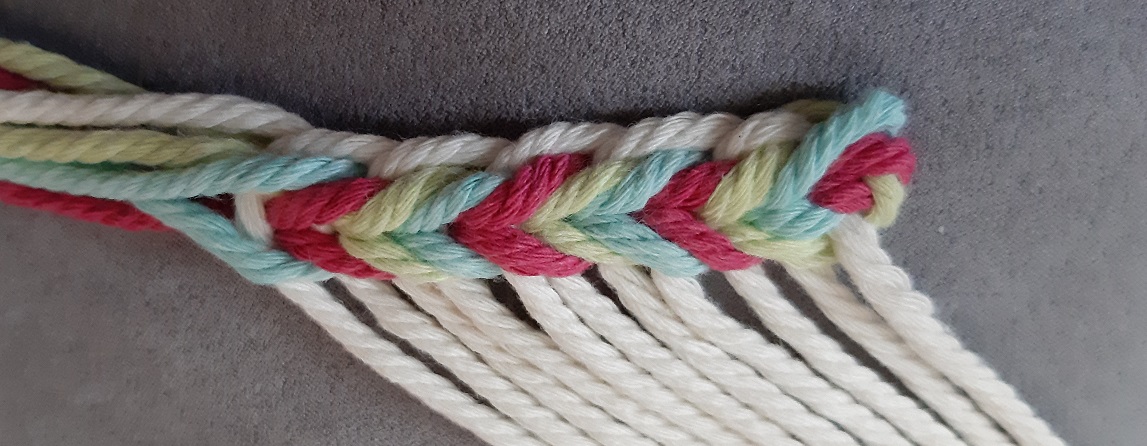
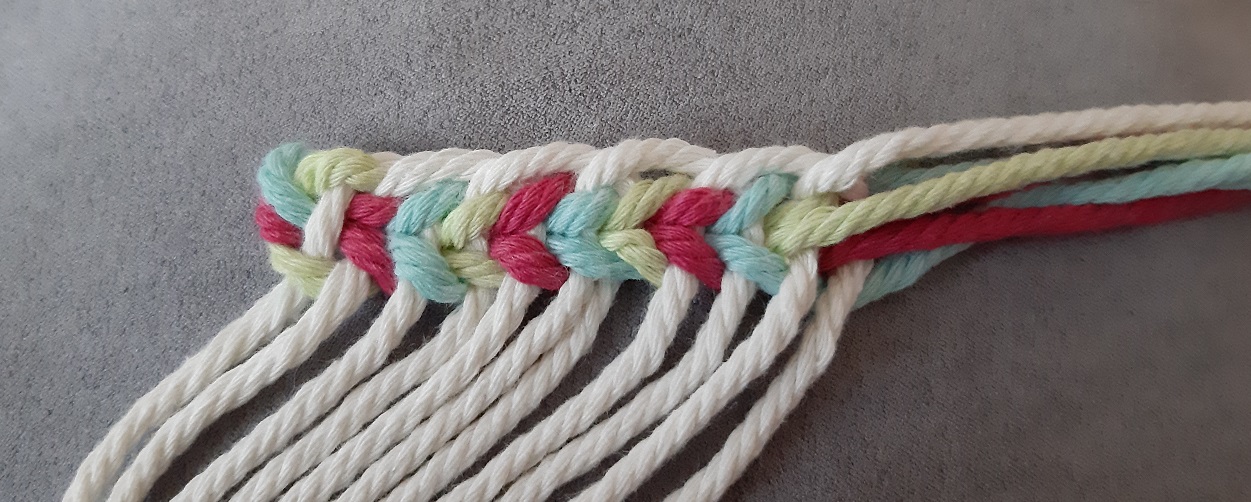 And so on. This is the result of some weaving.
 And this is how it looks at the back.
Push the weaving up like described at the basic steps, first page of this tutorial. You are now ready to weave. Look in the menu for the Tāniko weaving tutorials.