
Overview of the tutorials
This tutorial is split up into a couple of pages and I also have pages with more pictures of the bottom border, so I give here an overview so that you can go quickly to the page you need.
- Introduction and overview: click here to go the page
- The practice piece: click here to go the page
- The setup: click here to go the page
- Rows 2a and 2b: click here to go the page
- Rows 3a and 3b: click here to go the page
- Rows 4a and 4b: that’s this page
- Rows 5a to 6b: click here to go the page
- Rows 7a to 8b: click here to go the page
- Rows 9a to 10b: click here to go the page
- Rows 11 to 14: click here to go the page
The videos
I’ve made videos for the first couple of rows to explain and show you everything you need to know. Click here to see the playlist with all videos.
Overview of the videos:
- Introduction and start: click here
- Weaving through and row 1b: click here
- Rows 2a and 2b: click here
- Rows 3a and 3b: click here
- Rows 4a and 4b: click here
Rows 4a and 4b
There are also solid squares in rows 4a and 4b. If you are used to work from the pattern charts, and you use the charts of the back of the pattern for the even rows, then this will not work unfortunately! De closed squares will be done only at the front of the blanket with this technique. This is not visible on the pattern charts of the back!
Maybe I should have called this technique single sided solid squares, because you could also do solid squares at the back of the blanket, but this is not the case now. Maybe one day :-). What you could do, is use the pattern chart of the front, but you should have to read it from left to right, and switch front and back….. I find it easier to use the written instructions and use the charts as a reference if I’ve done it right, but I will go into it a bit how this works.
If you’re thinking: ‘Ehm, I will just follow the written instructions’, then you can skip the parts about the pattern charts. Maybe you do want to use the pictures to check your work, and use the written instructions for crocheting, so you can take a look at them.
Click on the pictures to see them fully and in detail.
Row 4a
The instructions for row 4a are: color 2 to front, side st, b 1x, f 1x, 3b 1x, f 2x, *(3b 1x, f 4x, b 1x, f 4x)* 11x, 3b 1x, f 2x, 3b 1x, f 1x, b 1x, side st
About the pattern charts
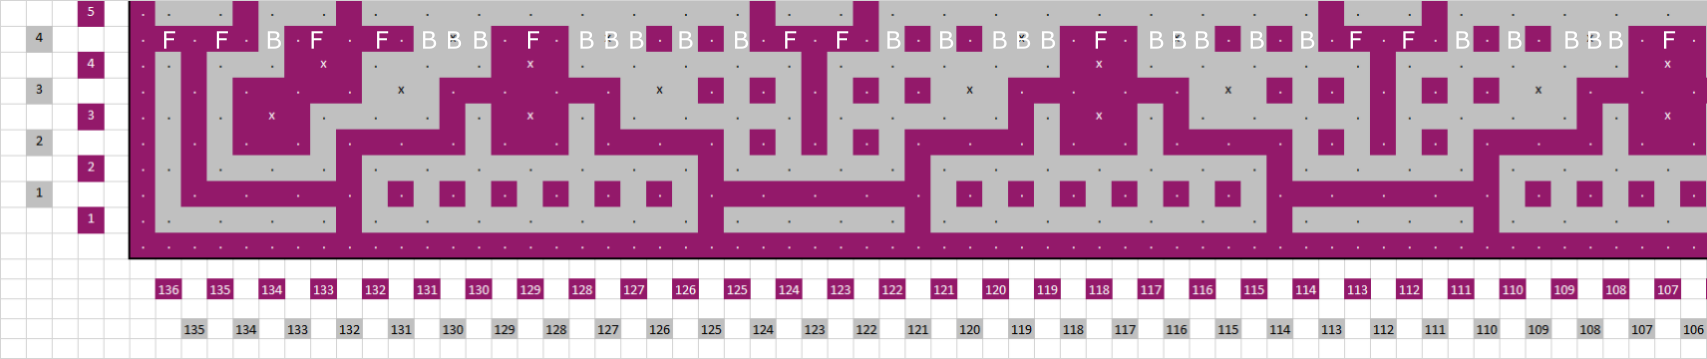
 Focus on the row with the bordeaux red 4 in front. This is the pattern chart of the beginning of row 4a of the front side of the blanket. Read from left to right. You see the white crosses in this row, that will be made at the front of the blanket (just like the dcs just before and after it).
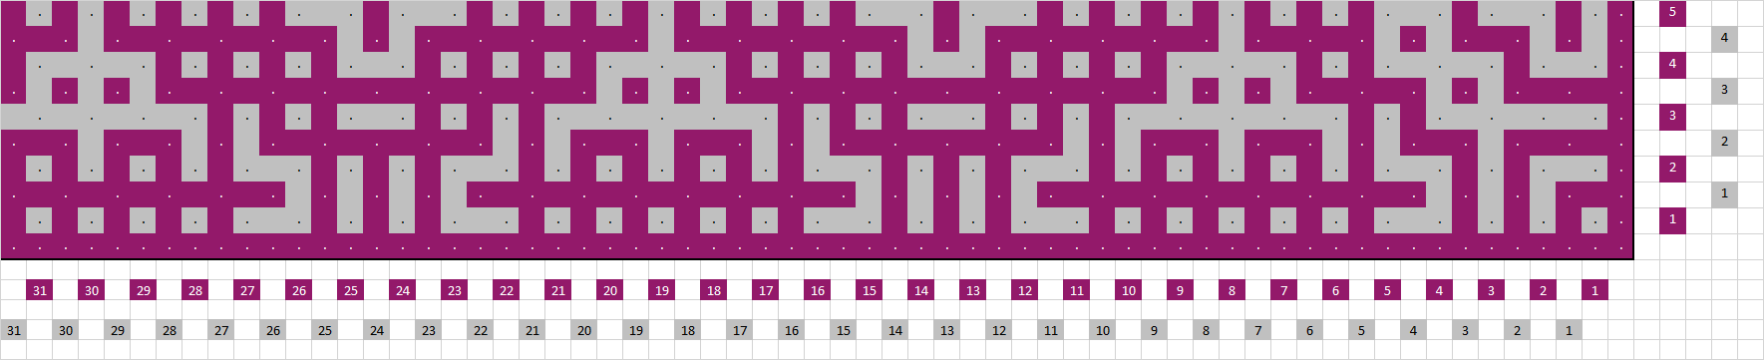 Here you see the pattern chart of the back of the blanket. You won’t find x-es here, in none of the rows….
You could use this chart as a reference if you’ve done the back right, but to check if you did really good, you do need to use the front of the pattern! Then the back will be correct automatically.
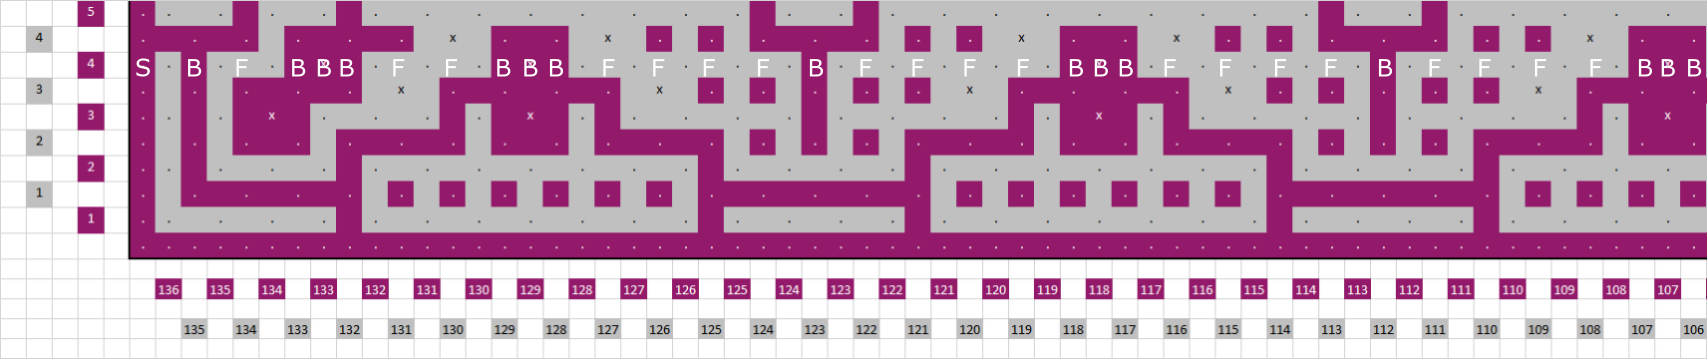 In this pattern chart of the front of the blanket I’ve drawn in the instructions. So you read it from left to right. This is the case for all even rows.
The pictures
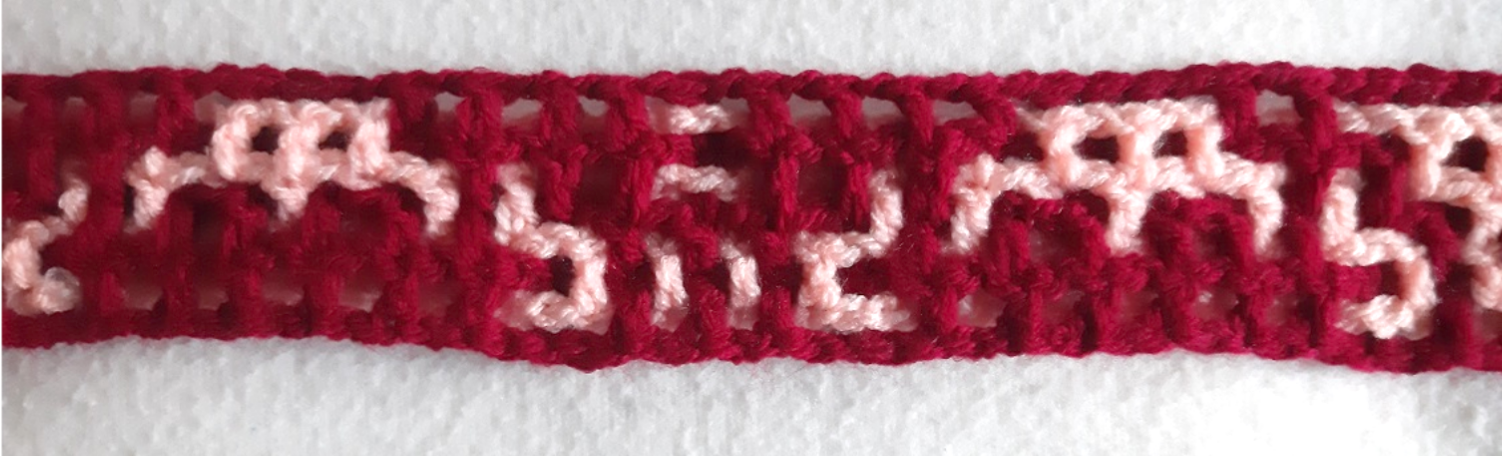
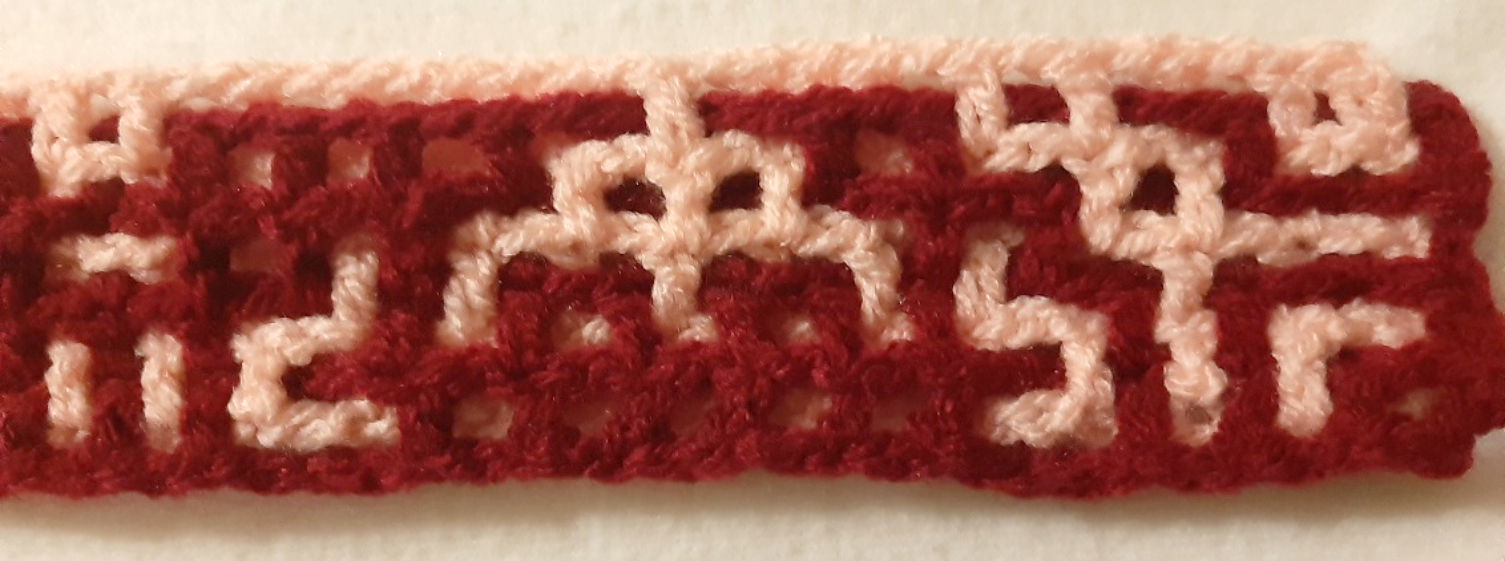
 Row 4a, back, the side. The solid square is not visible here at the back, because it is made at the front, or ‘good’ side of the blanket.
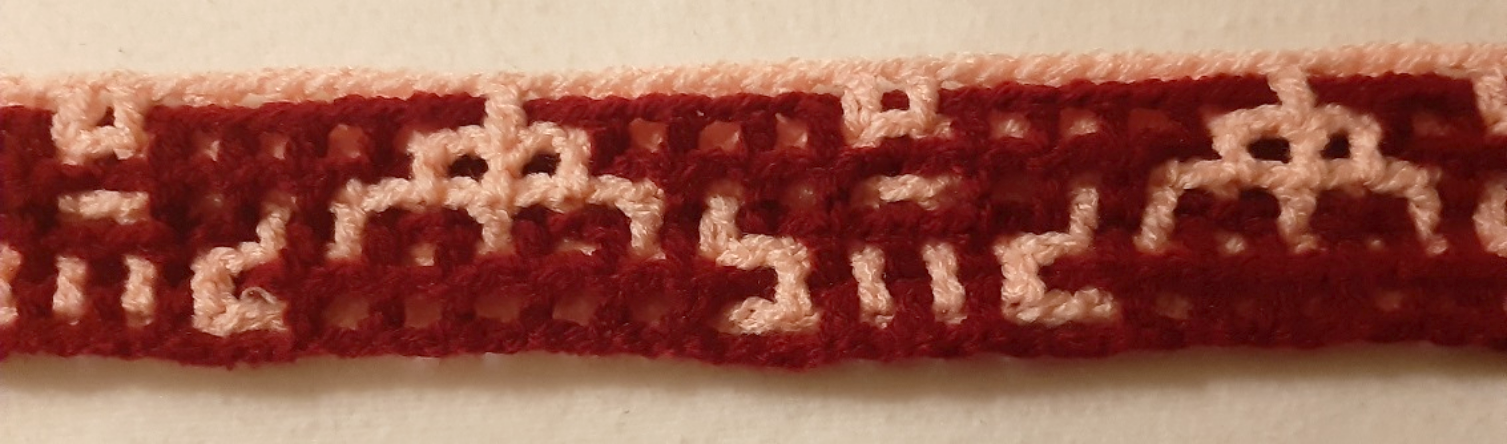
 Row 4a, back, the repeat.
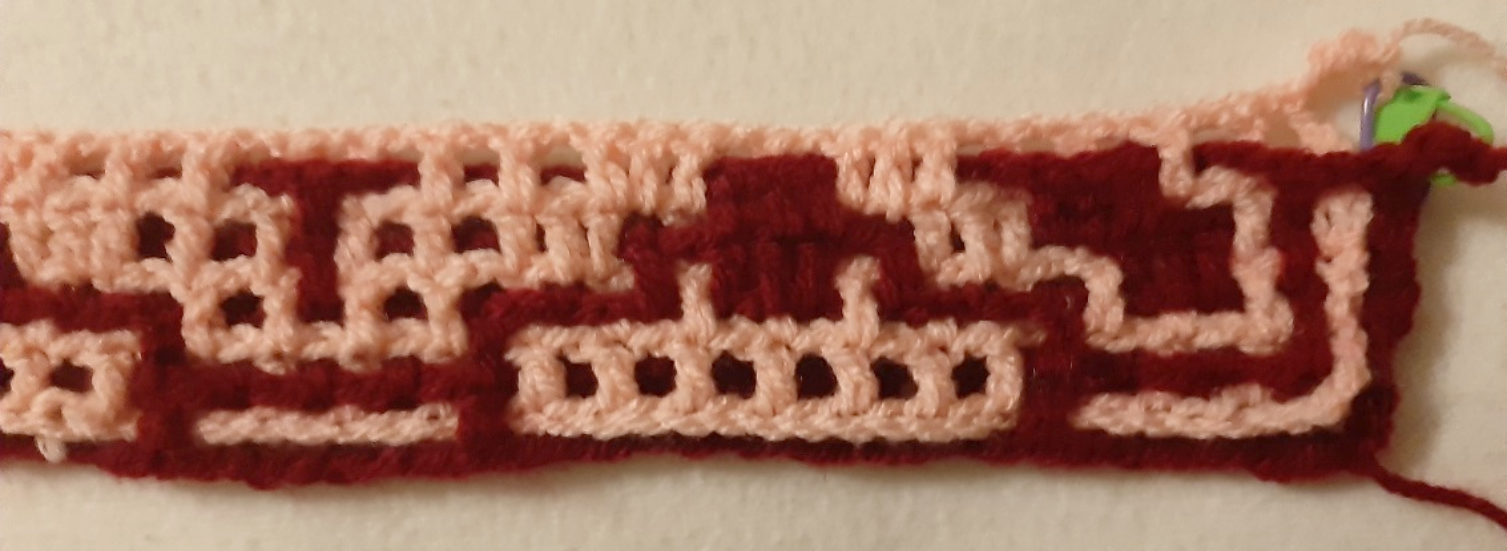
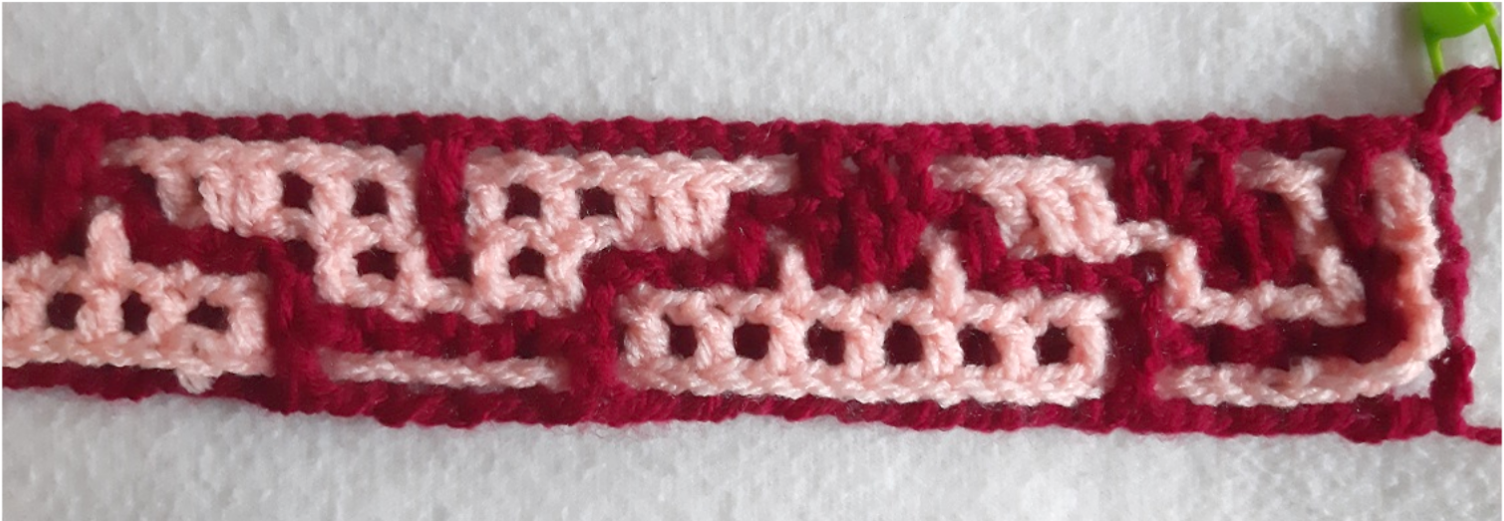 Row 4a, front, the side. Here at the front the solid square is visible!
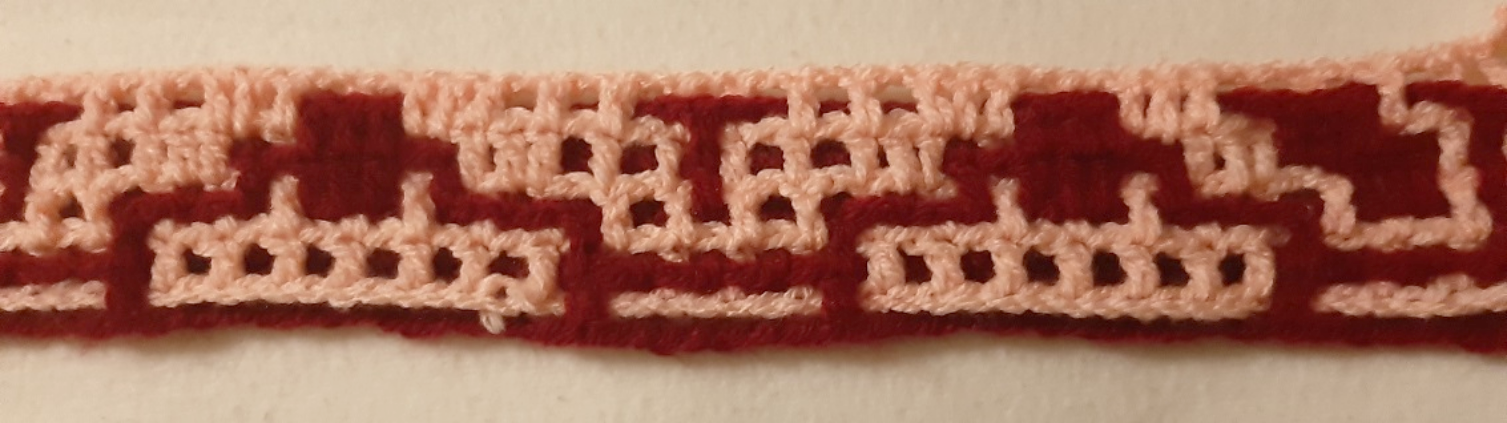
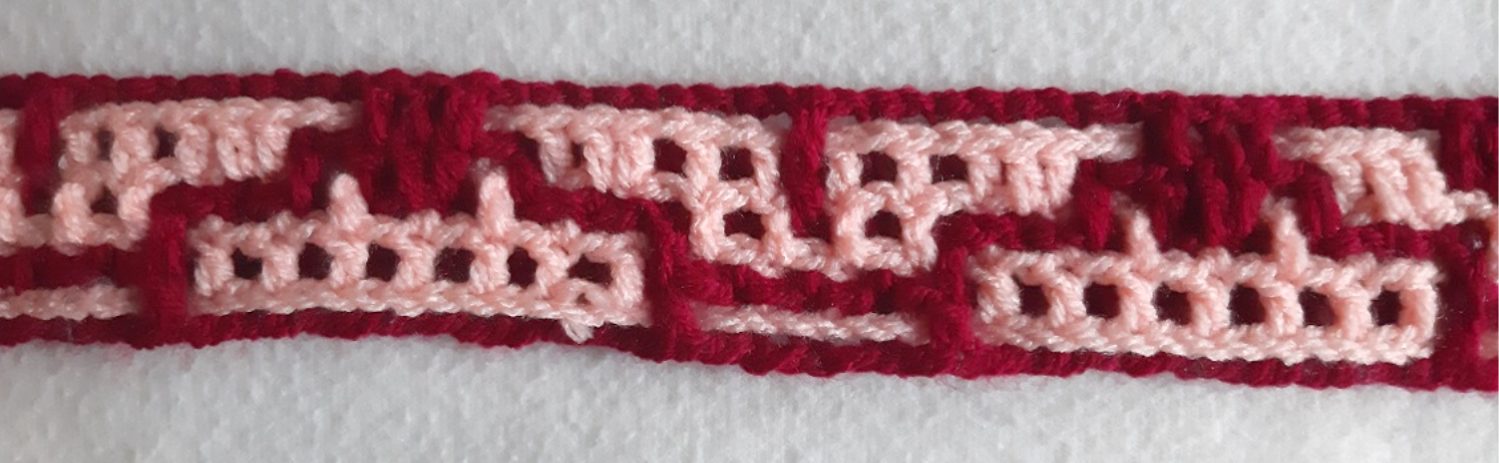 And here a bit of a repeat of row 4a at the front side of the work.
Row 4b
 Here in this pattern chart you see again the instructions drawn in if you do want to use the pattern charts. Row 4b is also crocheted at the back, as all rows with an even number, and you read the chart from left to right.
The instructions for row 4b are: f 2x, b 1x, f 2x, *(3b 1x, f 1x, 3b 1x, b 2x, f 2x, b 2x)* 11x, 3b 1x, f 1x, 3b 1x, f 2x, b 1x, f 2x
 Row 4b, back, side. Here is clear again that the solid square is not visible.
 Row 4b, back, repeat
 Row 4b, front, side. The solid square is visible!
 Row 4b, front, repeat
On the next pages I show pictures of the next rows: click here to go the next page.