
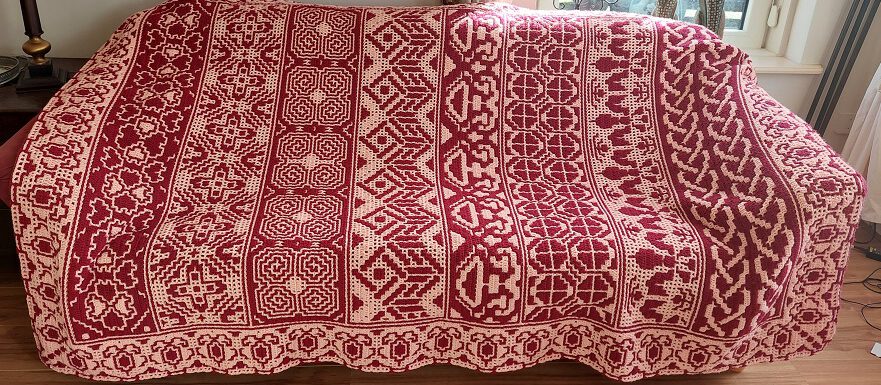
Overview of the tutorials
This tutorial is split up into a couple of pages and I also have pages with more pictures of the bottom border, so I give here an overview so that you can go quickly to the page you need.
- Introduction and overview: click here to go the page
- The practice piece: click here to go the page
- The setup: click here to go the page
- Rows 2a and 2b: click here to go the page
- Rows 3a and 3b: that’s this page
- Rows 4a and 4b: click here to go the page
- Rows 5a to 6b: click here to go the page
- Rows 7a to 8b: click here to go the page
- Rows 9a to 10b: click here to go the page
- Rows 11 to 14: click here to go the page
The videos
I’ve made videos for the first couple of rows to explain and show you everything you need to know. Click here to see the playlist with all videos.
Overview of the videos:
- Introduction and start: click here
- Weaving through and row 1b: click here
- Rows 2a and 2b: click here
- Rows 3a and 3b: click here
- Rows 4a and 4b: click here
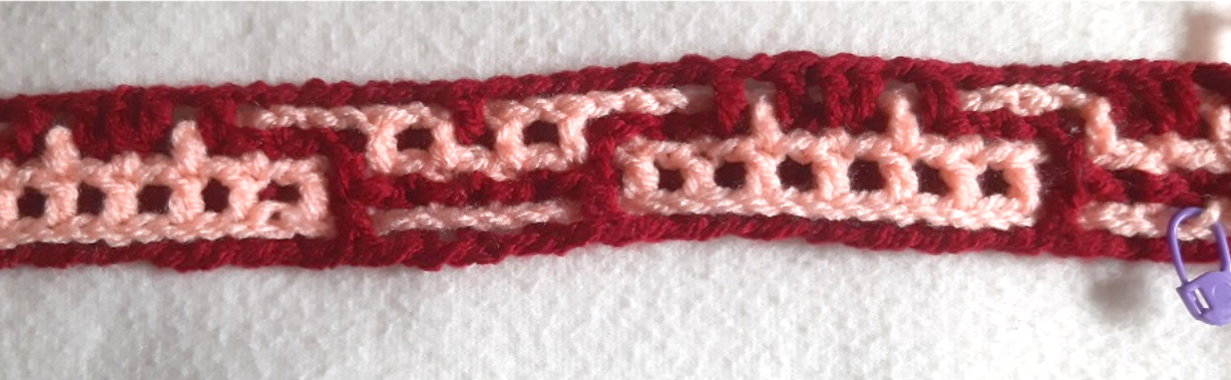
The rows 3a and 3b
In the rows 3a and 3b the first solid squares (the closed squares) will show up. I will first show the instructions quickly and show the pictures. If you haven’t done the practice piece yet of this CAL yet, then please do that first. There I explain how to do this technique and how to read the crochet instructions.
Click on the pictures to see them fully and in detail.
 This is a part of the pattern chart where you can see rows 3a and 3b. De x-es are the places where you will now make stitches into the chain opening of the previous row in between two dc’s.
If you want to learn how to read pattern charts, you can take a look here: click here. Focus for row 3a on the row which has the bordeaux red 3 in front of it.
The instructions for row 3a: color 2 to front, side st, f1x, 3f 1x, b 2x, **(f 1x, 3f 1x, *(f 1x, b 3x)* 2x, )** 11x, f 1x, 3f 1x, f 1x, b 2x, 3f 1x, f 1x, side st
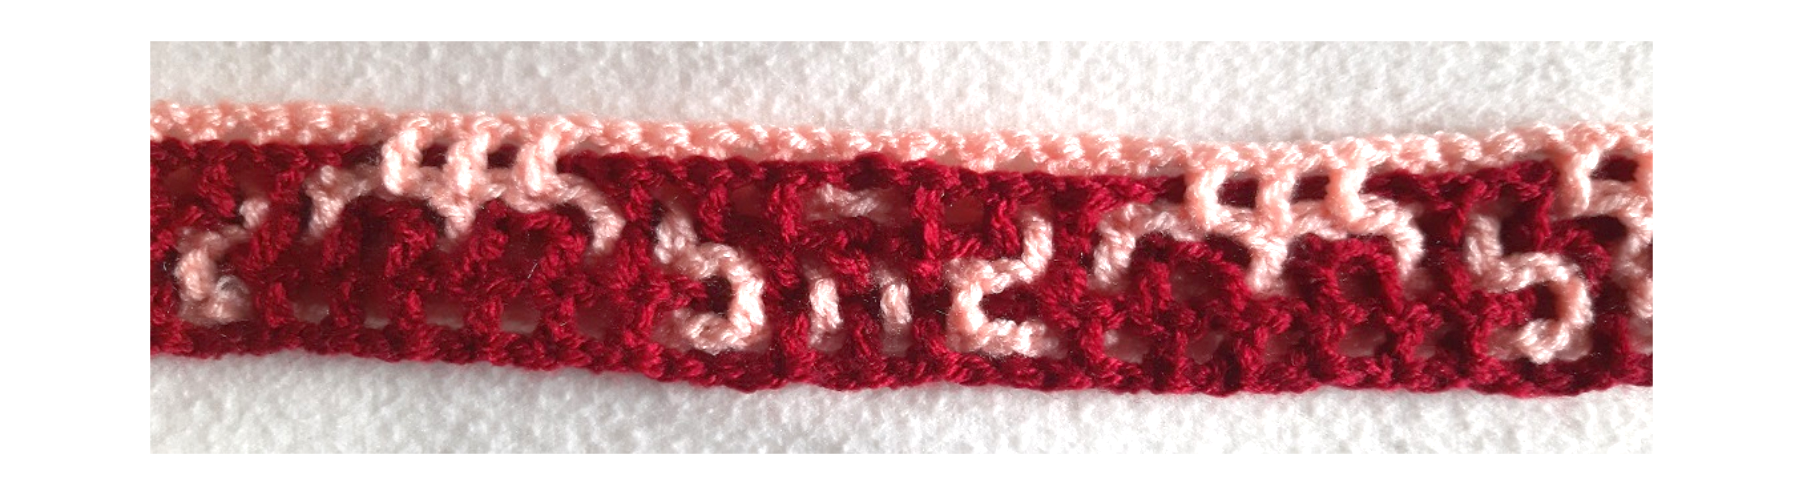
Apologies for the bad picture of the side: I only saw later that I didn’t have the side stitch on the picture….
- After the side stitch and the in-beween chain you start with 1 dc in front + 1 in-between chain.
- After this you do the 3f 1x, a solid square: three dcs next to each other without in-between chains! A solid square can be recognized by a number that is in front of the ‘f’ or ‘b’. The first dc is crocheted where you would normally do it with regular interwoven crochet, this is into the top of the dc of the previous row. The second dc is made into the chain opening of the previous row. And the third dc again in the top of the next dc of the previous row. Pay attention, this is all in front!!! With regular interwoven you have alternating stitches that are made in the front and the back, but with solid squares you could have open and closed blocks next to each other, and these could all be made at the same side of the work. After these 3 dcs you do an in-between chain. A solid square always ends with an in-between chain.
- b 2x: Here you do a dc with an in-between chain twice: so dc, chain, dc, chain
- The next part between the double asterisks will be repeated 11x.
- f 1x: this is 1 dc in front + 1 in-between chain
- 3f 1x: this is again a solid square: 3 dcs next to each other, then 1 chain
- After this you do 2 times what’s in between the single asterisks:
- f 1x, this is 1 dc in front + 1 in-between chain
- b 3x: this is 3 times a dc at the back with in-between chains: so dc, chain, dc, chain, dc, chain
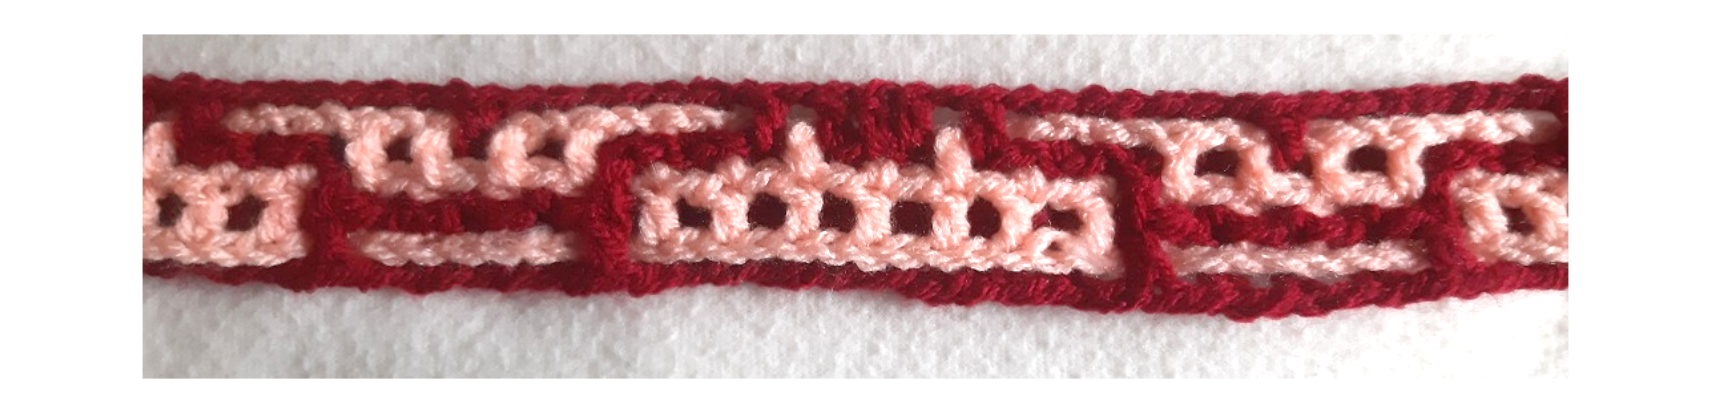
 The picture shows how it looks at the start of the row.
Further in the pattern you can find instructions that for example say 5f 3x. This means that you will make a solid square of 5 dcs 3 times: 5 dcs, 1 in-between chain, 5 dcs, 1 in-between chain, 5 dcs, 1 in-between chain. So the number directly in front of the ‘f’ or ‘b’ shows how wide the solid square is, after that it syas how many times you repeat this. With a 5f you will crochet into the top of a dc, into a chain space, into the top of a dc, into a chain space and into the top of a dc of the previous row. This makes that where there used to be 2 open squares you will now have twee closed squares.
Pay attention! With this row you will crochet the extra dcs of the solid squares into the chain opening of the previous row. If you also have a solid square in that place in the previous row, than you will crochet the ‘in-between dc’ into the top of the ‘in-between dc’ of the previous row. But that is also shown in the tutorial of the practice piece.
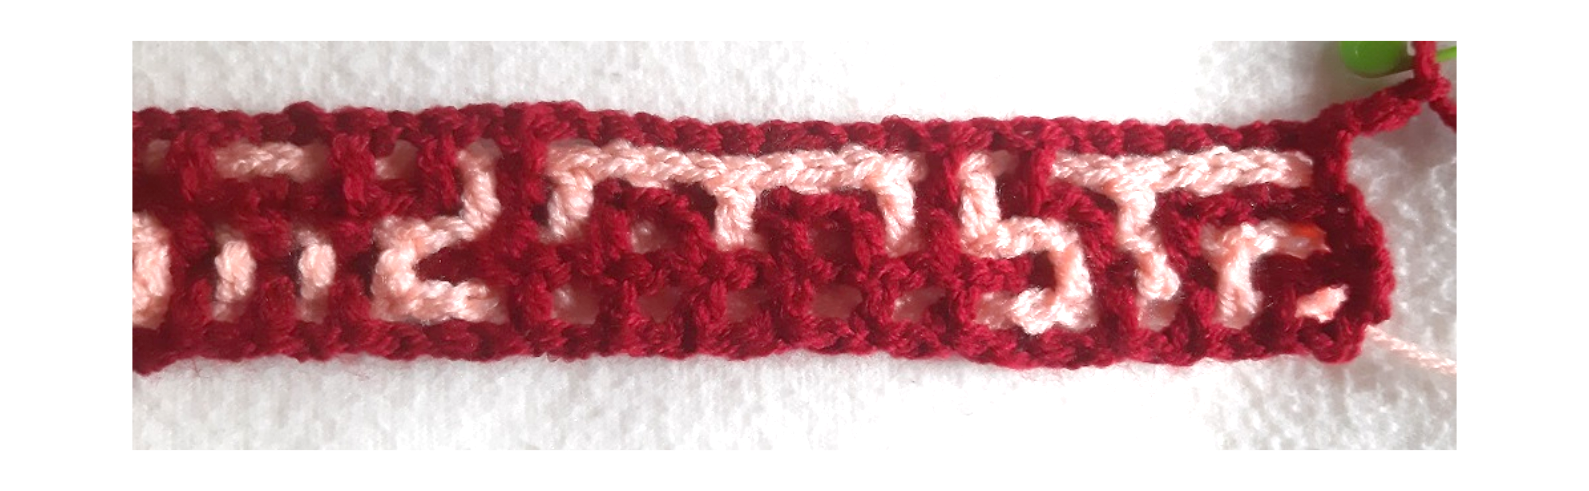
 Here a picture of a bit further in the row.
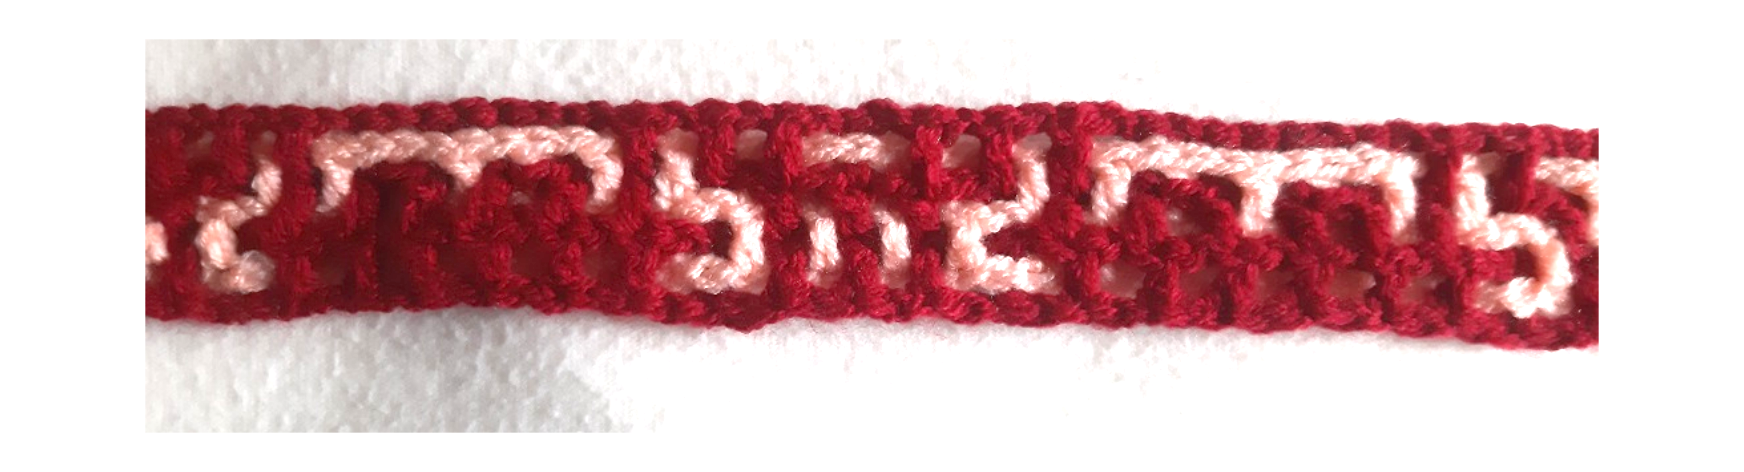
 3a back, side
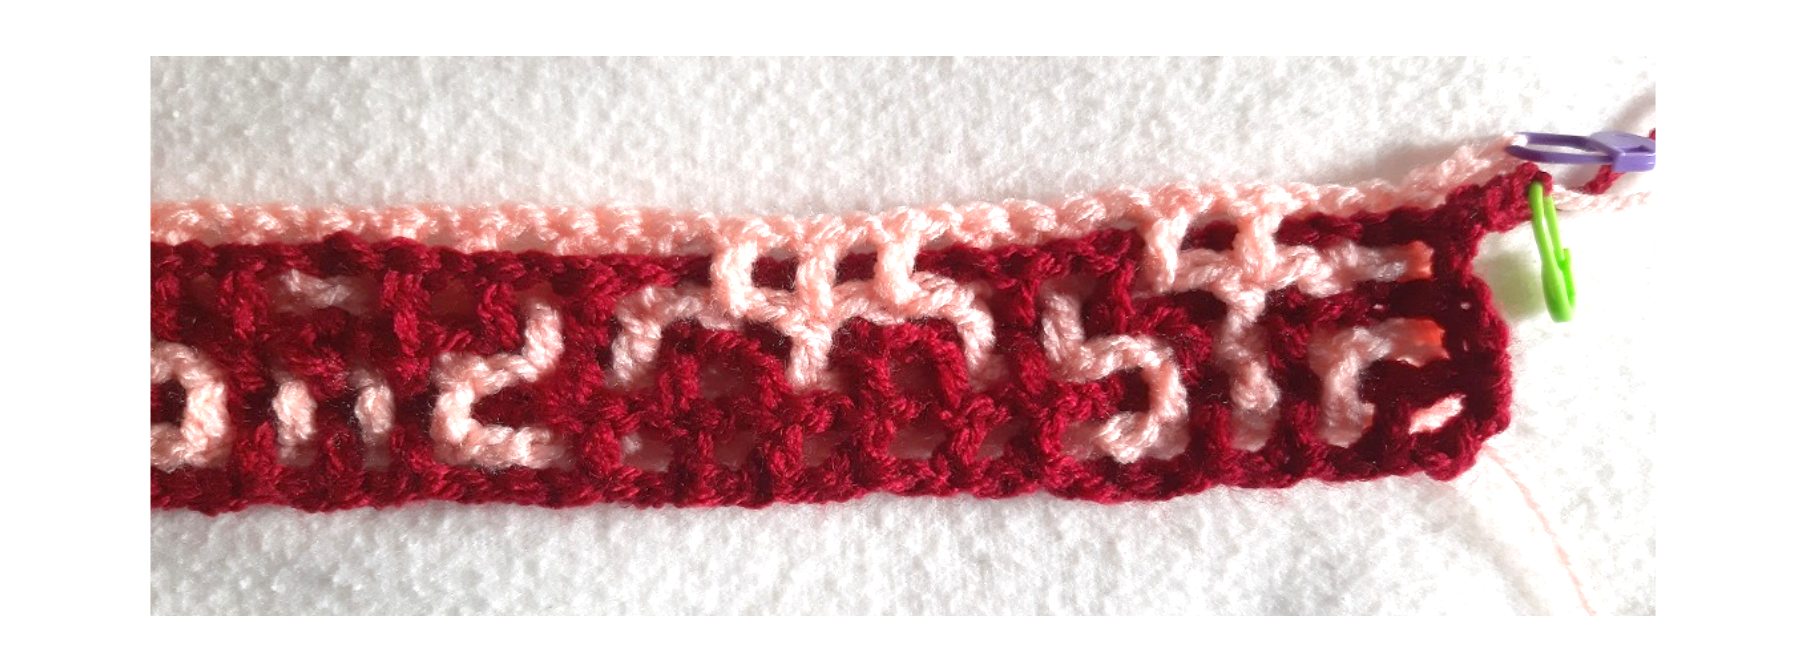
 3a back, repeat
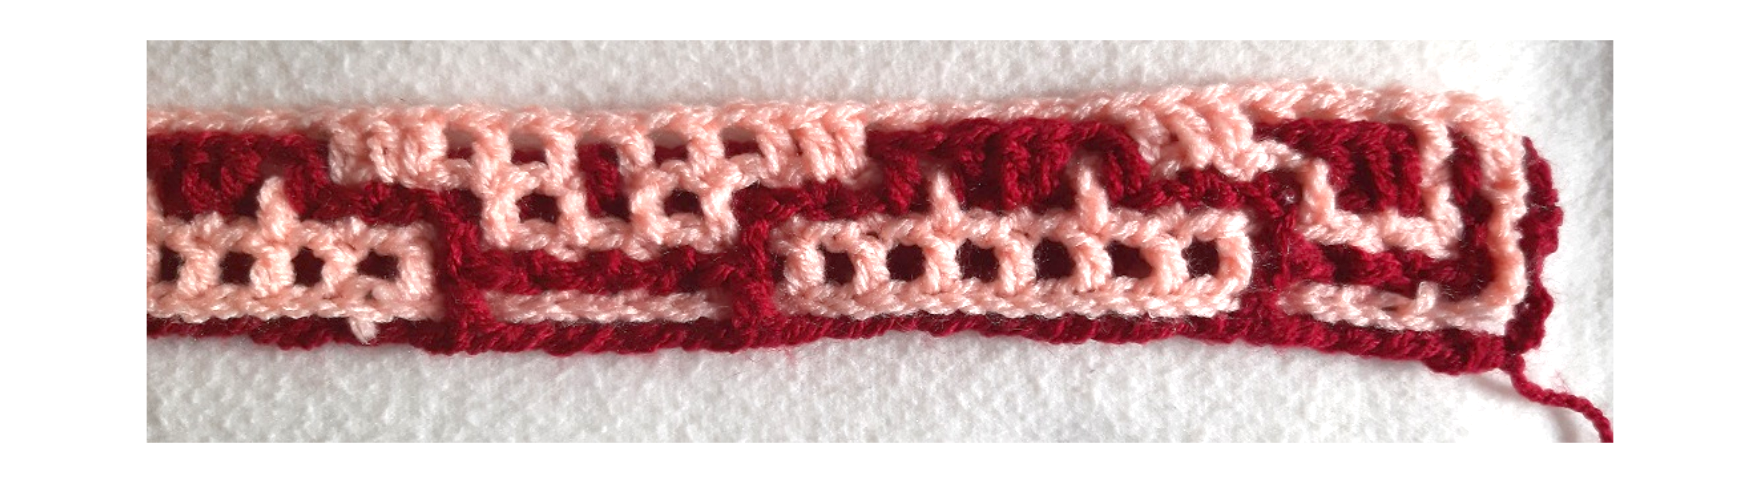 3b front, side
 3b front, repeat
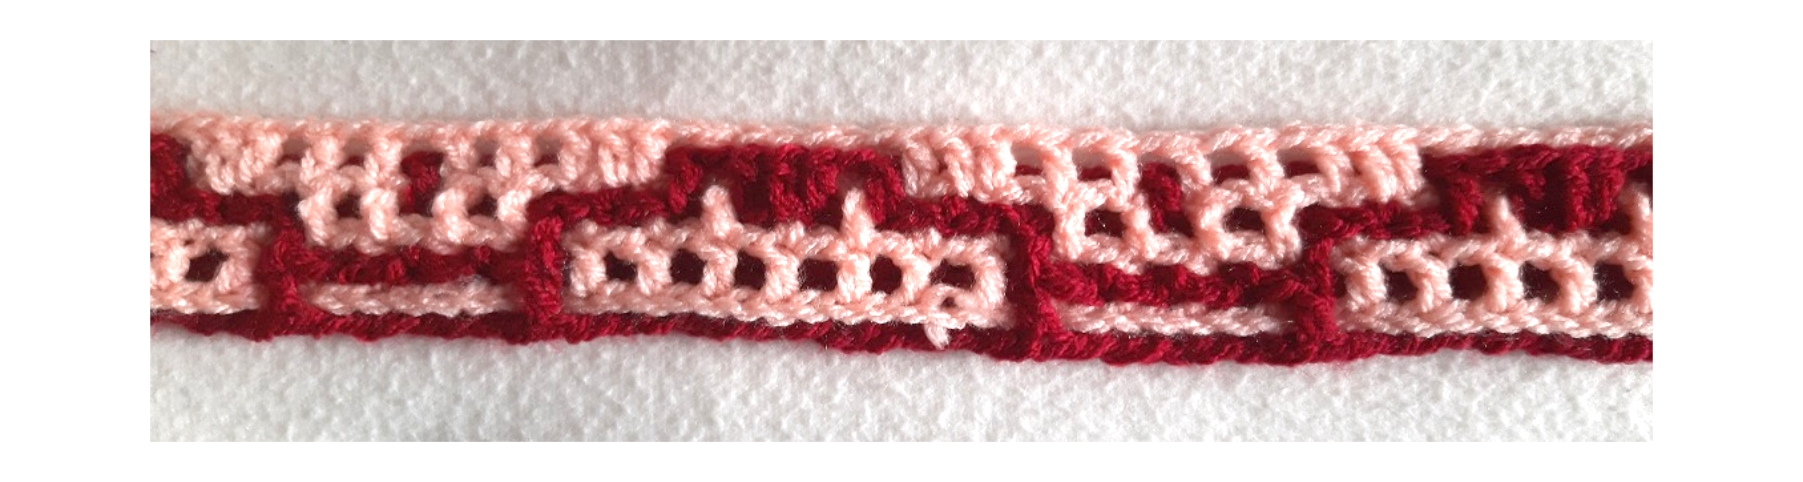
 3b back, side
 3b back, repeat
On the next page I will show a row that we will crochet at the back of the blanket: click here to go the page.