

Ending
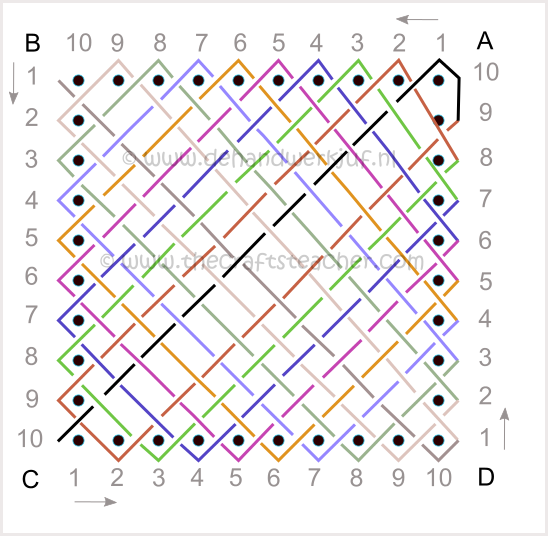
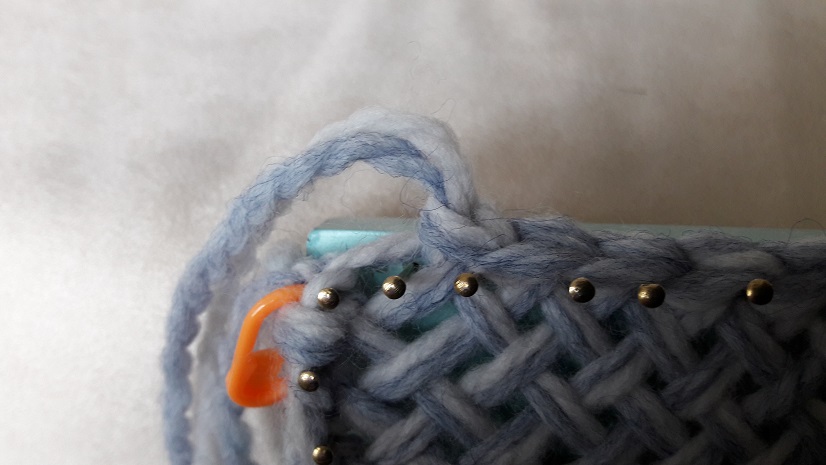
De ending at corner A is a bit different than with the other corners, because you have a sideloop around the top 2 nails. In the next picture you have come to just before corner A, right before the corner loop. In the drawing this is the loop around nail 8. On my loom that’s nail 22. I did 22 stitches on that side. Now to make these last 2 ‘stitches’, to take care you get the same number of stitches on each side, we’re going to do a trick.
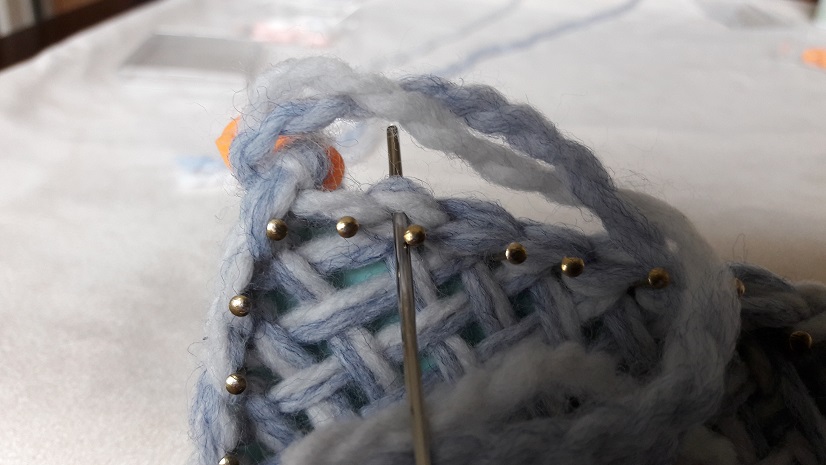
First of all you start making a slip stitch in the corner loop. You now have made 9 (or in my case 23) stitches for the fourth side. You have now 2 stitches in corner A, because at the very start you already made a stitch in this corner loop.
Now you will not be going to make another stitch in this corner loop! And that’s because of 2 reasons.
The first reason is that I don’t want to make more than 2 stitches in the corner loops. When you look at the drawing, and as long as the weave is on the loom, you might think that there would be enough space to do it. It would certainly fit, but once the weave is off the loom, it draws in to the middle, and the corner loop will get a bit smaller. Yarn also has a strong tendency to ‘find it’s natural way’ when it is in a relaxed state. Especially when it’s also washed. And then this corner will be smaller in the end, than when it’s still on the loom. So I want to prevent there will be a ‘lump’ of yarn from the crochet stitches.
The second reason is I want to make an ‘invisible’ finishing. And you do that by ‘simulating’ a stitch with a needle. In this way you have 2 for the price of 1: a nice finishing, and the extra stitch you still need to take care you get the same number of stitches on each side!
I will show you these these last steps in the following pictures.
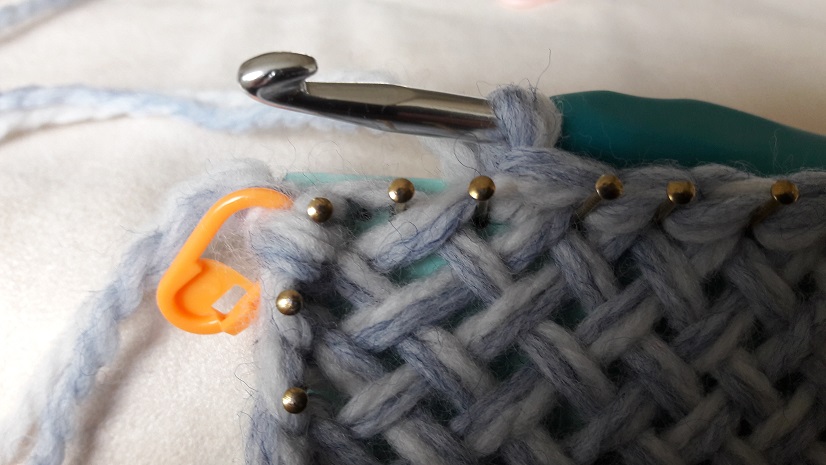
Cut off the yarn after you’ve made your last stitch, stitch 9, in corner A:
Pull the yarn through this stitch right away:
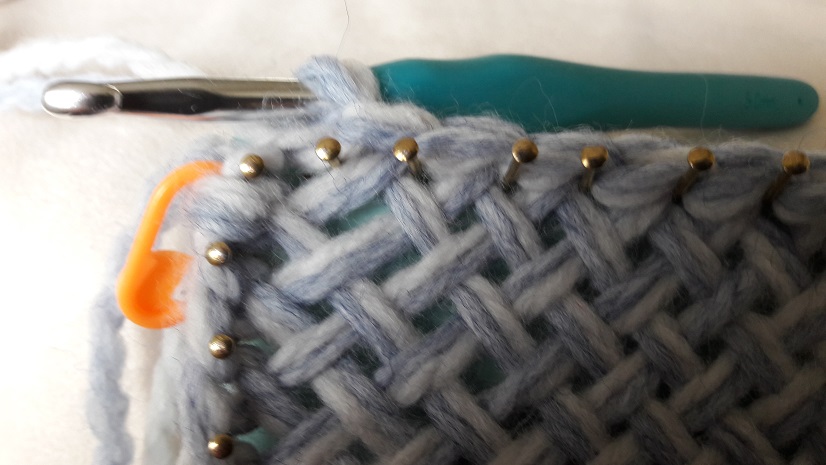
Take a needle and thread it with the yarn end. Put the needle through the V-shape of the very first stitch you made. This is the stitch I marked with a stitch marker. Now you see why it’s so handy to do that!

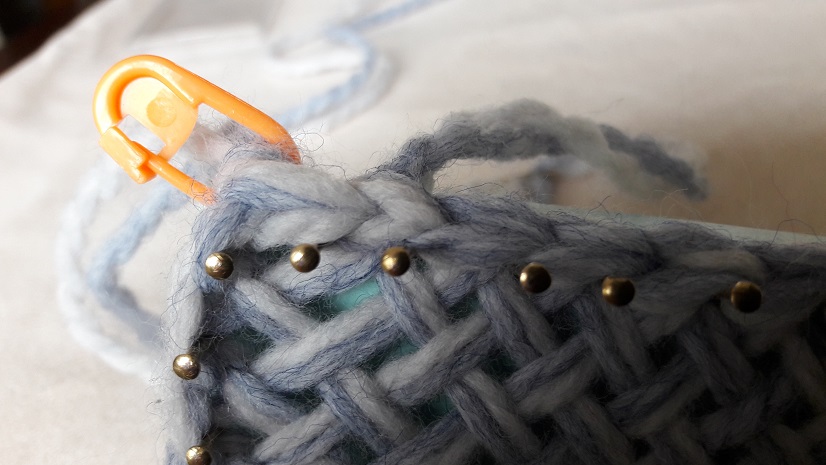
Now insert the needle back again into the center of the V-shape of the crochet stitch you made last.
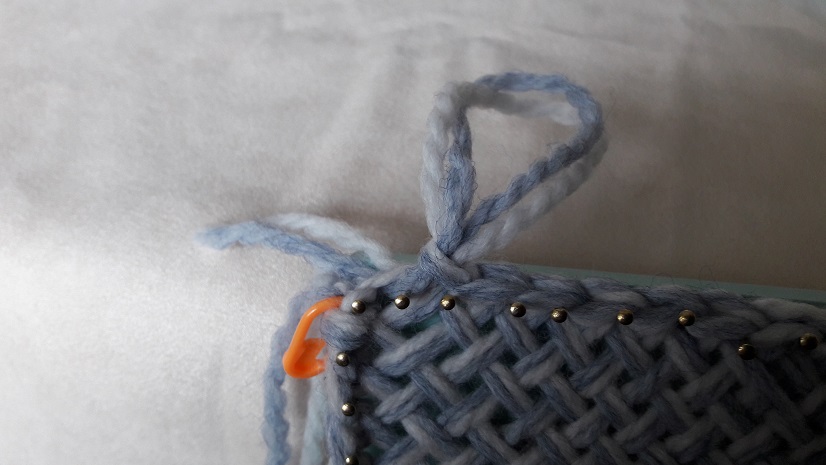
Et voila! The last stitch is made by needle. You now have the same number of stitches on each side!
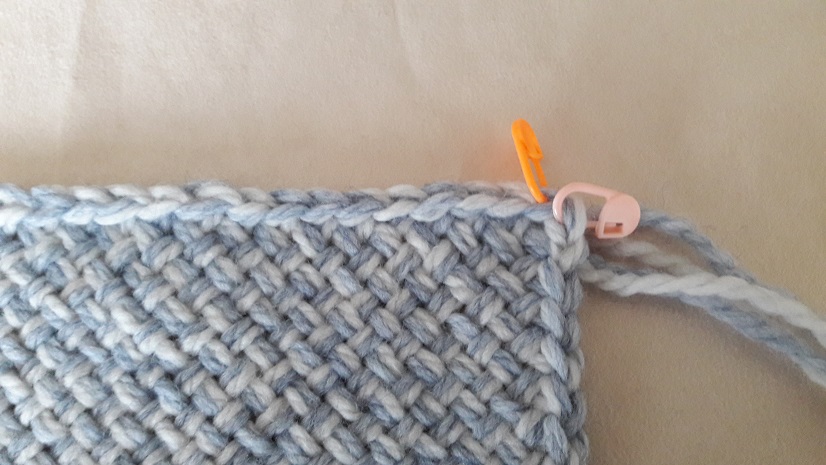
The result
This is how the final result looks when it’s off the loom. You can see very clearly now that the weave is smaller than when it still was on the loom. You can also see clearly that corner A has become smaller, and why I didn’t want to make anymore stitches in it. This will also be pointed out with some pictures in the tutorial where I do a crochet border with single crochets.


I hope this was again a clear tutorial!