
Introduction
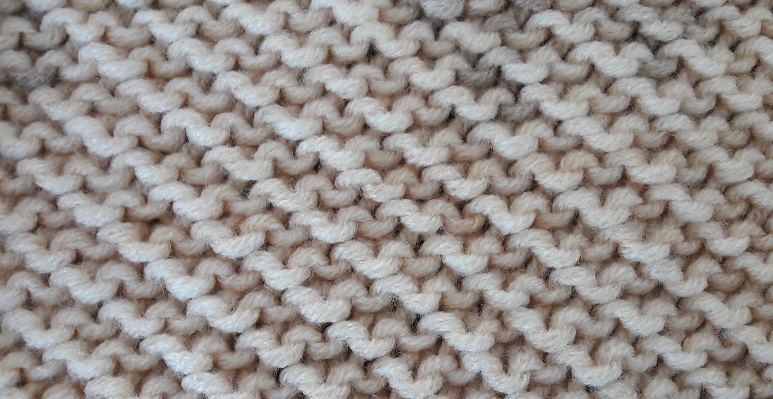
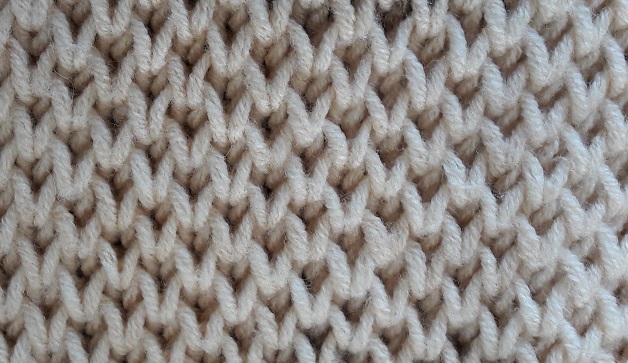
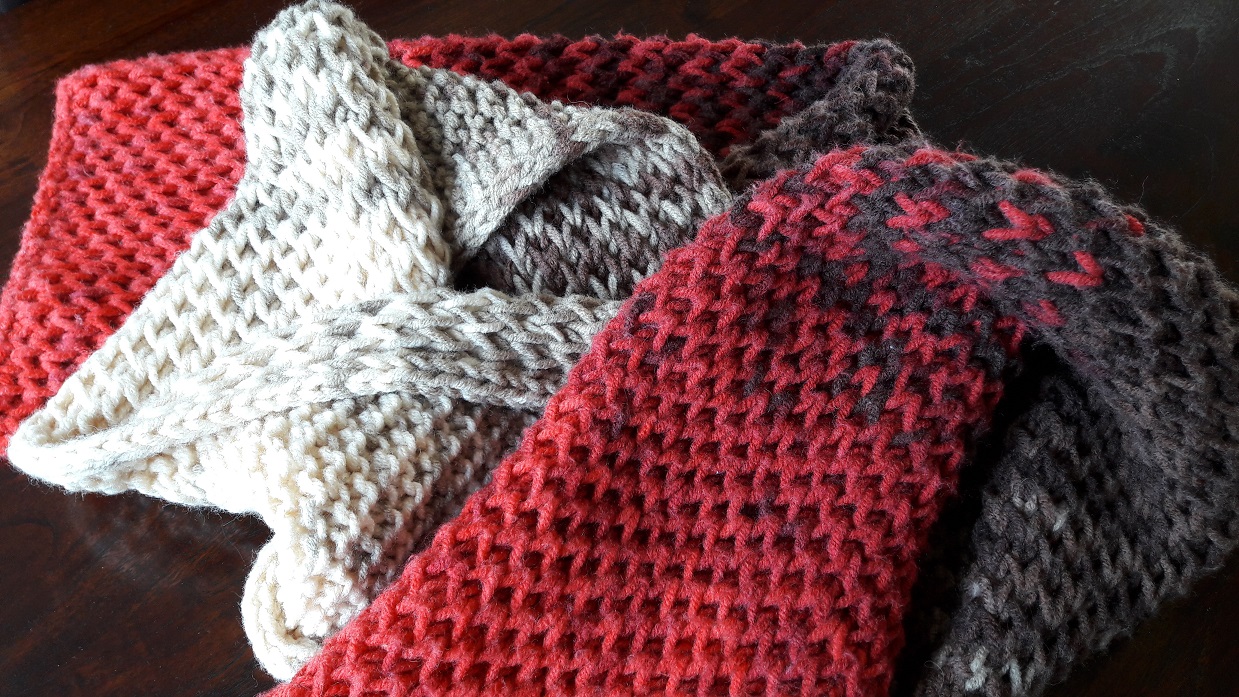
This stitch is kind of a brioche stitch and goes by different names. The Honeycomb stitch is the commonly used name. It’s a stitch that results in 2 layers. This gives depth and warmth, but also gives it gives it a drapiness that makes it very comfortable to wear. The back side of the stitch looks a lot like a garter stitch.
There are actually 2 ways to create this stitch. One way is using wraps (see that on this page), the other way is inserting your needle in a row lower than the usual row, the so called knit one below stitch. That’s the method I will explain here. To be honest, the wrap version has my preference, because I can see better where and how to knit. The knit-one-below method has a little ‘difficulty’ and that’s because the ‘shawls’, that are created by doing the knit stitch by inserting your needle into the row below, have to be knitted together with the made stitch in de next row. But, you will get used to that for certain! And maybe you will find it much easier to do, so I will show you this method here anyway.
The video
I made video’s of both methods. Here is the video with the wrap method (continue after the video link for the written version!) :
Abbreviations
To make it easier to read the pattern I will use some abbreviations.
➡ K1B: knit 1 Below. This is actually just a knit stitch, but you insert the needle in the stitch below it. You just knit the stitch and let the stitch above get off the left needle. It feels a bit strange, just like you drop a stitch, but that’s not the case.
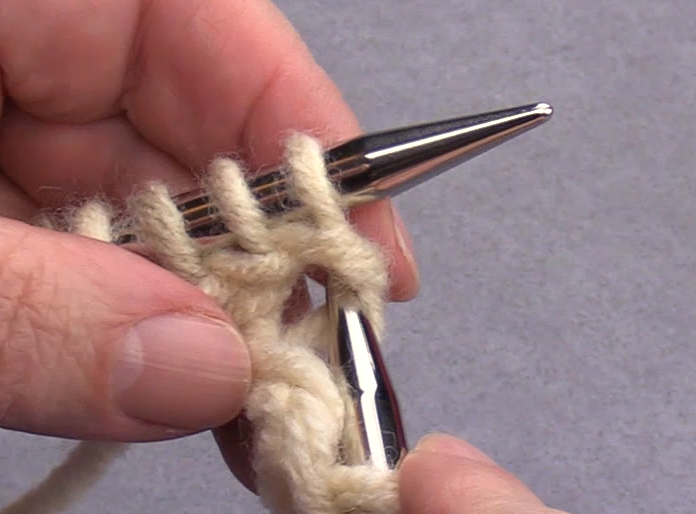
➡ KWS : knit the stitch together with the ‘shawl’. The stitch you will be going to knit has a wrap beneath it: I call it it’s ‘shawl’. You will have to pick that up and put it on your needle, so you can knit it together with the stitch on your left needle. In writing that’s a bit difficult to say what I mean, but the video shows it clearly! So please watch that! I will also show it here with some pictures.
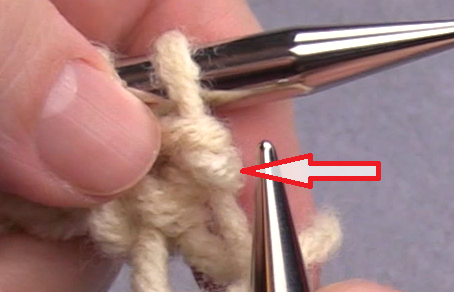
You have to look closely which of the 2 wraps you will use for knitting together. In the picture here it’s the wrap to which the arrow is pointing.
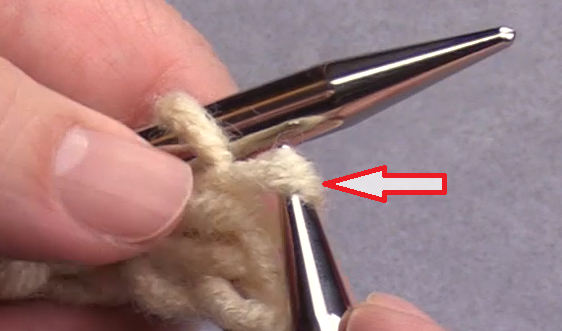
Pull that wrap to above, put it on your needle and knit it together with the stitch above it:
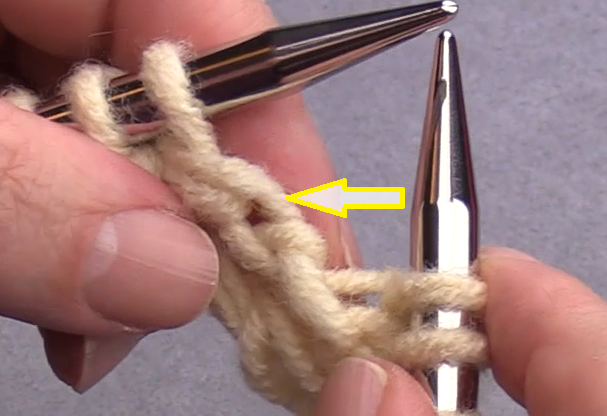
This is often the hardest to see with the first stitch, that is: the first stitch after the side stitch(es). The next time you will have to do this stitch again it’s often more clear, but sometimes you again have to get it from under the other wrap. In the next picture the yellow arrow is pointing to the wrap that has to be picked up:
Casting on
For making this stitch you have to cast on an even number of stitches, next to the number of side stitches you will be using. In the video I used 14 stitches: 1 stitch for each side and 12 stitches for the honeycomb motif. You can also use the side stitch I used with the wrap-method.
Use a way of casting on that is flexible and use thicker needles than the ones you will use for the rest of the work. In the video I used needlesize 8 mm for knitting the pattern, for casting on I used needlesize 10 mm. I used a knitted cast on, also called the cable cast on. You can see that at this page here vinden, together with a video. The nice thing about this way of casting on is that you don’t have to figure out how much yarn you need for casting on. This way of casting on is also shown in the wrap-version-video where I do the casting on.
Making the side stitches
At the page with the wrap-method I used a side-pattern over 3 side stitches, for this version I slipped the first stitch purlwise with the yarn in front of the work, the last stitch is a plain knit stitch, at every row.
In the rest of the pattern I will only refer to it as side stitch. You can of course choose another side stitch. Just replace it the following pattern.
Pattern
Starting row, row 1 (once), back side
➡ Side stitch
➡ In this row you will do only knit stitches
➡ Side stitch
Row 2, front side
➡ Side stitch
➡ The stitch: (knit 1, k1b) * repeat this until you come to the side stitch(es)
➡ Side stitch
Row 3, back side
➡ Side stitch
➡ The stitch: (1 kws, knit 1) * repeat this until you come to the side stitch(es)
➡ Side stitch
Row 4, front side
➡ Side stitch
➡ The stitch: (k1b, knit 1) * repeat this until you come to the side stitch(es)
➡ Side stitch
Row 5, back side
➡ Side stitch
➡ The stitch: (knit 1, 1 kws) * repeat this until you come to the side stitch(es)
➡ Side stitch
Repeat rows 2 to 5 . End with a back side row.
Casting off
Do the casting off at the front side of your work. Use again a thicker needle then the size you used for the pattern, so your border will stay flexible. Because you now don’t have to deal with wraps on your needle you don’t have to knit them together 🙂 .