
Introduction
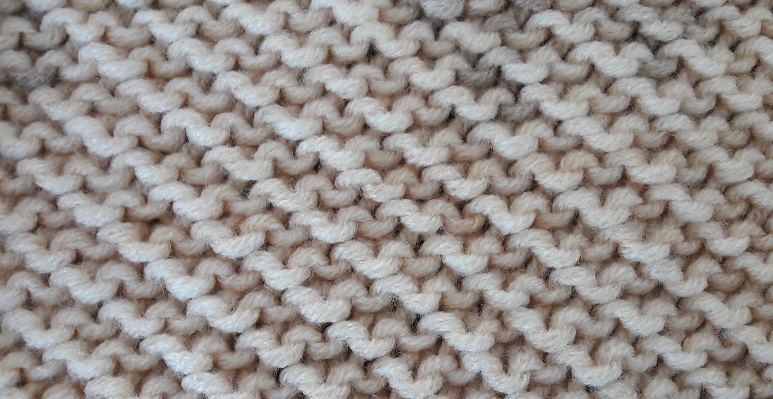
This stitch is kind of a brioche stitch and goes by different names. The Honeycomb stitch is the commonly used name. It’s a stitch that results in 2 layers. This gives depth and warmth, but also gives it gives it a drapiness that makes it very comfortable to wear. The back side of the stitch looks a lot like a garter stitch.
There are actually 2 ways to create this stitch. One way is using wraps, the other way is inserting your needle in a row lower than the usual row, the so called knit one below stitch. The wrap version has my preference, because I can see better where and how to knit. You can find the version with the knit one below method on this page here.
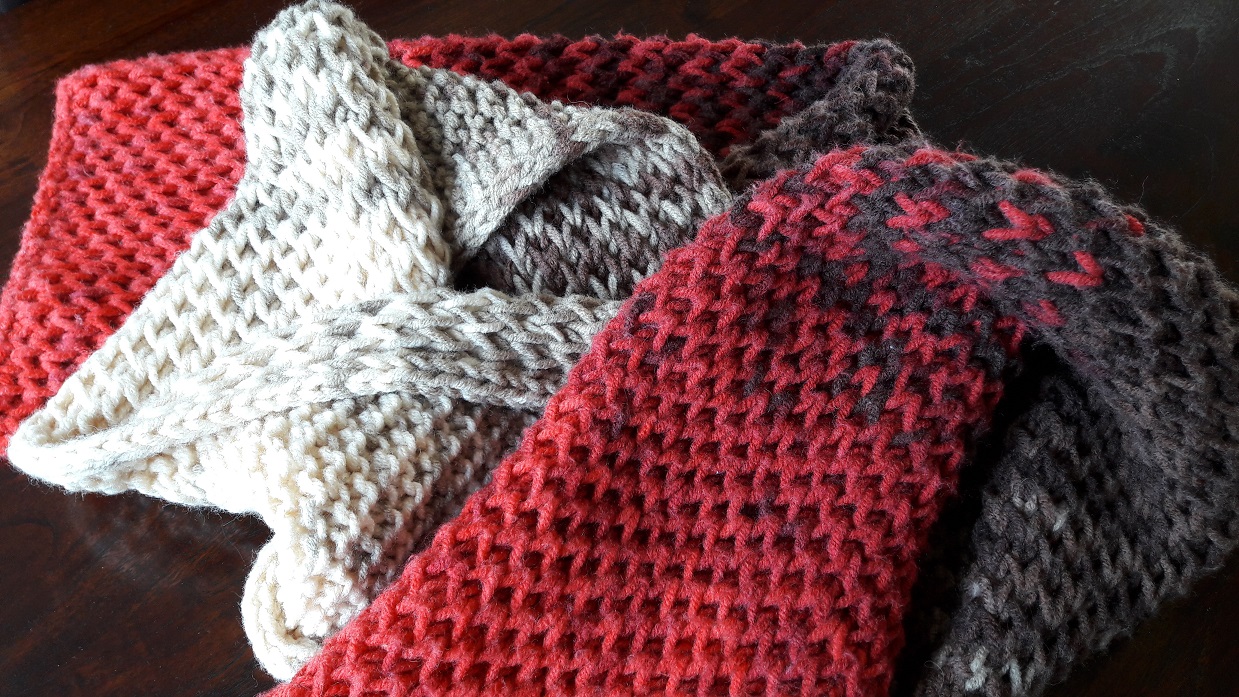
I will also prodvide an example of a side stitch that combines beautifully with this stitch. I used this border in the shawl you see here. I will use the pattern of this shawl when explaining how to do this stitch.
The video’s
I made video’s of both methods. Here is the series of video’s with the wrap method (continue after the video links for the written version!)
Abbreviations
To make it easier to read the patter I will use some abbreviations.
➡ Yf sl1 yo: yarn front, slip one, yarn over
- Bring the yarn to the front of you work (facing you)
- Slip the next stitch purlwise
- Bring the yarn to the back side again, but óver the needle, so you create a wrap!
➡ Sl1pwise wyib : slip the stitch (or actually the wrap) purlwise with the working yarn at the back side of the work.
➡ Sl1pwise wyif : slip the stitch purlwise with the working yarn at the front side of the work.
➡ Brk : brioche knit, knit the stitch with the yarn over.
Pattern symbols
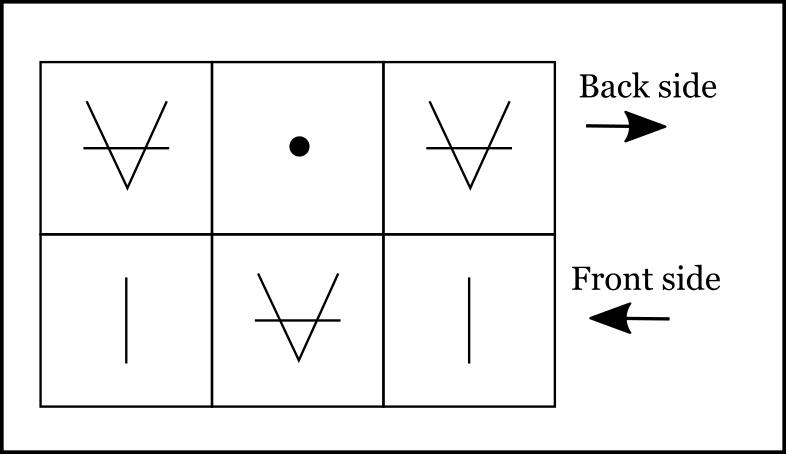
Before you start read the explanation of the symbols used for the pattern drawings.
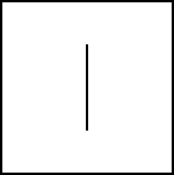
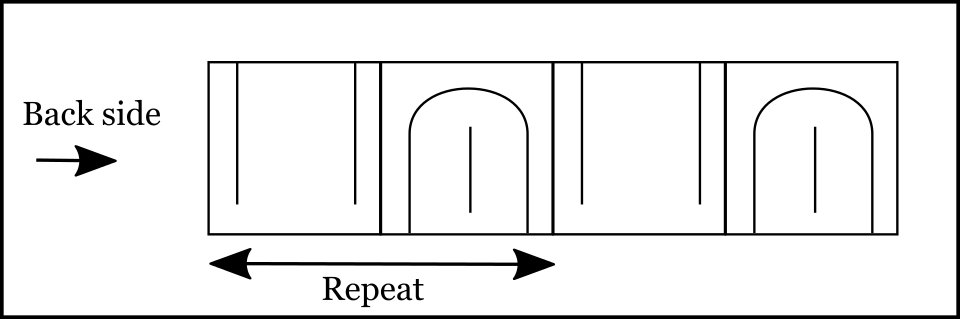
Knit, at the right side of the work .

The symbol for purl, but pay attention: this is a knit stitch when done at the back side of the work!
Sl1pwise wyif : slip the stitch purlwise with the working yarn at the front side of the work. In this case this means that, both when working at the front side or the back side of the pattern, you bring the yarn forward, to the side facing you. I used this symbol for both back side and front side.
![]()
Sl1pwise wyib : slip the stitch (or actually the wrap) purlwise with the working yarn at the back side of the work. In this case this means that, both when working at the front side or the back side of the pattern, you bring the yarn to the back, to the side not(!) facing you. I used this symbol for both back side and front side.
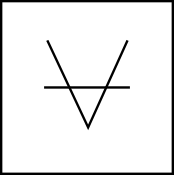
Yf sl1 yo: yarn front, slip one, yarn over (over the needle, that is, creating a wrap!)
![]()
Brk : brioche knit, knit the stitch with the yarn over.
Casting on
For making this stitch you have to cast on an even number of stitches, next to the number of side stitches you will be using. In my shawl I use 3 stitches on both sides for the border and 22 stitches for the honeycomb motif, so that makes a total of 28 stitches.
Use a way of casting on that is flexible and use thicker needles than the ones you will use for the rest of the work. I knitted the shawl with needlesize 8 mm, for casting on I used needlesize 10 mm. I used a knitted cast on, also called the cable cast on. You can see that at this page here vinden, together with a video. The nice thing about this way of casting on is that you don’t have to figure out how much yarn you need for casting on. This way of casting on is also shown in the video of the honeycomb stitch.
Making the side stitches
I’ll describe here how to do the side stitches. In the rest of the pattern I will only refer to it as side stitch.
➡ Front side, both at the start and at the end of the row over 3 stitches: knit 1, sl1pwise wyif, yarn to the back again, knit 1.
➡ Back side, both at the start and at the end of the row over 3 stitches: sl1pwise wyif, yarn to the back again, knit 1, sl1pwise wyif.
Pay attention! When bringing the yarn to the back again, do NOT put it over the needle, but just UNDER the needle, in between the made sitch and the next stitch. For this side stitch you mustn’t make a wrap, so don’t confuse this with the stitches of the honeycomb pattern!
You can of course choose another side stitch. Just replace it the following pattern.
Pattern
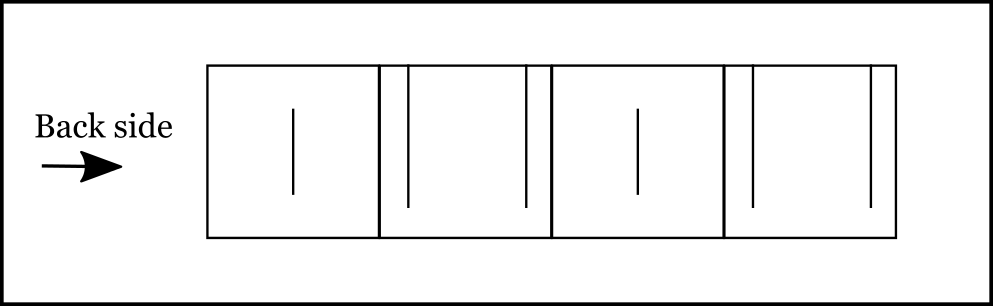
Starting row (once), back side
➡ Side stitch
➡ The stitch: (knit 1, Yf sl1 yo) * repeat 11 times
Pay attention! You will end the honeycomb stitch with a wrap by bringing the yarn to the back over the needle. The next stitch for the side starts with a slipping a stitch purlwise with the yarn in front. So the yarn first goes over the needle to the back creating the wrap for the honeycomb stitch, next bring the yarn to the front again underneath the needle for doing the slip stitch for the side stitch.
➡ Side stitch
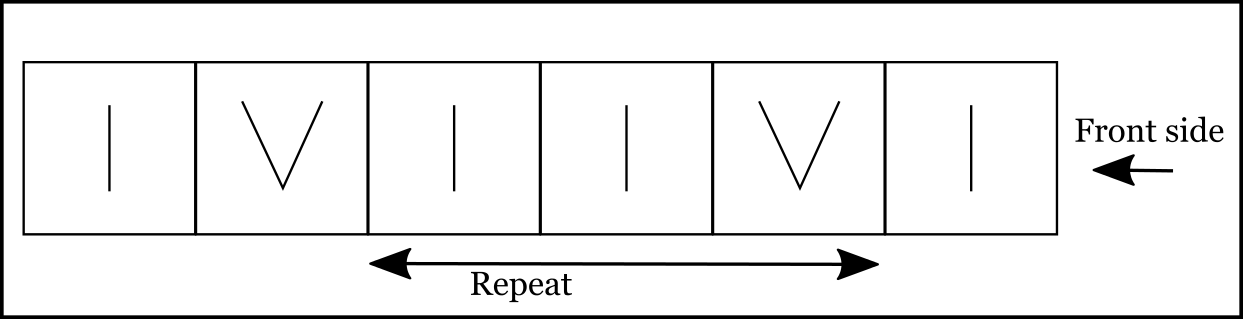
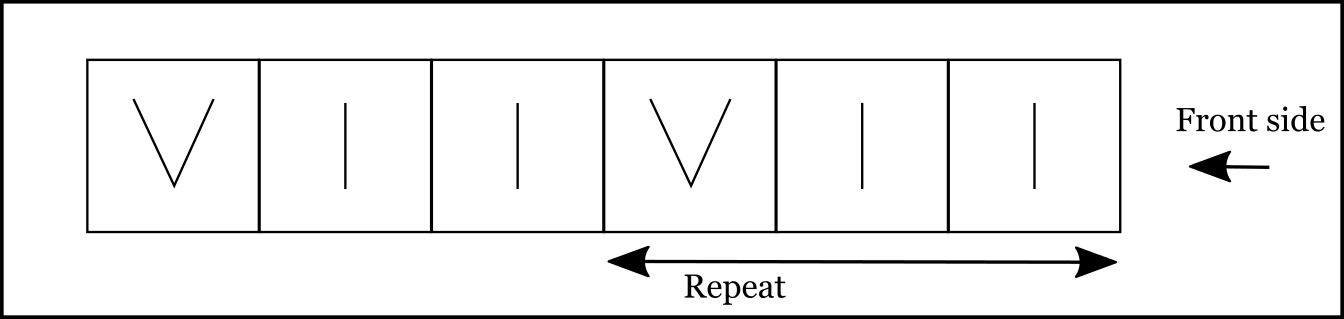
Row 1, front side
➡ Side stitch
➡ The stitch: knit 1, (Sl1pwise wyib, knit 2) * repeat 10 times, Sl1pwise wyib, knit 1
Pay attention! The 1st knit stitch you make in this row, is made in the knit stitch of the previous row, so do not knit the wrap! Often the wrap lies just a little bit before the knit stitch, which can be confusing. I pay attention to this quite explicitly in the video, so watch that to see what I mean if this explanation is not completely clear to you.
➡ Side stitch
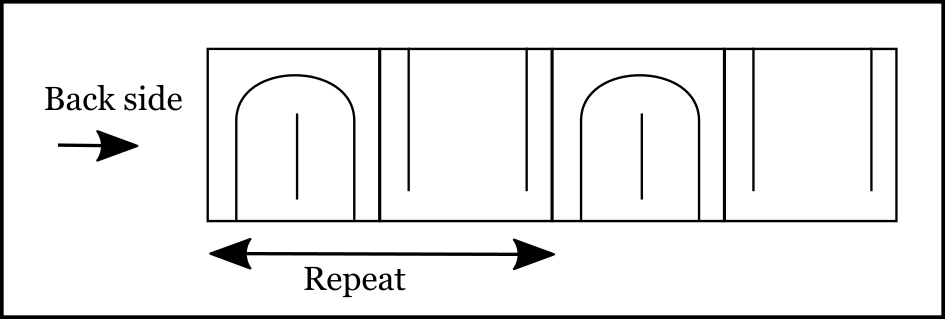
Row 2, back side
When you look closely to the stitches on your needle before starting this row, you actually see stitches that are ‘on their own’, and stitches accompanied by a wrap. In this row you will create wraps with the stitches that are lonely and all by theirselves, you give them a buddy, and the stitches that already have a wrap you will unite for eternity by putting them together. That’s how I remember it 🙂 .
➡ Side stitch
➡ The stitch: (Yf sl1 yo, 1 Brk) * repeat 11 times
➡ Side stitch
Row 3, front side
➡ Side stitch
➡ De steek: (knit 2, Sl1pwise wyib, ) *repeat 11 times
➡ Side stitch
Row 4, back side
➡ Side stitch
➡ The stitch: (1 Brk, Yf sl1 yo ) * repeat 11 times
➡ Side stitch
Repaet rows 1 to 4 until the desired length of the shawl. End with a back side row.
Casting off
Do the casting off at the front side of your work. Use again a thicker needle then the size you used for the shawl, so your border will stay flexible. Knit each stitch, and pull the previous stitch over the next stitch. When you come to a stitch with a wrap, knit them together. When your last row was a row 2, you will knit the 5th stitch together with a wrap (first one where you encounter this). The casting off is also shown in the video.