
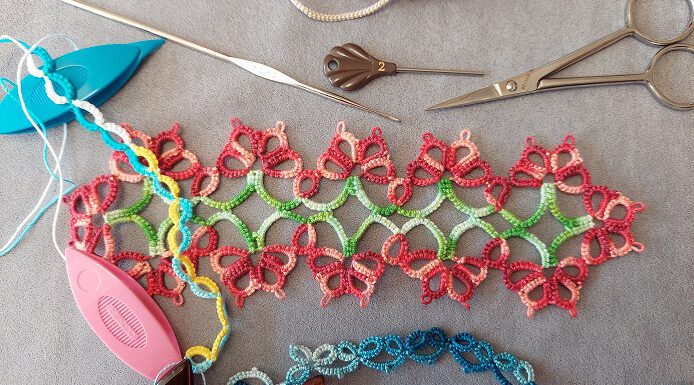
What is tatting?
Tatting (in Dutch and French frivolité) is the making of knotted lace, and exists of rings and chains with picots that are connected in such a way that you can can get beautiful patterns. You’re working with so called shuttles and yarn that is suitable for the technique. So it’s actually all knots that are made around a base thread.
There is also a way of doing tatting with a needle, which of course is called needle tatting, but this has a couple of limitations that you don’t have with shuttle tatting. It is easier to learn, but using the tutorials here, and a little bit of perseverance, you will surely mange! I once started using a needle and switched over to shuttles, because I saw so many patterns that I couldn’t make with a needle (as far as I know…).
Just do it and carry through!
I must confess that I had a moment at the start that I wanted to throw the shuttles out of the window, but I persevered! The moment you get it you will make the knots almost without thinking! It is creating ‘muscle memory’, that your hands just know what to do! Doesn’t it go well at the start? Then just try for 10 minutes each day, and then put it away. And does it feel good and are you starting to feel progress? Then do it a bit longer! If you are a crocheter or a knitter, you will probably remember that this also has been a process of doing doing doing and doing. It’s the same with tatting. Also for working consistently you just need to practice! Just like with knitting or crocheting. And you are never too old to learn! I started doing tatting probably around my early 50’s, so I may not be a supertatter 🙂 , but it is so beautiful and such fun to do, that age doesn’t matter! So just do it!
What do you need?
Shuttles
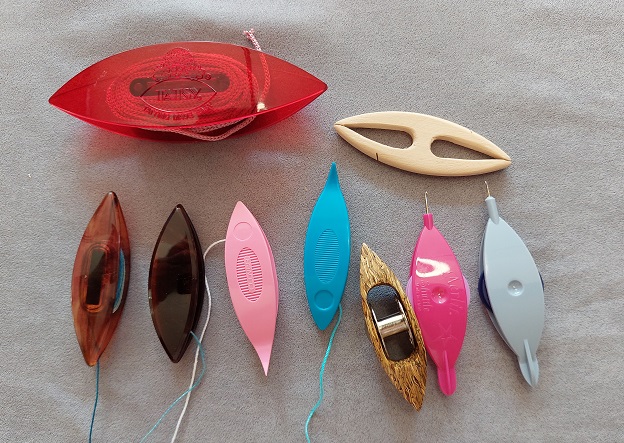 This is an overview of the shuttles I have. You have them in different versions, and it depends on you which one you prefer working with.
- The light pink and blue shuttles are my personal favorites. These shuttles are from the brand Clover, and they have a sharp point. This is super handy if you have to undo stitches, and they can be used to pick up a thread though a picot when the picot is large enough. Pay attention to not buy cheap fakes! The points of the fake versions are very dull (guess how I know!) and this is very annoying. Loading the shuttles with yarn works nicely.
- The two brown shuttles at the left are also okay, but do miss that handy little point. Disadvantage of these shuttles is that they are harder to load, because the points are quite tight to each other, which makes it hard to pull the threads through. These are unbranded and quite a bit cheaper.
- The ‘woody’ shuttle (next to the blue one) has a bobbin in the middle where the yarn is filled. So you can put that on the sewing machine. Rolling up and unrolling your yarn while working is a bit different. Some use a rubber mat where they roll up or down the bobbin, which protrudes slightly, while working.
- The dark pink and gray shuttle have a bobbin in the middle, just like the previous shuttle. The bobbin can be placed on the back of the shuttle for winding the thread. To be honest, I haven’t tried them yet to see if they fit my sewing machine’s mechanism for winding the thread. It’s nice that they have a small crochet hook at the tip for pulling thread through picots. And what’s nice is that loose bobbins are available for it! You often have some yarn left over, and with enough bobbins you can go on for a while! These are from the Aerlit brand.
- The light wooden shuttle at the top right is a shuttle that can hold a relatively large amount of thread. Extra suitable also if you are going to work with beads.
- The very big red shuttle at the top left is a Tatsy shuttle. This is used when you’re working with thicker threads or yarn, but you can also use it when you’re going to be working with a lot of beads. This is not a very nice shuttle to work with due to its size, but certainly not a bad thing for beginners!
I will make the necessary tutorials with a thick yarn or thread so that you can see very well what is happening and what to do. I will use the Tatsy shuttle regularly for that. But for my regular projects I use the smaller shuttles.
Crochet hooks
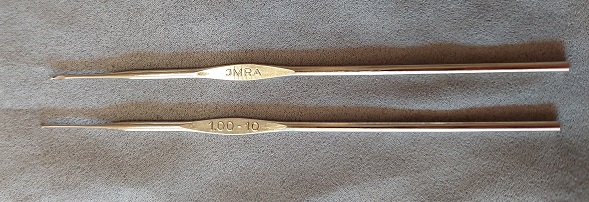
I use very fine crochet hooks, 1.00 and 1.50 mm. I use this to pull a thread through a picot. Always match your crochet hook to the size of thread you will be using. In the tutorials I will work with thick macramé nylon cord, and then a 1 mm needle is of course inconvenient. But for regular work with fine thread you can use this well. Clover even has crochet hooks that go up to 0.5 mm, so if it is necessary because you work with super fine yarn, you can buy even thinner crochet hooks.
Other tools
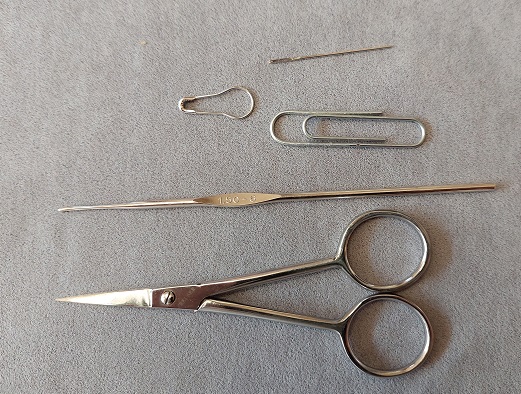
You also need very fine scissors. If you have to cut your yarn, you want to do this as close to your work as possible, so that you don’t see a thread tip sticking out, so don’t use kitchen shears or the like.
You also need a fine needle if you need to weave in yarn ends. Of course you have to match the thickness of your needle to the thickness of the thread you are working with.
Paper clip or a stitch marker. Here you see a kind of ‘safety pin’ without an extra wrapped round at the end, in English this is called a coiless or coilless safety pin. Sometimes you have to make a ‘fake’ picot, or hold an opening in a spot that you want to work through later. This can be useful for that.
Picot gauges
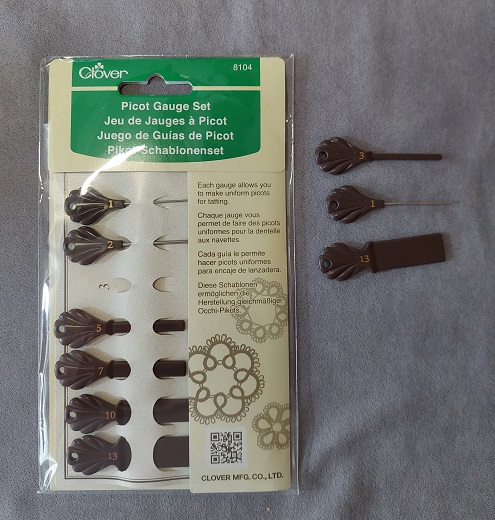 You can use special gauges to make picots. Do you really need this? Well, no, but if you’re a finicky person like me, and you want your picots to look even, this is a really nice tool. You can also make picots by estimating the size, which is definitely faster, and the purists among us think you should really just learn to estimate, but I simply like using them. I have the Clover picot gauges you see here in the picture, but there are also other tools, that I personally find less pleasant to work with. You can also make your own gauges from a piece of plastic that you cut out (for example, use the plastic cards to wind up embroidery floss) or make them from sturdy cardboard. The latter will bend faster and break, but it is possible. Write on the gauges how many mm wide they are!
 Saving leftovers
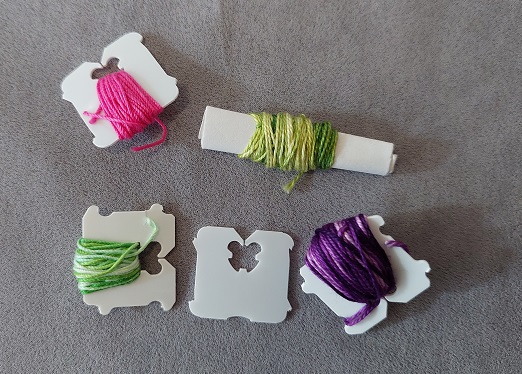
You often have small scraps of yarn left over. I save these pieces to make a butterfly (nice to give away!) or I collect it to make colorful tatting bracelets.
You can, of course, wrap the yarn around a rolled up piece of paper, but what I really like are the little clips that are used to close sandwich bags. I cut an extra slot in them to clamp the yarn end in so they don’t unroll. I put them in a plastic ziplock bag, and I use a different ziplock bag for each yarn type and brand.
Threads
On a separate page I will tell you more about the yarn to use: click here.