
The design: a short review
As you can read and see in my previous blogs, I made a design for a knotted bag. And now the sequel: the actual knotting of it! The ones that follow my facebook page already saw a preview in a vlog of the start, and how to knot the threads around the upper border threads. If you don’t follow my facebook page yet, you can see a direct link to my page in the menu! I can tell you secretly that I am a lot further already, and it turns out so nice!!! A special twist on the design happened, and it unexpectedly turned out to be extra extra nice. But this is to tease you, so you will remain curious to see the sequel 🙂 .

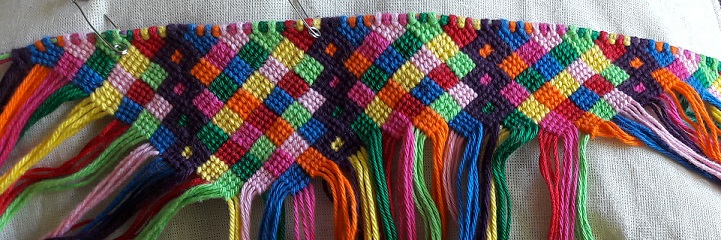
Okay, first I will step back to the design of the upper border. I chose this version. It is just a part, but if you understand the order of the threads of the blue/orange part and the dark and light pink part, you will also know the order in which you have to knot the other colored blocks. I promise that the digital design will be on this website later also, and that will contain the complete design!
The start
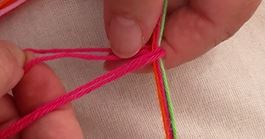
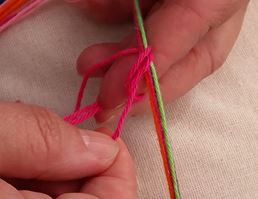
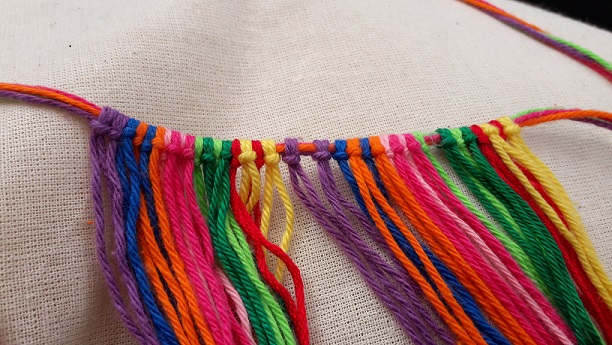 And here we go! For the upper border threads I cut 4 threads of 75 cm (30 inch) long. The threads used for knotting, each 2 metres (about 2 yards) long, are being knotted around the upper border threads. I folded them in half, and took the fold under the border threads from above downwards, and then pulled the ends through the loop of the fold (see the screenshots from my vlog).
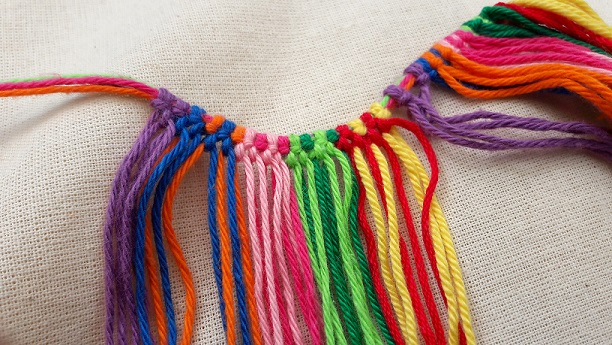
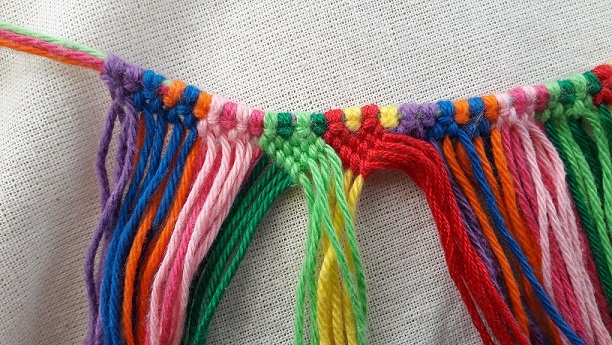
You can see here the order of knotting the threads of 2 repeats of the pattern. I have chosen to just repeat the pattern several times without any change in color or order of the colors.
The first row
Initially we just make the knots in a row next to eachother. Working in the round comes later. The only thing you have to remember is that you must ‘preserve’ the threads on the left and right side for the moment that you will attach the left and right side to eachother. This is a reminder especially for the ones that are used to making friendship bracelets with this knotting technique! Here you see that I knotted the first part of the pattern, and next the second part. In the end I did 8 repeats of the pattern, because I wanted to end up with a wide bag that I could keep pencils in, but of course you can change that to your own wishes. What is very important of this row, is how you make the knots. Look closely at how the threads enter into the knot and on which side they come out of it. In this row only 2 kind of knots are used actually! The double right knot (see here for the tutorial) and the left-right knot (see here for the tutorial). So watch closely, but if you do this correctly, you will see that the threads will be in the right order for knotting the rest of the pattern!
The next rows
Actually, you could close the circle when you have knotted all the threads you need around the upper border threads. But I never do that. I always knot a substantial part of the pattern, because, to my experience, you will obtain the right distribution of needed space when knotting bigger parts of the design. Well, this may sound a bit vague maybe, but what I mean is this. When you have knotted the threads around the border threads, you could actually slide them together very tightly. If you would close the circle then, you wouldn’t need very much space on you border threads. When you start knotting then, it turns out that the knots take more space than the folded threads. And you’re in trouble when your border threads turn out to be too short! So take extra length for your border threads, better to shorten it later than having too little!
So, start knotting the design, but take care about the sides, because you cannot knot all blocks completely to the sides yet. But, believe me, it shows by itself when you’re working on it, you will see right away why not.
Okay, I got distracted a bit, but in the next photo gallery I show you an example of the order how to knot the colored blocks.
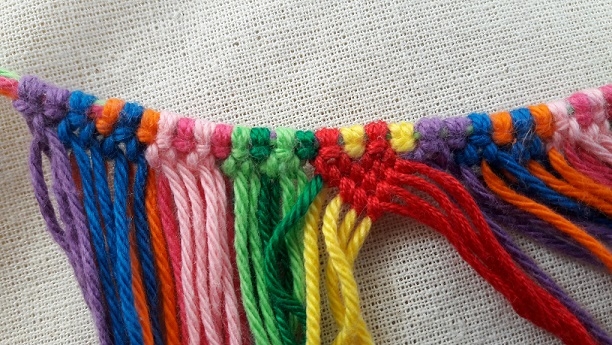

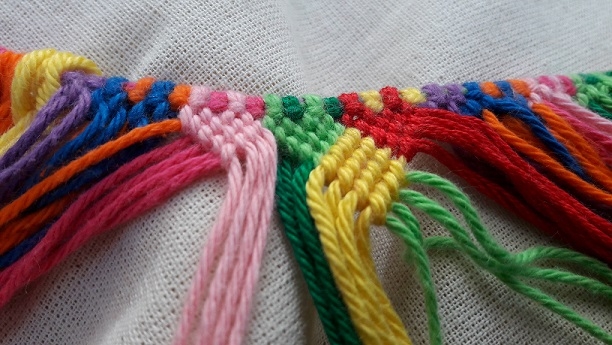
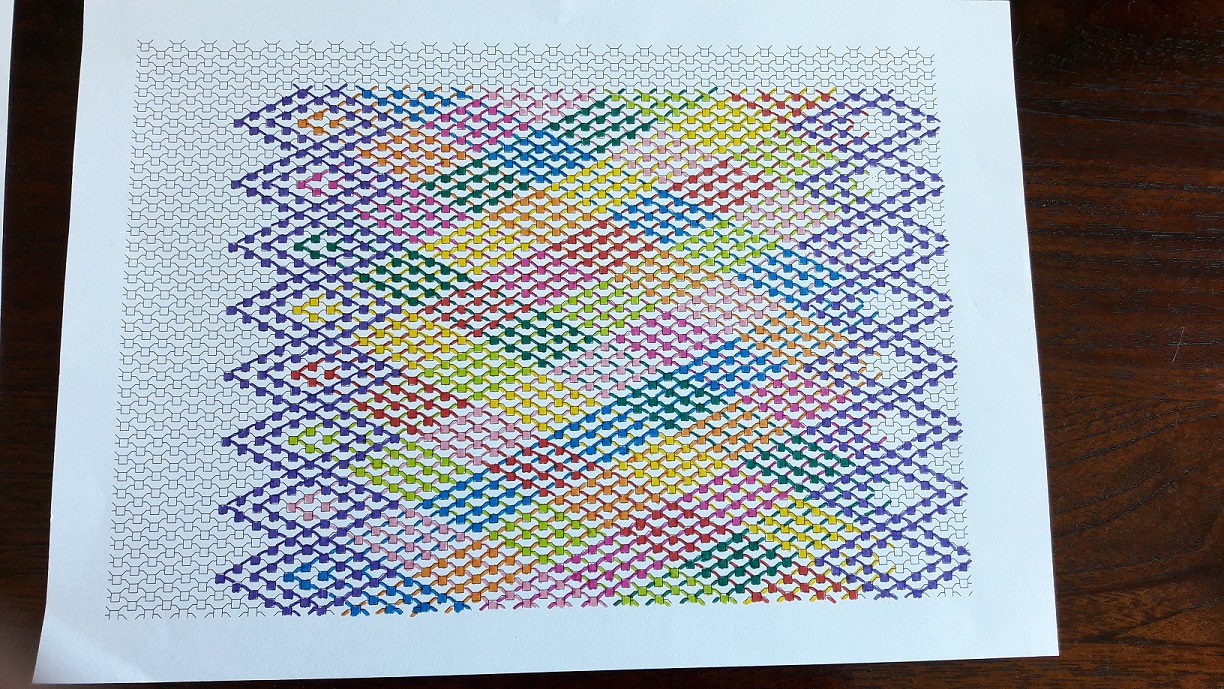
I started with a half block in red, next a half block in light green, and subsequently you can knot the full yellow block that connects the previous blocks. Next you do the half block in light pink, and then you can knot the full block in dark green that connects the light pink and light green block. The red, light green and light pink blocks are knotted from left to right (with the double right knot, see here), the yellow and dark green block are knotted from right to left (using the double left knot, see here). And subsequently you can make a block with light pink that connects the dark green and yellow block, again from left to right. You can do the same with blue and dark pink, and so on. Just follow the design, just pay attention how to knot the threads.
The purple zigzag-parts
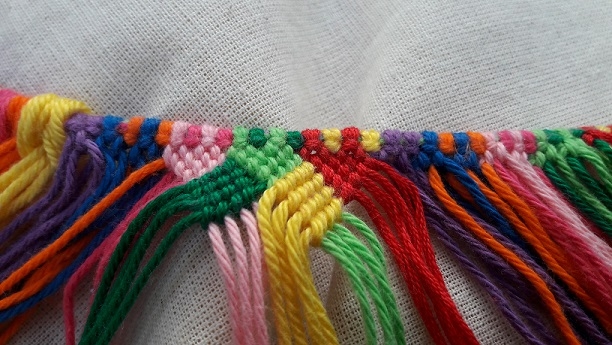
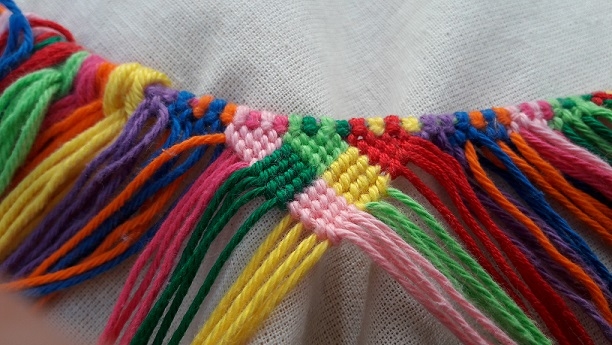
Alas, I didn’t take pictures of the knotting order of the zigzag parts. I really wanted to make progress, because it’s quite a job when you make 8 repeats of the pattern. But ‘the magic word’ is: just follow the pattern! The last variation of the used knots, the right-left knot (seee here for the tutorial), is used in this part, so if you don’t know exactly how to do this, look at the tutorial. And, the video’s with the full instructions are in the making, also especially for this part, so keep on the lookout with this blog when I will release them on my YouTube channel. I will show you a couple of pictures here so you can see how it looks when you’ve knotted a bit further. But, this is not everything! Because I ran into a ‘problem’, and I had to make a change to a part of my design, but believe me, it made it look much more fun and exciting! Really, honestly, so keep following this blog!

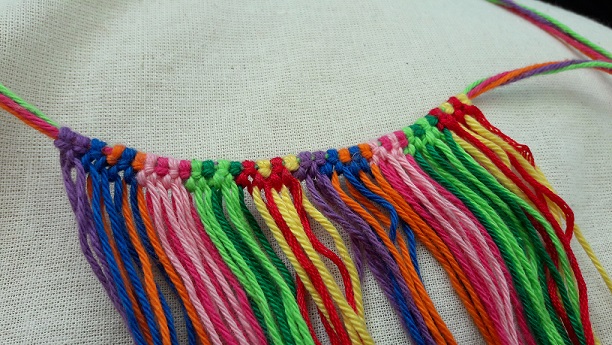
PS: here you can see, at the left side, that I worked downwards in a v-shape, because I can only use the threads on the left of that when the circle is closed!
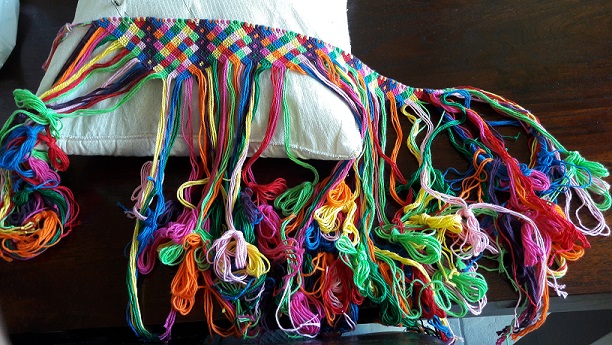
PS PS: and make large knots in the threads you don’t work with! Each time I take a bundle of 4 threads of a group I worked with, and make a knot in it that can easily be removed. Please do yourself a favor, because you will have a bunch of threads that’s one big tangle you cannot undo if you don’t, and that would be so sad if you can’t finish your project! In this way it is easy to work with and you don’t get in trouble!