
Because we need to help
I actually never discuss political stuff on my website and in my videos…. But the pictures of the Ukranian refugees hunt my mind. I just cannot let it go. And I feel an urgent need for help for these people. They had to leave everything behind, their possessions, the place where they lived, but above all their loved ones, family, friends. And all of this in this bitter cold. There is a lot of help going on, but there has to be more money to help the refugees get to a safe and warm place and to prepare a new future for them. The images of the people that are waiting in the bitter cold are cutting through my soul. Especially the images of the children and the elderly….
What can I do? What can you do?
Donate money! I made some donations to several organisations, and I would like to encourage you to do the same. But I also understand that not everyone is financially capable doing this, especially since we start to feel the effects here too, but you might feel the need to do so. I woke up this morning, and this appeared in my mind: a friendship bracelet in the colors of the flags of the Netherlands (where I live), which happen to be the same as the colors of the American flag, and the colors of the flag of Ukraine. The idea is that you will make this bracelet (lots of them!) and wear them to show your support, but also to sell them, and donate the money that you earn from it to the organizations that help the refugees!
 The pattern
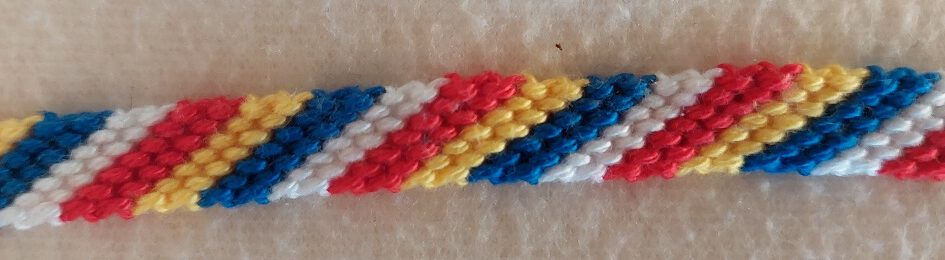
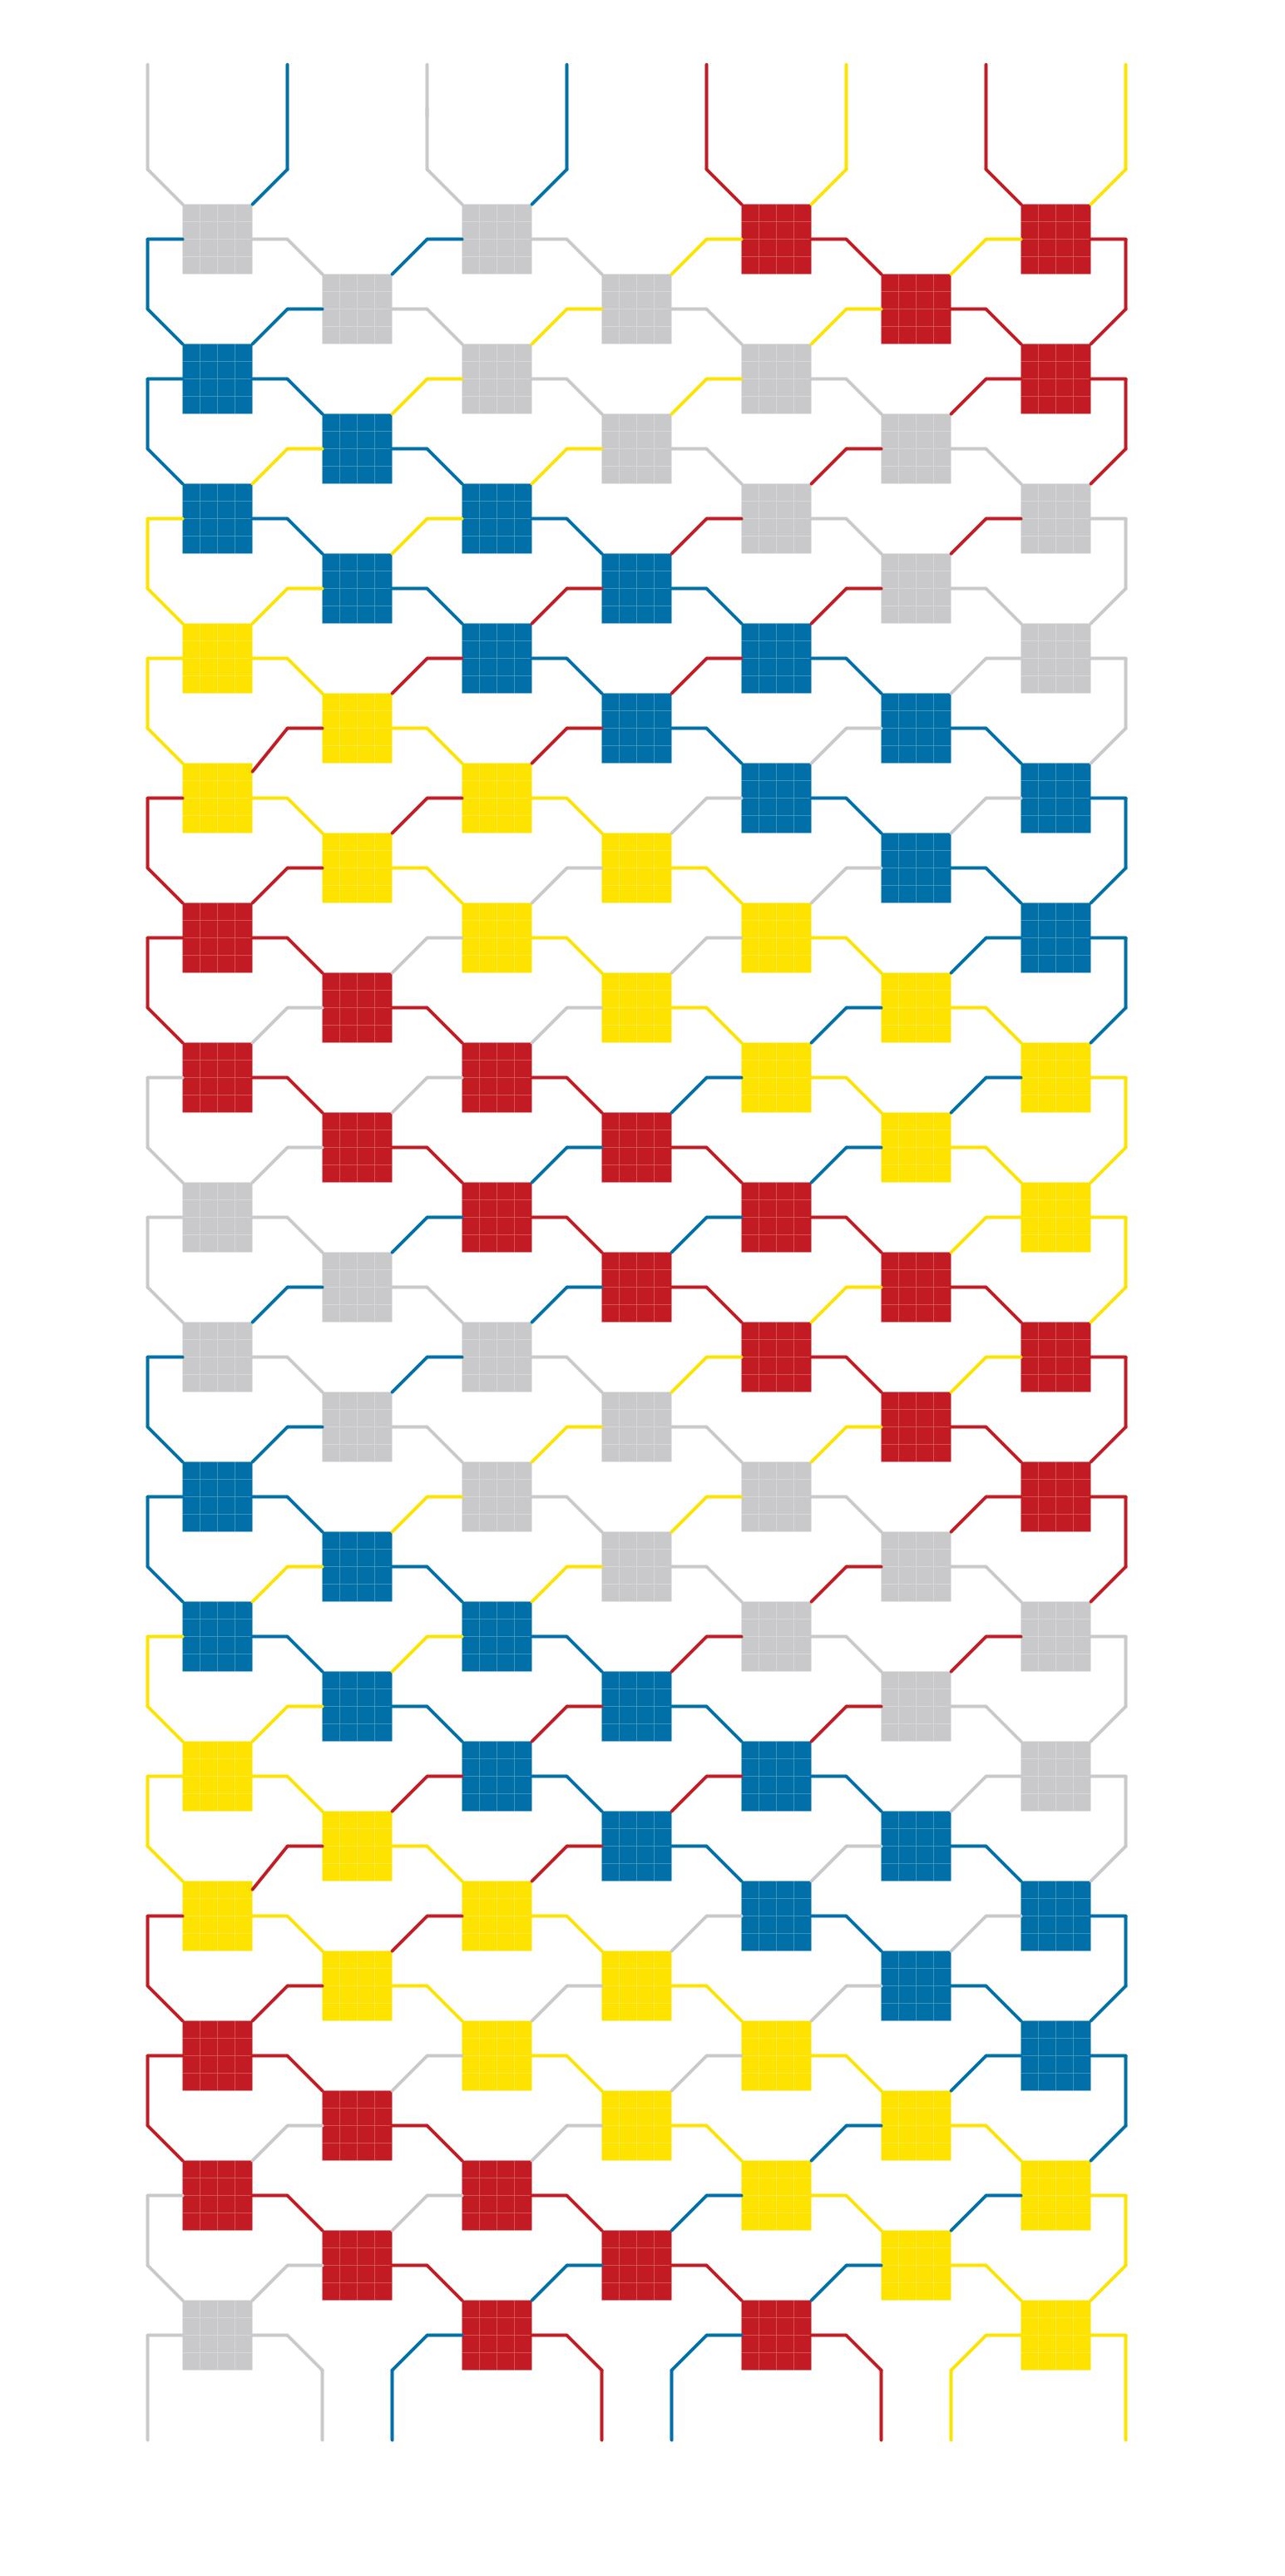
Here you see the pattern that I made. It is really super simple. If you are already familiar with the technique of making friendship bracelets, you will probably be able to do this right away. If you are not familiar with the technique yet, then watch the video I made especially for this. The link is below on this page. You can click on the picture to get it full size and download it. Print it, so that you can keep it next to the video and follow it.
I’ve used regular crochet cotton, the Phil Coton 3 of Phildar. I’ve use 2 strands of yarn per color, each 1.5 meter (60 inch) long. The starting knot I made at about 15 cm (6 inch). I’ve made about 7 repeats of the pattern, and the knotted part is about 21 cm (8.5 inch) long (the size of my wrist). I also left 15 cm (6 inch) at the end for the ‘fringe’. After that I had about 30 cm (12 inch) left that I cut off. You can decide how long you want to make the bracelet and adjust the usage of the yarn accordingly.
I’ve chosen to do super easy ends. This makes the learning curve less steep for the new ones. You can just make a knot with the threads at the start and end of the bracelet. You can then simply tie the bracelet around your wrist by tying the ‘fringe’. You could also make braids.
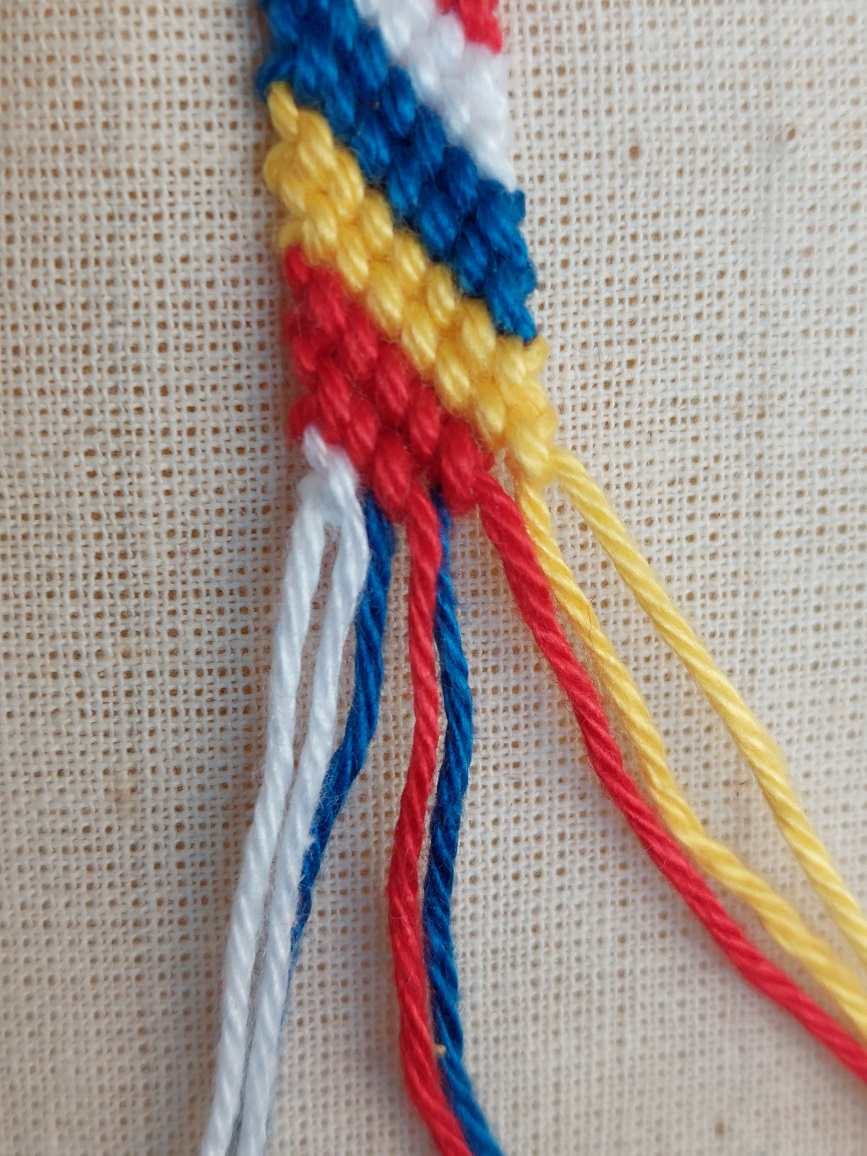
 Undo the knot at the start and place the threads in the right position, use the 3 threads at the left as a set, the middle 2 threads as a set, and the right 3 threads as a set.
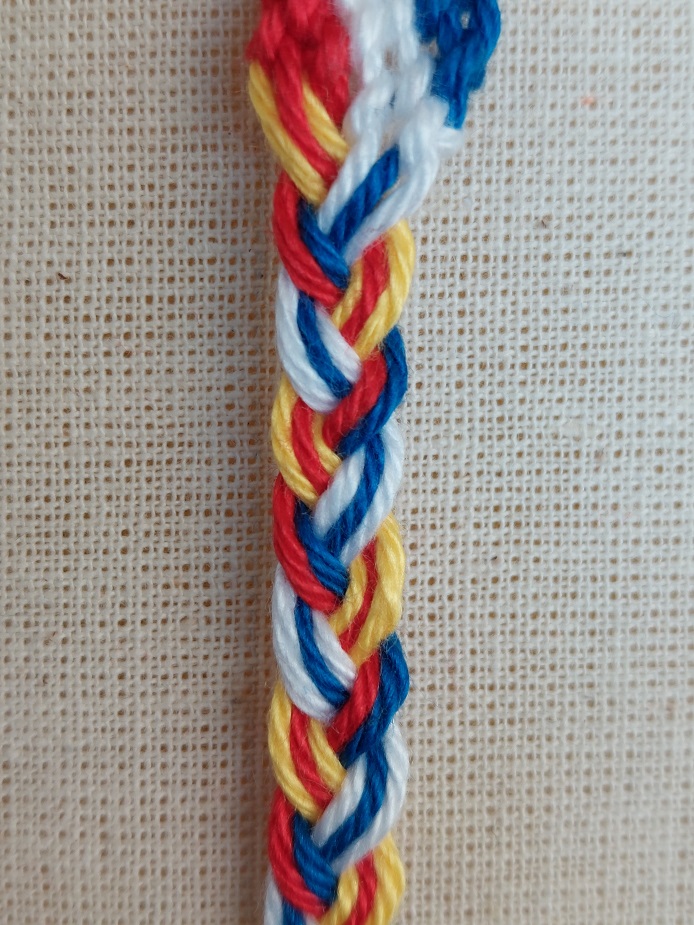 When you braid very carefully, keeping the threads in the right order, you will get a very fancy look.
 Do the same with the end of the bracelet.
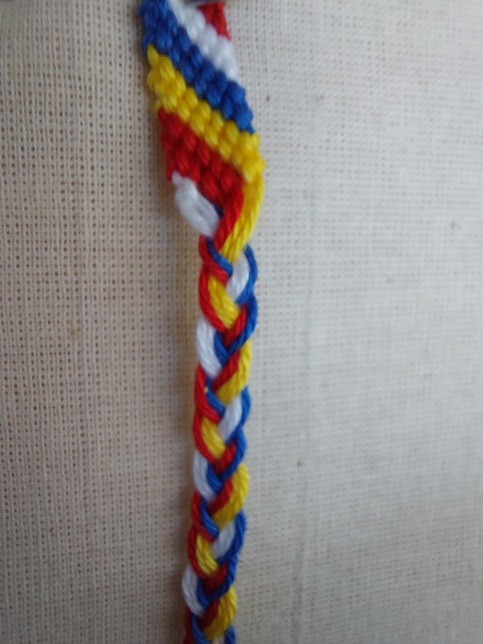 This gives a slightly different look, but also very attractive!
What more you could do
I hope you will make a lot of bracelets and sell a lot of them, so that you will be able to donate a lot. But also share this! Share this with your church, your community centre, friends! Go make a lot together!
Help the refugees… please!